wangzhen477
2016-01-31 20:04
下面这个Photoshop制作潮流风格的纹理立体字教程由图老师小编精心推荐选出,过程简单易学超容易上手,喜欢就要赶紧get起来哦!
本教程前期立体字部分需要用专业的3D软件来完成。其实现在的CS4,CS5都自带强大的3D工具,有这些版本的就可以直接用PS来做前期立体字。做好后再经过调色,增加纹理,阴影,装饰等即可完成效果。
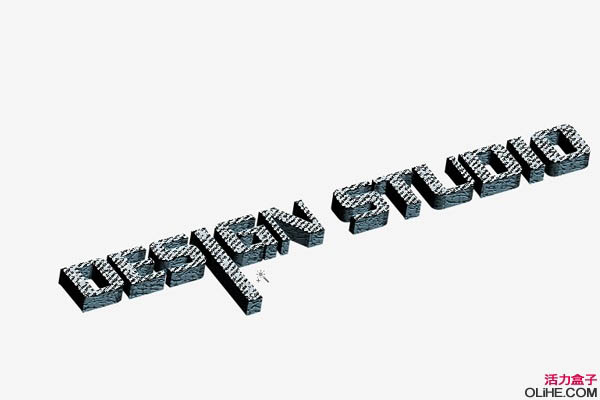
最终效果
1、在我们开始时,我们需要3D文字,我使用illustrator帮助创建3D文字。随意使用任何程序创建你要的3D文字。如果你喜欢使用Maya, 3Ds max等其他应用程序,请确保该文件保存了透明度(如果嫌麻烦的话可以直接跳到第三步用现成的立体字素材)。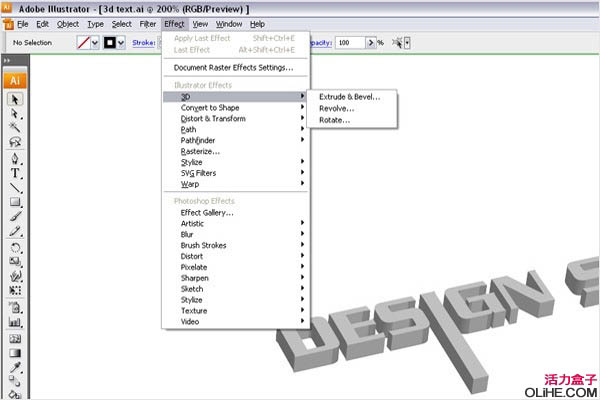
(本文来源于图老师网站,更多请访问http://m.tulaoshi.com/psxg/)
2、选择文件新建或按Ctrl /Command + N来创建一个新文档。我使用的是1440px(宽)× 900px(高)的墙纸。你可以随意设置任何大小的壁纸。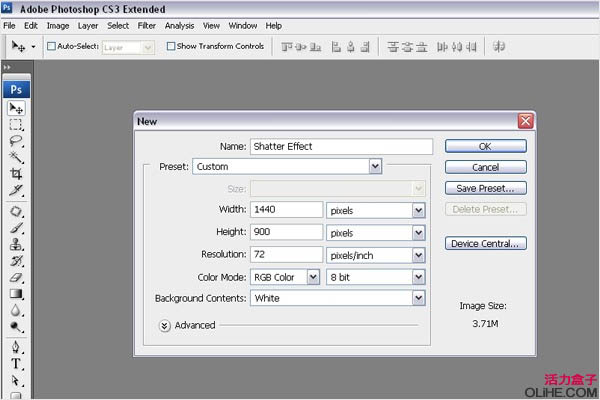
3、你可以保存图片为PNG格式获得透明背景,也可以直接从llustrator里复制(Ctrl/Command + C)3D文本&粘贴(Ctrl/Command + V)到Photoshop中。所以,你会在Photoshop中得到如下图所示的3D图像。
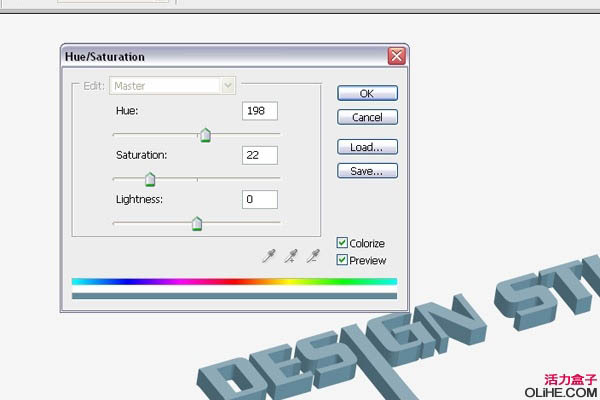
4、现在我们需要给文字添加一些颜色。要做到这一点,选择图像调整色相/饱和度,使用如下设置: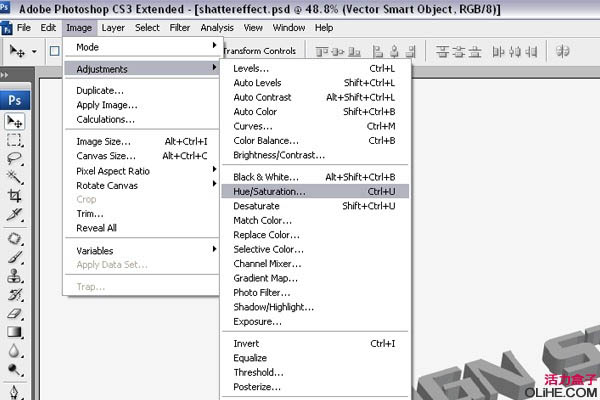
5、现在我们需要给文字增加更多的对比度。选择图像调整色阶,然后如下图设置。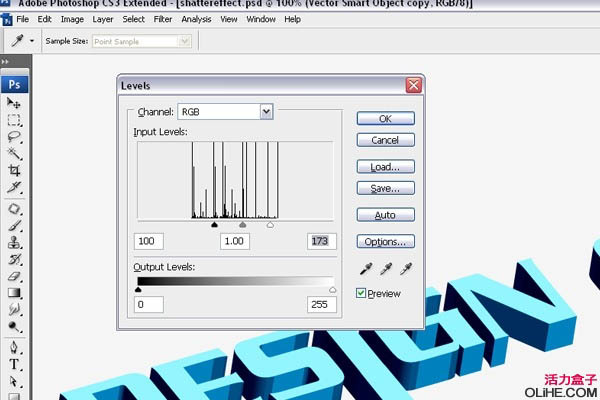
6、现在,我们将重复步骤4。选择图像调整色相/饱和度。使用下图的设置。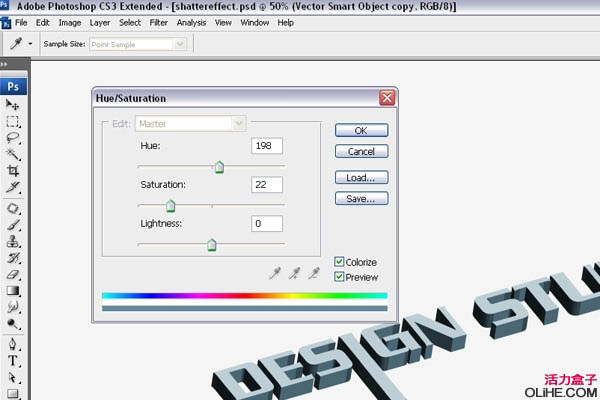
7、对于这个文本,我们将使用龟裂缝效果。选择滤镜纹理龟裂缝。使用这些设置: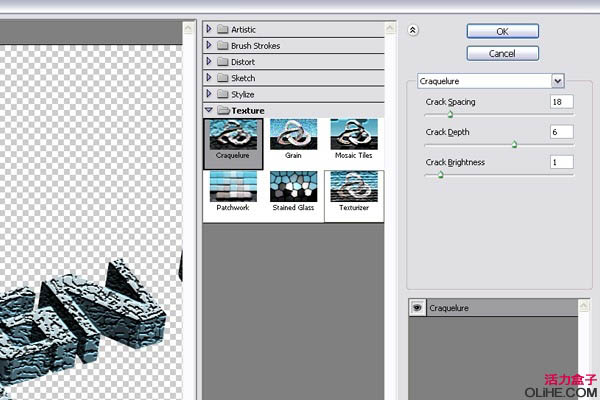
8、现在选择魔术棒工具(W),然后如下图创建文本顶部的选区。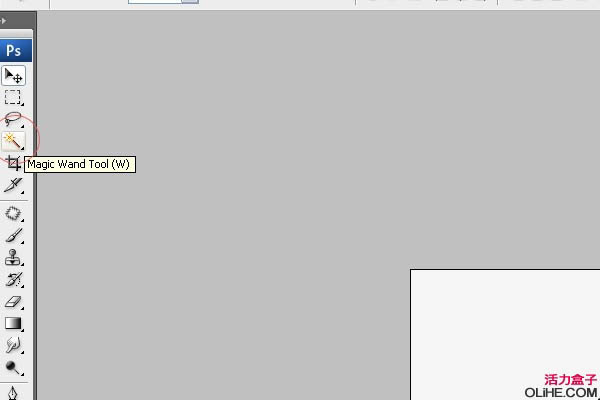
9、创建一个新层,然后用白色填充所选区域。
10、现在,我们通过添加光线和阴影来给图像添加更多的细节。按照下列步骤做。创建文本的选区。为了做到这一点,要按住Ctrl键点击图层面板上的图层缩略图。在3D文字层下方创建一个新层,然后用黑色填充所选区域。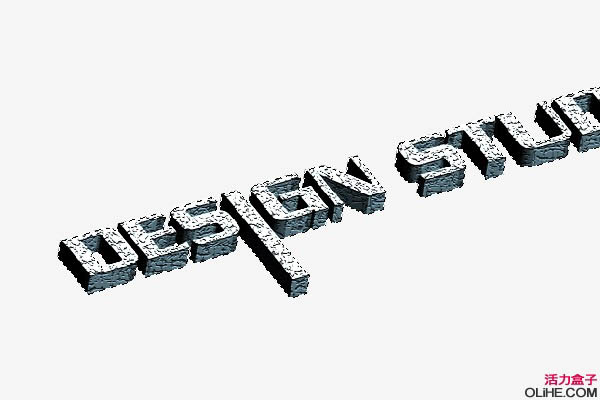
11、在一个新层上,选择滤镜模糊高斯模糊,然后应用一个轻微的模糊来创建阴影。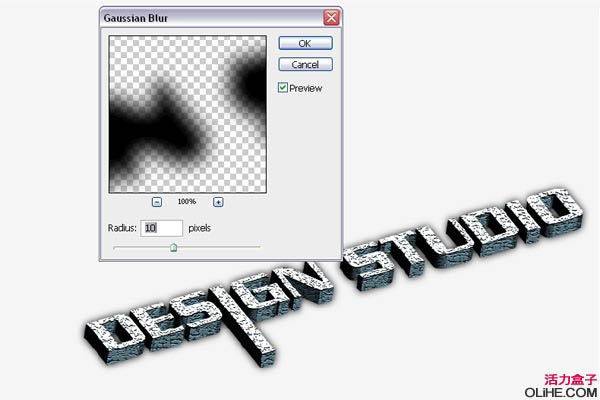
(本文来源于图老师网站,更多请访问http://m.tulaoshi.com/psxg/)
12、现在,我们将使用涂抹工具涂抹文本中心顶部和底部的阴影,使其隐藏。选择涂抹工具,然后按下图设置画笔: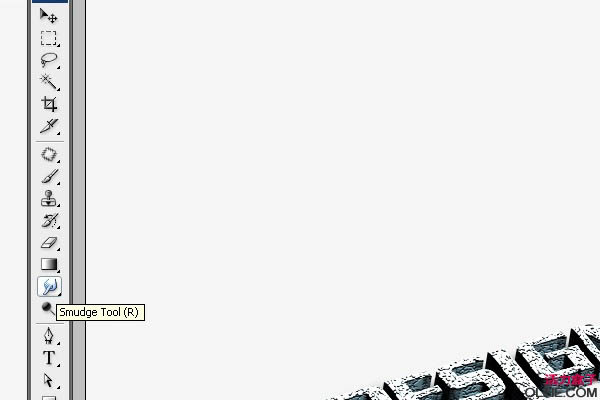
13、这就是你涂抹之后的阴影效果。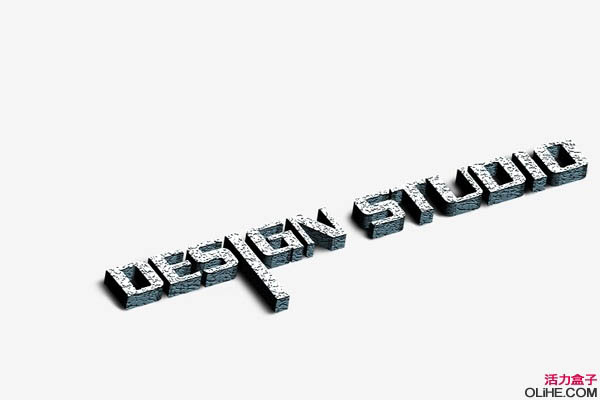
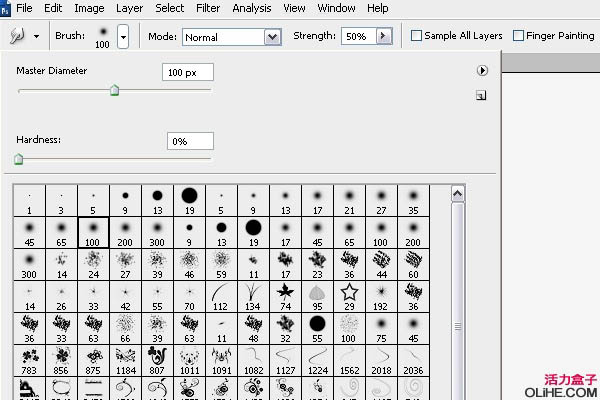
14、下载并安装一个漩涡(花卉)Photoshop画笔。可以去网上找到合适的Photoshop画笔后, 就把它载入到Photoshop中。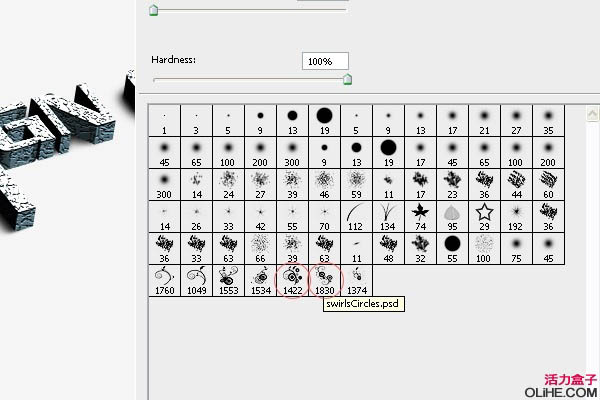
15、现在我们给图像创建一个地板形象,使其看起来像是3D文字在地板上的效果。为此你需要创建一个新层,选择画笔,然后在这个新层上描绘,选择编辑变换透视,然后变换漩涡花纹使其匹配文字,如下图:
16、现在我们将添加从文字里生长出的植物。选择一个花卉笔刷,并使用绿色。 如图所示。 给图像使用这个颜色(#326507)。为了添加深度要选择减淡工具(O)笔刷大小= 65范围=高光曝光= 50%。在文字形状的角落里拖动笔刷,如图所示。现在选择加深工具&加深形状对面的角落。 相信你会得到与我同样的效果。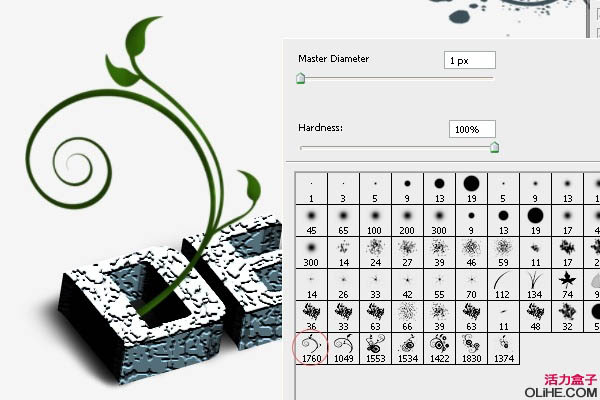
17、按照步骤16来创建你想要的元素。你可以参照下图的效果。
最终效果:


