下面图老师小编要跟大家分享Photoshop制作经典的潮流风格签名,简单的过程中其实暗藏玄机,还是要细心学习,喜欢还请记得收藏哦!
作者在制作的时候非常讲究细节和颜色。用到的素材也比较多,不过作者都安排的非常到位。整个效果华丽稳重,给人较强的视觉冲击力。
最终效果1 
最终效果2
1、打开背景素材,将画布设置成合适大小。
2、拖入边框素材,放到合适位置。
3、找一张人物素材扣好,放在合适位置,复制一层人物层,缩小去色,放在合适位置。。
4、拖入素材1,抠出来,放到边框层的下一层,调整好位置。
5、拖入鸟素材,调整好大小,放到合适位置。
6,7、拖入文字素材,放在边框上层。适当加一些投影。 
素材1 
(本文来源于图老师网站,更多请访问http://m.tulaoshi.com/psxpcl/)


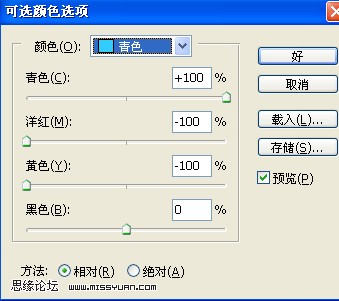
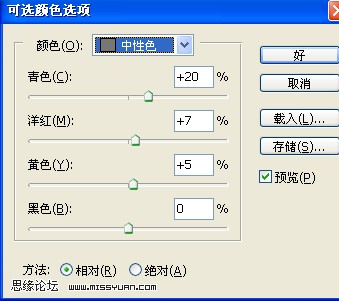
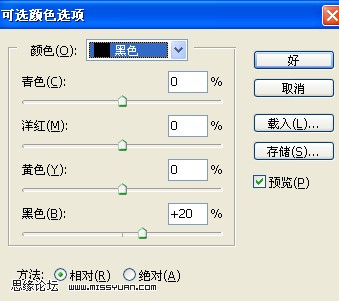
8、创建可选颜色调整图层,参数设置如下图。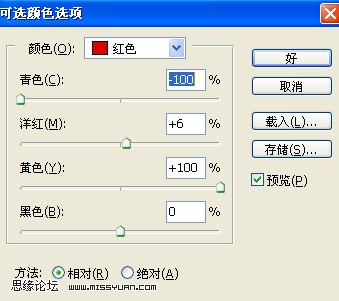
(本文来源于图老师网站,更多请访问http://m.tulaoshi.com/psxpcl/)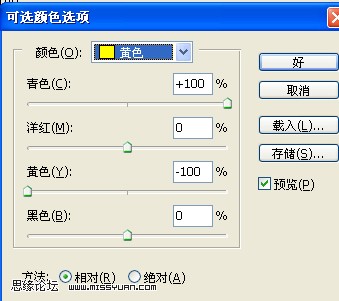
9、创建曲线调整图层,参数设置如下图。
10、创建色相/饱和度调整图层,参数设置如下图。 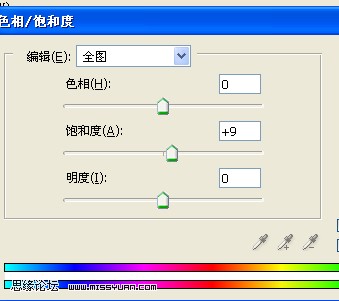
11、新建一个图层填充颜色:#010133,图层混合模式改为排除。
12、拖入一些自己喜欢的高光素材,图层混合模式改为“滤色”。最后再打上签名,完成最终效果。


