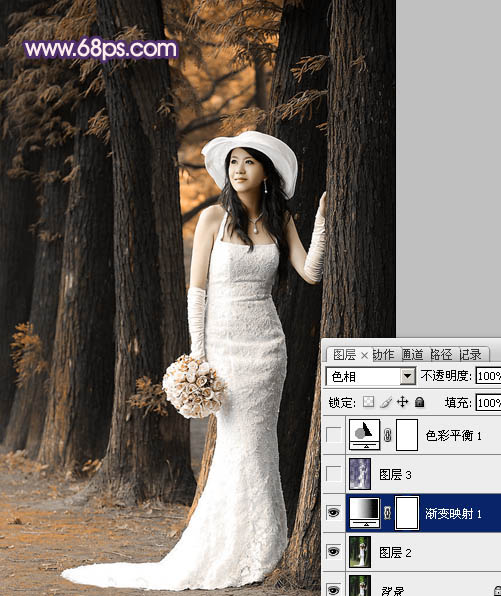
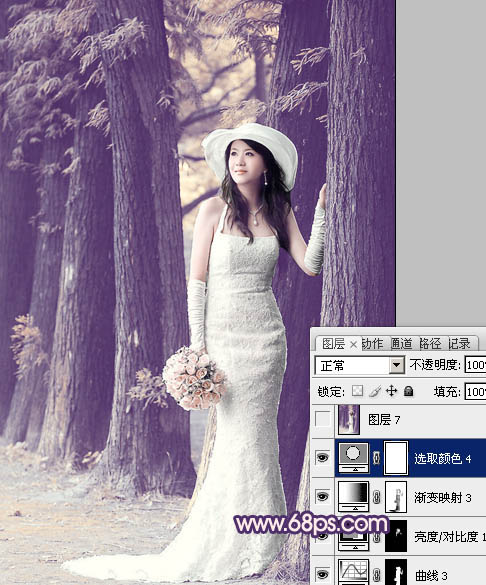
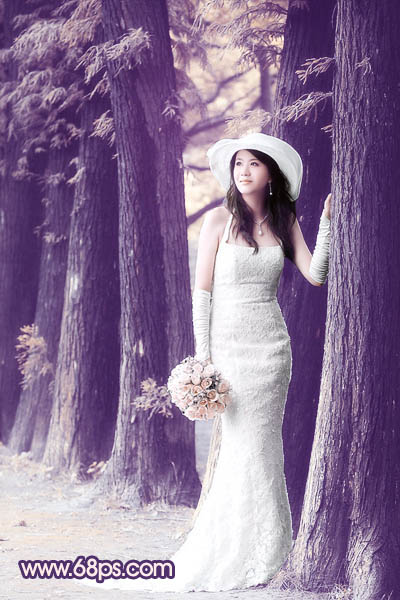
1、打开原图素材,创建渐变映射调整图层,颜色设置如图1,确定后把图层混合模式改为“色相”,效果如图2。
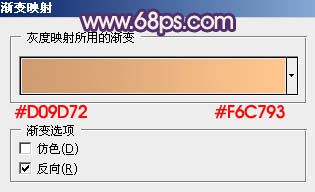
![](http://img.tulaoshi.com/image/20160201/da6fe0ff4b79465fb859690646de4deb.jpg)
图1 ![](http://img.tulaoshi.com/image/20160201/db0871a2ae0ccb0df4cd34f6ae24ccdb.jpg)
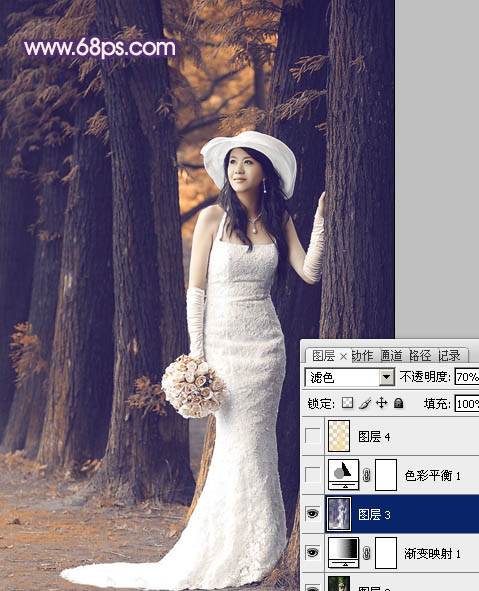
图2 2、按Ctrl + Alt + ~ 调出高光选区,按Ctrl + Shift + I 把选区反选,新建一个图层填充颜色:#281D60,图层混合模式改为“滤色”,不透明度改为:70%,效果如下图。![](http://img.tulaoshi.com/image/20160201/1de97334c7a0dda2d3cf95916232cf35.jpg)
图3
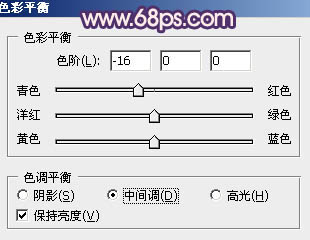
3、创建色彩平衡调整图层,对中间调及高光进行调整,参数设置如图4,5,效果如图6。![](http://img.tulaoshi.com/image/20160201/62b1862235f7848349aeeef81659bbf9.jpg)
图4 ![](http://img.tulaoshi.com/image/20160201/a2e3f3eb75ee2868211ac17143c943e5.jpg)
图5 ![](http://img.tulaoshi.com/image/20160201/ab7fe412e70b7f151c363f9d8ff1f3a3.jpg)
图6
4、按Ctrl + Alt + ~ 调出高光选区,新建一个图层填充颜色:#F7DE97,图层混合模式改为“颜色减淡”,不透明度改为:30%,效果如下图。![](http://img.tulaoshi.com/image/20160201/d7e34a89a3413606201eafda853c1057.jpg)
图7 5、创建可选颜色调整图层,对红,黄进行调整,参数设置如图8,9,效果如图10。![](http://img.tulaoshi.com/image/20160201/f2134c000b41cdc2c9e348b998eb65af.jpg)
图8 ![](http://img.tulaoshi.com/image/20160201/aeab502b92418f36caf2ce8c897eed62.jpg)
图9 ![](http://img.tulaoshi.com/image/20160201/d27c780f5ca41e22f8c8c86b7a9e4145.jpg)
图10
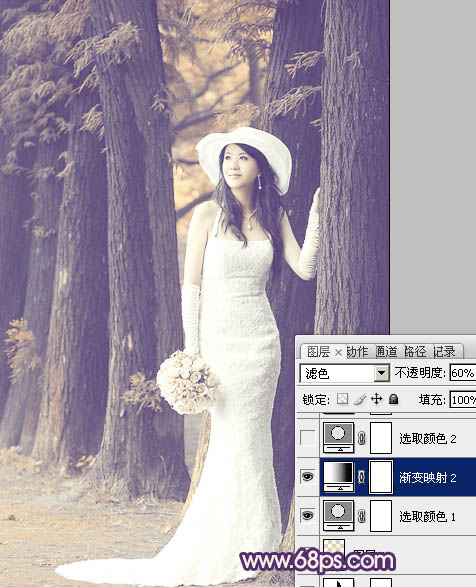
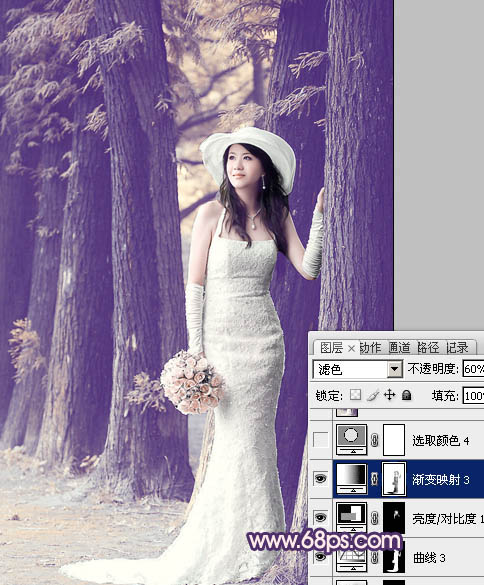
6、创建渐变映射调整图层,颜色设置如图11,确定后把图层混合模式改为“滤色”,不透明度改为:60%,效果如图12。![](http://img.tulaoshi.com/image/20160201/e756d9ba82c9a17a5859fd366c5268ff.jpg)
图11 ![](http://img.tulaoshi.com/image/20160201/de427953bd09644a806578a08a1962e0.jpg)
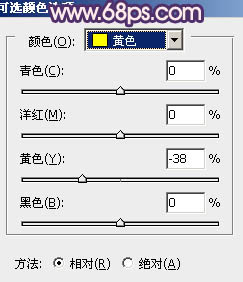
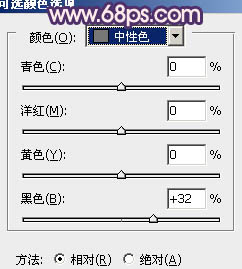
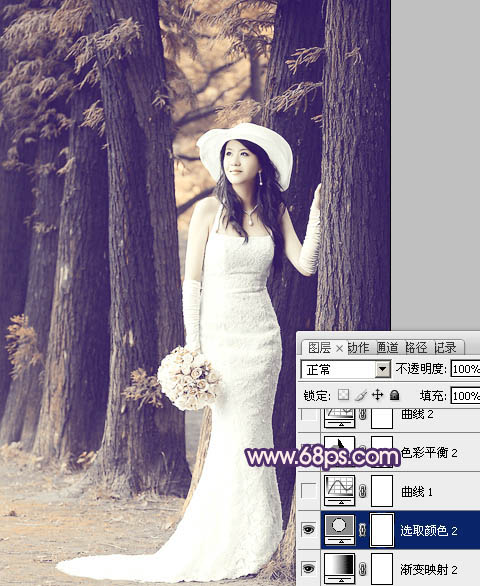
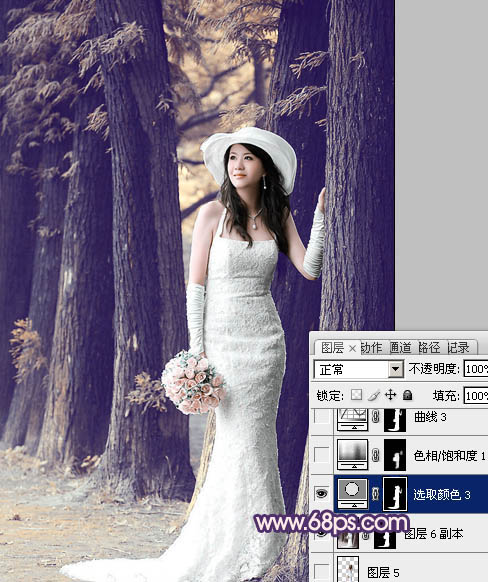
图12 7、创建可选颜色调整图层,对黄,中性色进行调整,参数设置如图13,14,效果如图15。![](http://img.tulaoshi.com/image/20160201/e45eb49f636d9d8503e5892f0e187879.jpg)
图13 ![](http://img.tulaoshi.com/image/20160201/22110cdb135c78d8cfe402c3a0ca1f4b.jpg)
图14 ![](http://img.tulaoshi.com/image/20160201/267cb46d110b45e32090f9ad0f6cacd8.jpg)
图15
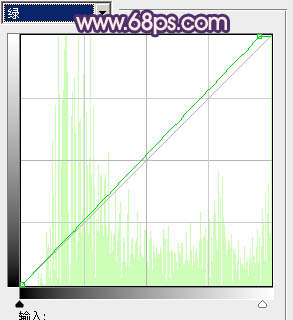
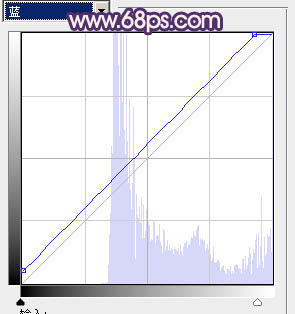
8、创建曲线调整图层,对绿、蓝进行调整,参数设置如图16,17,效果如图18。![](http://img.tulaoshi.com/image/20160201/e97e0c6abec300648b9f62e73c05a596.jpg)
图16 ![](http://img.tulaoshi.com/image/20160201/6847989ce831ef4e3d338047989bb333.jpg)
图17 ![](http://img.tulaoshi.com/image/20160201/bd93169ba8381298cd58fbd8c34641b4.jpg)
图18
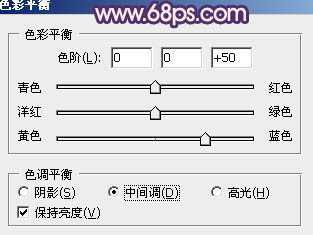
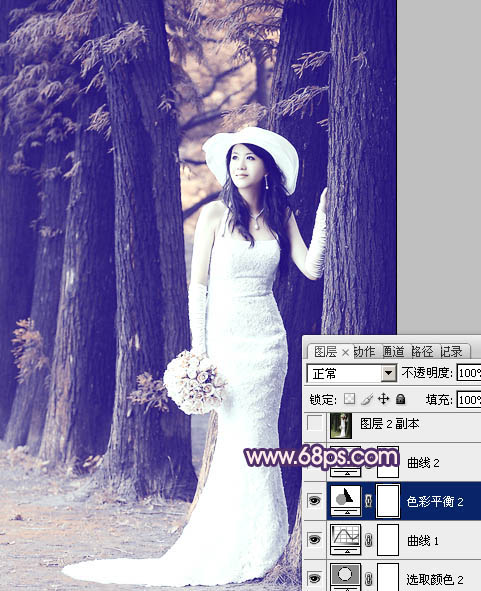
9、创建色彩平衡调整图层,对中间调进行调整,参数设置如图19,效果如图20。![](http://img.tulaoshi.com/image/20160201/be4414108a9f31960a9ca3e14539d72f.jpg)
图19 ![](http://img.tulaoshi.com/image/20160201/df1f2b83d887ef4393dd4f8c5bcf7fbf.jpg)
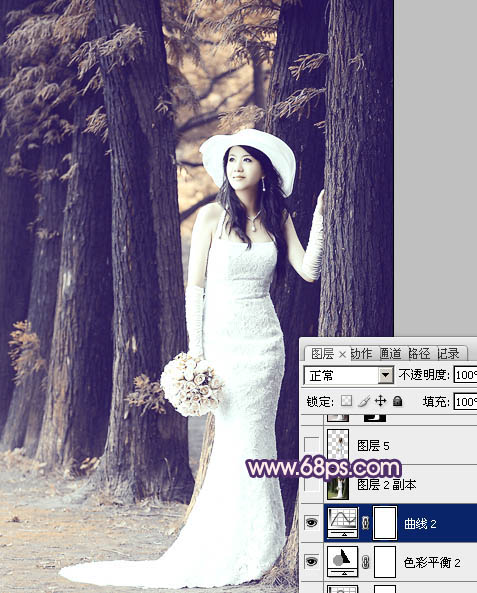
图20 10、创建曲线调整图层,对蓝色进行调整,参数设置如图21,效果如图22。![](http://img.tulaoshi.com/image/20160201/57d4684dbe9680680db43d4c6043d94e.jpg)
图21 ![](http://img.tulaoshi.com/image/20160201/a2513b9def71c70dcefa9560c50dcf53.jpg)
图22
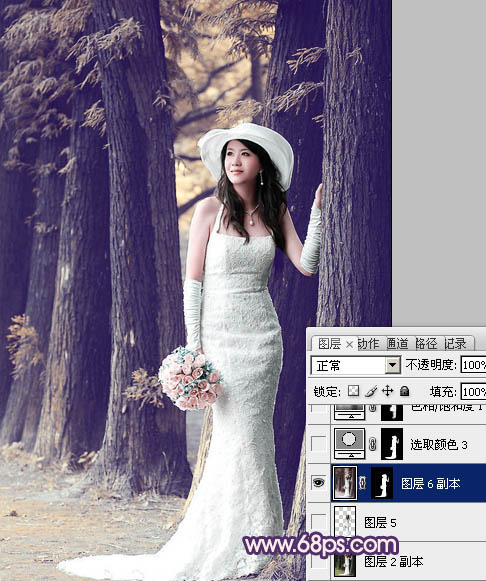
11、把背景图层复制一层,按Ctrl + Shift + ] 置顶,进入通道面板,选择绿色通道按Ctrl + A 全选,按Ctrl + C 复制。选择蓝色通道按Ctrl + V 粘贴,回到图层面板后,用钢笔工具把人物部分抠出来,复制到新的图层,再把背景副本图层隐藏,效果如下图。![](http://img.tulaoshi.com/image/20160201/3a24a17c52b5ba4198cde7d86ee9a866.jpg)
图23 12、调出人物选区,创建可选颜色调整图层,对红,青进行调整,参数设置如图24,25,效果如图26。![](http://img.tulaoshi.com/image/20160201/f126f4117ccaf7cc80096412b820305d.jpg)
图24 ![](http://img.tulaoshi.com/image/20160201/58f2c1219e1eb9d4ec16602fac771337.jpg)
图25 ![](http://img.tulaoshi.com/image/20160201/eff90a3c466b5aca86dfd38187f5f15a.jpg)
图26
13、再适当对人物肤色部分调色,调出与背景一致,效果如下图。![](http://img.tulaoshi.com/image/20160201/72adb8ff5a2a478430f3e8549c41d6d6.jpg)
图27 14、创建渐变映射调整图层,颜色设置如图28,确定后把图层混合模式改为“滤色”,不透明度改为:60%,用黑色画笔把衣服部分擦出来,效果如图29。![](http://img.tulaoshi.com/image/20160201/221afba70500f6a68851c056def32daa.jpg)
(本文来源于图老师网站,更多请访问http://m.tulaoshi.com/psxpcl/)
图28 ![](http://img.tulaoshi.com/image/20160201/6a6817a5b5932a3e1aea474355d0ee93.jpg)
图29
15、创建可选颜色调整图层,对蓝色进行调整,参数设置如图30,效果如图31。![](http://img.tulaoshi.com/image/20160201/2a568f2029c898b1635f1f0be7ef468c.jpg)
图30 ![](http://img.tulaoshi.com/image/20160201/151840e0150e0e727e9a7cd479130df8.jpg)
图31 16、新建一个图层,按Ctrl + Alt + Shift + E 盖印图层。执行:滤镜 模糊 高斯模糊,数值为5,确定后把图层混合模式改为“柔光”,不透明度改为:60%,效果如下图。![](http://img.tulaoshi.com/image/20160201/218d75b82b0ea2d22c320e153f532e9c.jpg)
图32
17、创建曲线调整图层,对蓝色进行调整,参数设置如图33,效果如图34。![](http://img.tulaoshi.com/image/20160201/529d46b3eace152cab9b774b8c7d4ec1.jpg)
图33 ![](http://img.tulaoshi.com/image/20160201/f1811f23d1777d60000ece8331a9d1cc.jpg)
(本文来源于图老师网站,更多请访问http://m.tulaoshi.com/psxpcl/)
图34 18、新建一个图层,简单给图片加上暗角,局部可以加上高光,大致效果如下图。![](http://img.tulaoshi.com/image/20160201/2c9445ad117c309e51755ab72e56a421.jpg)
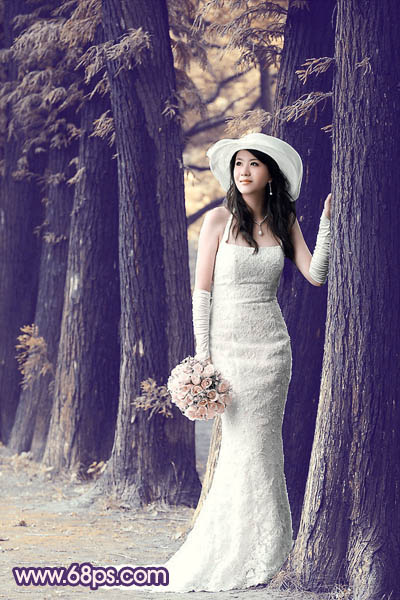
图35 最后调整一下细节和颜色,完成最终效果。![](http://img.tulaoshi.com/image/20160201/2b302d46c02fa85345360a8984e7029e.jpg)