阳光的小飞鱼91
2016-01-31 17:23
下面图老师小编要向大家介绍下利用描边路径制作超可爱的多层次水晶字,看起来复杂实则是简单的,掌握好技巧就OK,喜欢就赶紧收藏起来吧!
描边路径操作非常简单。不过运用起来就是千变万化的。如下面的教程,基本上都是用描边路径来制作色块,不过作者通过控制描边画笔的大小、颜色、渐变等,做出色彩非常丰富的字体效果。同上再给色块增加一下图层样式,出来的效果就更通透,更有水晶质感。
最终效果
1、以下10步为练习模式,后面的教程会用到。选择椭圆工具在选择路径的属性面板上选择如图所示选项。按住Shift并创建一个完美的圆路径。
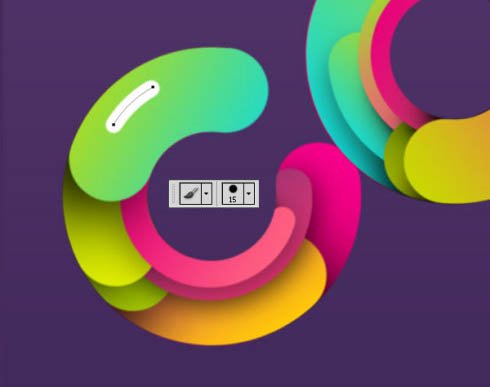
2、调出笔刷编辑器,快捷键F5。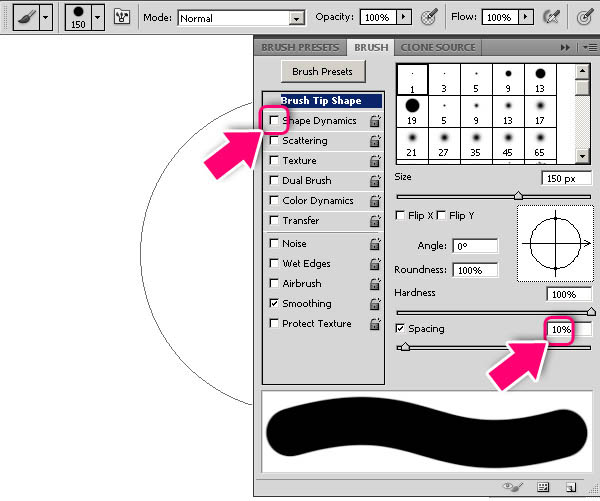
3、新建一层,描边路径,快捷键alt+enter。注意描边路径时的笔刷大小自己掌握,和你建的文件大小有关。
4、选择直接选择工具(A)。点击两个锚点之间的路径,并单击“删除”。创建一个新层,拿起画笔工具(B),挑选颜色较深,然后按Alt + Enter键创建新的路径。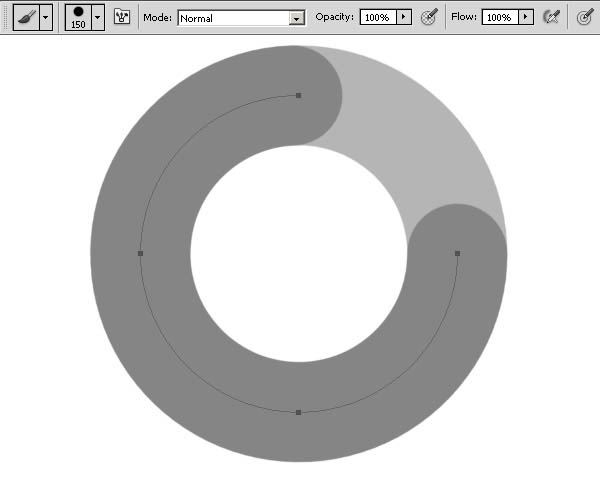
5、选择钢笔工具(P),并添加路径上的锚点,如下图所示。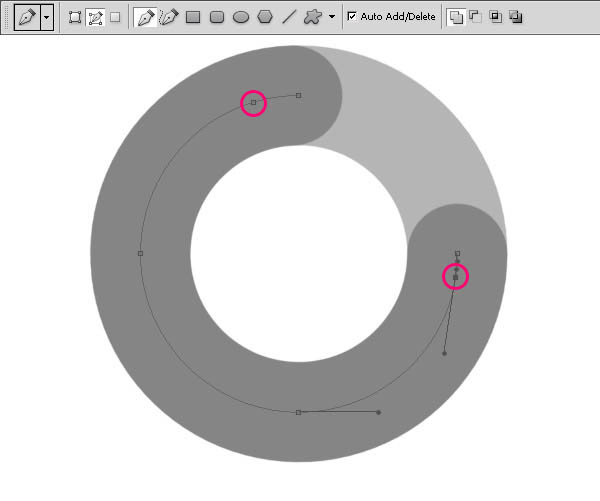
6、使用直接选择工具选择并删除两边的锚点。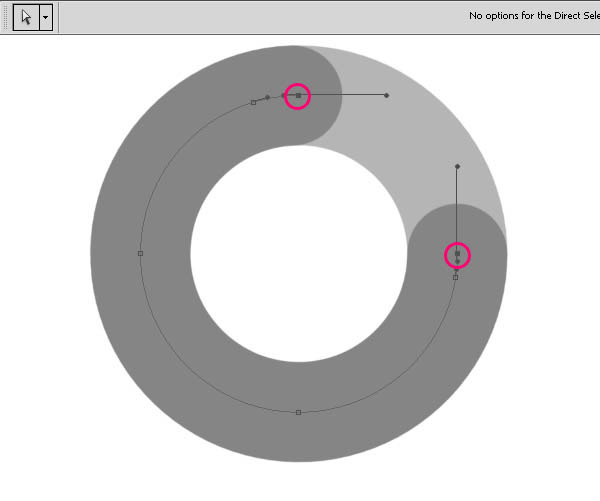
7、删后两边描点的路径。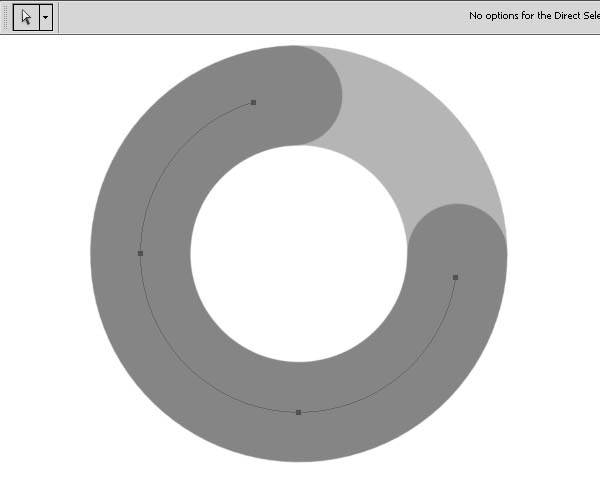
8、选择画笔工具(B),挑选颜色较深,创建新的图层,然后按Alt + Enter以描边路径。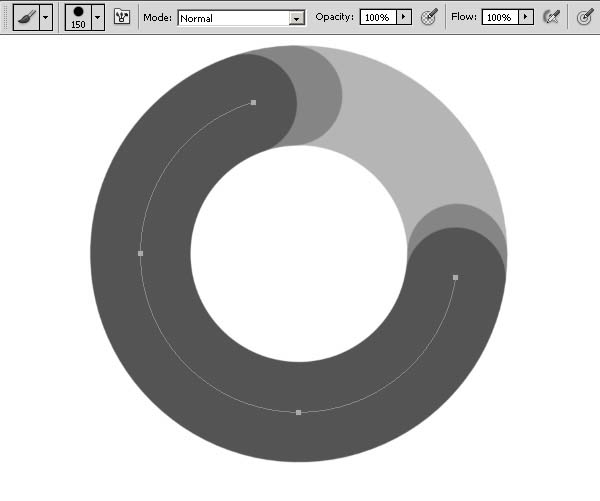
9、正如你看到的,我们只是删除了部分圆圈路径的锚点。这让我们做出漂亮干净的形状并创建有趣的效果。 这是本教程的基础技术。确保每一个图形始终在一个新层。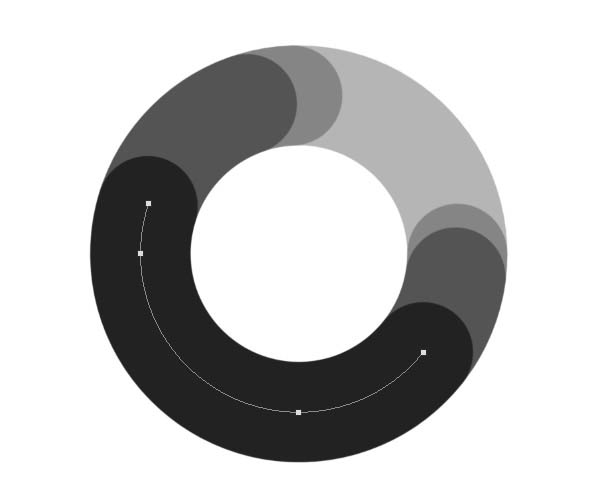
10、练习模式结束。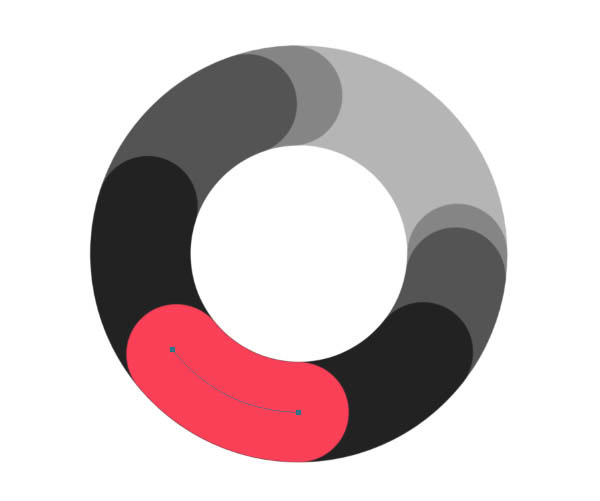
1、现在开始教程,因为有前面练习的铺垫以下应该更容易的掌握。创建一个新的文档,1600像素宽,1200像素,分辨率为72 dpi高。 填充“背景”层用黑色与暗紫色渐变#392354 - #593b70。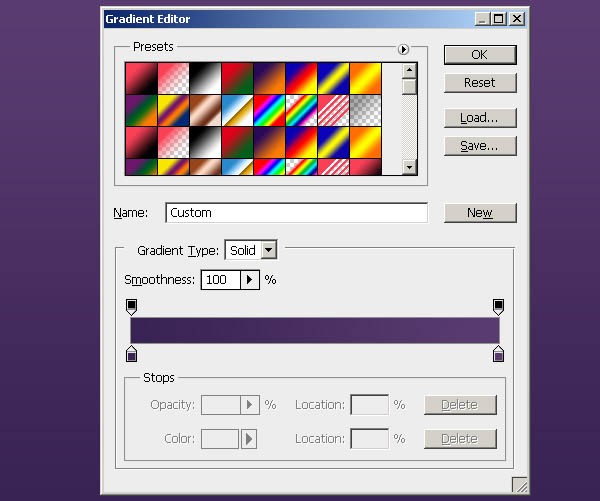
2、选择椭圆工具(U),并选择属性面板上的路径选项。按住Shift并创建一个圆圈。 转到“路径”面板多复制圆圈工作路径,备用。
3、现在我们将创建字母“C”,使用钢笔工具(P),添加两个锚点,然后删除它们之间的锚点。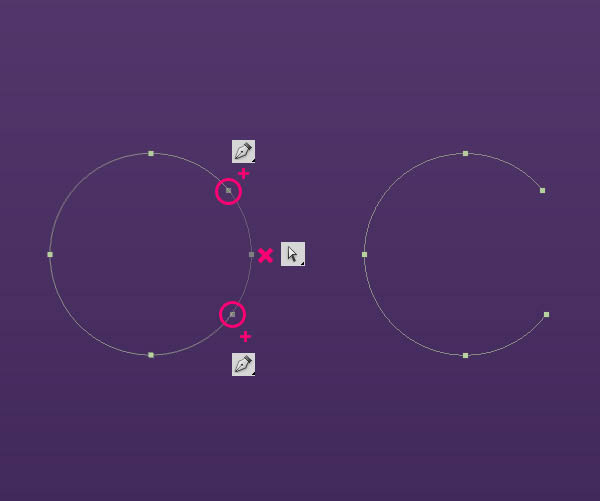
4、选择画笔工具(B)大小80像素(这里的笔刷大小按照你的字母在文件中的大小)。创建新的图层,然后按Alt + Enter以描边路径。确保不删除这条路径,我们将在以后需要。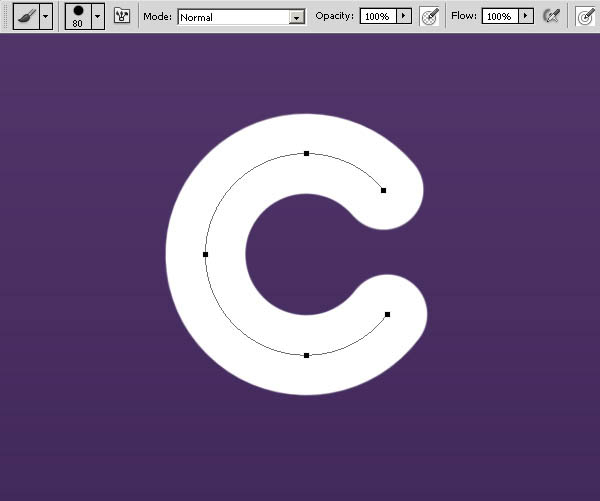
5、进入路径面板,复制并拷贝路径移动到旁边,成为字母“O”。要移动路径使用路径选择工具(A)。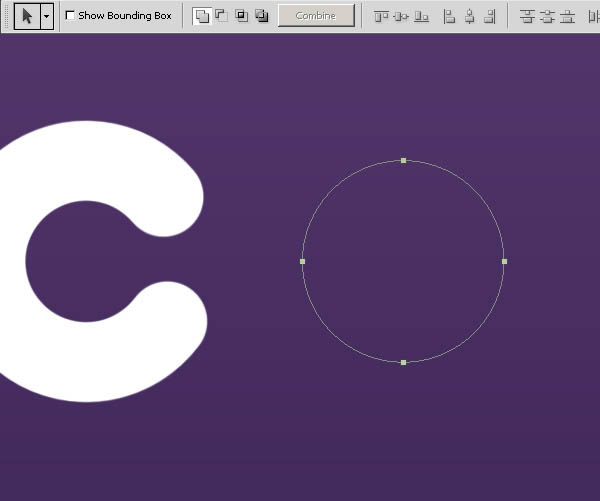
6、新建“图层”Alt + Enter键描边。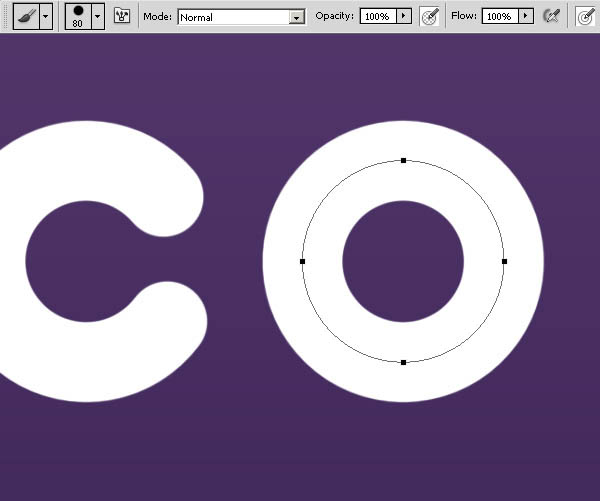
7、重复的“O”。
8、现在创建的“L”。创建参考线,挑选钢笔工具(P),按住Shift键创建一个直线路径。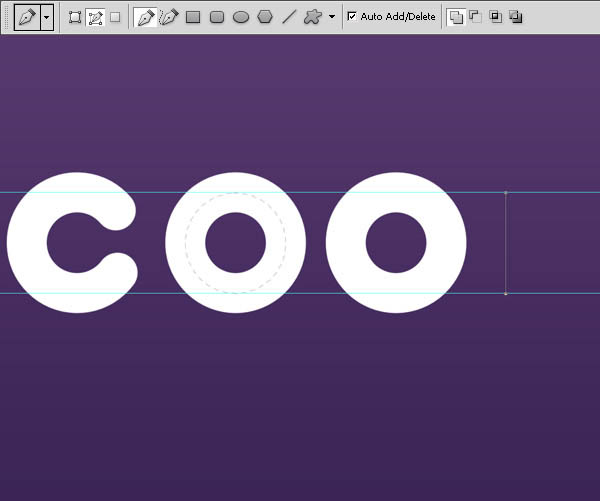
9、新建“图层”Alt + Enter键描边。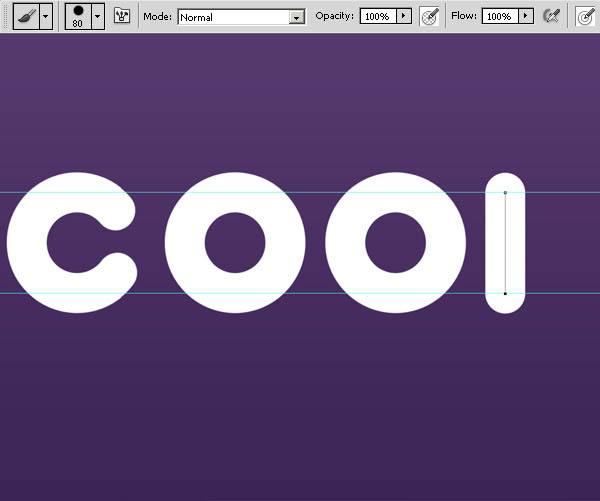
10、这样做,以创建“L”的第二部分。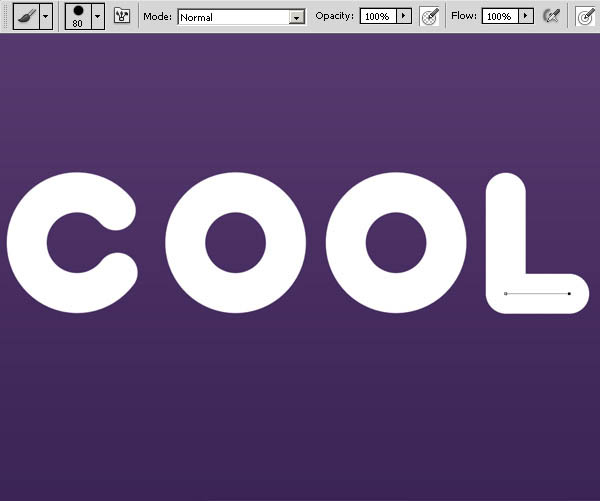
11、创建组,如下图所示,把每个字母放进单独的文件夹。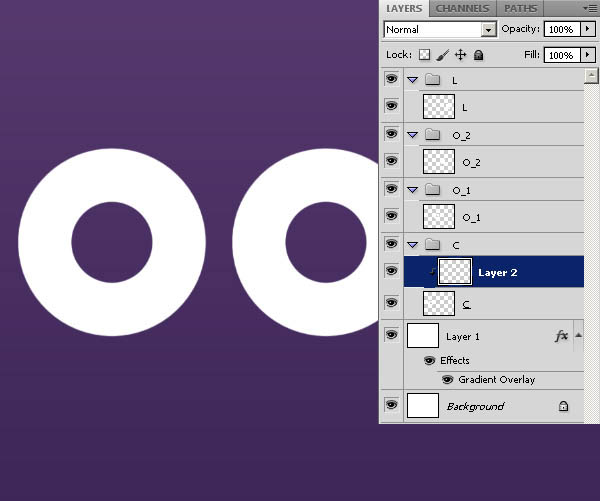
12、由于前面的练习我们就不再详细叙述创建字母过程,注意每一个新的层使用剪贴蒙版(在两个图层中间按住alt键,并单击左键)。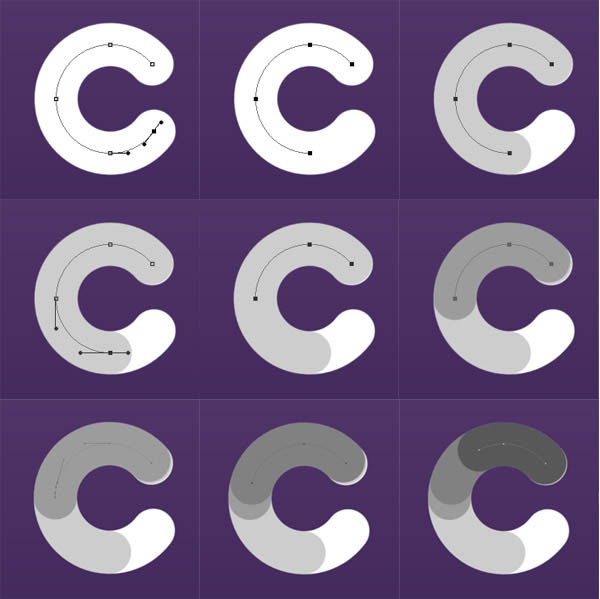
13、使用剪贴蒙版如下图所示。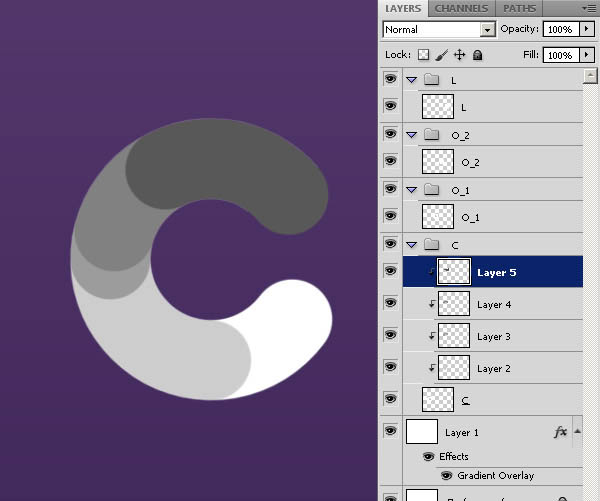
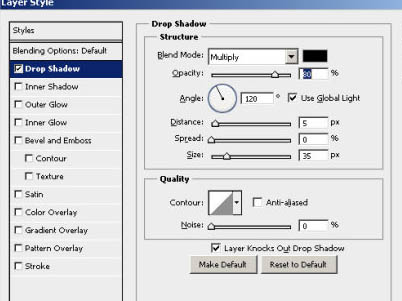
14、让我们的添加一些颜色!选择“C”的图层添加渐变叠加图层样式,设置入下图。渐变颜色为#ff0096 - #c20049。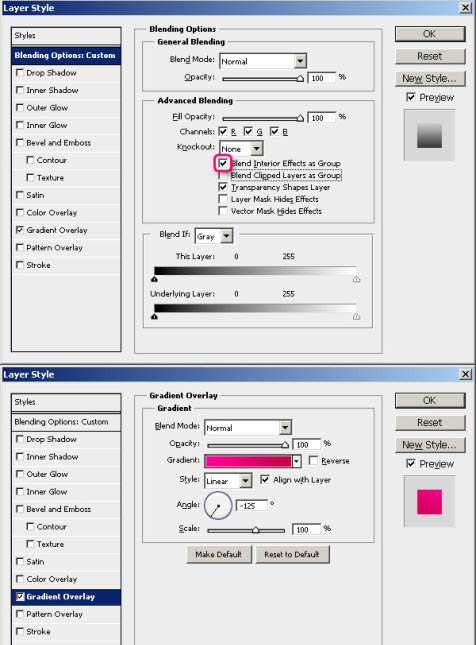

15、依次对每个形状应用渐变叠加,如下图所示。注意角度。
1. 1。 #ffd200 – #e900ba;2. 2。 #4a6d00 – #b1d603;3. 3。 #4a6d00 – #eaf900;4. 4。 #00dbef – #c8db00。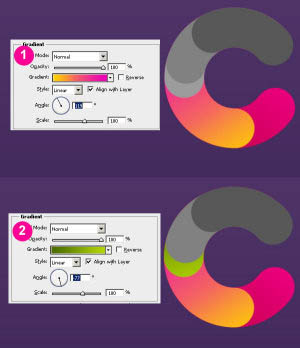

16、用一个大的软边画笔,设置不透明度为50%。创建新层,并根据每个形状绘制黑色的阴影。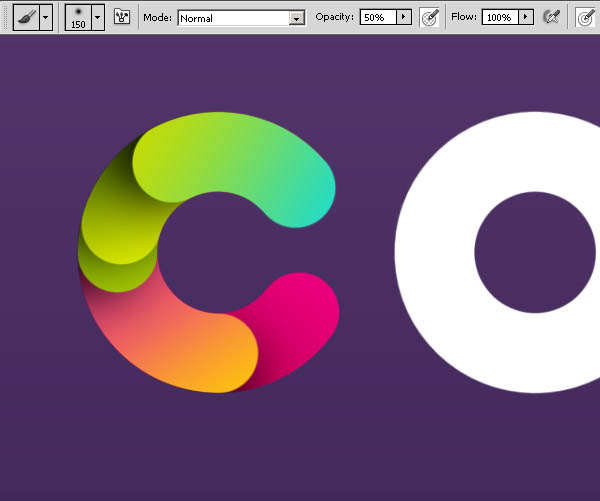
17、再次选择“C”的路径,并使其更小(路径选择工具(A),然后命令/ Ctrl + T将变换)。 创建新的层,它使用规格为40刷。添加渐变(#fb3a7e - #442b5d),并放置在图层的上部。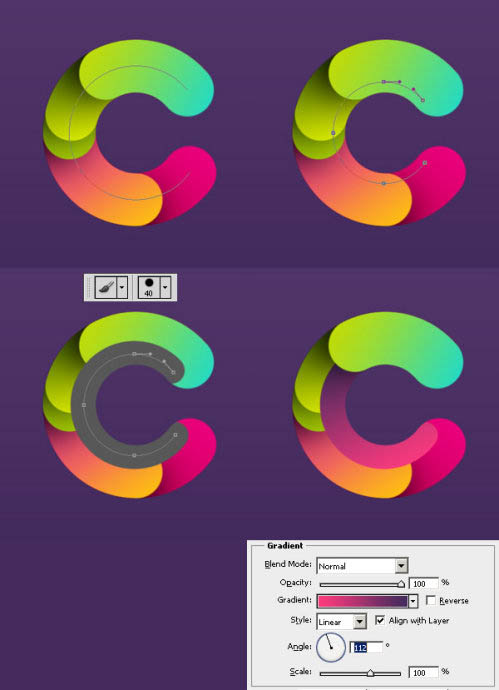
18、再次创造另一个小的形状。 渐变颜色为#e80079 - #ff6481。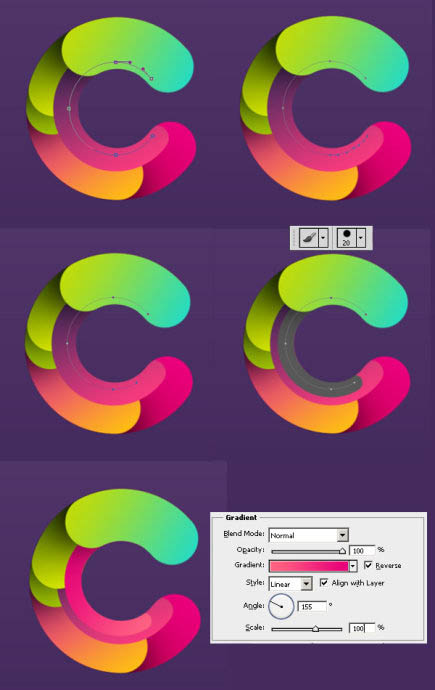
(本文来源于图老师网站,更多请访问http://m.tulaoshi.com/psxg/)19、同时移动第二个小的形状向上一个图层,并添加阴影图层样式。
20、现在所有其他字母重复类似的步骤,当然你也可以尝试新的路径,并创造不同的形状。颜色使用我们适用于组成字母“C”的颜色。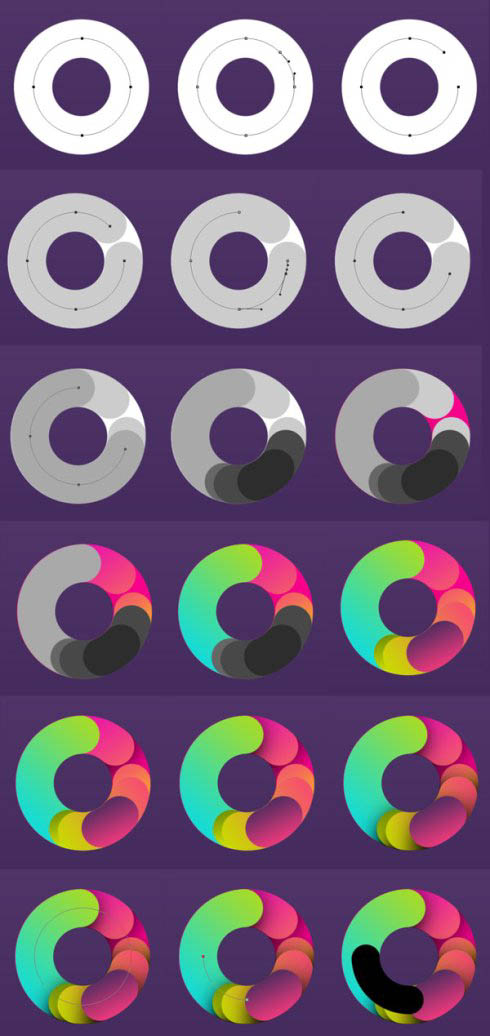
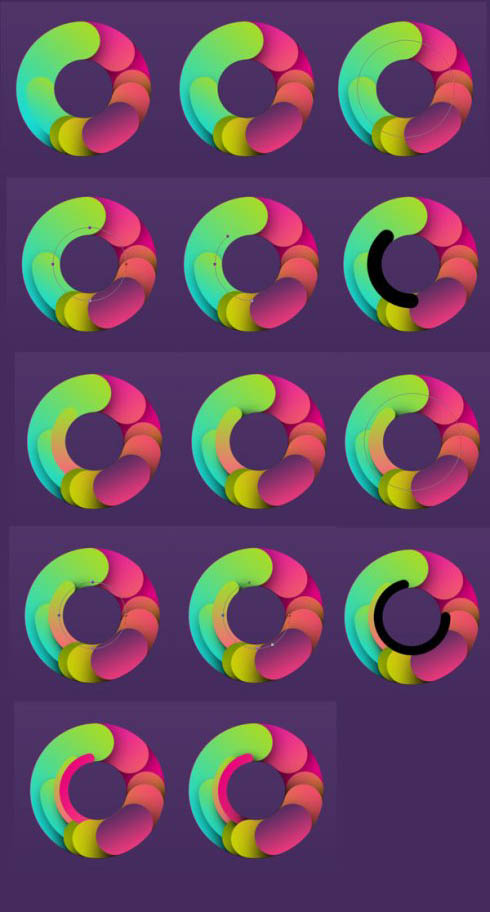

21、第二个“O”,重复此过程。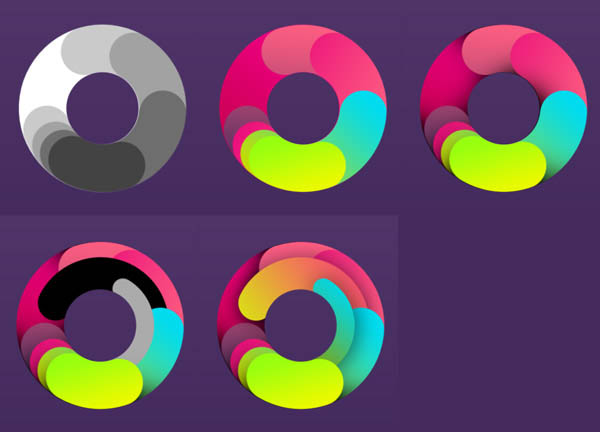
22、字母“L”。 现在看起来它真的很容易了。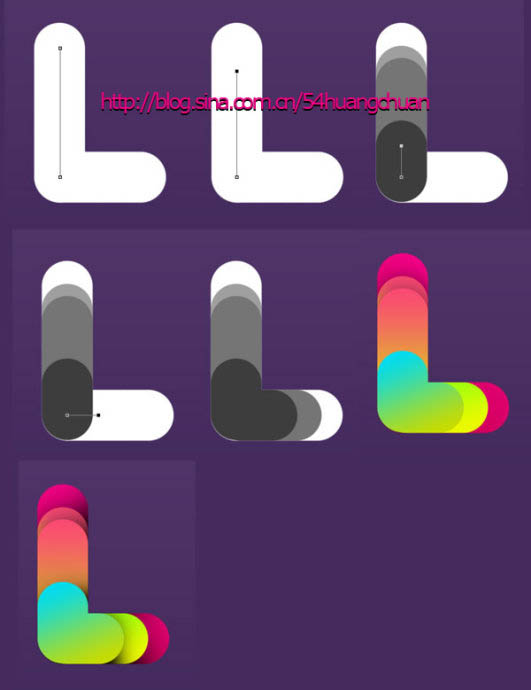
23、组合起来,并旋转。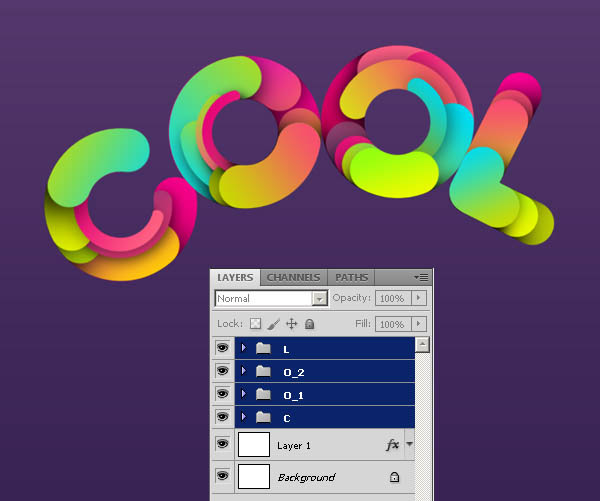
24、用同样的方法为字母创建高光。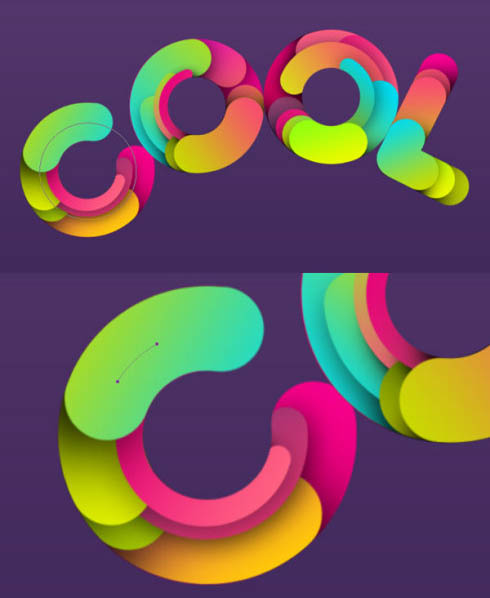

25、注意更改图层的不透明度。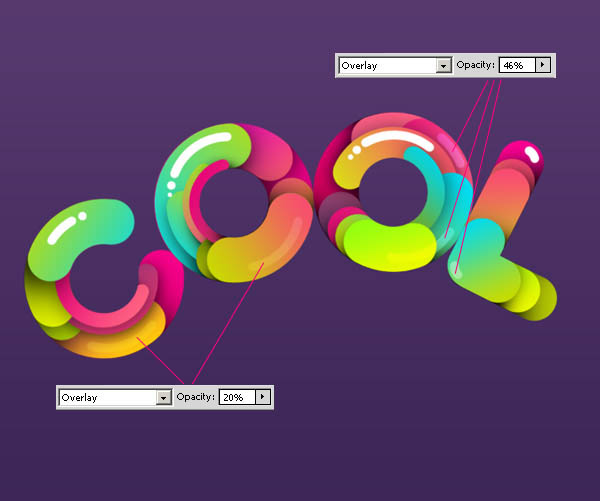
26、创建其他路径颜色的简单的方法:右键单击图层复制图层样式,然后选择新的形状图层,右键单击粘贴图层样式。


27、创建新层,选择多边形工具(U),确保它是形状,而不是一个路径。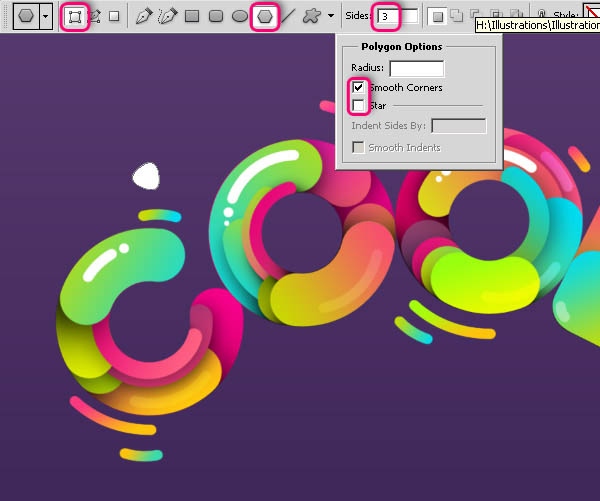
28、设置前景色为#754a9a,创造与周围的字母的大小不同的几个三角形。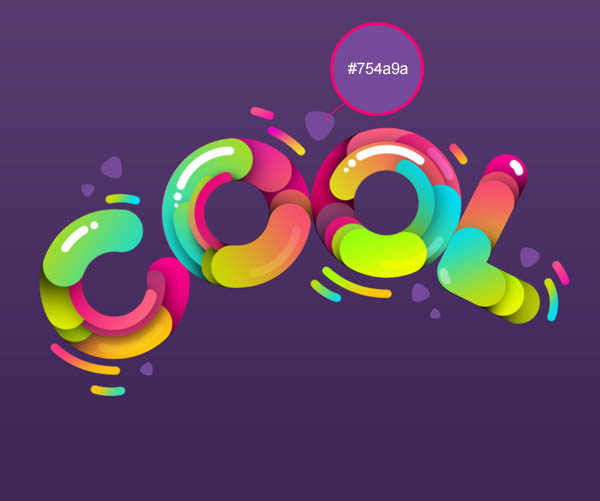
29、选择椭圆工具(U),设置前景色为白色,并创建不同形状。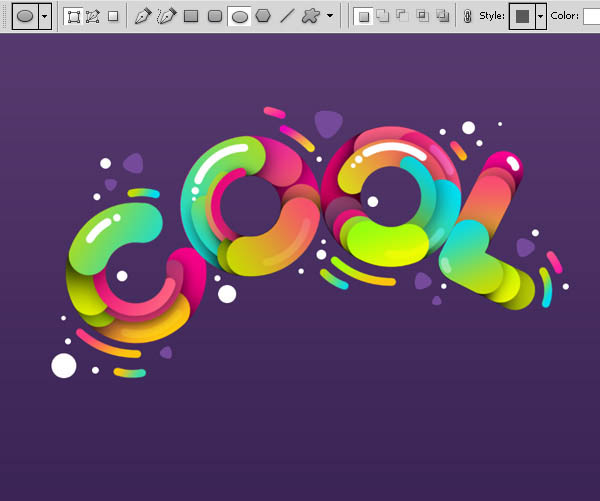
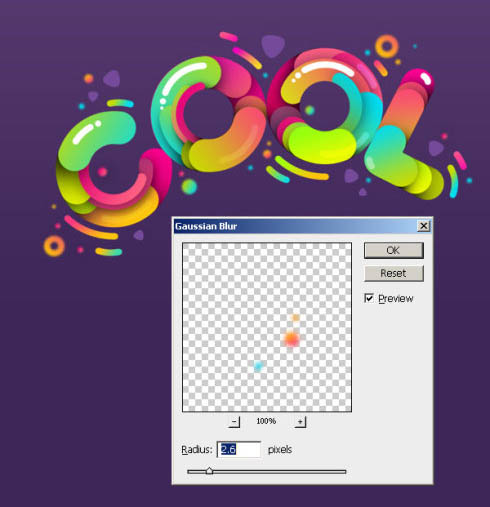
30、设置一些圆的图层样式如下所示。 选择另一个圆圈,执行滤镜模糊高斯模糊,设置半径为2.6像素左右。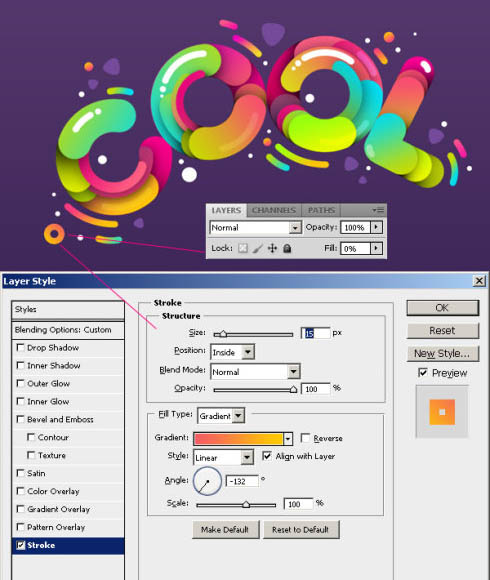

31、在背景上创建新层,选择大的软笔刷绘制,颜色为#ff02ea。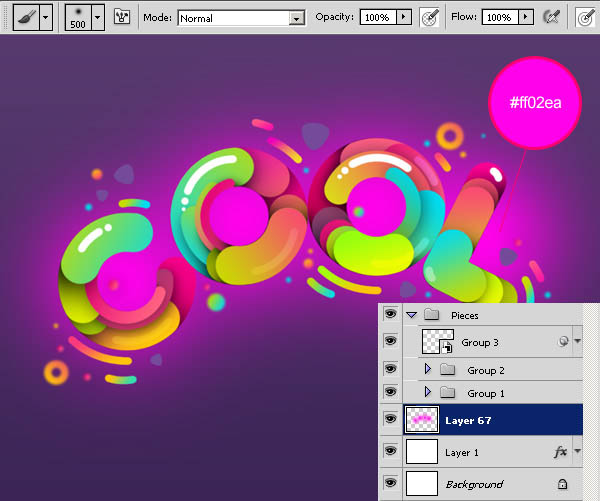
32、设置图层样式为柔光。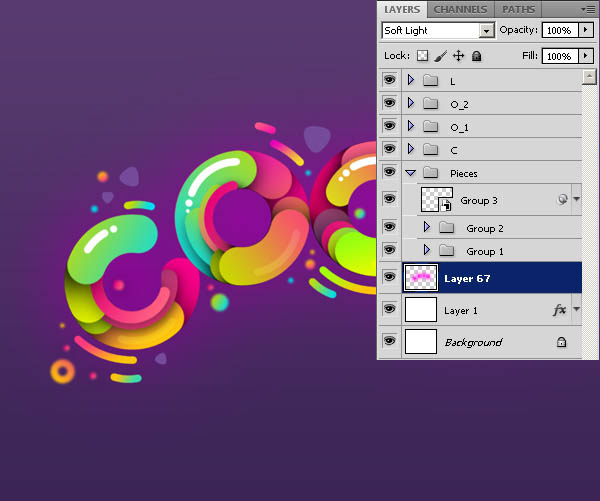
33、新建一层用小的软笔刷绘制阴影。
34、设置图层样式为柔光。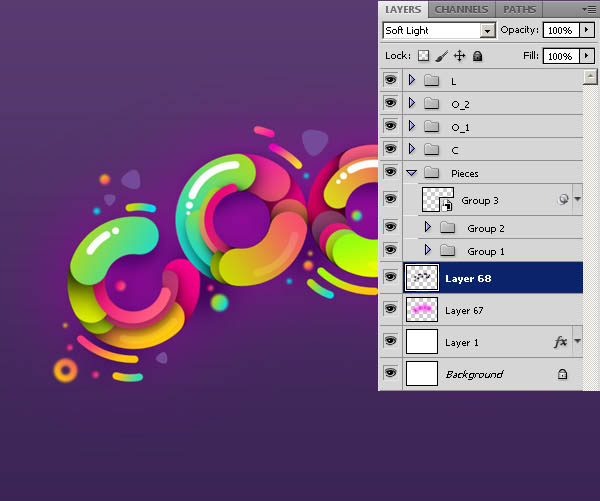
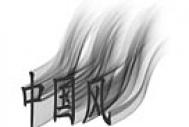
35、创建新层在所有的图层上面,按D设置前景色和背景色为黑色和白色。 执行滤镜渲染云彩。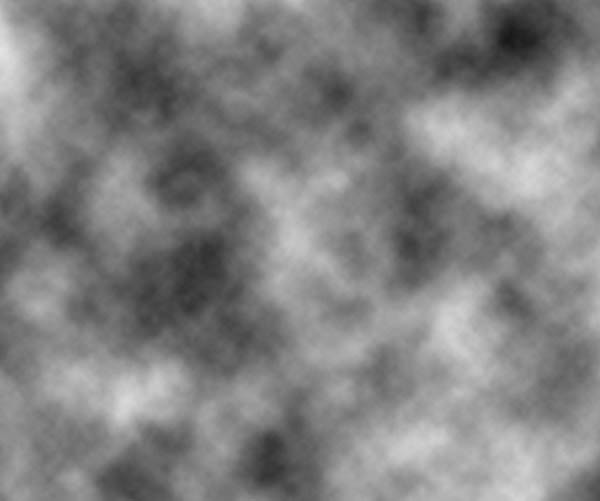
36、滤镜杂色添加杂色。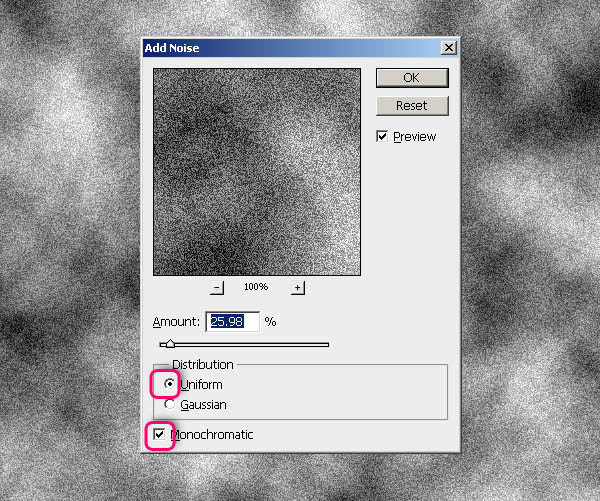
37、高斯模糊。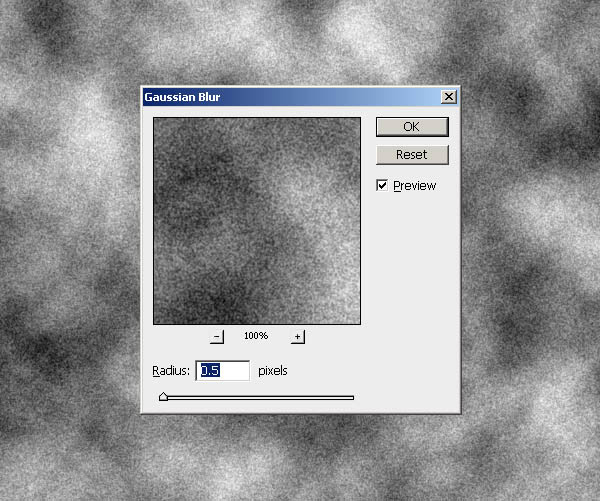
38、设置图层样式,颜色加深,不透明度为20%。
39、绘制背景。选择矩形工具(U),并按住Shift键创建一个黑色的方形。旋转45度。 选择路径选择工具(A),按住Alt + Shift键,移动复制创建的形状,重复几次像这样的形状直到布满背景图层。
(本文来源于图老师网站,更多请访问http://m.tulaoshi.com/psxg/)
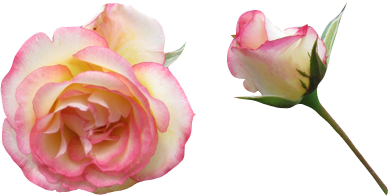
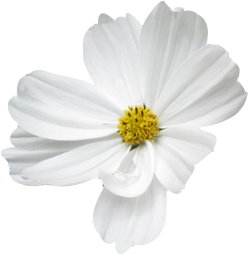
40、现在,添加一些花。他们是透明的PNG文件,所以你需要做的,只需将它们放置在画布上。 为每朵花添加阴影图层样式。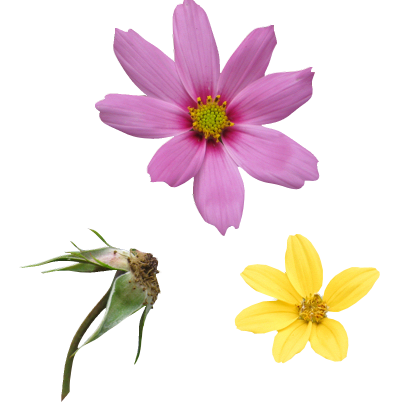


41、最后在所有的图层上面创建新层设置前景色为黑色。 Pick Gradient Tool (G).选择渐变工具(G)。 选择前景色到透明的渐变。在渐变属性面板中,选择径向渐。从画布中间画渐变的边缘。设置图层样式为柔光。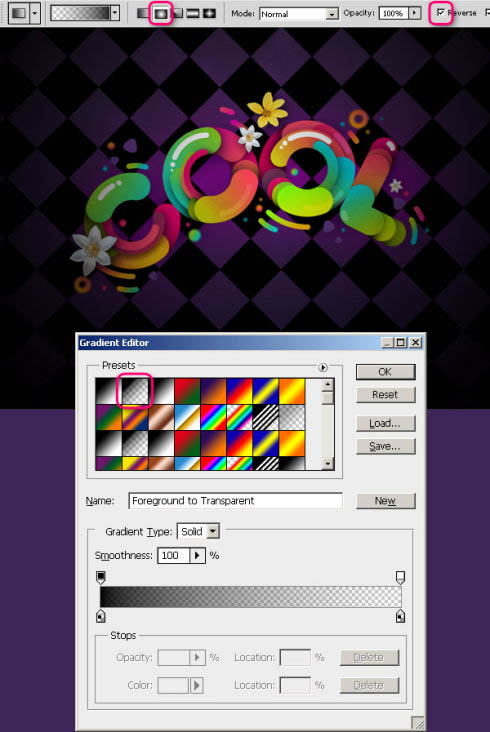
最终效果: