本教程立体字表面也有立体面,制作过程相对来说要复杂一点。同时文字局部有一些连写,制作的时候需要分开来制作,这样立体感好表现一点。。
最终效果

1、新建一个800 * 600像素的画布,选择渐变工具,颜色设置如图1,由中心向边角拉出图2所示的径向渐变作为背景。

图1

图2
2、先来制作第一个文字“2”,需要完成的效果如下图。

图3 3、新建一个组,命名为“2”。在组里新建一个图层,选择工具勾出图4所示的选区。然后选择渐变工具,颜色设置如图5,拉出图6所示的线性渐变。

图4
图5

图6
4、新建一个图层,按Ctrl + Alt + G 创建剪贴蒙版。然后在当前图层下面新建一个图层,用钢笔工具勾出下图所示的选区,羽化1个像素后填充稍亮的橙黄色,如下图。

图7 5、新建一个图层,用钢笔工具勾出下图所示的选区,羽化8个像素后填充白色,作为顶部的高光。
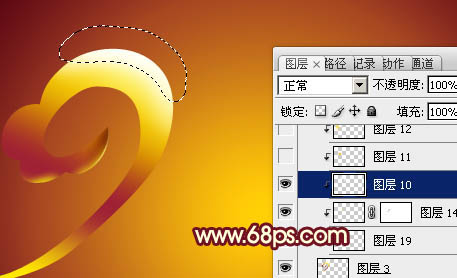
图8 6、新建一个图层,用钢笔勾出左侧的高光选区如下图,羽化6个像素后填充橙黄色。取消选区后添加图层蒙版,用黑色画笔把边缘的过渡涂抹自然。
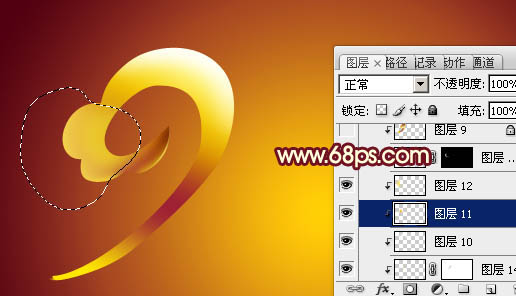
图97、新建一个图层,用钢笔勾出下图所示的选区,羽化5个像素后填充比底色稍亮的黄色,作为边缘高光。
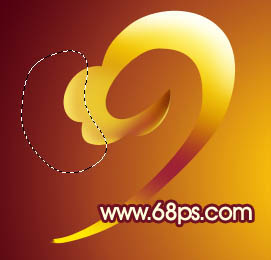
图10
8、在组的最上面新建一个图层,用钢笔勾出图11立体面的选区,选择渐变工具,颜色设置如图12,拉出图13所示的线性渐变。

图11
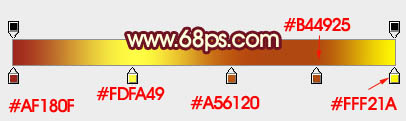
图12

图13 9、取消选区后把当前图层复制一层,调出图层选区,选择菜单:选择 修改 收缩,数值为2,确定后再羽化1个像素,然后按Delete 删除,混合模式改为“滤色”,效果如下图15。
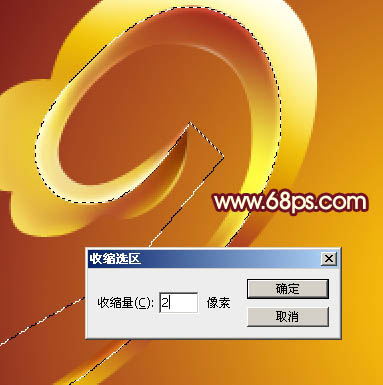
图14
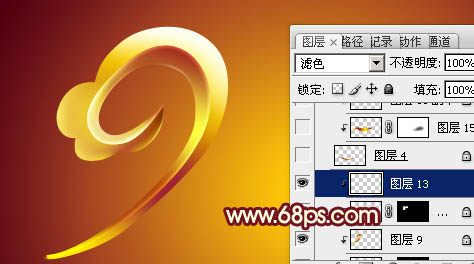
图15
10、新建一个图层,用钢笔勾出图16所示的选区,拉上图17所示的线性渐变。

图16
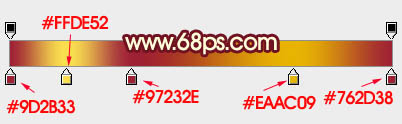
图17 11、新建一个图层,同上的方法制作立体面,过程如图18,19。

图18

图19
12、在组的最下面新建一个图层,用钢笔勾出图20所示的选区,拉上图21所示的线性渐。
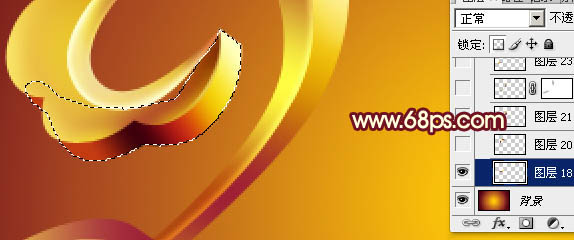
图20
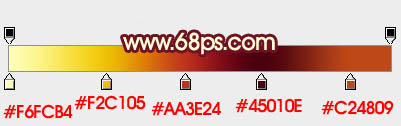
图21 13、同上的方法制作其它立体面,过程如图22 - 24。
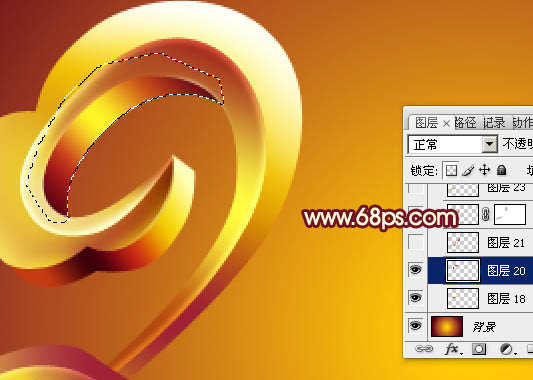
图22

图23

图24
14、同上的方法制作其它文字,过程如图25 - 27,后面的“2”字可以复制前面做好的。

图25

图26

图27
15、给文字添加投影,大致效果如下图。

图28 最后调整一下细节,给文字增加对比度,完成最终效果。
图29


