sky876408134
2016-01-31 15:02
下面是个简单易学的Photoshop调出沙发上的美女图片清爽的青黄色教程,图老师小编详细图解介绍包你轻松学会,喜欢的朋友赶紧get起来吧!
室内人物图片一般会偏暗,人物脸部、肤色及背景会出现一些杂点。处理之前需要认真的给人物磨皮及美白,然后再整体润色。
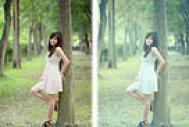
原图
最终效果
1、用修补工具及图章工具简单去除大一点的黑斑。
(本文来源于图老师网站,更多请访问http://m.tulaoshi.com/psxpcl/)
2、创建可选颜色调整图层,参数设置如下图。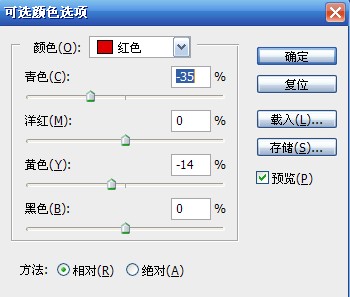
3、创建色相/饱和度调整图层,参数设置如下图,这步是提亮皮肤颜色。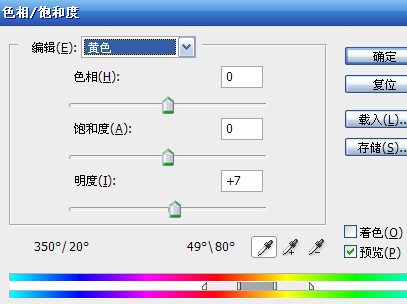
4、然后新建图层,填充这个颜色,模式排除,不透明度95%。排除的作用就是去除所选颜色,同时便会凸显其颜色的互补色,也就是黄色。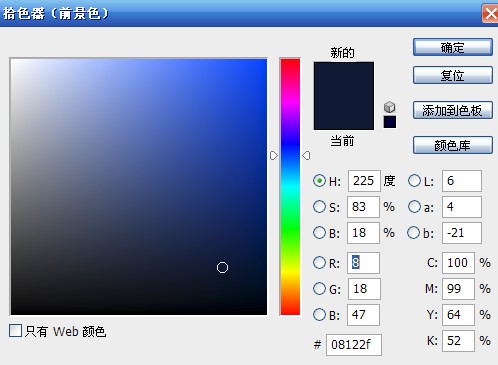
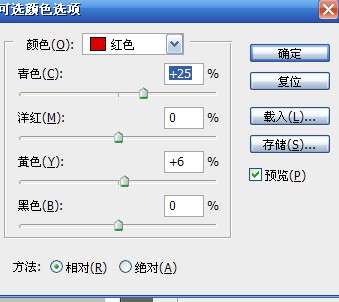
5、创建可选颜色调整图层,对蓝色进行调整,参数设置如下图。这是为了把沙发弄青点,亮点。
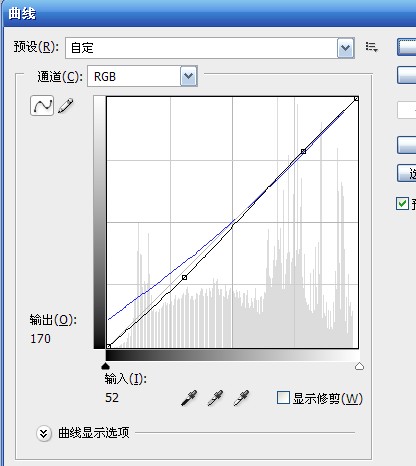
6、创建曲线调整图层,对RGB,蓝进行调整,参数设置如下图。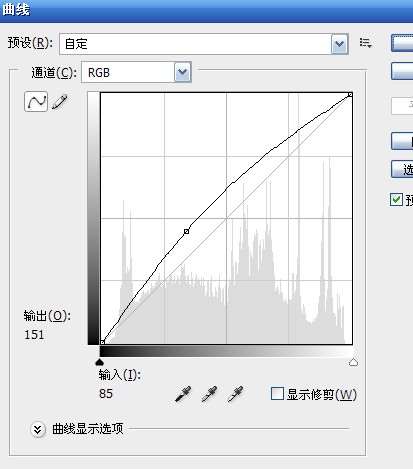
7、创建色阶调整图层,参数设置如下图。让暗部更暗,再次更加对比。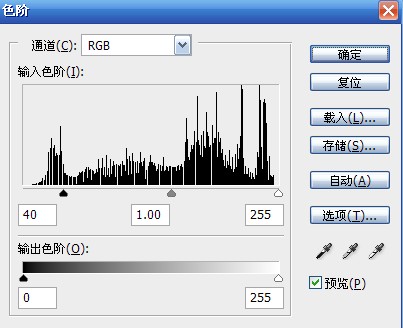
8、创建色彩平衡调整图层,对高光进行调整,提亮高光,烘托整体氛围。
9、新建调整图层,选黑白,模式柔光,透明度40,这也是为了去灰色,增加对比。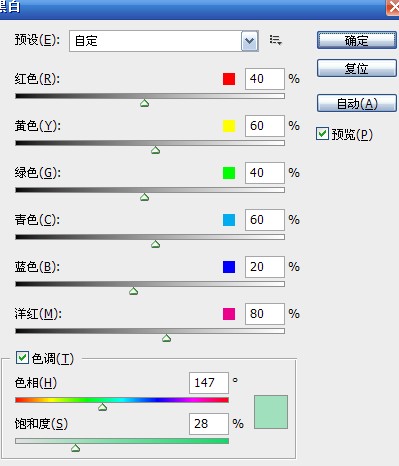
10、全图加饱和,然后擦去头发的颜色,主要是让皮肤更健康些看着。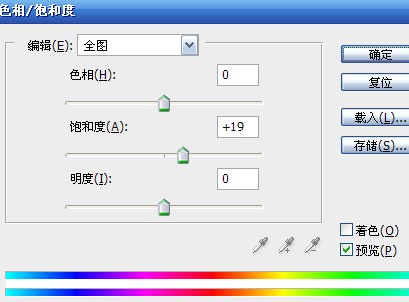
11、创建色阶调整图层,参数设置如下图。这是为了让图片更柔和。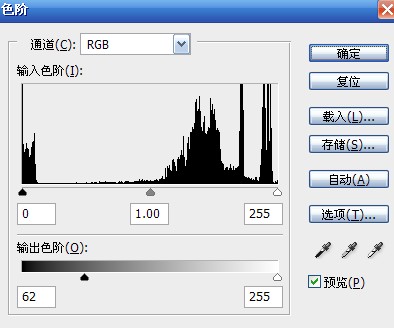
12、盖印图层,高反差保留,模式柔光,目的是锐化。
13、再调整可选色,对颜色微调。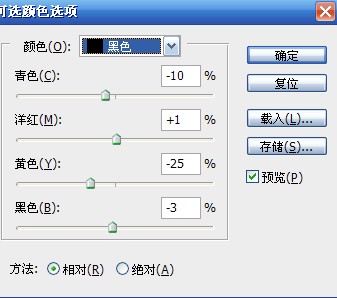
(本文来源于图老师网站,更多请访问http://m.tulaoshi.com/psxpcl/)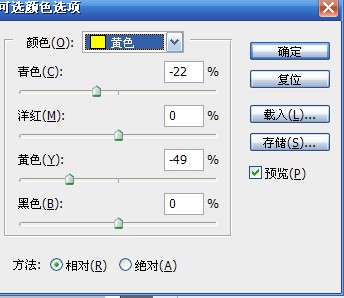
最后液化,处理细节,完成最终效果。