get新技能是需要付出行动的,即使看得再多也还是要动手试一试。今天图老师小编跟大家分享的是简单用滤镜给夜景图片加上满天繁星,一起来学习了解下吧!
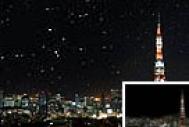
原图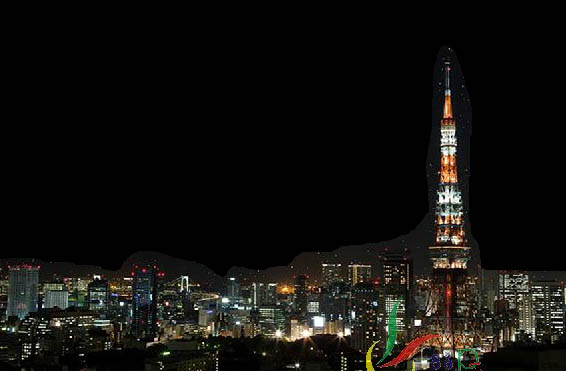
最终效果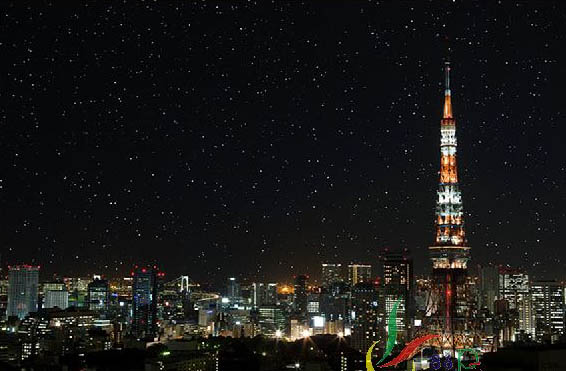
(本文来源于图老师网站,更多请访问https://m.tulaoshi.com)1、打开原图,新建一个图层,填充黑色。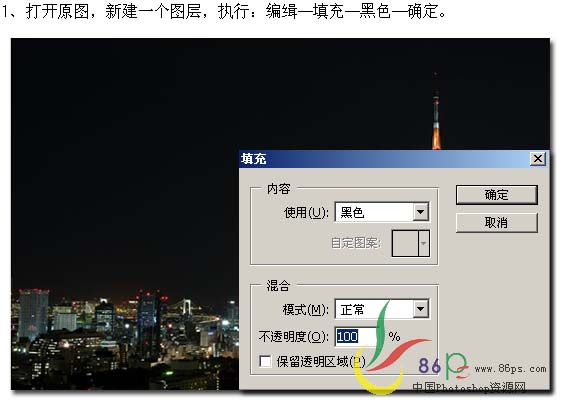
2、执行:滤镜 杂色 添加杂色,参数设置如下图。
3、执行:滤镜 模糊 高斯模糊,数值为0.3。
4、把星星图层隐藏,用套索工具选出天空部分。 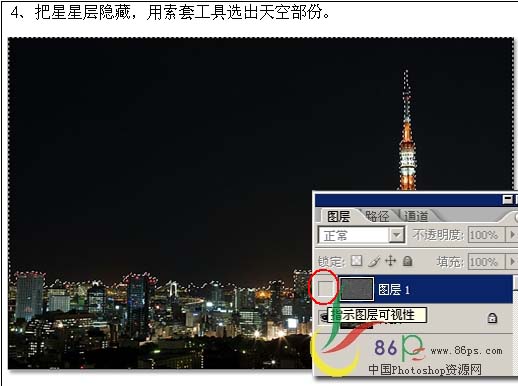
(本文来源于图老师网站,更多请访问https://m.tulaoshi.com)5、给星星图层加上蒙版,然后把图层显示出来。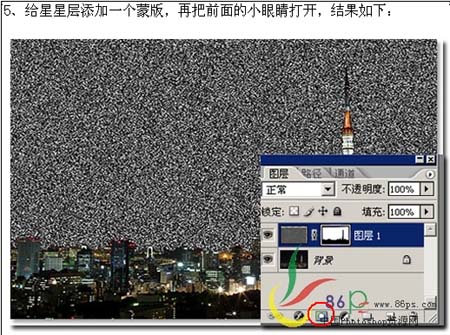
6、按Ctrl点蒙版载入选区,然后创建色阶调整图层,参数设置如下图3所示。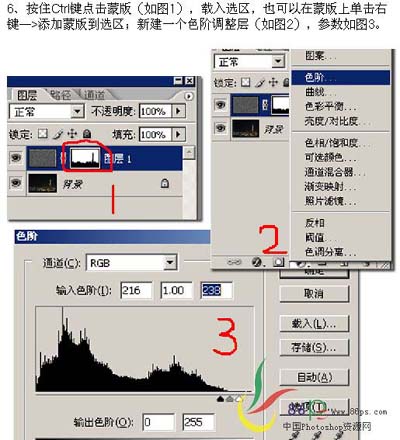
调暗后的星星数量少了。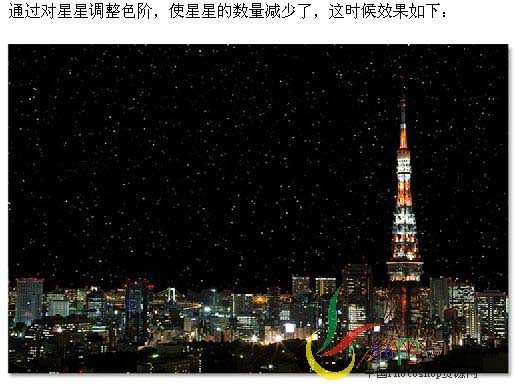
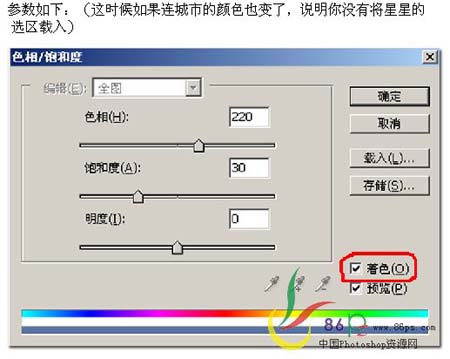
7、把星星图层的图层混合模式改改为“滤色”,再在色阶调整图层上面创建色相/饱和度调整图层。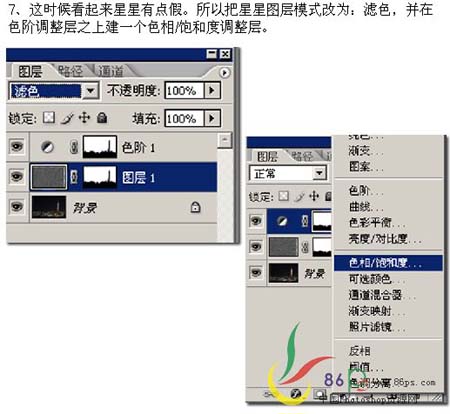
8、最终效果。
(本文来源于图老师网站,更多请访问https://m.tulaoshi.com)