教程用到的都是PS自带的笔刷和图案,制作之前只需要调出画笔设置面板,适当选择好笔刷,再适当设置一些参数和纹理。然后用画笔就可以画出自己想要的云彩图案。
最终效果![](https://img.tulaoshi.com/image/20160202/dd958de0bc739eda332b9e08b489c201.jpg)
![](https://img.tulaoshi.com/image/20160202/e12a94531009c659a8de9a0d7824bb66.jpg)
(本文来源于图老师网站,更多请访问https://m.tulaoshi.com)![](https://img.tulaoshi.com/image/20160202/f4a9756a8e24d3a2eb2fdbda68e30d86.jpg)
![](https://img.tulaoshi.com/image/20160202/7cb9d09c042f9e46a525230b0417a0e2.jpg)
(本文来源于图老师网站,更多请访问https://m.tulaoshi.com)1、首先我们新建一个 400*400的文档,设置前景色81C1E9、背景色2785DA,线性渐变垂直拉制背景。![](https://img.tulaoshi.com/image/20160202/261ac3c32db4bda72245a393fc69e4ef.jpg)
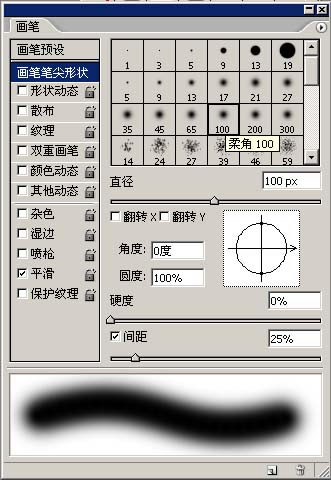
2、按F5进入笔刷调板。 画笔笔尖形状:笔尖类型 柔角100 ,直径 100Px,间距 25。
![](https://img.tulaoshi.com/image/20160202/5e72dd8af6406ee71c17e757c6ef2f67.jpg)
形状动态:大小抖动 100%,最小直径 20%,角度抖动 20%。![](https://img.tulaoshi.com/image/20160202/d3c60def3d01b43c0c5d885afdb3cf42.jpg)
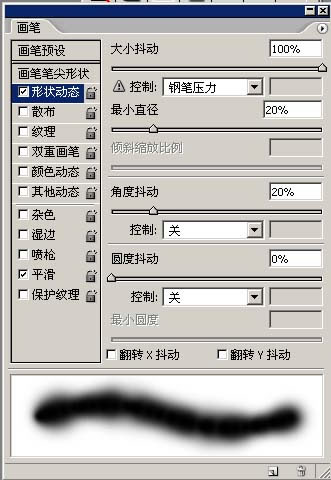
散布:两轴 120%,数量 5 ,数量抖动 100%。![](https://img.tulaoshi.com/image/20160202/cdeaa2c4fe5ba534ece21610dd2842d8.jpg)
纹理:图样 云彩(128*128 灰度),缩放 100%,模式 颜色加深,深度 100%。![](https://img.tulaoshi.com/image/20160202/b2ce581271d35897cc9d701b39264092.jpg)
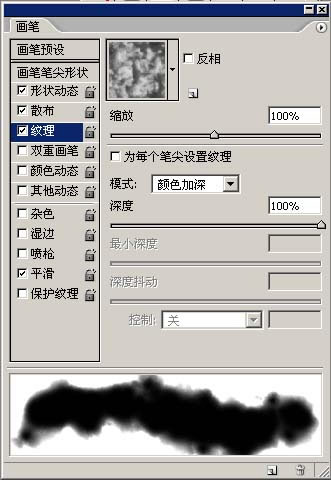
其他动态:不透明度抖动 50%,流量抖动 20%。![](https://img.tulaoshi.com/image/20160202/3e79c9e70998799df598ba380330b811.jpg)
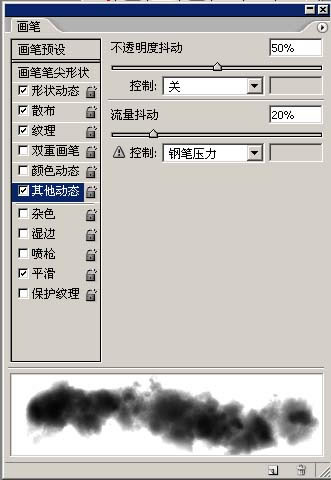
3、新建图层,前景色设置白色,笔刷上色。![](https://img.tulaoshi.com/image/20160202/137654eaeb44d966ddd05a7ee773a200.jpg)
4、注意一点:笔刷的直径与纹理中云彩的缩放样式保持一致大小,合理改变笔刷的颜色,你可以制作出阴云密布的景象。![](https://img.tulaoshi.com/image/20160202/9d8b9b33da48ebc6cb83d8e3ddb28f81.jpg)
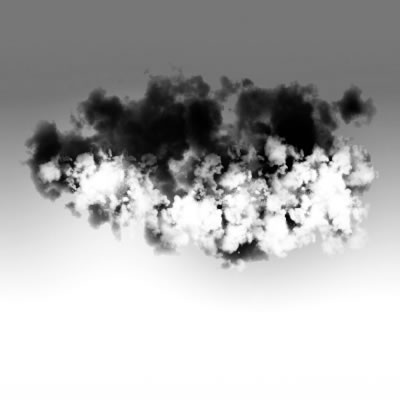
5、利用路径描边,你可以创建出这样的图像。![](https://img.tulaoshi.com/image/20160202/e12a94531009c659a8de9a0d7824bb66.jpg)
(本文来源于图老师网站,更多请访问https://m.tulaoshi.com)![](https://img.tulaoshi.com/image/20160202/f4a9756a8e24d3a2eb2fdbda68e30d86.jpg)
6、结合图层样式和光效,利用云彩笔刷的简单操控性,可以创造出更多的奇幻景色。![](https://img.tulaoshi.com/image/20160202/7cb9d09c042f9e46a525230b0417a0e2.jpg)
(本文来源于图老师网站,更多请访问https://m.tulaoshi.com)