whz1466845192
2016-01-31 19:25
今天天气好晴朗处处好风光,好天气好开始,图老师又来和大家分享啦。下面给大家推荐Photoshop调出外景美女图片柔和的黄褐色,希望大家看完后也有个好心情,快快行动吧!
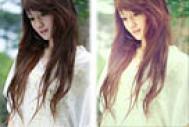
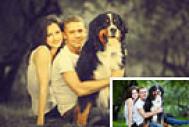
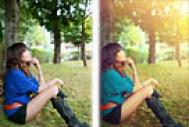
黄褐色是组比较经典的颜色,调色方法有很多。可以根据图片的实际颜色构成选择不同的方法来调。如下面素材图片,颜色比较单一,可直接用调色工具来完成。 原图
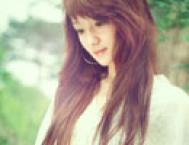
最终效果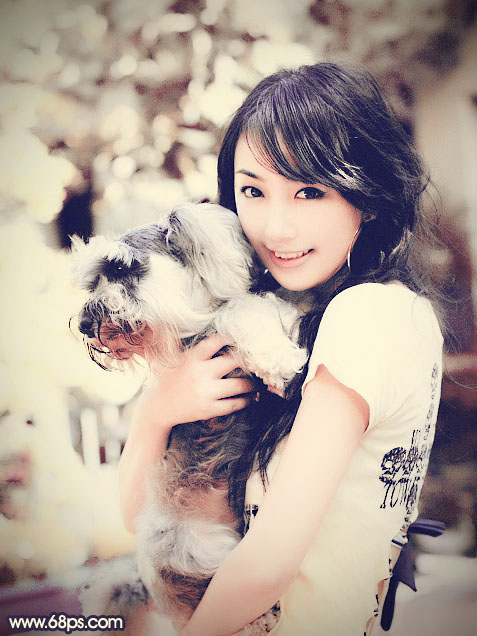
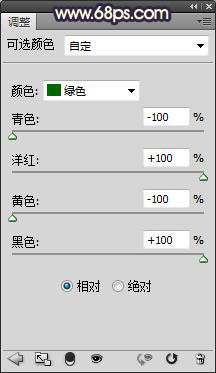
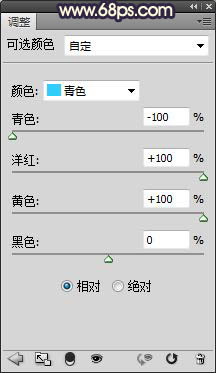
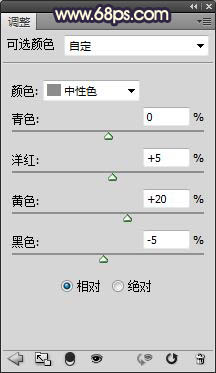
1、打开照片,复制一层,创建可选颜色调整图层,分别调整黄/绿/青/中性色,这一步是调整背景,使其变为统一色彩,参数如图,效果如图。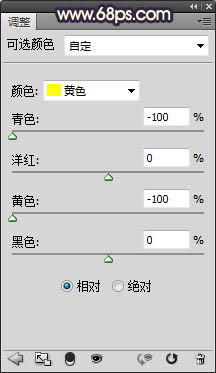
(本文来源于图老师网站,更多请访问https://m.tulaoshi.com/psxpcl/)
2、按CTRL+J复制一层可选颜色调整图层,加强下色彩调整强度,效果如图。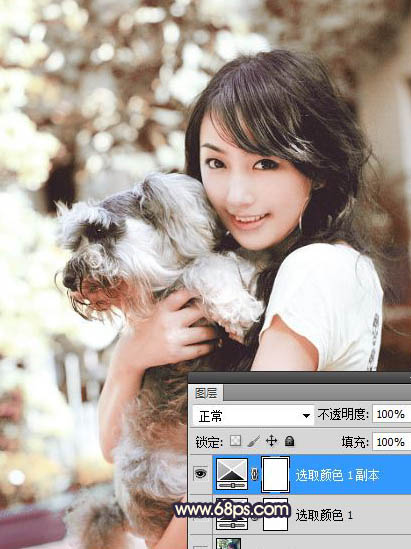
3、新建空白图层,按CTRL+SHIFT+ALT+E盖印空白图层,执行:图像-自动对比度,这一步是通过软件预设的工具调整照片中的明暗对比度,效果如图。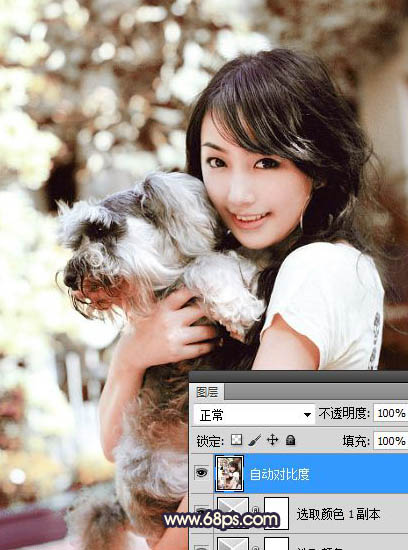
4、新建空白图层盖印空白图层,按CTRL+SHIFT+ALT+2调出高光选区,新建空白图层并填充褐色#665354,调整图层的不透明度为50%,效果如图。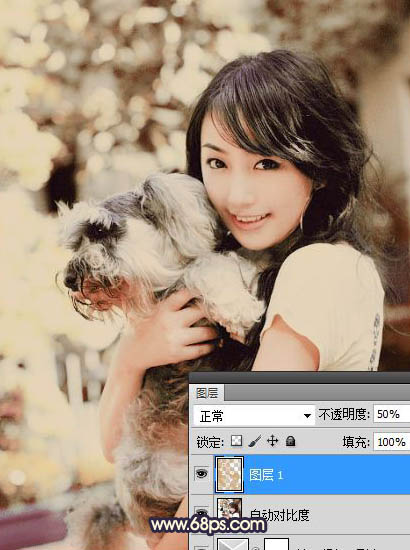
5、新建空白图层并盖印图层,设置图层的混模式为柔光,图层的不透明度为50%,效果如图。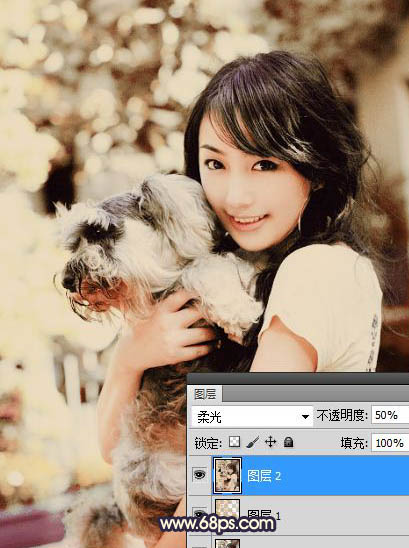
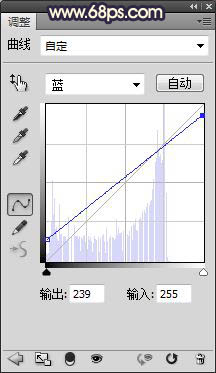
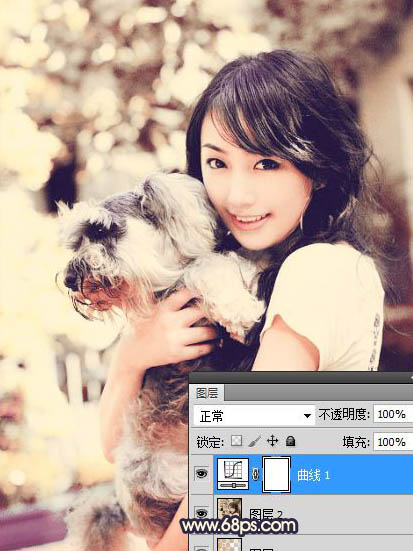
6、创建曲线调整图层,调整RGB/蓝,为照片提高亮度及增加蓝调,参数如图,效果如图。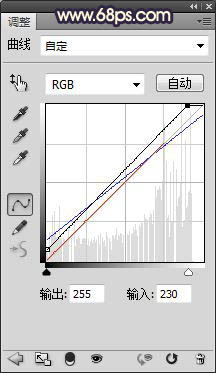
7、新建空白图层,并填充与背景相同的褐色,并添加图层蒙板,用画笔擦去不需要的部分,效果如图。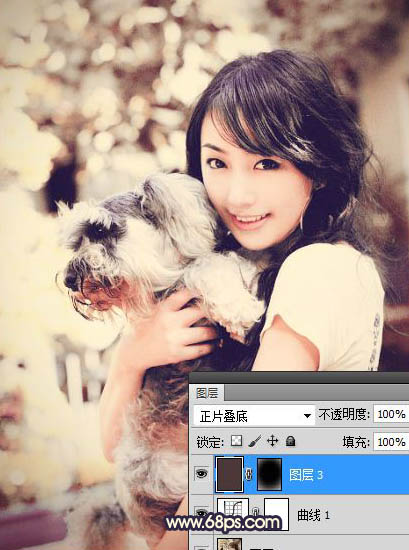
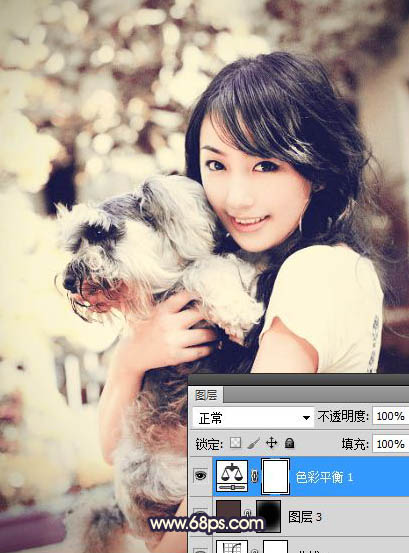
8、创建色彩平衡调整图层,分别调整阴影/中间调/高光,这一步是使照片我色彩变的稍微淡一些,参数如图,效果如图。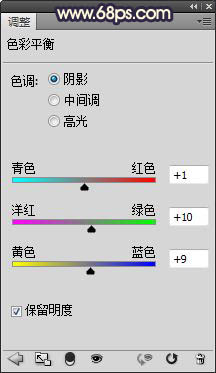
(本文来源于图老师网站,更多请访问https://m.tulaoshi.com/psxpcl/)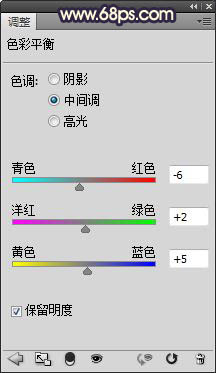

9、新建空白图层,并填充黑色,为照片制作暗角部分,效果如图。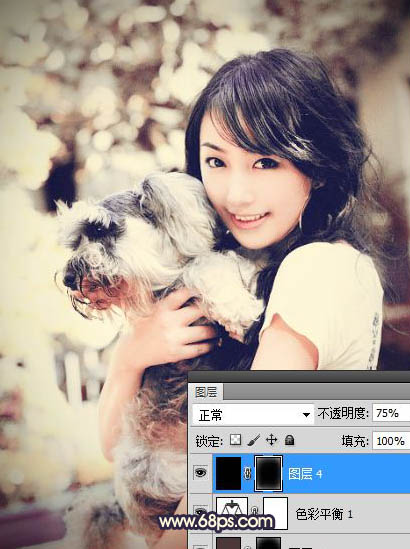
10、对照片进行锐化处理,参数自定。再对人物进行简单的磨皮,修饰细节完成最终效果。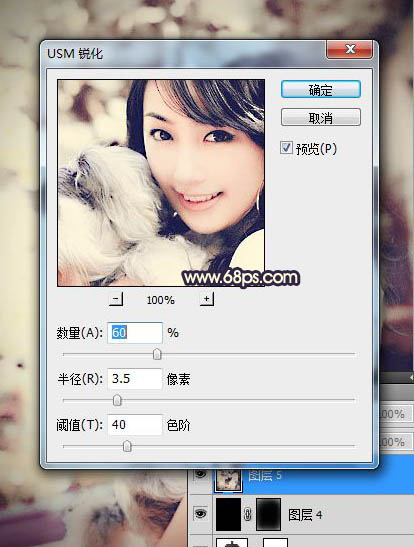
最终效果: