今天图老师小编要跟大家分享用画笔描边路径及图层样式制作彩色糖果字,精心挑选的过程简单易学,喜欢的朋友一起来学习吧!
制作文字之前,需要自己定义一些糖果图形笔刷,然后在文字边缘用描边路径加上糖果图形,再用图层样式加上颜色和质感,文字中间则用画笔涂上图形后再用图层样式增加质感。
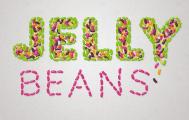
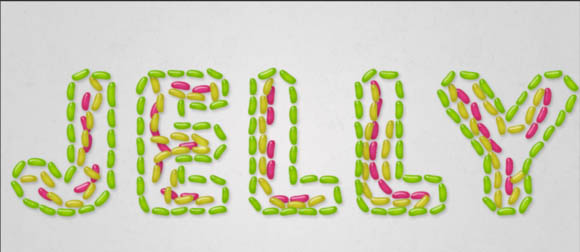
最终效果
1、创建一个500*500的画布。
2、用椭圆工具创建一个圆,大小自己定,随意。
3、用直接选择工具框选中中间的锚点。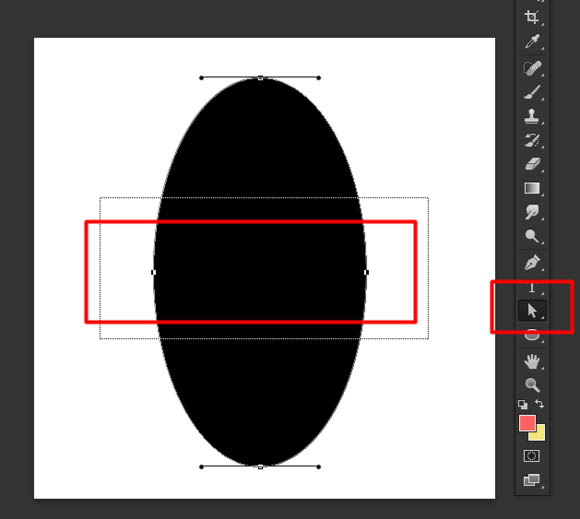
4、用方向键的左箭头键进行移动。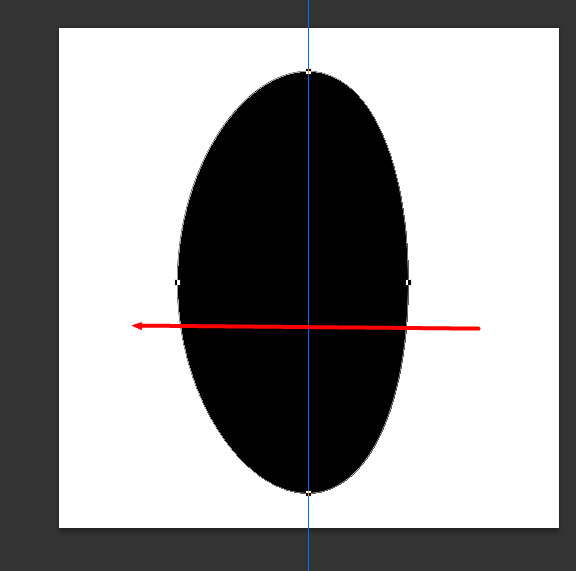
5、用直接选择工具移动锚点的方向线,耐心的调整形状。
6、调整好大概的形状,如果你不能确定什么形状,你可以上网搜各种豆类的形状来模仿!
调整后,在菜单栏,编辑——定义画笔预设那里定义为画笔。
7、创建一个1250*850大小的画布,添加个渐变填充调整层,颜色自己看着办。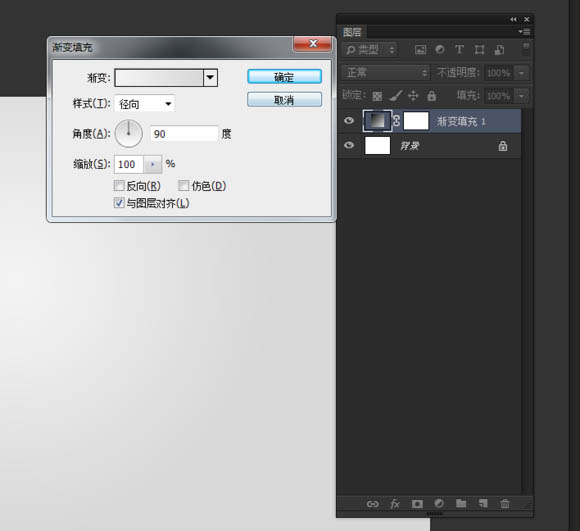
8、打开素材里面的背景素材,然后定义为图案。
(本文来源于图老师网站,更多请访问https://m.tulaoshi.com/psxg/)

9、添加一个图案填充调整层,图案选择我们刚刚定义的纹理。混合模式为正片叠低,不透明度随意调整。
10、载入教程提供的字体,然后调整大小,调整字距,颜色随意。

11、单击字体图层然后右键,选择创建工作路径。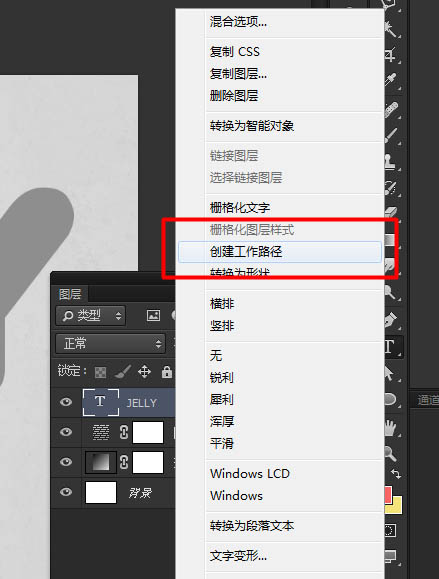

12、创建工作路径后,关闭字体层,然后创建一个空白图层。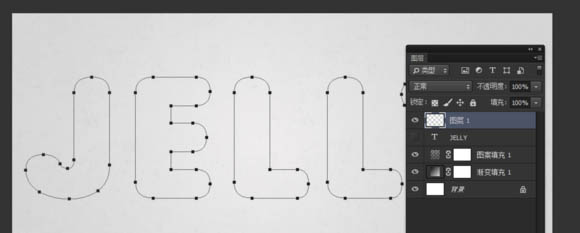
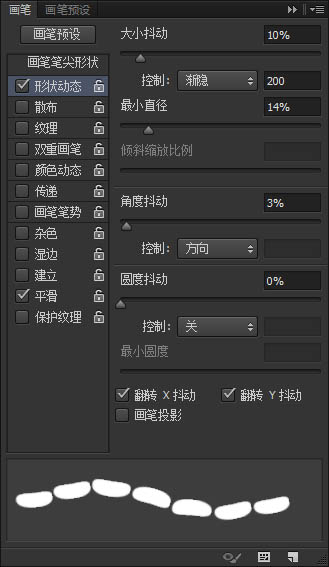
13、选择画笔,打开画笔选项,(窗口——画笔),设置如图所示。
14、选择钢笔工具,然后在路径上右键,选择描边路径。

15、描边完我们可以看到一些地方会产生重叠的区域,这时我们应该解决掉它。
16、选择橡皮擦工具,擦掉重叠的地方。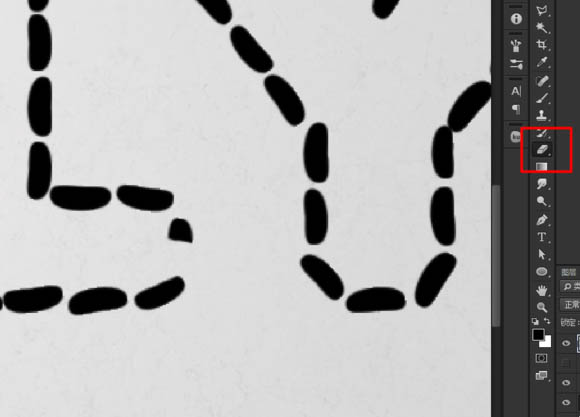
17、选择合适的形状,然后复制移动到空缺的地方。不过要注意这些都要合并成一个图层。

18、打开素材包下的字体纹理素材,定义为纹理。

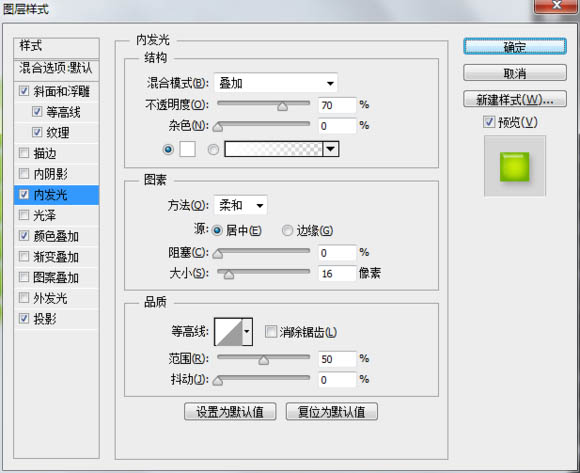
19、如图所示,在纹理图案中选择我们刚刚定义的纹理图案。 具体参数如图所示,颜色可根据自己喜欢的而定,随意即可。


20、把图层样式拷贝下来。
21、在下面新建一个空白图层,然后粘贴之前拷贝的图层样式到新建的图层上。

22、修改拷贝下来的图层样式的颜色,然后用画笔在图层上随意的画。

23、这一步花了我几分钟,就是新建一个图层,换一种颜色,然后画!注意要有层次感。
(本文来源于图老师网站,更多请访问https://m.tulaoshi.com/psxg/)


24、用橡皮擦擦掉边缘的豆豆,然后画几颗不同颜色的豆豆,看起来就像跑出来一样。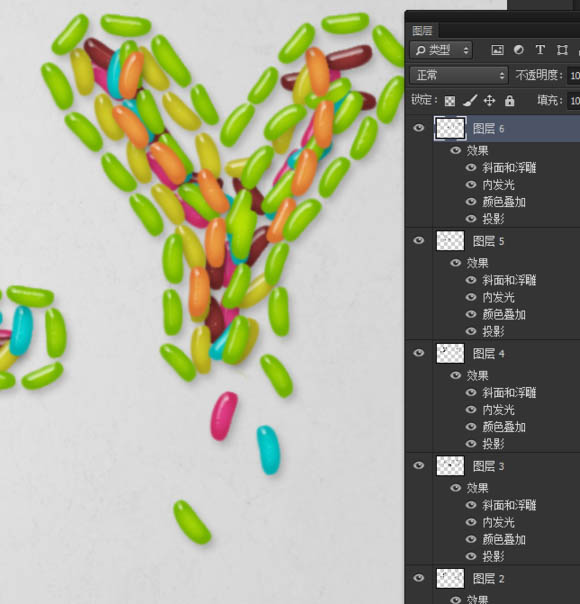
25、当然了!图层一多,我看起来就烦了,好的,选择所有豆豆层,右键——转换成智能对象。
26、一行太单调,我们弄多行,我为图省事,就打了ps两个单词上去。
27、用钢笔工具描出路径。
28、其实这一步很简单,就是描绘路径,描边,加图层样式。相信对于大部分人来说是没有压力的。
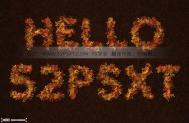
最终效果: