今天图老师小编给大家展示的是Photoshop制作一颗水晶质感五角星,精心挑选的内容希望大家多多支持、多多分享,喜欢就赶紧get哦!
最终效果![](http://img.tulaoshi.com/image/20160203/038330cbf825ba127af5e463f7c7153f.jpg)
1、新建一个大小自定的文件,背景填充白色,然后选择多边形工具,在上面的属性栏设置如下图。![](http://img.tulaoshi.com/image/20160203/7d6bb91c1e7edaaa3d9bad5517336bbb.jpg)
2、按住Shift拉出下图所示的五角星,然后按Ctrl点五角星调出选区,新建一个图层填充黑色。![](http://img.tulaoshi.com/image/20160203/931e508290771d6c8b20e8899ebbe614.jpg)
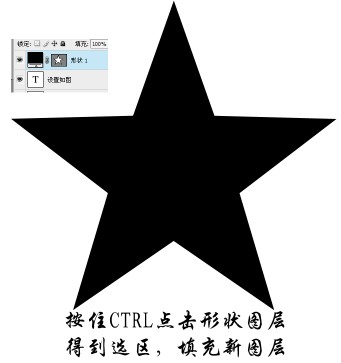
3、用钢笔工具选出一个角后拉上下图所示的渐变色。![](http://img.tulaoshi.com/image/20160203/680e7c1f48e28fdfe5971c66f10606cc.jpg)
4、把做好的渐变图层复制一层,按Ctrl + T变形,把中心节点移到五角星中心位置,再把角度设置为72度。![](http://img.tulaoshi.com/image/20160203/0d7f3d0f7e09e7a19db12712c2ca0fd0.jpg)
(本文来源于图老师网站,更多请访问http://m.tulaoshi.com)![](http://img.tulaoshi.com/image/20160203/c21b8f278804be7a2e904d2f84f5d619.jpg)
5、按住Ctrl + Shift + Alt + T复制,复制5次得到下图所示效果。![](http://img.tulaoshi.com/image/20160203/5ac1fc3bfd0d88783edde247cca95161.jpg)
6、回到背景图层,新建一个图层,选择渐变工具颜色设置如下图。
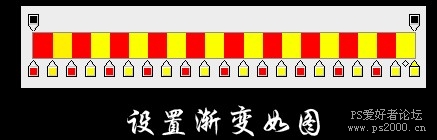
![](http://img.tulaoshi.com/image/20160203/f941004e912c582f85c84d21ac2956af.jpg)
7、由中心拉出下图所示角度渐变。![](http://img.tulaoshi.com/image/20160203/f09c98e371fc04582a37b1b3fffc6e06.jpg)
8、在背景图层上面新建一个图层,拉出下图所示黄红径向渐变。![](http://img.tulaoshi.com/image/20160203/11dab4ac87bd4a12f5decbdb11d88754.jpg)
9、把角度渐变的图层混合模式改为“变暗”。![](http://img.tulaoshi.com/image/20160203/504bbb6cc8a5f2d42088f50a78cb0a80.jpg)
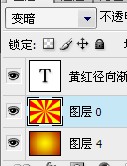
10、把做好的五角星几个图层合并,双击图层调出图层样式加上投影效果,参数及效果如下图。![](http://img.tulaoshi.com/image/20160203/523693e94270f1ef1cdf8c60b860d95a.jpg)
![](http://img.tulaoshi.com/image/20160203/4dc08e62f24cc24c4d9282de6c6d5ac7.jpg)
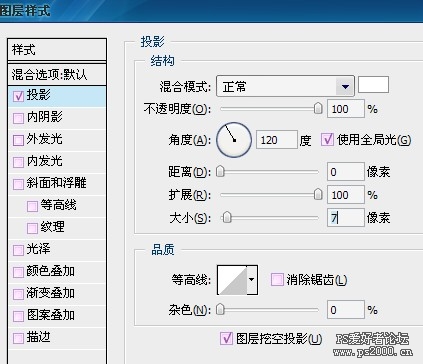
11、新建一个空白图层,把空白图层与五角星图层合并,双击图层调出图层样式,参数及效果如下图。
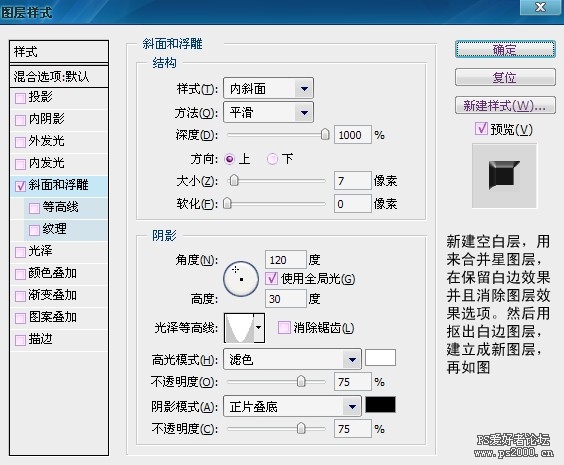
![](http://img.tulaoshi.com/image/20160203/616124dd6294f3a3f6ff8166077136ed.jpg)
![](http://img.tulaoshi.com/image/20160203/53d12ae22a2fac96ba679c2a441892e2.jpg)
(本文来源于图老师网站,更多请访问http://m.tulaoshi.com)12、在加点高光,如下图。![](http://img.tulaoshi.com/image/20160203/3402f390d8453399155fad589bb76649.jpg)
13、删掉背景填充白色。![](http://img.tulaoshi.com/image/20160203/6a60999f80d8f2a05974c9cc36dfd256.jpg)
加上文字,完成最终效果。![](http://img.tulaoshi.com/image/20160203/038330cbf825ba127af5e463f7c7153f.jpg)