想要天天向上,就要懂得享受学习。图老师为大家推荐Photoshop制作非常精细的自动铅笔图标,精彩的内容需要你们用心的阅读。还在等什么快点来看看吧!
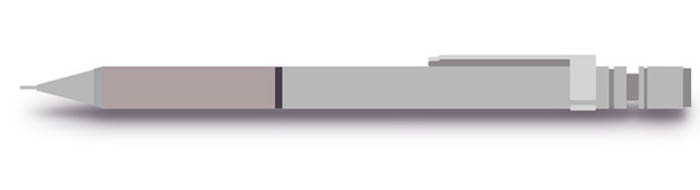
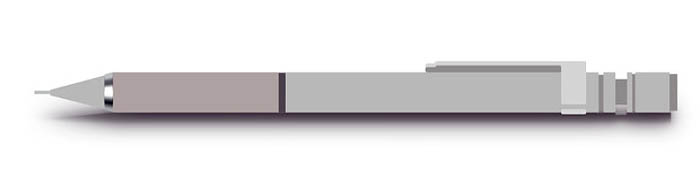
教程非常详细非常全面的介绍自动铅笔的绘制方法,基本上每一个细节都有详细说明。过程:先了解清楚铅笔的构造,然后分层把每一部分都用色块标识出来;再逐层上色,刻画质感和细节等即可。 最终效果
1、绘制自动铅笔基本雏形。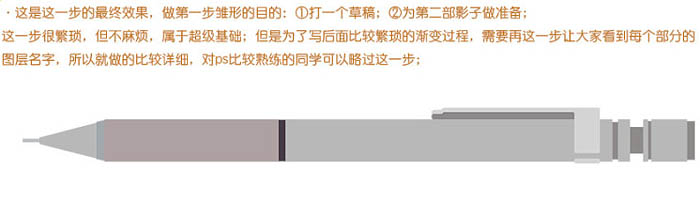
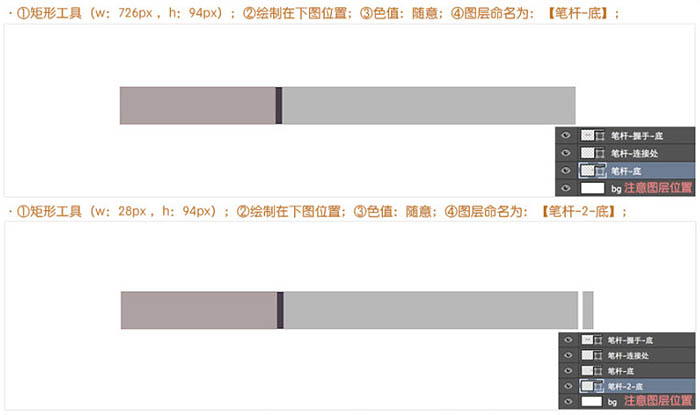
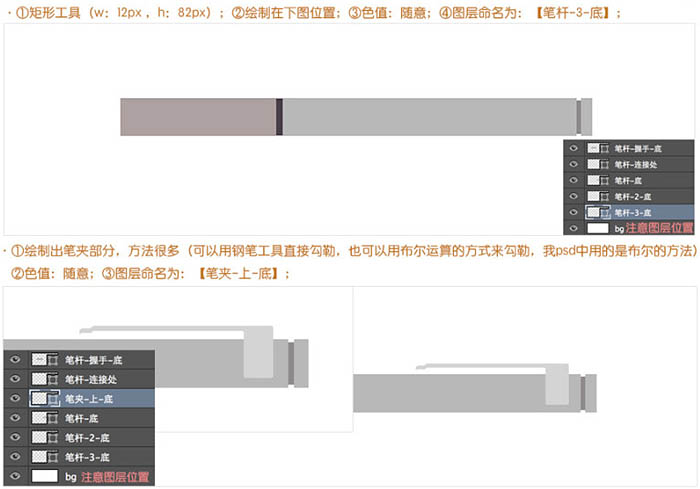
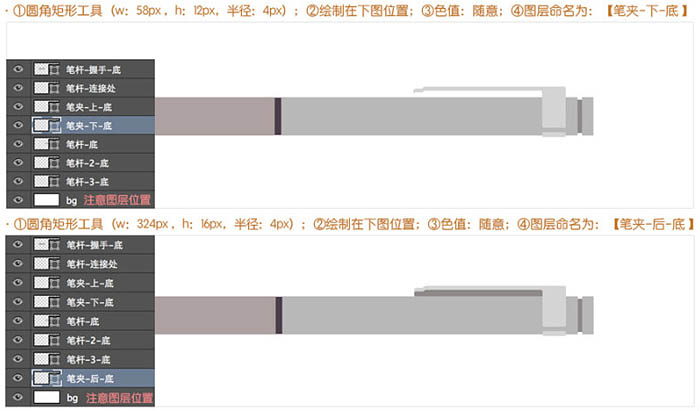
1-1、绘制笔杆雏形。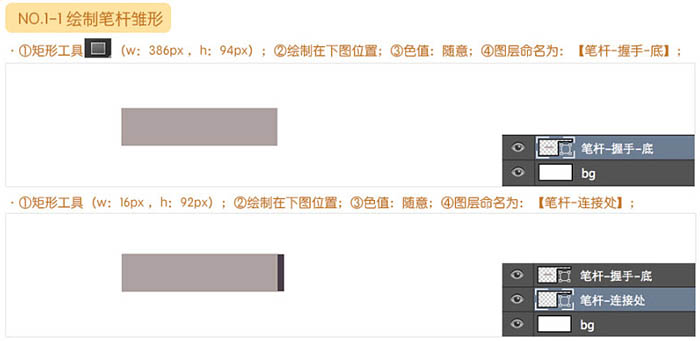
1-2、绘制护芯雏形。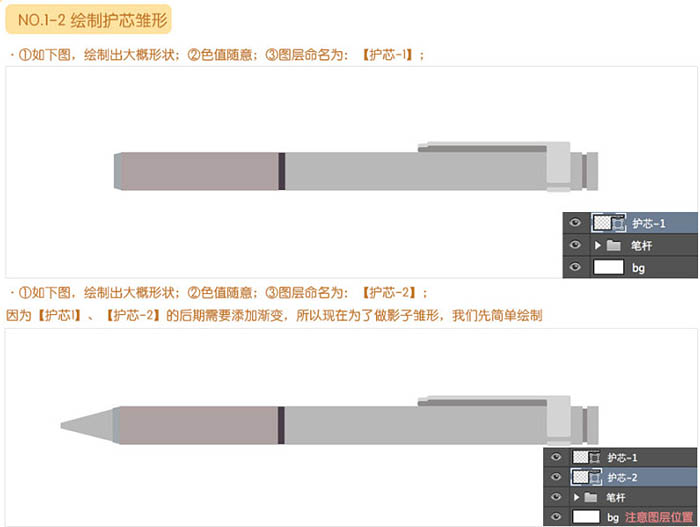
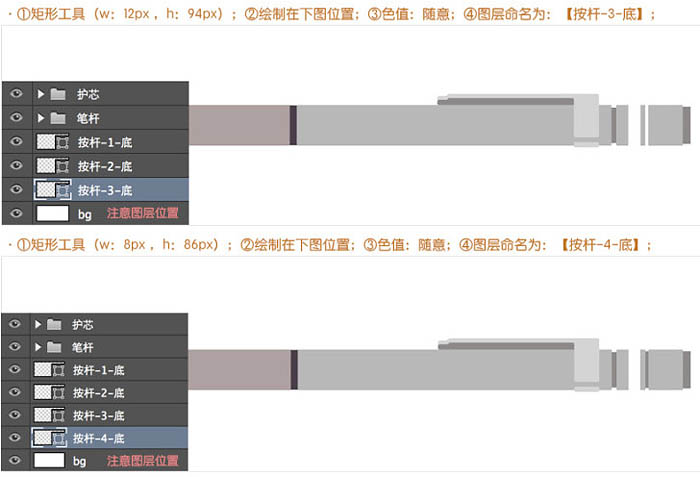
1-3、绘制按杆雏形。
(本文来源于图老师网站,更多请访问http://m.tulaoshi.com)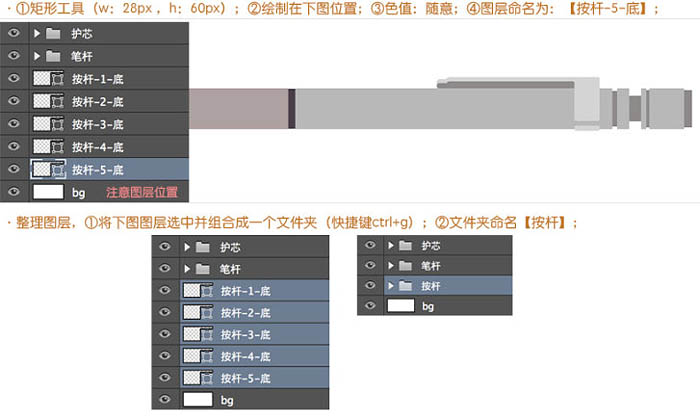
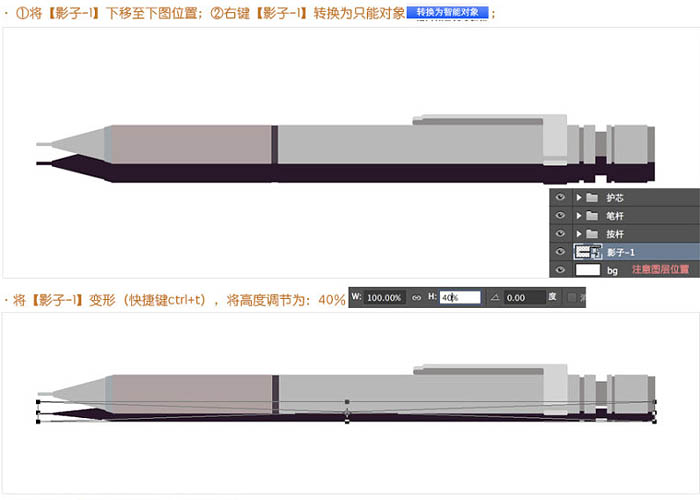
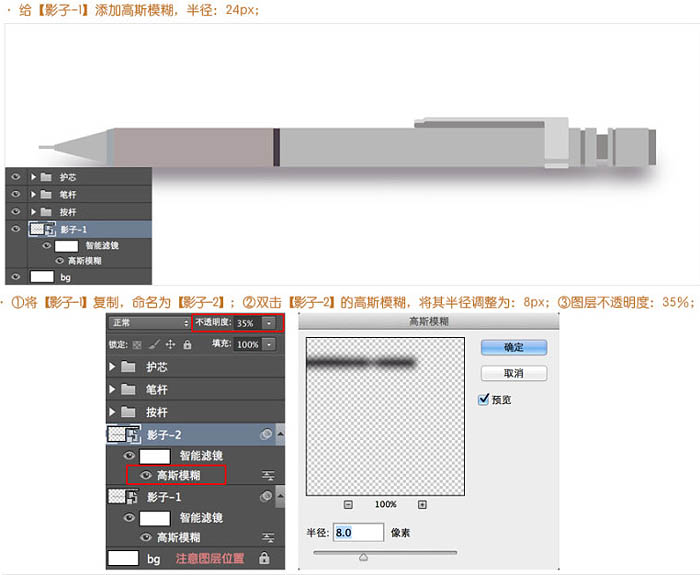
2、绘制影子:
2-1、第一、二层影子。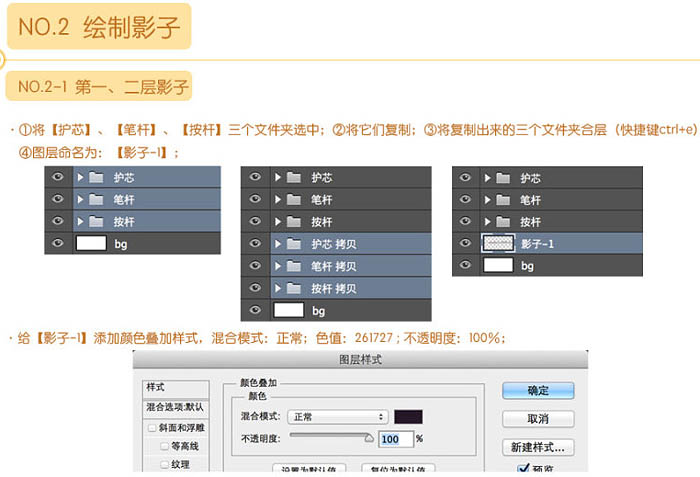
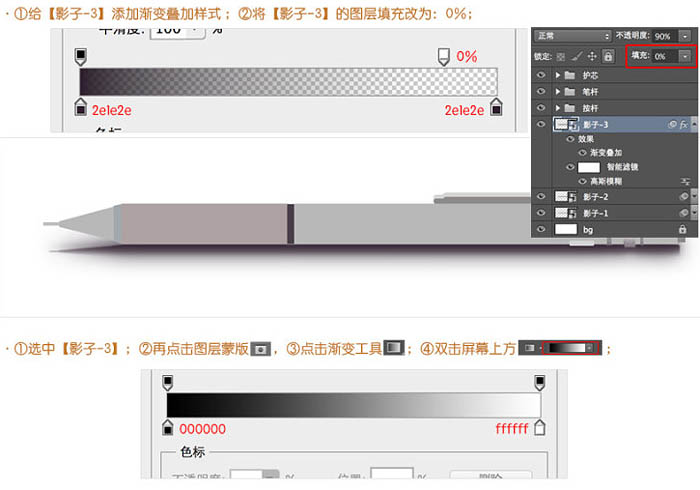
2-2、第三层影子。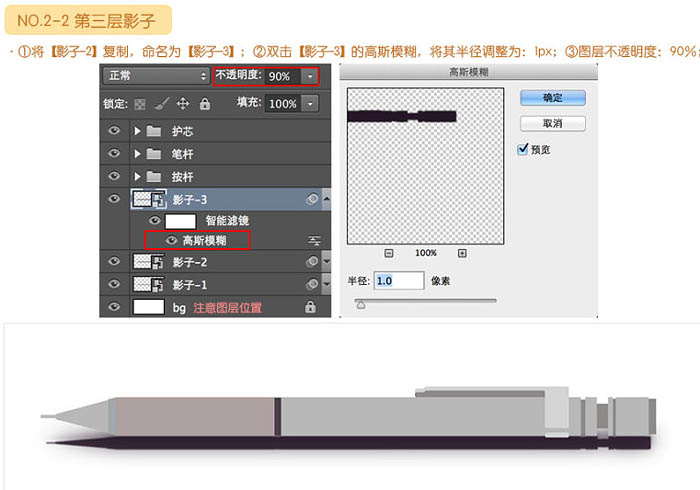
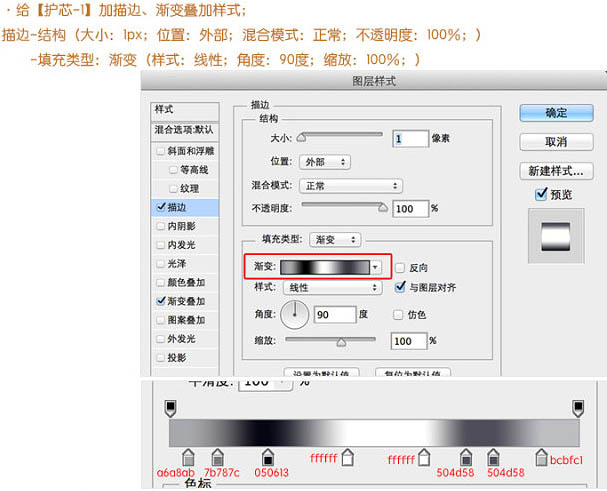
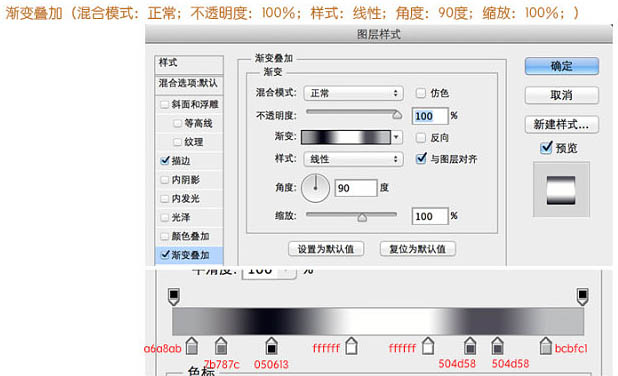
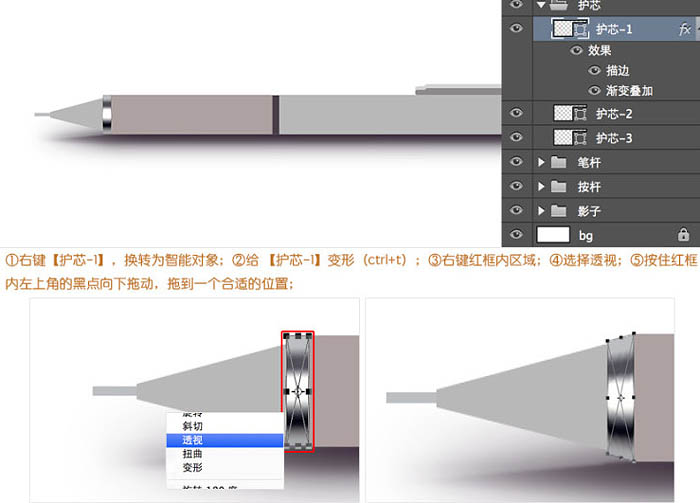
3、绘制护芯:
3-1、绘制护芯-1。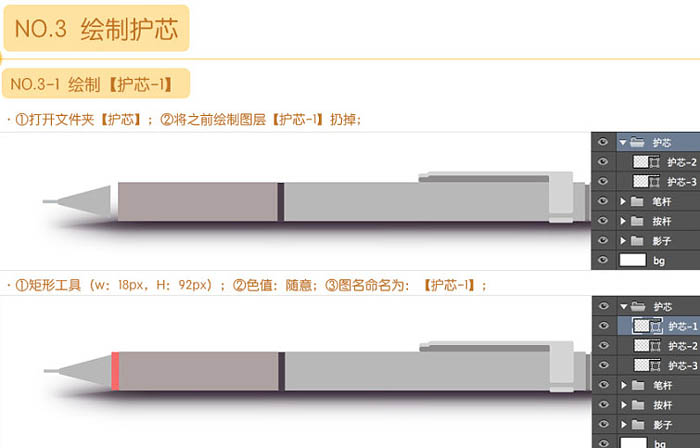
3-2、绘制护芯-2。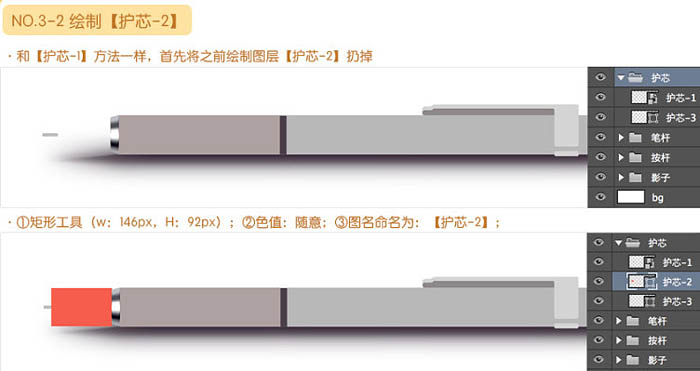
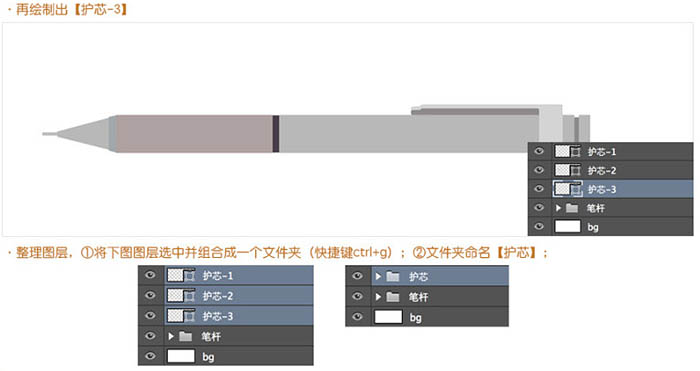
3-3、绘制护芯-3。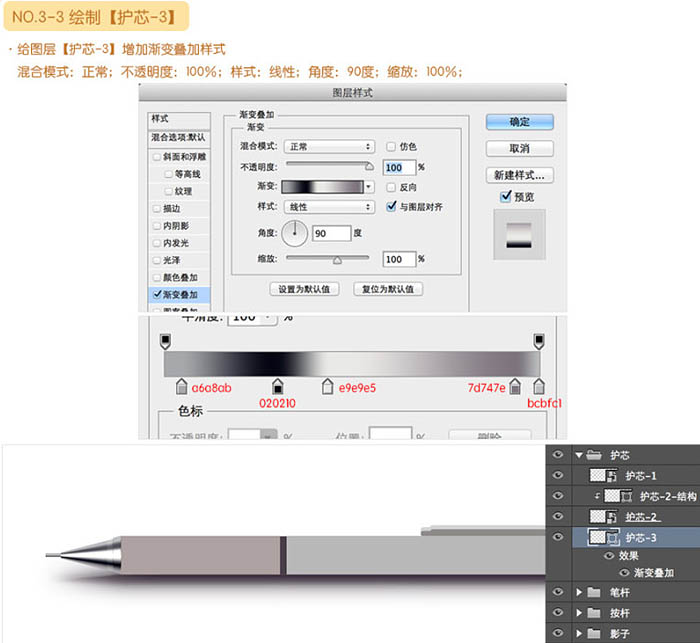
4、绘制笔杆:
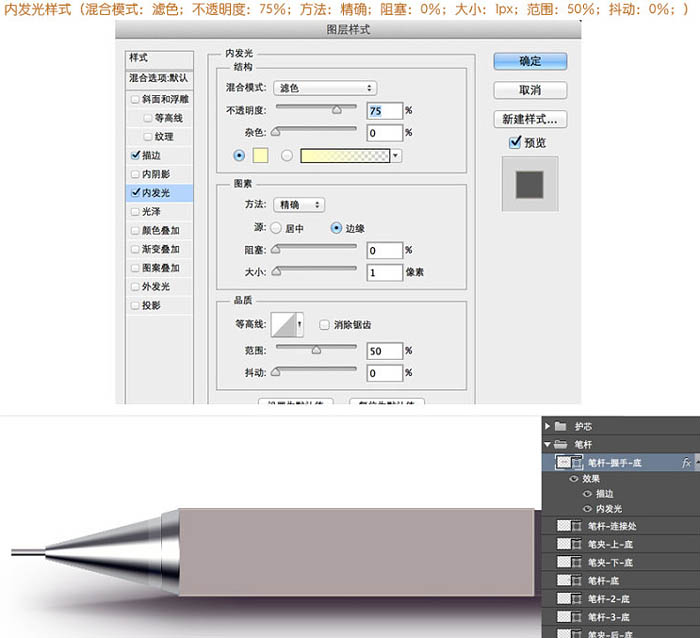
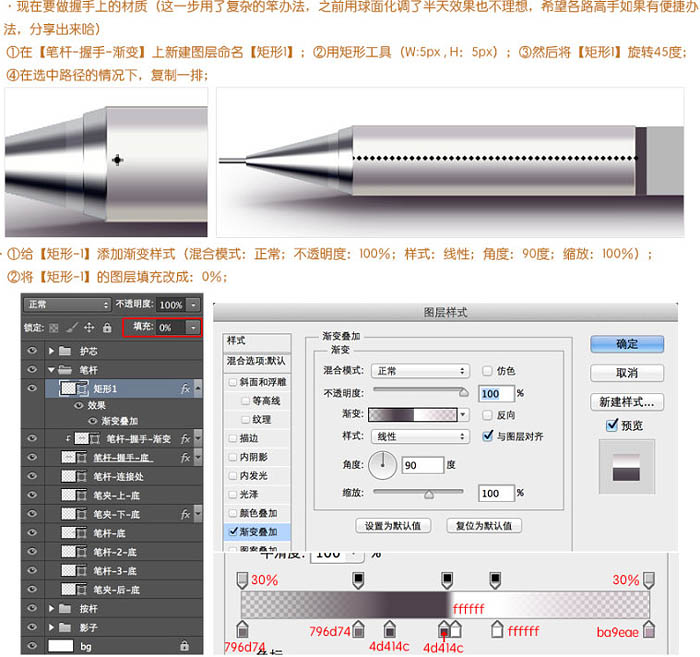
4-1、绘制笔杆-握手。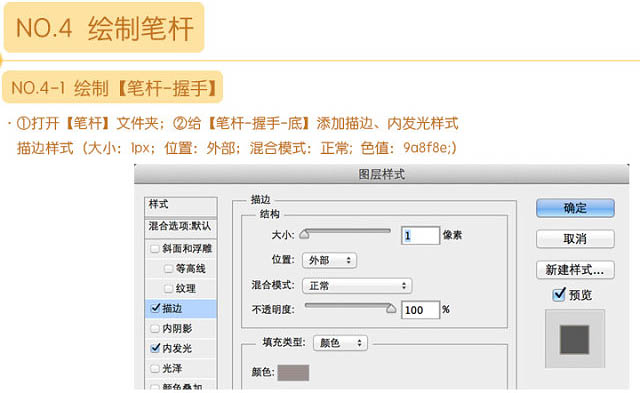

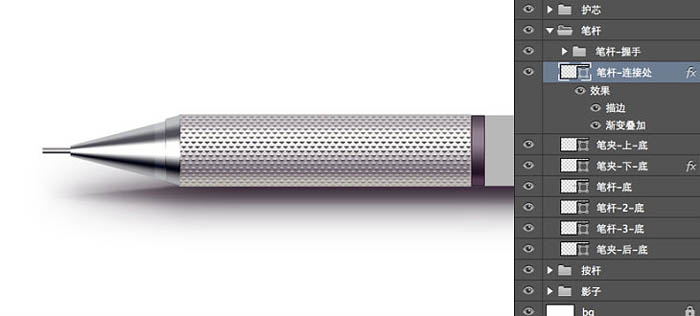
4-2、绘制笔杆-连接处。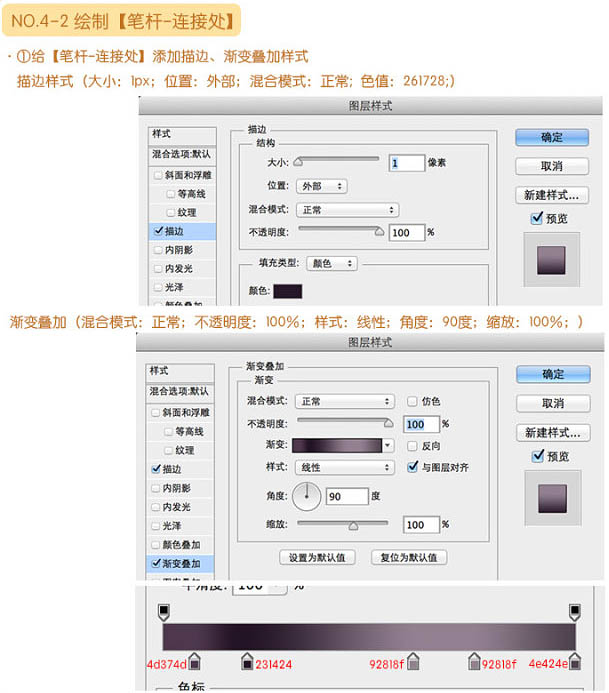
4-3、绘制笔夹。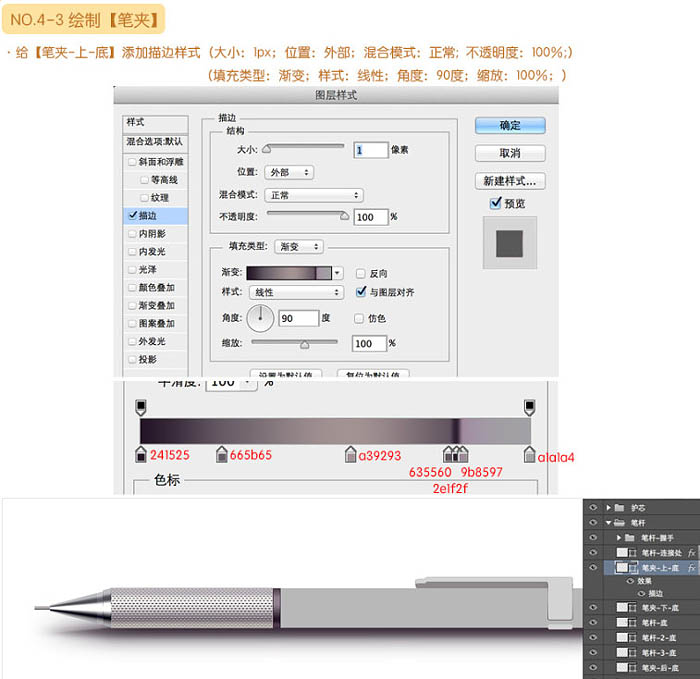
(本文来源于图老师网站,更多请访问http://m.tulaoshi.com)4-4、绘制笔杆。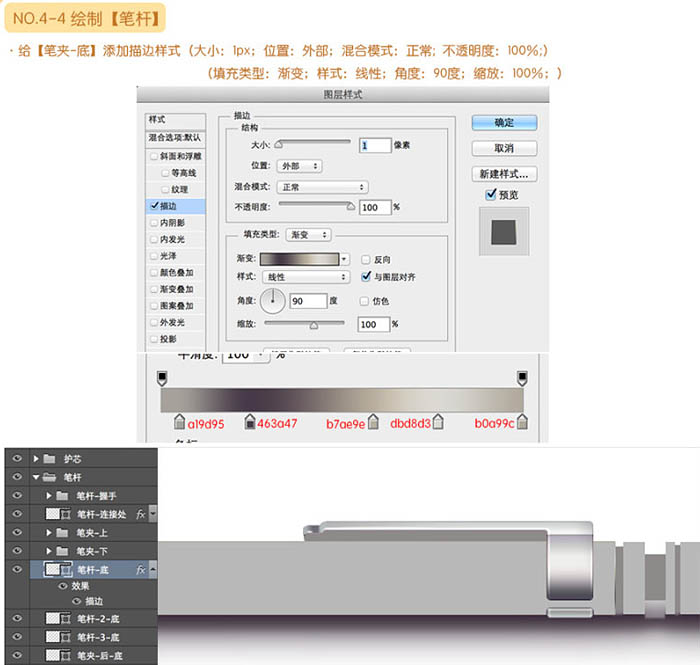
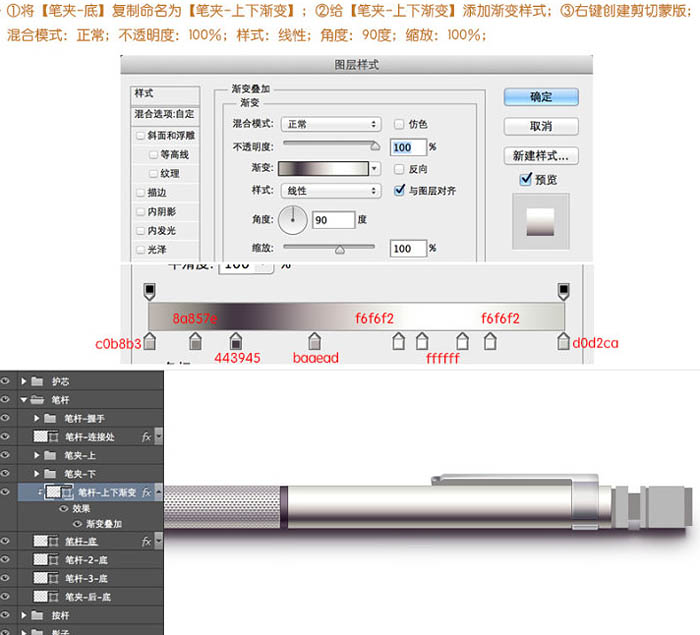
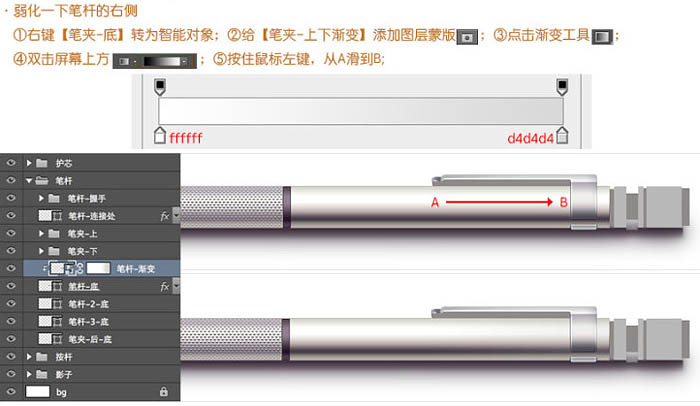
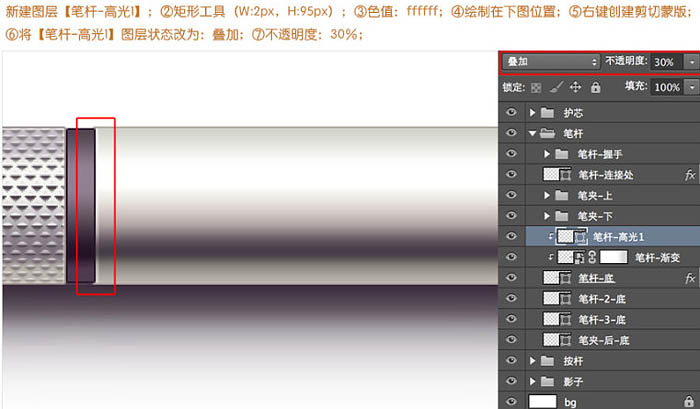
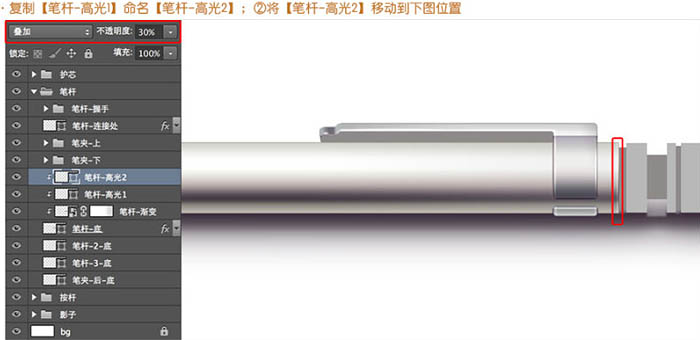
4-5、绘制笔杆2、3。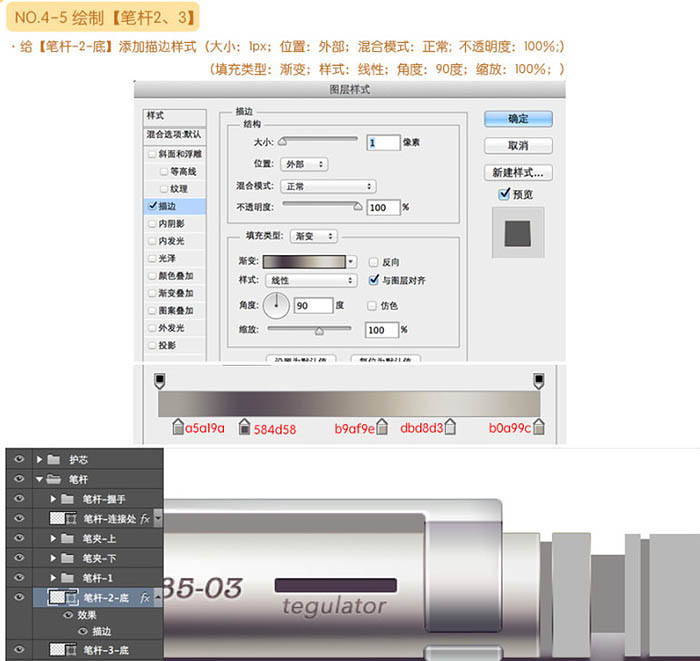
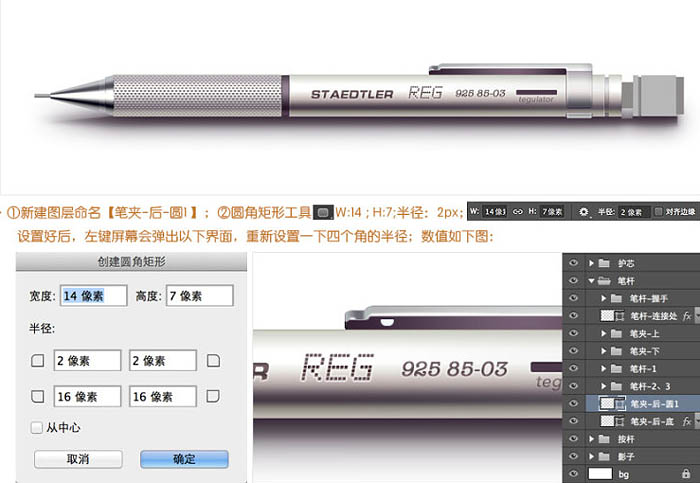
4-6、绘制笔夹-后。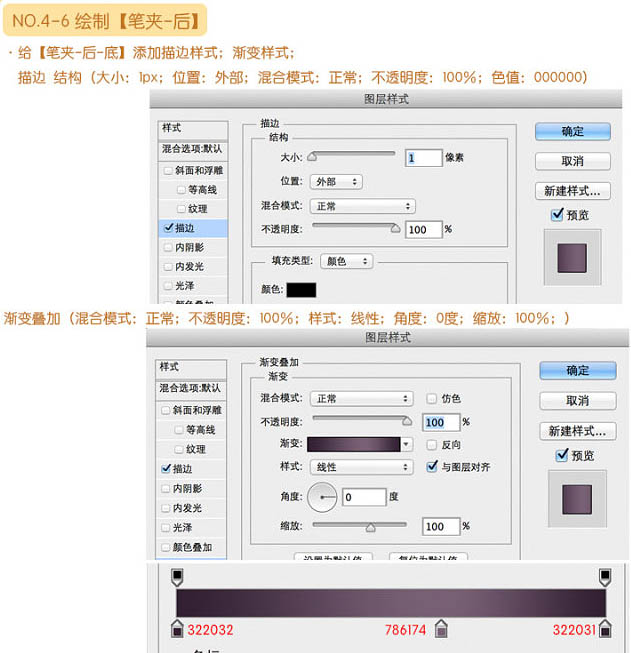
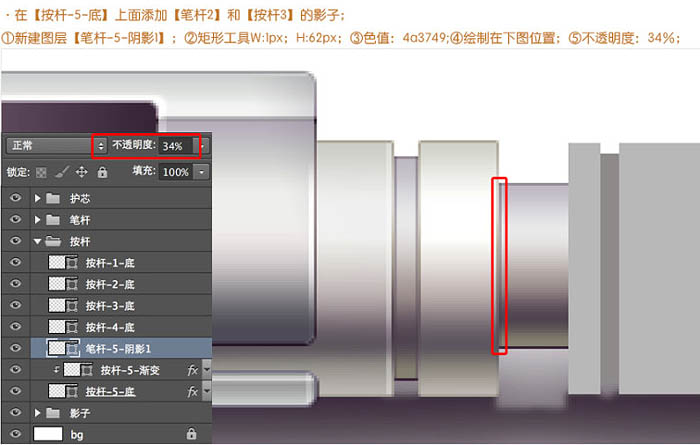
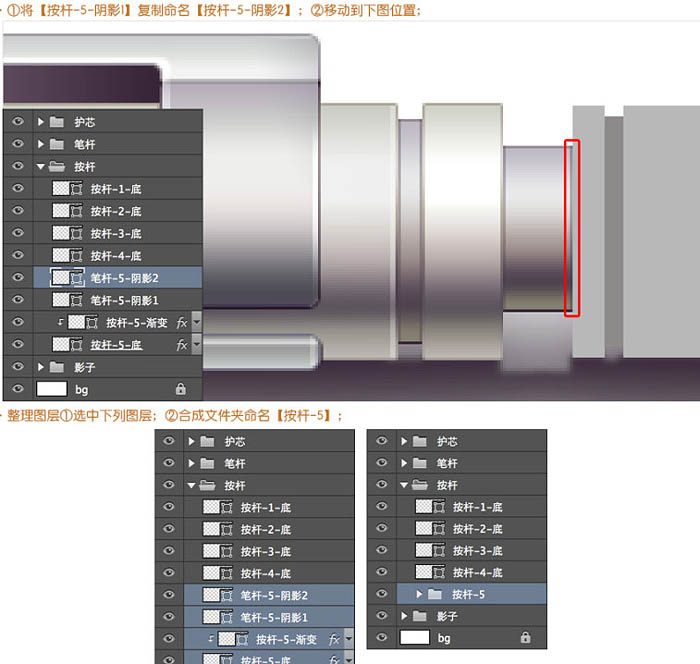
5、绘制按杆:
5-1、绘制按杆-5。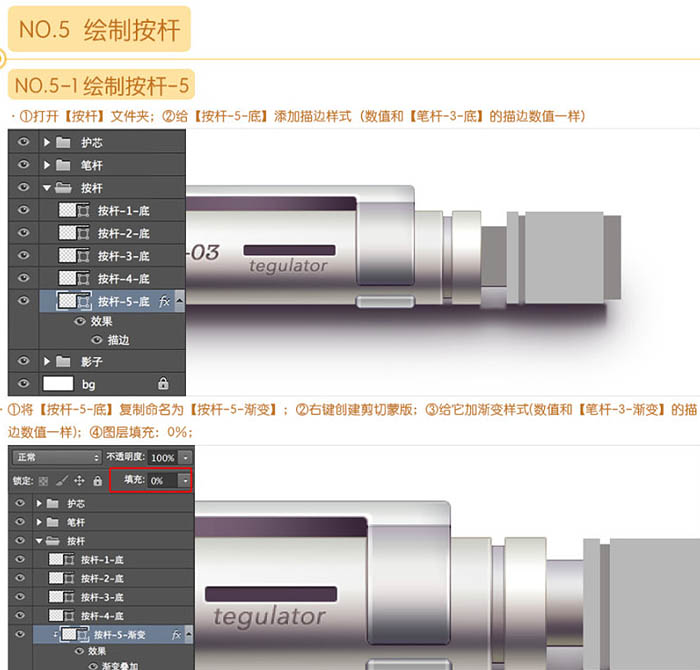
5-2、绘制按杆-4。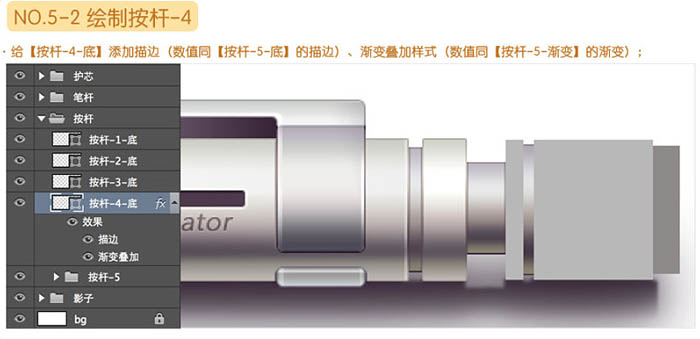
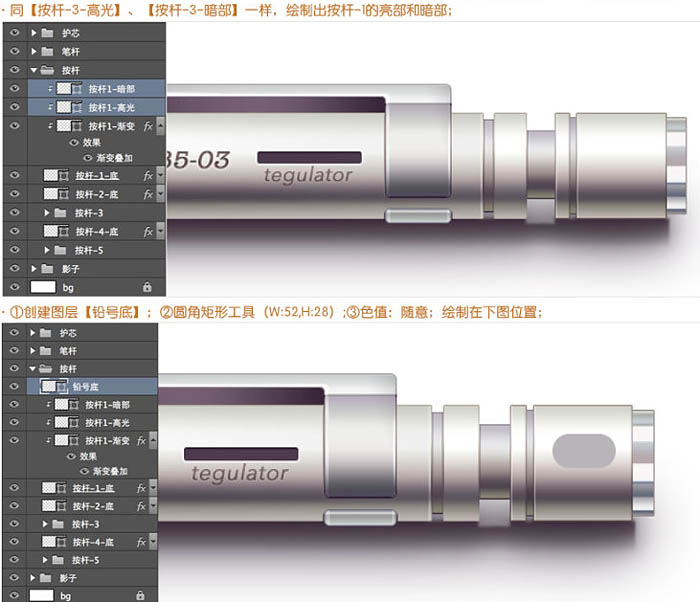
5-3、绘制按杆-3。
5-4、绘制按杆-2。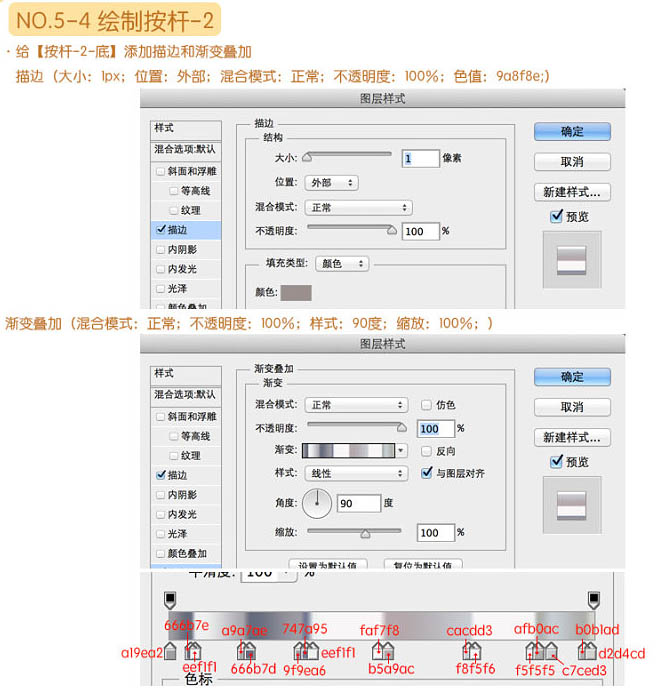

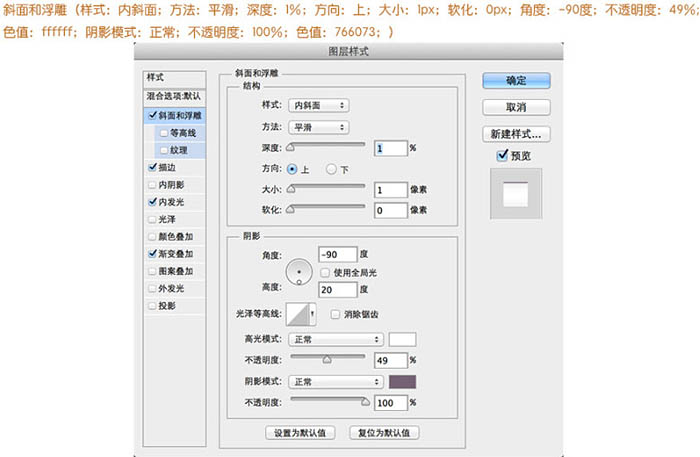
5-5、绘制按杆-1。
最终效果:


