只要你有一台电脑或者手机,都能关注图老师为大家精心推荐的Photoshop制作绚丽的文字海报,手机电脑控们准备好了吗?一起看过来吧!
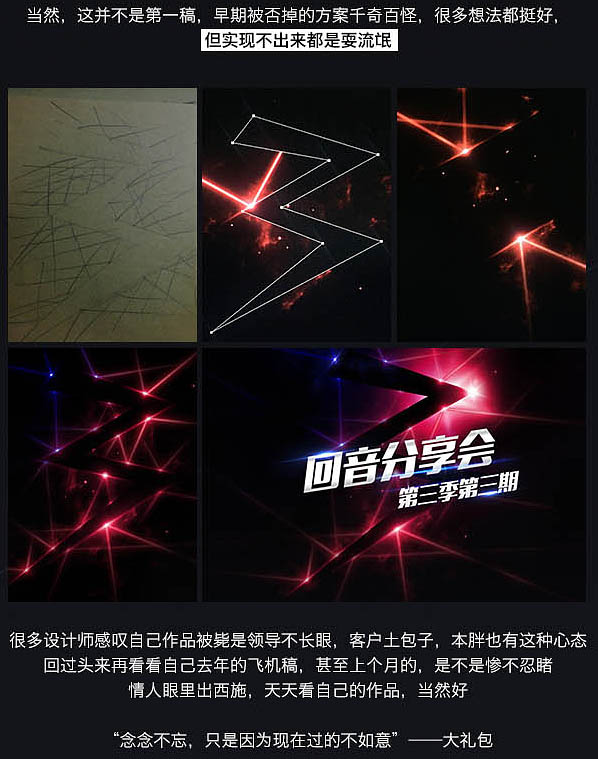
相比上篇视幻觉的教程,本篇教程稍许复杂些,所以并不能把每个细枝末节都写上,但大体思路都给说了一遍,希望大家喜欢!
最终效果
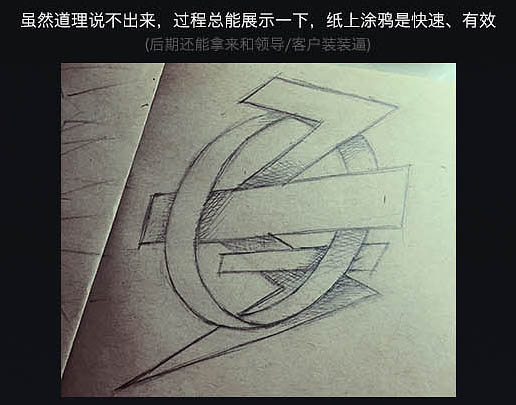
一、设计思路分析。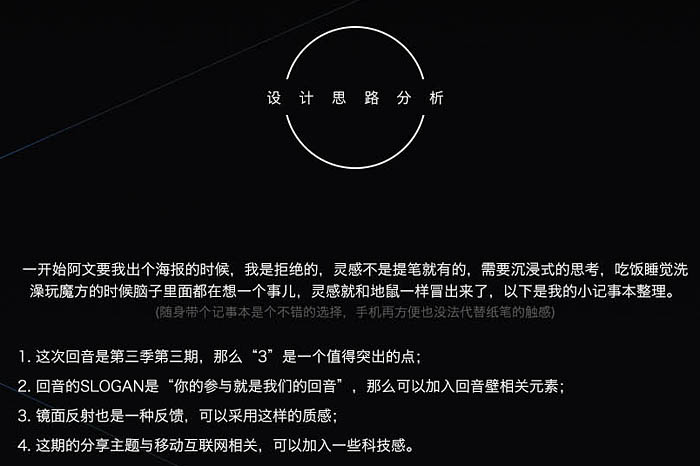
二、构图。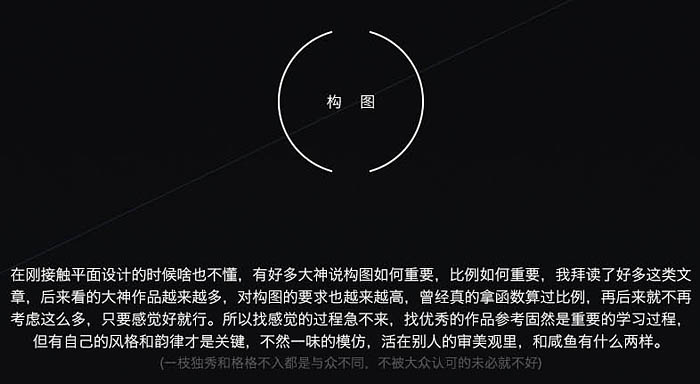
(本文来源于图老师网站,更多请访问http://m.tulaoshi.com)
三、思路。
1、手稿转线稿很简单,拍照然后导入PS钢笔工具勾一下就成。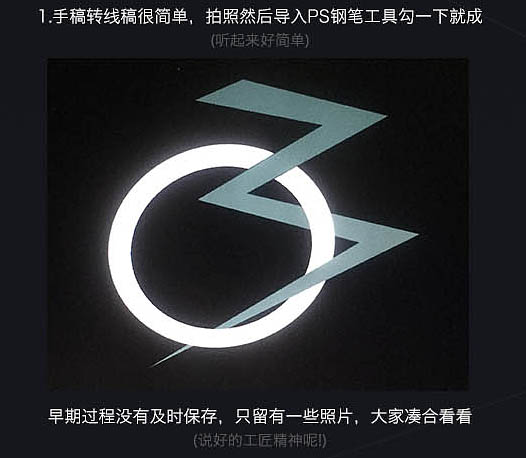
为了后面做图层样式,这个路径画在一个图层里了。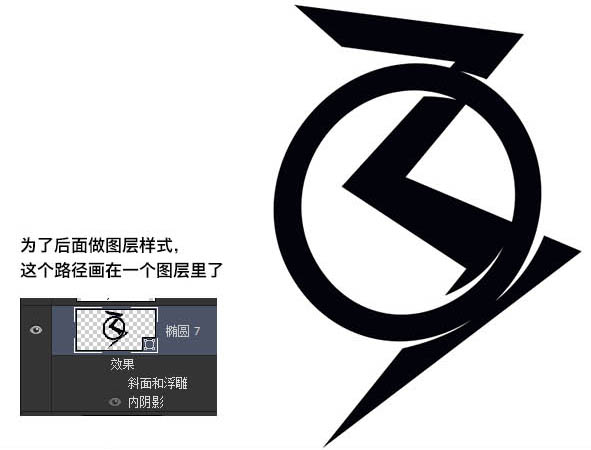
2、为了增强刚刚做出来的效果,咱们复制一层,然后收缩一圈,再加上一层投影。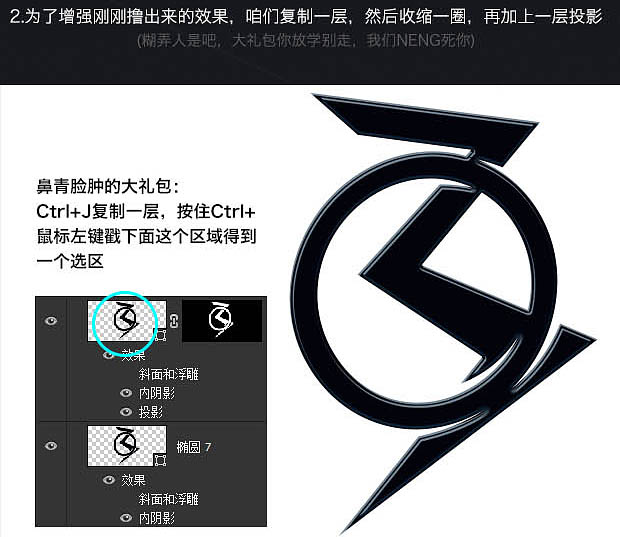
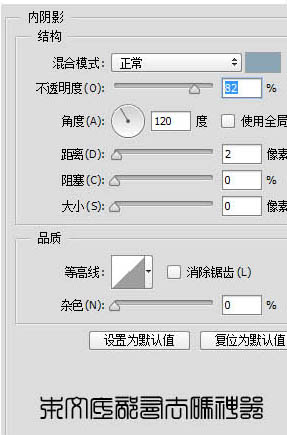
点击菜单:选择 修改 收缩,2像素,然后点这儿加个蒙版。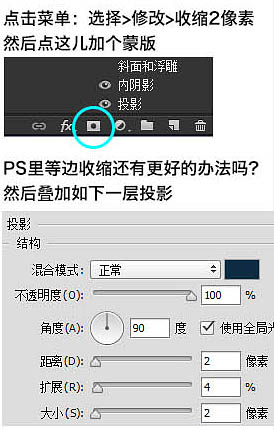
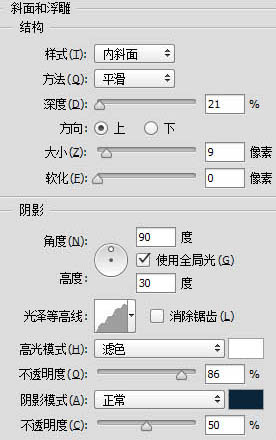
3、重复一次刚刚的操作,这次多加一个斜面和浮雕。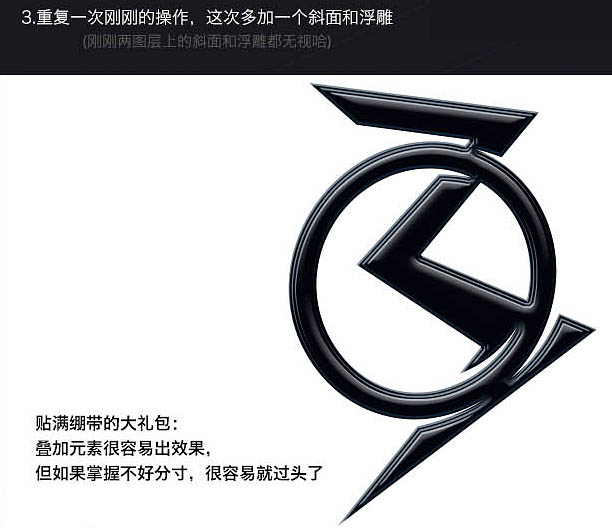
4、背景的3做出了雏形后,再加上文案信息。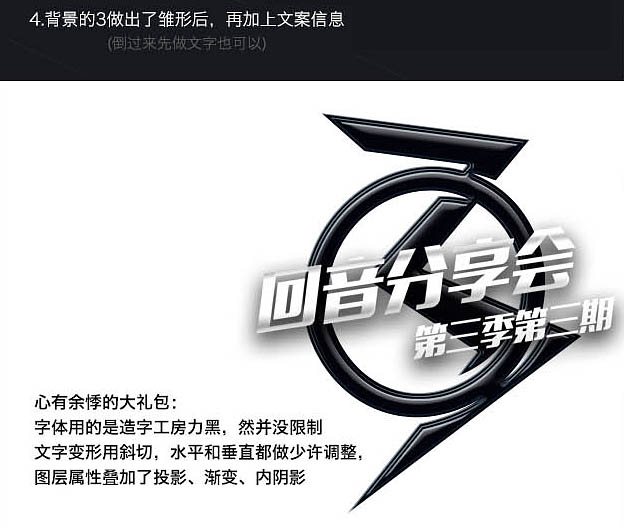

5、更换背景颜色为黑色,给最下面的3加一点环境光,增加质感。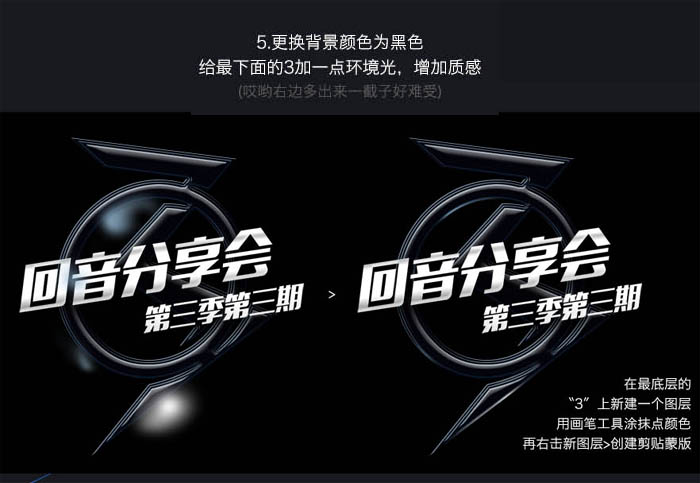
6、一次类推再给上面一层加高光。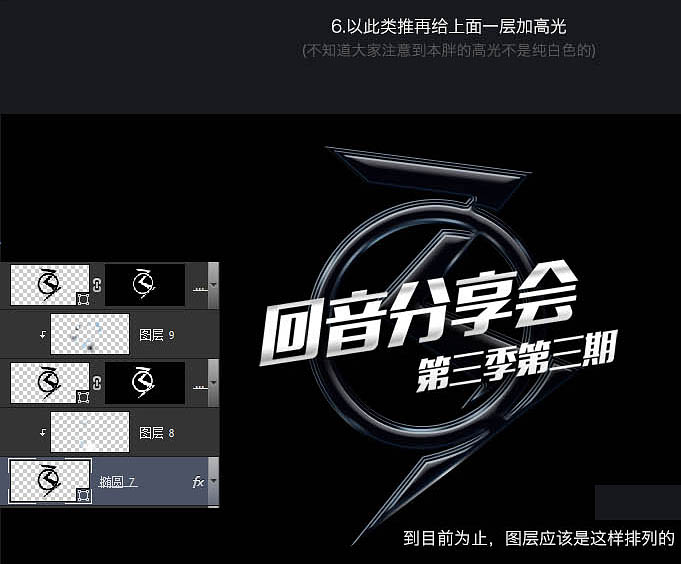
7、最上面的3会有一些不同,因为反射面大了,所以高光区域也会大些。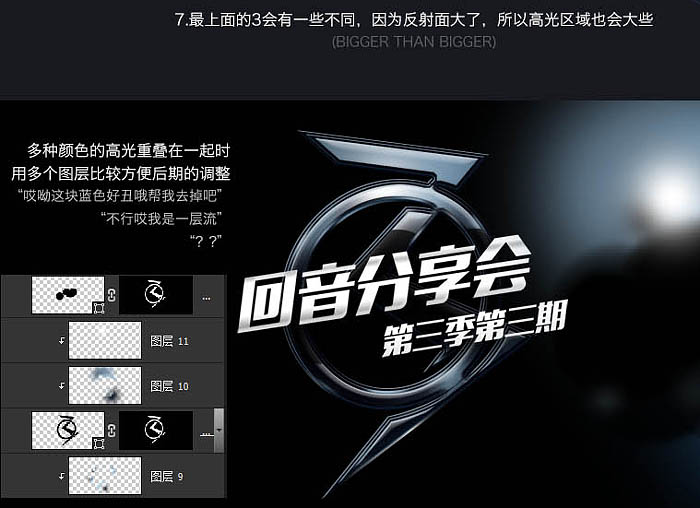
8、接下来我们要让文字穿过3上的圆圈。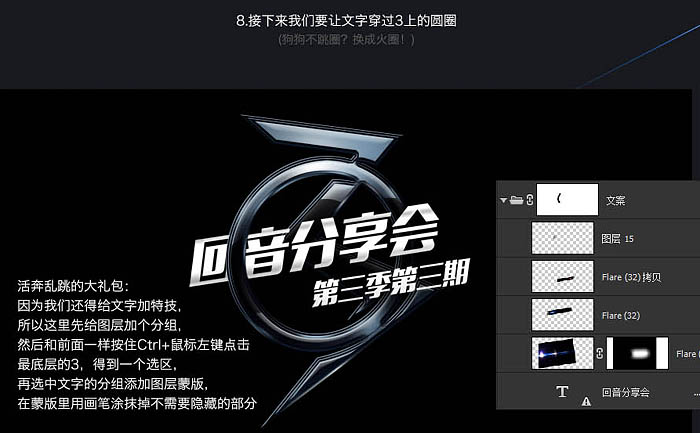
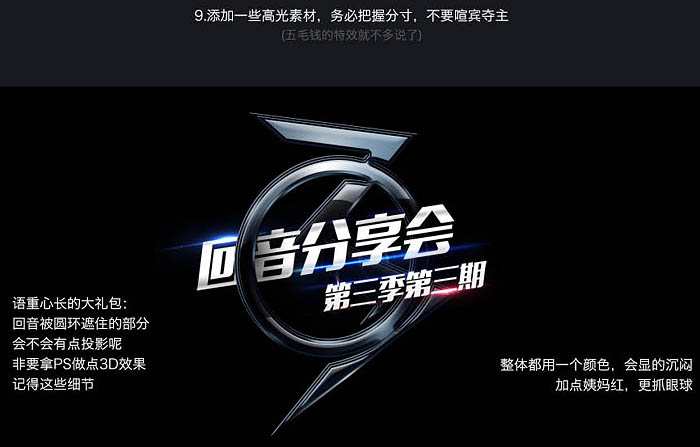
9、添加一些高光素材,务必把握分寸,不要喧宾夺主。
(本文来源于图老师网站,更多请访问http://m.tulaoshi.com)
10、既然3是玻璃质感,那文字上的光线是不是会有点反射呢。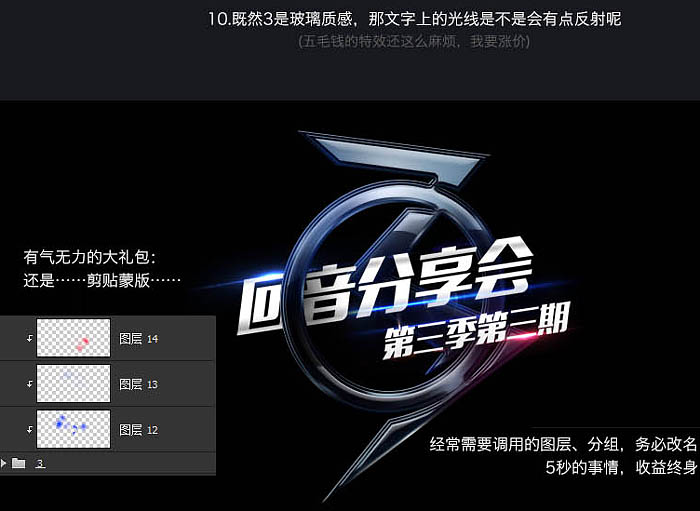
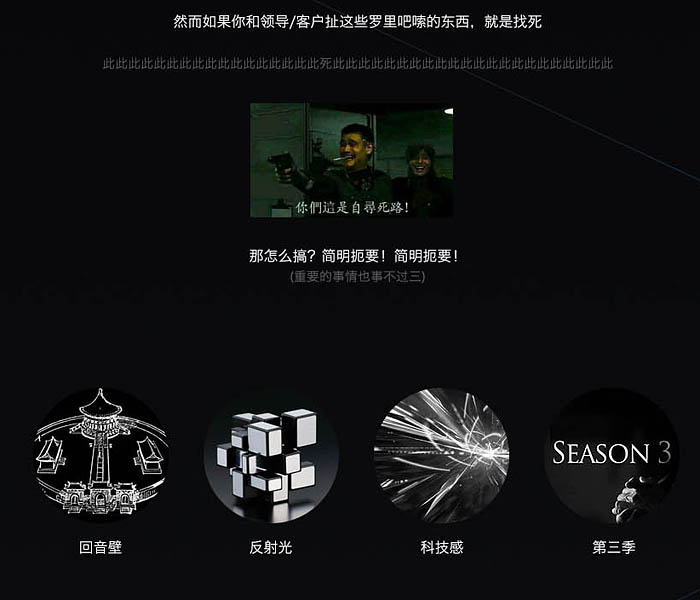
11、回音壁反射声波产生回音。
12、最后加上特效。
四、调整。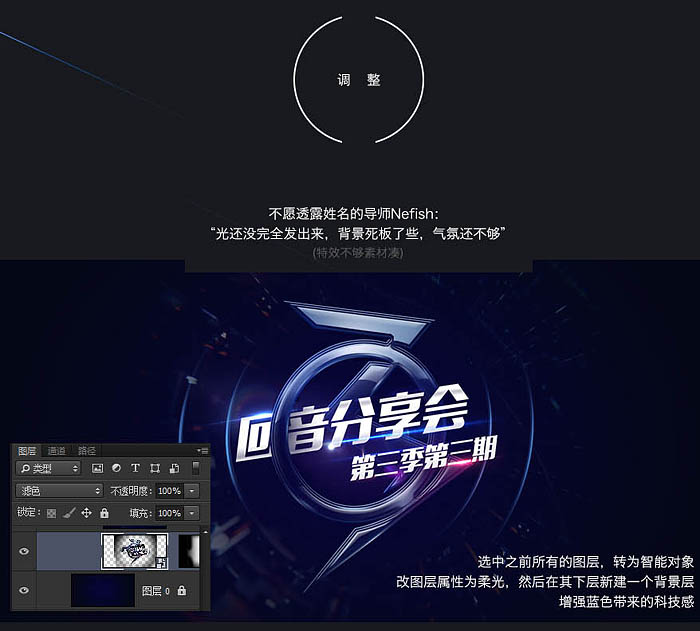
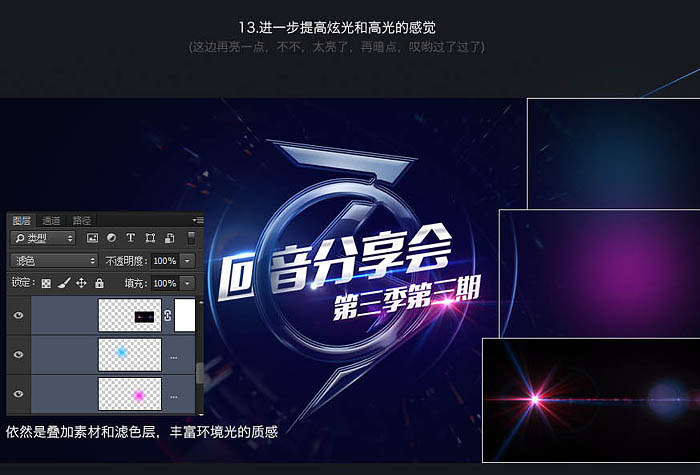
13、进一步提高眩光和高光的感觉。
14、整体还是有点灰暗的,稍微提亮一点。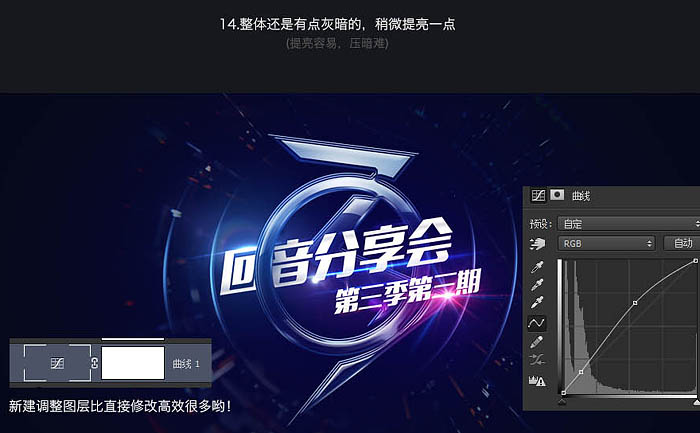
15、最后加强一些饱和度,使颜色更鲜亮。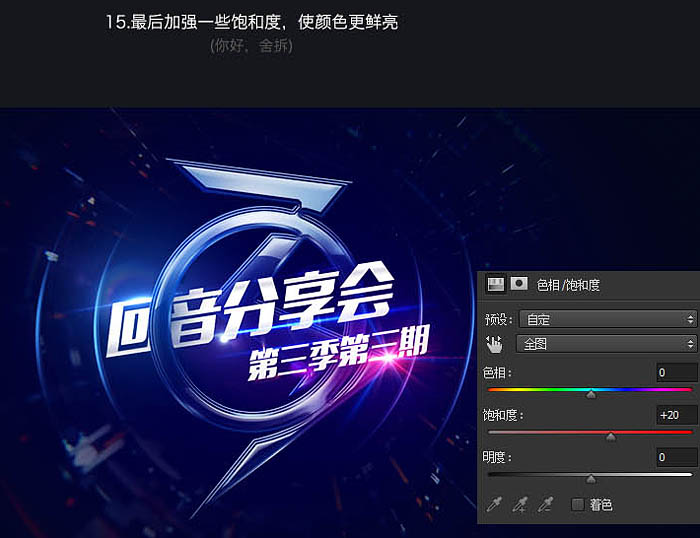
最终效果:


