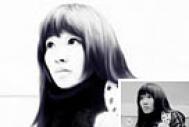
1、打开原图素材,把背景图层复制一层,创建色相/饱和度调整图层,分别对红色和黄色进行调整,参数及效果如下图。
![](http://img.tulaoshi.com/image/20160201/bdb4bf498bebde31b05ddbd356d4118b.jpg)
![](http://img.tulaoshi.com/image/20160201/06139aeeda38d843adbea49b6170b21f.jpg)
![](http://img.tulaoshi.com/image/20160201/21d1d150ca4bc0ece3b7728d0454d9eb.jpg)
![](http://img.tulaoshi.com/image/20160201/2bf58a7d12bd552cc737f63b57785718.jpg)
2、经过上面的操作,皮肤色彩饱和度、明度已经降下来了。但整个画面明暗对比不够,西药继续进行强化。
创建色阶调整图层,对暗部和亮部进行调整,参数设置及效果如下图。![](http://img.tulaoshi.com/image/20160201/19d1a08b9f929fa1685eed006ccbaa61.jpg)
![](http://img.tulaoshi.com/image/20160201/cc135bb37528e063f479c95fb952f6a9.jpg)
(本文来源于图老师网站,更多请访问http://m.tulaoshi.com/psxpcl/)![](http://img.tulaoshi.com/image/20160201/d47754c3dfe69ff61dc97683530cb3ac.jpg)
3、在调整画面整体明暗后,需要对整体颜色进行调整,进一步去除暖色成分,增加以蓝,青为主的冷色成分,并压暗画面的中间调部分,初步烘托出阴冷氛围。
添加曲线调整图层,分别对红,蓝,RGB通道进行调整,参数及效果如下图。 ![](http://img.tulaoshi.com/image/20160201/8f0d54e484b0aa3d98686b2eb18cfd6c.jpg)
![](http://img.tulaoshi.com/image/20160201/b4809a90c4773575ddcf3c20ec04bdd8.jpg)
![](http://img.tulaoshi.com/image/20160201/975bcdb85f66befd2012db8ab751b49d.jpg)
![](http://img.tulaoshi.com/image/20160201/c134ce03384e0f8d554ad6f127ea12cc.jpg)
![](http://img.tulaoshi.com/image/20160201/2e9c7b14d94ff9a47c89286764ba3679.jpg)
4、新建一个图层,按Ctrl + Alt + Shift + E 盖印图层。得到图层1,然后复制一层得到图层1副本,对图层1副本执行:滤镜 其它 高反差保留,数值自定。确定后把图层混合模式改为“叠加”,目的是强化人物五官、头发边缘及高光处的清晰度。 ![](http://img.tulaoshi.com/image/20160201/b0050c21164154916cd1861f7a96c417.jpg)
![](http://img.tulaoshi.com/image/20160201/d5d30bca84aaa8ebeaaf049fa47cf298.jpg)
![](http://img.tulaoshi.com/image/20160201/f4925a88c513971e3d42bffb8e8c4939.jpg)
5、新建一个图层,盖印图层,得到图层2,执行:滤镜 艺术效果 胶片颗粒,参数不能选的过大,否则画面噪点会增多,目的是使皮肤的质感和高光效果进行一步增强,同时也使暗部进一步趋向青蓝色调。![](http://img.tulaoshi.com/image/20160201/124bbf4b94efc6f7d6e5245e536c558b.jpg)
![](http://img.tulaoshi.com/image/20160201/e2e1c25a26836895251ee9f3996050f6.jpg)
![](http://img.tulaoshi.com/image/20160201/8f4c87a8b156a850a4aadd03e61cec43.jpg)
6、复制图层2,得到图层2副本,进入快速名呢过吧,选择从白到黑的径向渐变,从人物眼睛处向外拉,退出快速蒙版后按Delete 删除选区部分图片,并将图层混合模式改为“差值”,过程如下图。 ![](http://img.tulaoshi.com/image/20160201/4bee70f7b84df377884742954ee07f54.jpg)
![](http://img.tulaoshi.com/image/20160201/ebac5c3af0781014a31176bd96ce7529.jpg)
![](http://img.tulaoshi.com/image/20160201/2b53f99205a40c83cc818422fc02c45d.jpg)
![](http://img.tulaoshi.com/image/20160201/e35744373470f6f2e7937af3be13e408.jpg)
![](http://img.tulaoshi.com/image/20160201/6a219422273a2cd5f053bbda172c6efc.jpg)
7、再次复制图层2,生成图层2副本2,将其置于图层2副本上面,进入快速蒙版,选择从黑到白的对称渐变,从人物眼睛处顺着鼻子的方向向下拉。退出快速蒙版,按Delete删除选区内容。 ![](http://img.tulaoshi.com/image/20160201/2e3176365792738e89fd22a58cdcdfd7.jpg)
![](http://img.tulaoshi.com/image/20160201/d519e2267b81a294c3c784a5b7753451.jpg)
![](http://img.tulaoshi.com/image/20160201/e76e25c8c546960705d5fd0a75fc20b1.jpg)
![](http://img.tulaoshi.com/image/20160201/1345ac4e0caff489be250f57be368214.jpg)
(本文来源于图老师网站,更多请访问http://m.tulaoshi.com/psxpcl/)![](http://img.tulaoshi.com/image/20160201/09117839a3688ba9bcb622583f92bd14.jpg)