3、按Ctrl + D完成选区,应用:滤镜 模糊 高斯模糊,设置如下图:
![](http://img.tulaoshi.com/image/20160131/14edcfd0b2208f7e16f1c8715228e41c.jpg)
4、改变当前层的不透明度为70%。![](http://img.tulaoshi.com/image/20160131/a61a89013f4a00bcfdb536979a8eb5b5.jpg)
5、让我们在背景上工作,现在我们开始创建文本效果!选择水平文字工具,用KabelBd字体和任何颜色写出字母P。![](http://img.tulaoshi.com/image/20160131/e00fa7d1ad0e9751d9fdc36c15206efc.jpg)
6、之后,在当前文本层应用下图的混合选项:投影、外发光、渐变叠加、描边,参数及效果如下图。![](http://img.tulaoshi.com/image/20160131/496fb08855a944c98353e162cc7cfa0d.jpg)
![](http://img.tulaoshi.com/image/20160131/743ca8f15b15825ba0ccb716320627f6.jpg)
![](http://img.tulaoshi.com/image/20160131/e98f38962fc639a024f82393584d3979.jpg)
![](http://img.tulaoshi.com/image/20160131/630273d2f0524f9bb41bafd870635c63.jpg)
![](http://img.tulaoshi.com/image/20160131/374305739dbf80ebb9a92cd2e97c1198.jpg)
7、在图层面板上右击图层,选择复制图层样式菜单。![](http://img.tulaoshi.com/image/20160131/f76cf52f7cbf4ad7a9df4880b9b0e751.jpg)
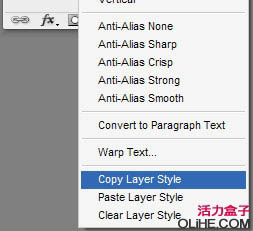
8、在字母’p’图层的下方写出另一个字母’h’。![](http://img.tulaoshi.com/image/20160131/aadbc240805a171d552454889cce1ae4.jpg)
9、然后在图层面板上右击图层,选择粘贴图层样式菜单。![](http://img.tulaoshi.com/image/20160131/7620e241237673d76f1b95d71b74b66e.jpg)
![](http://img.tulaoshi.com/image/20160131/2ed5b8be271244d5bade566171896283.jpg)
10、用同样的方式添加其他的字母。![](http://img.tulaoshi.com/image/20160131/53bc1a6015c3884498aac3899d26310d.jpg)
11、我想给背景添加一些形状。现在,使用自定义形状工具,然后在形状栏里选择星形。(如下图)![](http://img.tulaoshi.com/image/20160131/b68128a9a3157694e0a5983f609922dd.jpg)
12、在背景上添加这个形状:![](http://img.tulaoshi.com/image/20160131/2b2dc2b5028efcb7b63ab327c5a586a5.jpg)
13、添加之后,填充不透明度设置为0%,在当前层上应用描边的图层样式,参数及效果如下图:![](http://img.tulaoshi.com/image/20160131/22d52116209a9401efc184ec17377613.jpg)
![](http://img.tulaoshi.com/image/20160131/37d247e3d8bea0978766a82caaa7779b.jpg)
(本文来源于图老师网站,更多请访问http://m.tulaoshi.com/psxg/)14、用同样的方法添加更多的星星就完成喽,效果如下图:![](http://img.tulaoshi.com/image/20160131/79eb7d2ec1b0d1b00121fabf28eebbbb.jpg)