下面是个超简单的Photoshop制作漂亮的绿色纹理水晶字教程,图老师小编精心挑选推荐,大家行行好,多给几个赞吧,小编吐血跪求~
好的文字需要好的背景来衬托。在制作文字之前需要自己做出一些合适的纹理背景。字体部分的制作并不复制。打好文字后用图层样式做出水晶效果,然后再用滤镜等做出纹理即可。
最终效果
(本文来源于图老师网站,更多请访问http://m.tulaoshi.com/psxg/) 1、创建画布,然后设置前景色为:#abd46e,背景色为:#4aa350。然后转到滤镜渲染云彩。
2、然后在到滤镜艺术效果绘画涂抹。设置如下。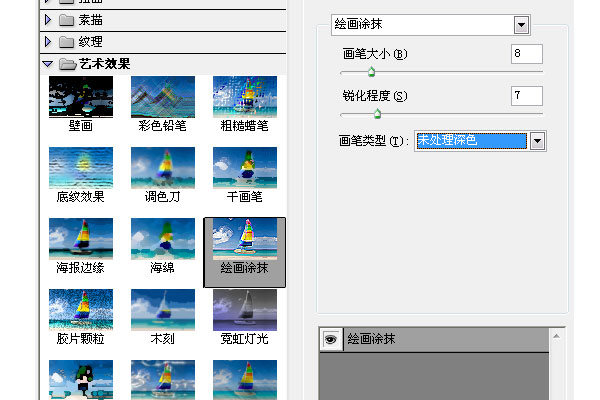
3、点击确定后,在到滤镜扭曲海洋波浪,设置如下。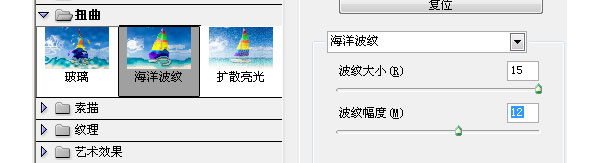
4、完成上面几步后我们在选择滤镜渲染光照效果。设置如下。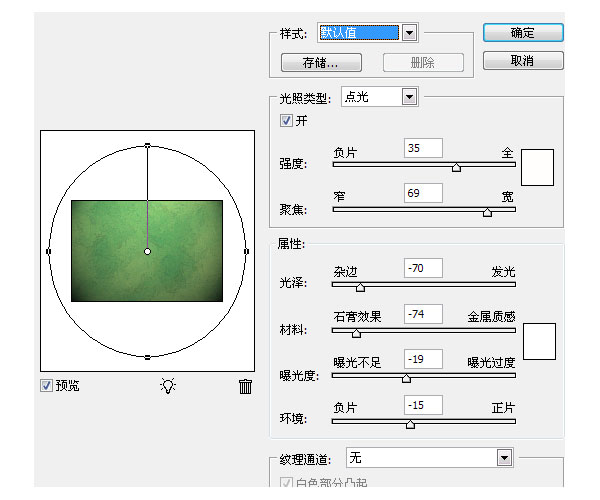

5、创建一个新的图层,然后到滤镜杂色添加杂色。填充的颜色是我们前面那个前景色,如果你没改的就不用动,然后在设置属性,如下。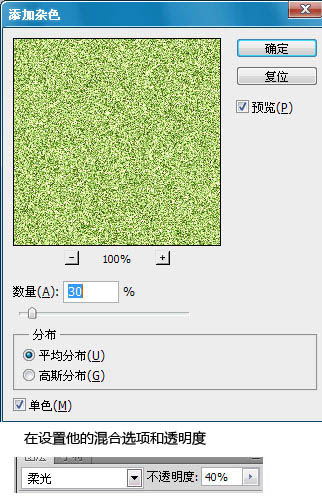
6、打上想要的文字,然后设置颜色为:#abd46e。
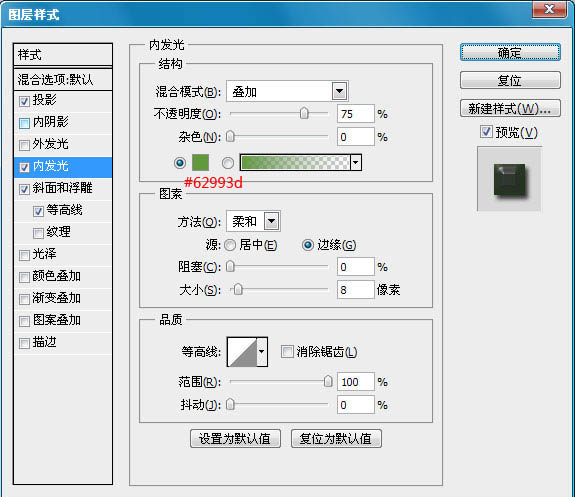
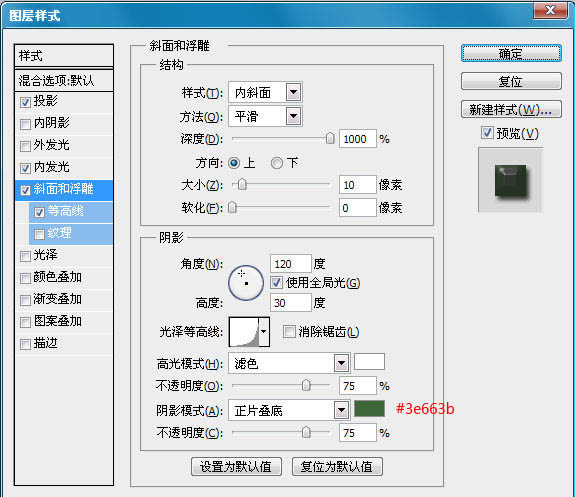
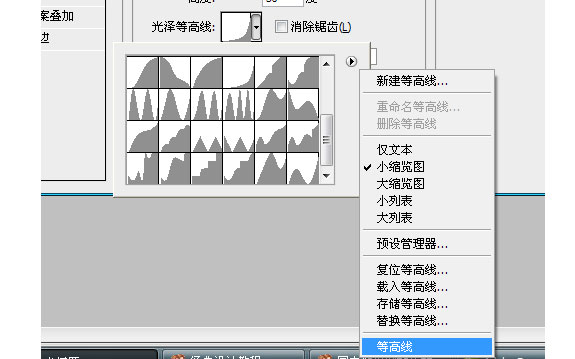
7、双击文字,添加混合样式。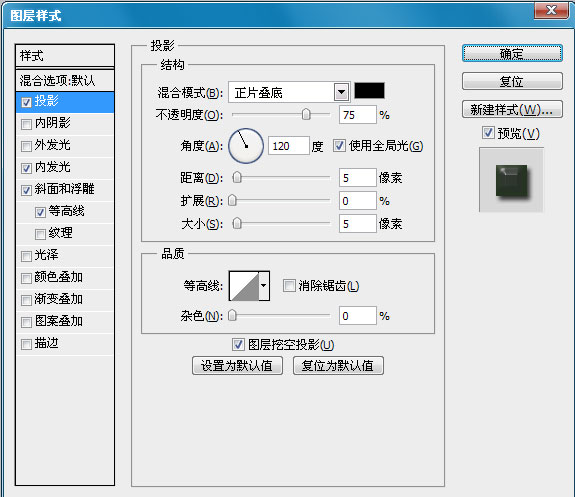
(本文来源于图老师网站,更多请访问http://m.tulaoshi.com/psxg/)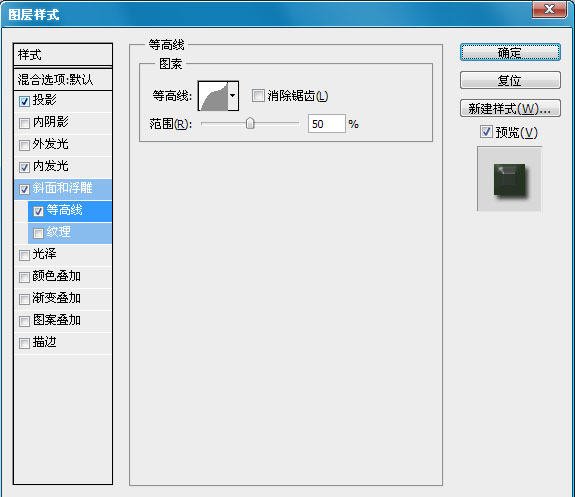

8、现在我们从新设置前景色和背景色。前景色色码为:#c8e19d 背景色为:#658f40。在创建一个新层,命名为“纹理”,现在按住CTRL键,然后单击文字图层,会出现选取框。然后鼠标选择“纹理”图层。填充前景色—(#c8e19d)。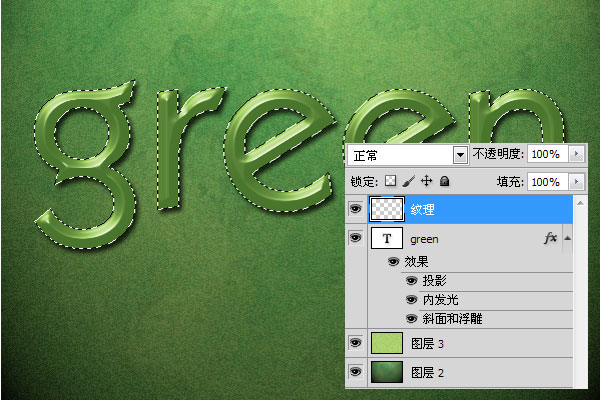
9、选择滤镜渲染纤维。设置如下。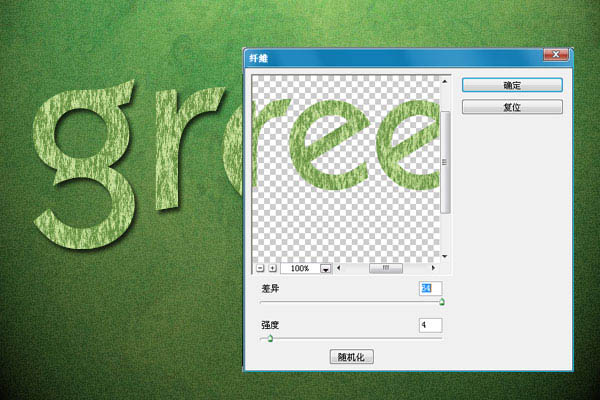
10、确定后在到滤镜画笔描边成角线条。设置如下。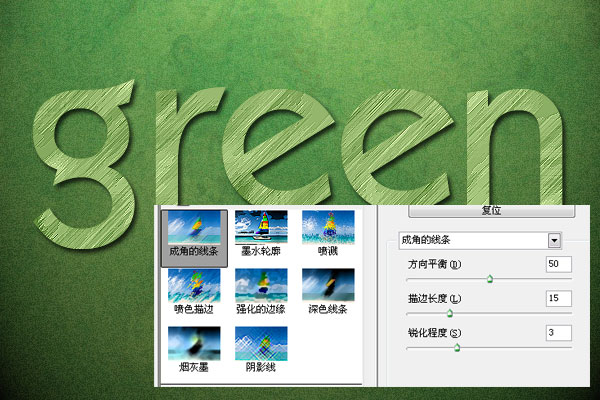
11、设置好后在到滤镜扭曲海洋波纹。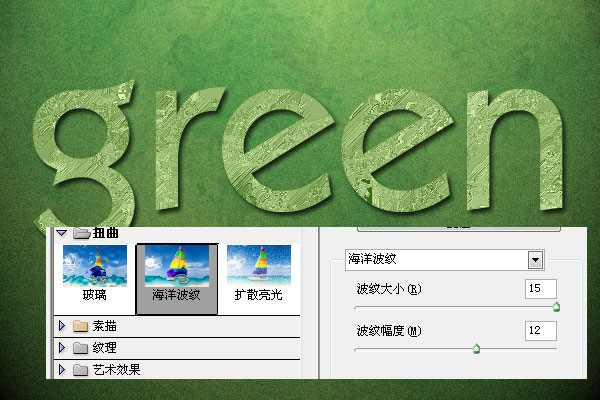
12、最后把这个图层混合选项设置为“柔光”。不透明度为:40%。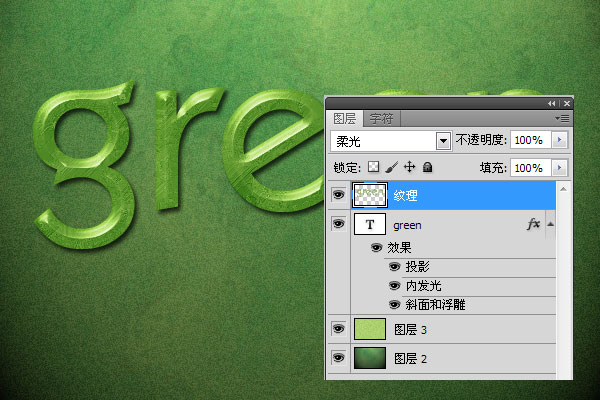
最终效果图:
(本文来源于图老师网站,更多请访问http://m.tulaoshi.com/psxg/) 


