岁数大了,QQ也不闪了,微信也不响了,电话也不来了,但是图老师依旧坚持为大家推荐最精彩的内容,下面为大家精心准备的Photoshop调出室内人物图片唯美的日系暖色调,希望大家看完后能赶快学习起来。
学习本教程调色之前需要安装一款RAW数码插件,CS5版本有自带的。调色过程较为简单,先用RAW微调图片,简单修复光感和颜色。然后再用调色工具渲染一些淡黄暖色即可。
原图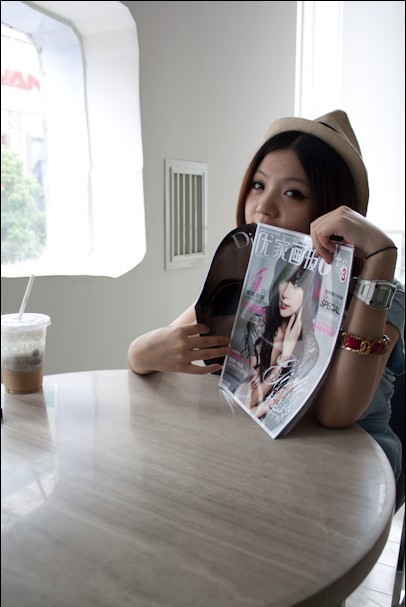
(本文来源于图老师网站,更多请访问http://m.tulaoshi.com/psxpcl/)最终效果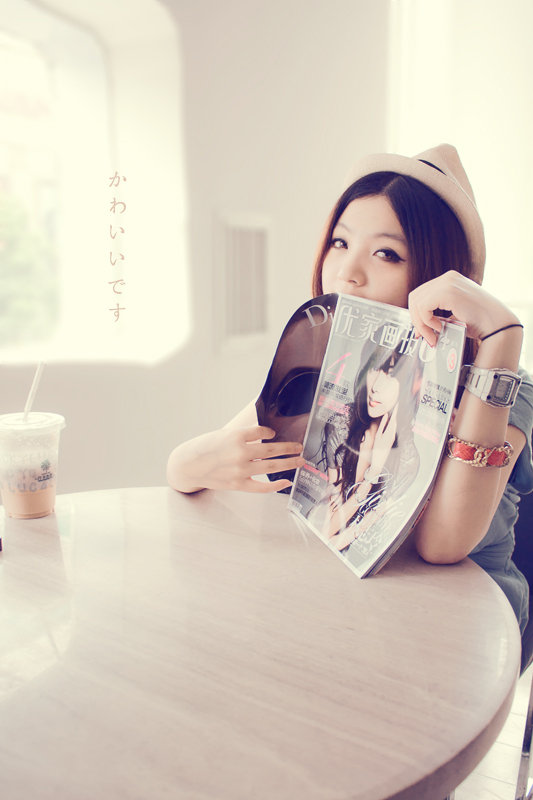
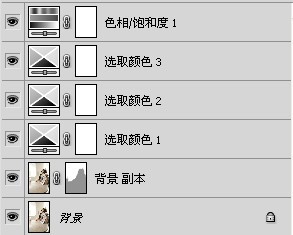
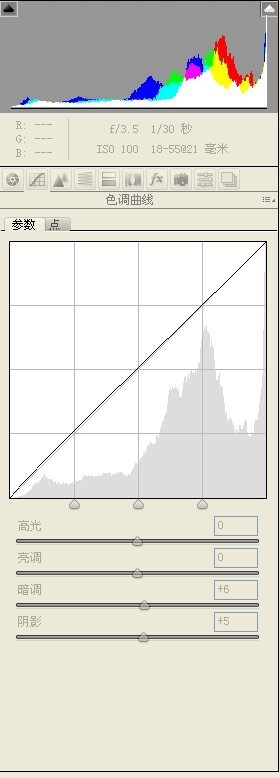
1、首先RAW参数设定。PS CS5自带有这款插件,没有的需要单独下载并安装。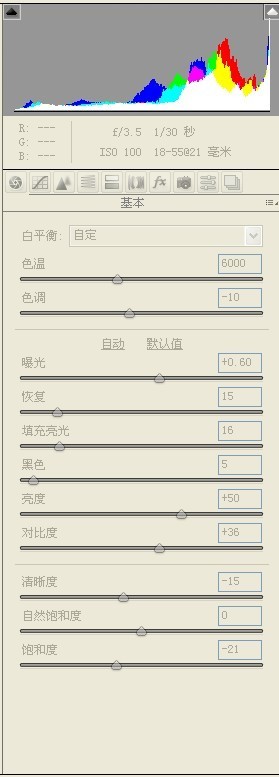
2、在图层中复制一个然后选取高光区域。用套索和磁性套索把人物桌子还有咖啡杯,吸管套出来。选择镜头模糊,数值大概在50-70之间,具体数值不记得了。因为光线比较硬·所以必须柔和光线来达到和风的效果。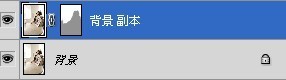
3、镜头模糊之后选择这个图层的蒙版调整浓度和羽化,让模糊更加柔和。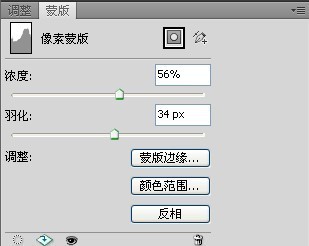
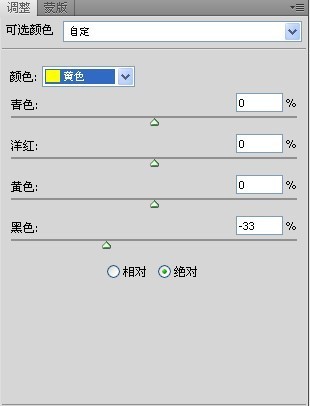
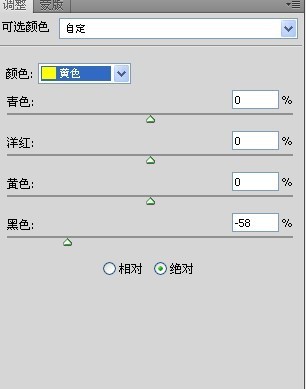
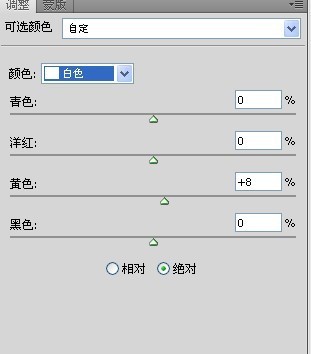
(本文来源于图老师网站,更多请访问http://m.tulaoshi.com/psxpcl/)4、创建一个可选图层数值如下。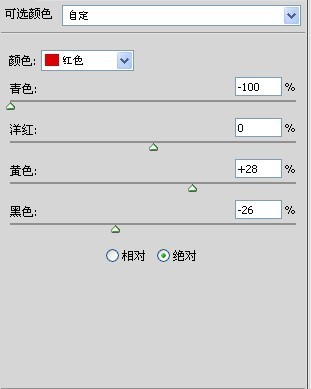
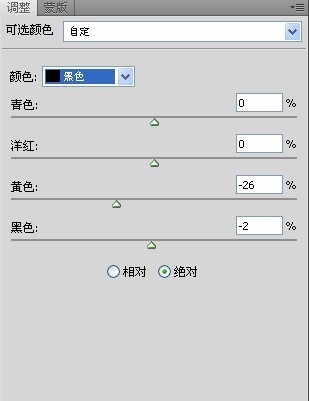
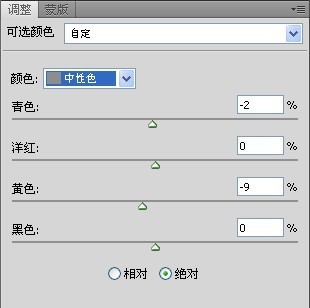
5、再创建一个可选图层数值如下。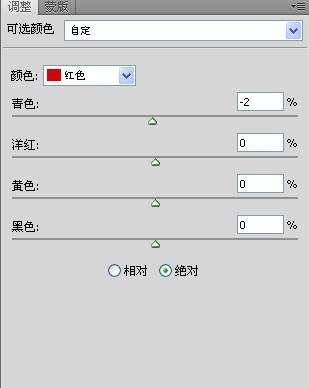
6、再创建一个可选图层数值如下。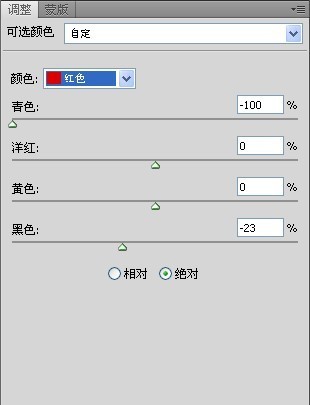
7、创建一个饱和度图层数值如下。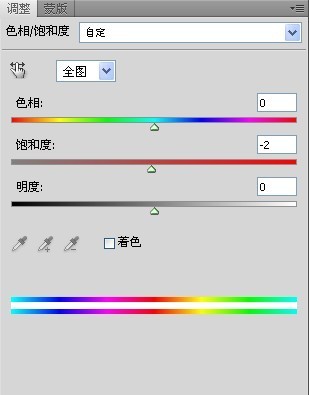
打上文字,完成最终效果。