下面这个Photoshop制作带有斜纹的黄金浮雕字教程由图老师小编精心推荐选出,过程简单易学超容易上手,喜欢就要赶紧get起来哦!
效果图是用多层及多个图层样式制作的。思路并不复杂,制作之前可以把文字或图形图层多复制几层,然后用不同的图层样式做出描边、浮雕、纹理、装饰效果即可。
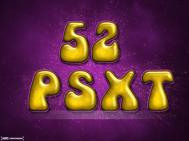
最终效果
1、新建1152*864px大小的文档,设置前景色为#00336e,背景色为 #000f1f,拉径向渐变我们做背景图层。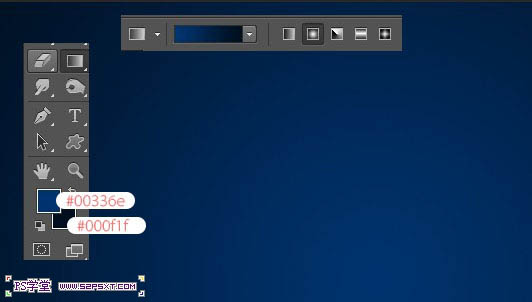
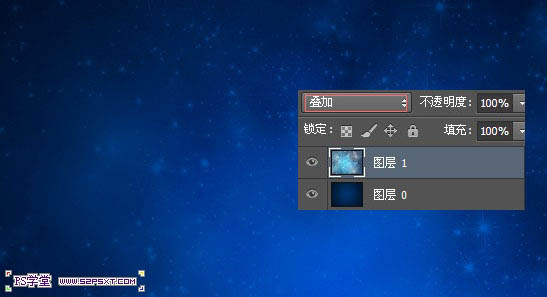
2、拉入背景素材,我们调整大小摆放好位置,改图层模式为叠加。
3、新建调整图层--色相/饱和度,我们将整个背景的色调进行调整。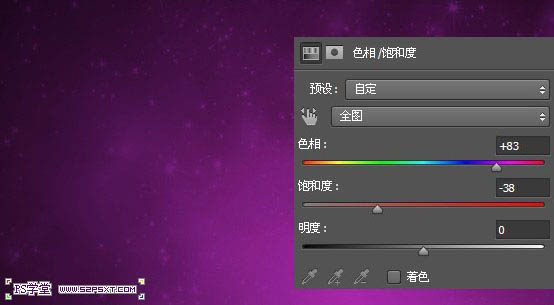
4、我们打上文字,这里字体我选择的是Mama,颜色#8f720c,大小设置如下。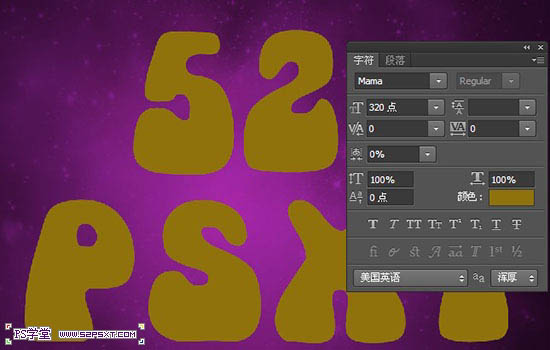
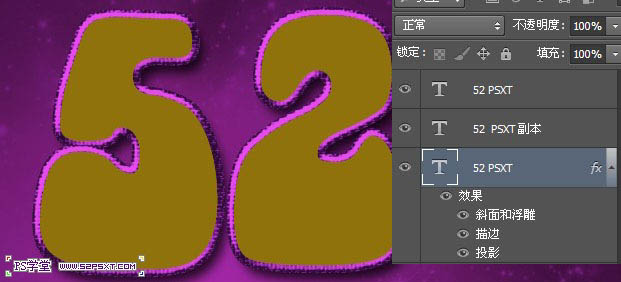
5、复制两次字体图层,这样我们就得到了三个字体图层。我们将最上面的一个字体图层填充改为0%。
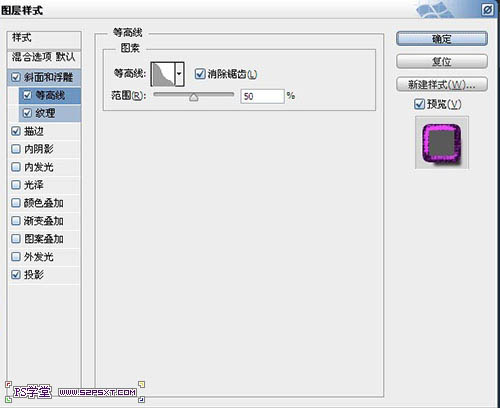
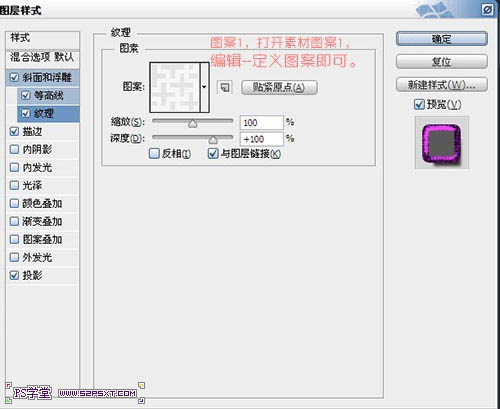
6、我们将原始字体图层设置图层样式如下,设置样式之前先下载下面的素材,并载入到图案里面。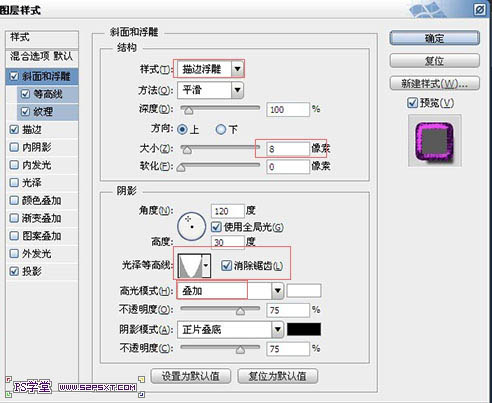
(本文来源于图老师网站,更多请访问http://m.tulaoshi.com/psxg/)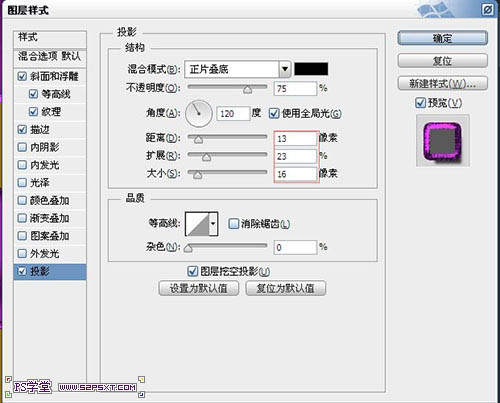
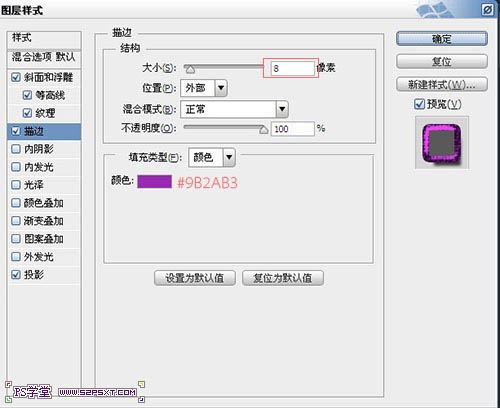
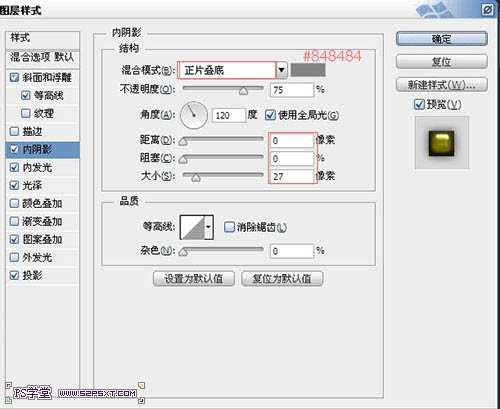
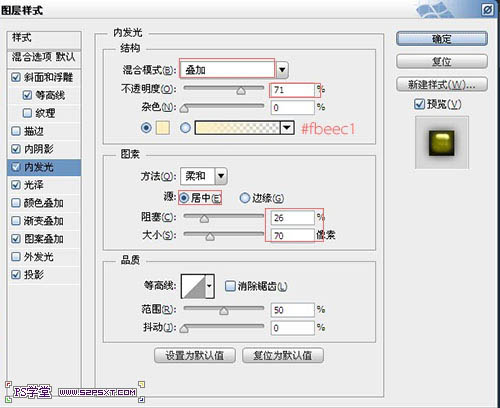
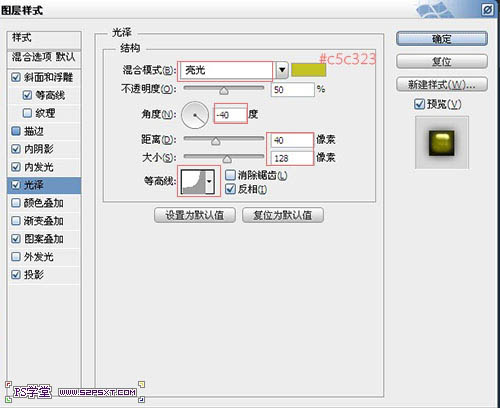
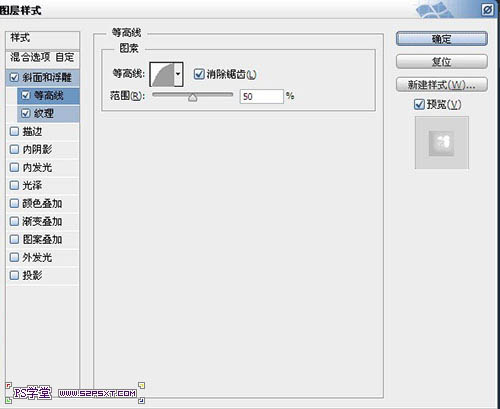
7、将第二个字体图层设置图层样式如下。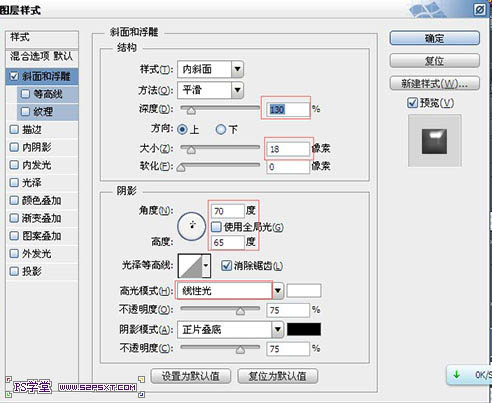
(本文来源于图老师网站,更多请访问http://m.tulaoshi.com/psxg/)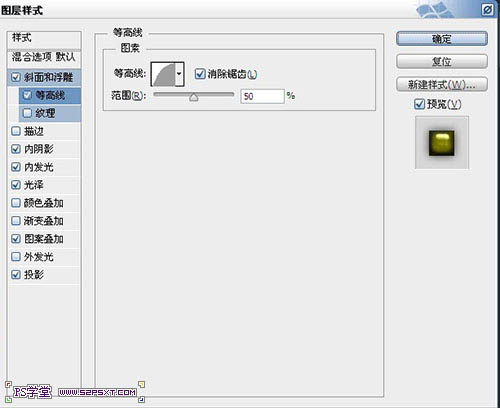
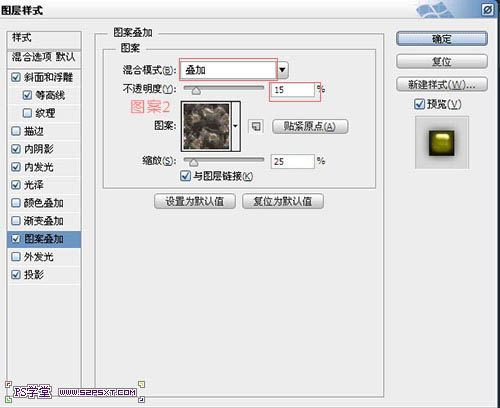
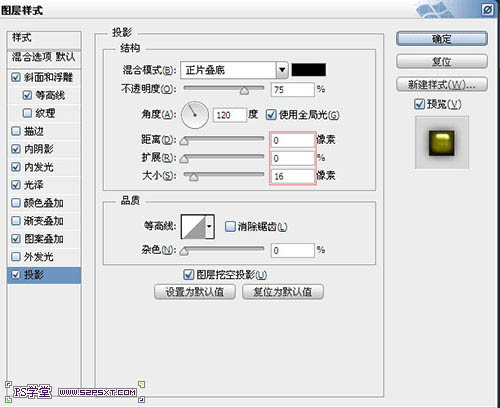
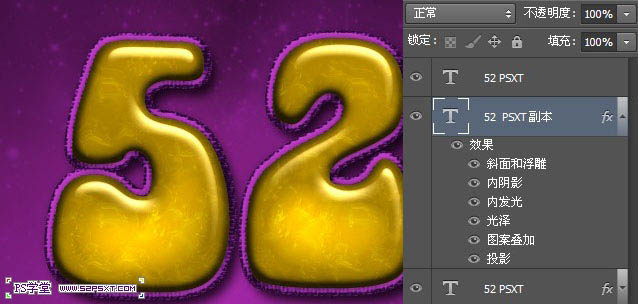
8、将最上面的一个字体图层设置图层样式如下。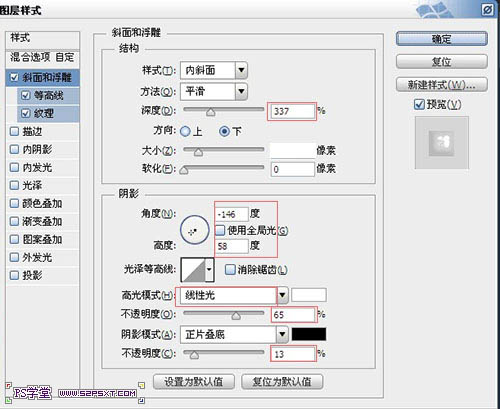


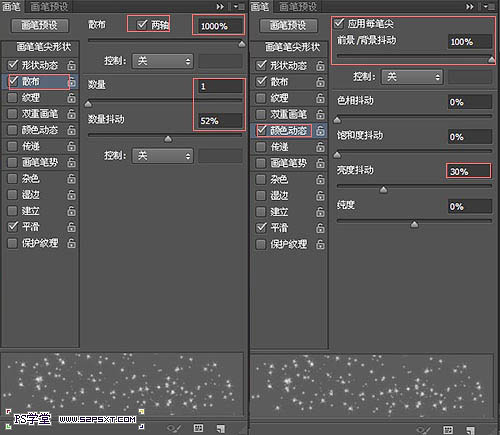
9、选择画笔工具,我们设置画笔如下。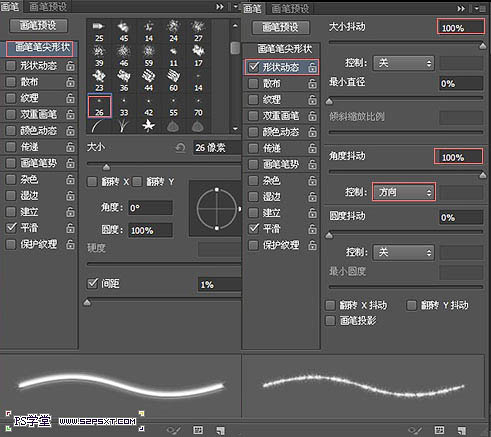
10、在原始字体图层上面,新建图层“描边”,我们右击字体图层,创建工作路径。
11、设置前景色为#fc79ff,背景色为#fbfb9f,右击描边路径,再右击删除路径,得到效果如下。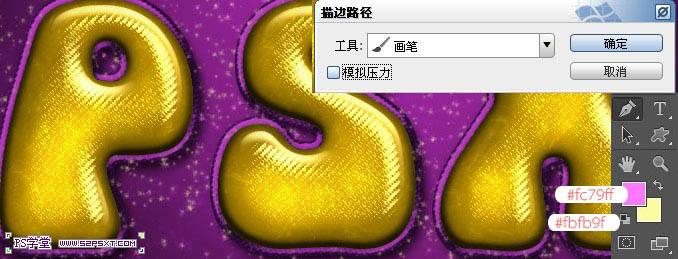
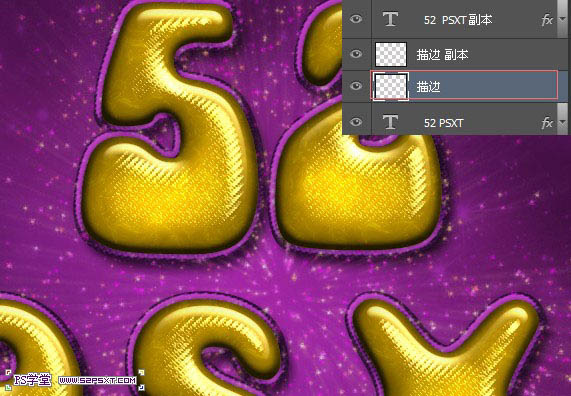
12、复制一层描边图层,将图层模式改为线性光。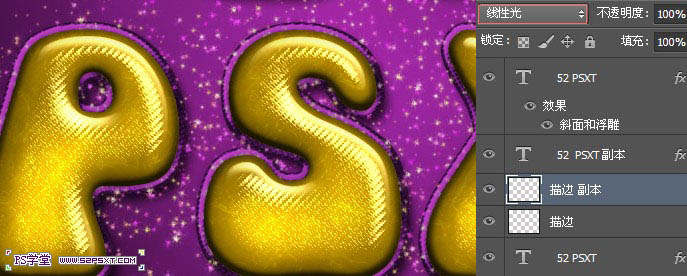
13、我们将原始的描边图层进行滤镜--模糊--径向模糊,设置如下,我们的字体就这么简单的做好了。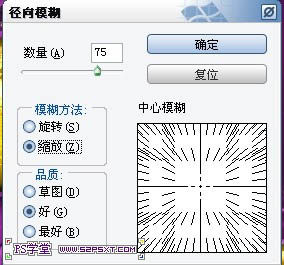
最终效果: