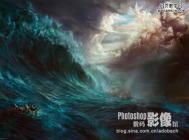
PS简单几步创造冲击力震撼的动感效果

脑残片专卖120

脑残片专卖120

2016-04-01 12:26

清醒时做事,糊涂时读书,大怒时睡觉,无聊时关注图老师为大家准备的精彩内容。下面为大家推荐PS简单几步创造冲击力震撼的动感效果,无聊中的都看过来。

PS简单几步创造冲击力震撼的动感效果

 PS简单几步创造冲击力震撼的动感效果 图老师

  最终效果:

Photoshop Radial Blur action effect. Image © 2013 Photoshop Essentials.com

  开始吧!

  1、 将原素材图片转换为智能对象:

The Layers panel in Photoshop CS6 showing the photo on the Background layer. Image © 2013 Photoshop Essentials.com
Clicking the Layers panel menu icon. Image © 2013 Photoshop Essentials.com
Choosing Convert to Smart Object from the menu. Image © 2013 Photoshop Essentials.com
The layer preview thumbnail showing the Smart Object icon. Image © 2013 Photoshop Essentials.com

  2、 使用径向模糊滤镜

(本文来源于图老师网站,更多请访问https://m.tulaoshi.com)

  滤镜→模糊→径向模糊,设置如下红色圆圈内数据:

Selecting the Radial Blur filter in Photoshop. Image © 2013 Photoshop Essentials.com
Setting the Blur Method and Quality options for the Radial Blur filter. Image © 2013 Photoshop Essentials.com
Setting the Amount value for the Radial Blur filter in Photoshop. Image © 2013 Photoshop Essentials.com
Clicking and dragging the origin point for the Radial Blur effect. Image © 2013 Photoshop Essentials.com

  效果如下:

(本文来源于图老师网站,更多请访问https://m.tulaoshi.com)
The image after applying the Radial Blur filter. Image © 2013 Photoshop Essentials.com

  3、 重新打开径向模糊做调整

  上面的模糊似乎还不是很完美,打开面板把中心点往上调一点:

Editing the Radial Blur Smart Filter settings. Image © 2013 Photoshop Essentials.com

  效果如下:

(本文来源于图老师网站,更多请访问https://m.tulaoshi.com)
The image after re-applying the Radial Blur Smart Filter. Image © 2013 Photoshop Essentials.com

PS简单几步创造冲击力震撼的动感效果(2)

  4、 选中智能滤镜蒙版

Selecting the layer mask for the Smart Filters in the Layers panel. Image © 2013 Photoshop Essentials.com

  5、 选中渐变工具

Selecting the Gradient Tool from the Tools panel in Photoshop. Image © 2013 Photoshop Essentials.com

  6、 选择径向渐变

Choosing Radial Gradient in the Options Bar. Image © 2013 Photoshop Essentials.com

  7、 选择黑白渐变

Clicking the triangle icon to the right of the gradient preview bar in the Options Bar. Image © 2013 Photoshop Essentials.com
Selecting the Black, White gradient in the Gradient Picker in Photoshop. Image © 2013 Photoshop Essentials.com

  8、 按图示绘制渐变(记住此时图层面板被选中的是智能滤镜)

Dragging out a radial black to white gradient. Image © 2013 Photoshop Essentials.com

  这个时候智能滤镜图层变成如下效果:

The Smart Filter mask thumbnail in the Layers panel showing the black to white radial gradient. Image © 2013 Photoshop Essentials.com

  而图像的效果变成:

The snowboarder is now visible through the zoom effect. Image © 2013 Photoshop Essentials.com

  9、 降低滤镜的不透明度

  双击所示图标,不透明度数值设置为55%

The Smart Filter Blending Options icon in the Layers panel. Image © 2013 Photoshop Essentials.com
Loweing the opacity of the Radial Blur Smart Filter. Image © 2013 Photoshop Essentials.com

  最终效果如下:

Photoshop Radial Blur action effect. Image © 2013 Photoshop Essentials.com

        :更多精彩教程请关注图老师photoshop教程栏目,图老师PS群:339853166欢迎你的加入

展开更多 50%)
分享

猜你喜欢

PS简单几步创造冲击力震撼的动感效果

电脑网络
PS简单几步创造冲击力震撼的动感效果

photoshop教程:利用径向模糊滤镜简单几步创造冲击力震撼的动感效果

PS PS教程
photoshop教程:利用径向模糊滤镜简单几步创造冲击力震撼的动感效果

s8lol主宰符文怎么配

英雄联盟 网络游戏
s8lol主宰符文怎么配

创造视觉冲击力

设计 颜色
创造视觉冲击力

PS调色:增强图片视觉冲击力

电脑网络
PS调色:增强图片视觉冲击力

lol偷钱流符文搭配推荐

英雄联盟 网络游戏
lol偷钱流符文搭配推荐

Photoshop制作非常有冲击力的动感碎块字

PS效果 PS PS基础
Photoshop制作非常有冲击力的动感碎块字

PS怎么让商品图片更有冲击力

PhotoShop PS PS教程
PS怎么让商品图片更有冲击力

lolAD刺客新符文搭配推荐

英雄联盟
lolAD刺客新符文搭配推荐

PS后期模拟“丁达尔效应”详细教程

PS后期模拟“丁达尔效应”详细教程

Photoshop打造肤色细节的美白效果

Photoshop打造肤色细节的美白效果
下拉加载更多内容 ↓