今天图老师小编要向大家分享个PS调出照片的时尚蓝色调教程,过程简单易学,相信聪明的你一定能轻松get!
原图
最终效果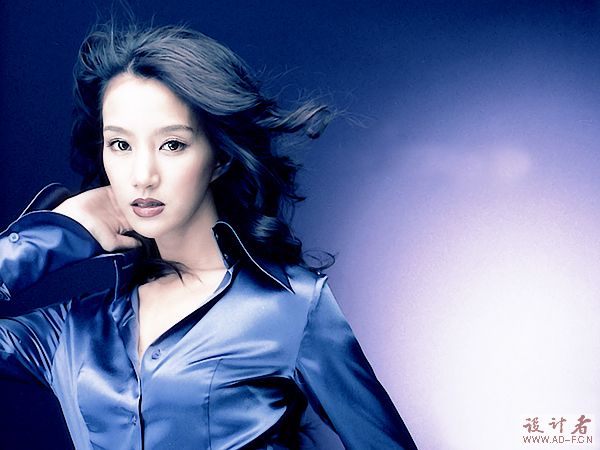
1、打开原图按Ctrl + J把背景图层复制一层。
2、简单的使用Topaz滤镜磨皮,参数设置如下图。 
(本文来源于图老师网站,更多请访问https://m.tulaoshi.com/psxpcl/)3、按Ctrl + Alt + ~调出高光选区。新建一个图层,填充白色,按Ctrl + D取消选区。 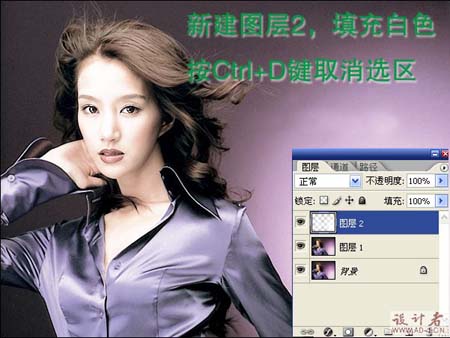
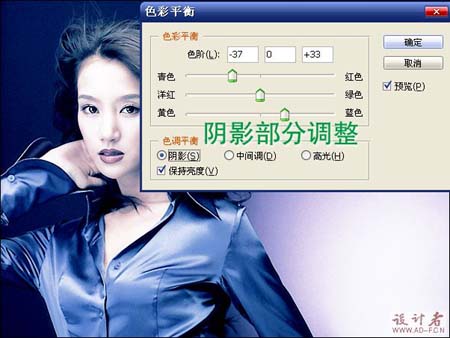
4、创建色彩平衡调整图层,参数设置如下图。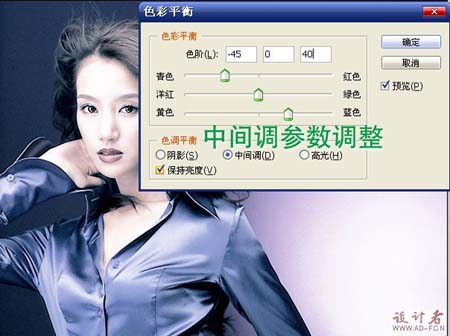
5、最后用透明度为:50%的画笔工具在蒙版部位擦出皮肤,完成最终效果。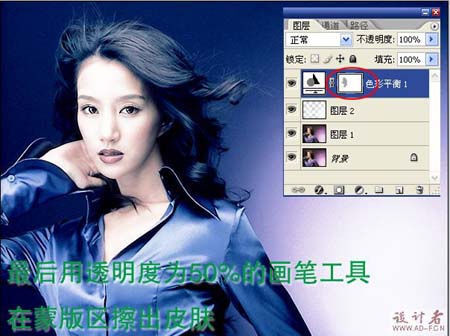
(本文来源于图老师网站,更多请访问https://m.tulaoshi.com/psxpcl/)