最近很多朋友喜欢上PS,但是大家却不知道如何去做,别担心有图老师给你解答,史上最全最棒的详细解说让你一看就懂。
本教程文字效果制作过程较为复杂,需要制作的部分较多:如背景、镂空字、金属浮雕、火花等。镂空字及火花部分有点复杂,需要根据作者的提示慢慢设置参数,制作的时候一定要有耐心。
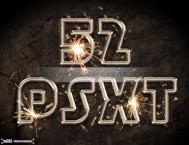
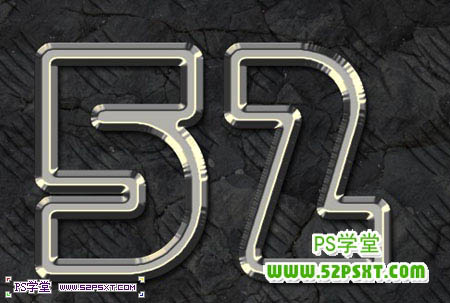
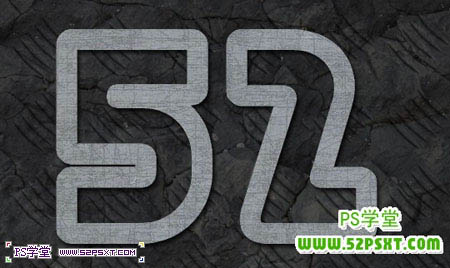
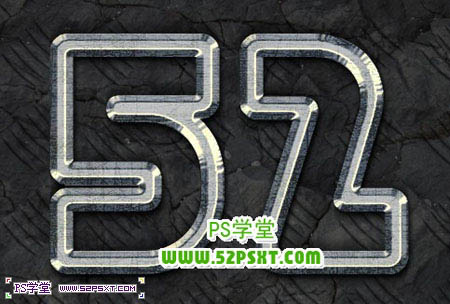
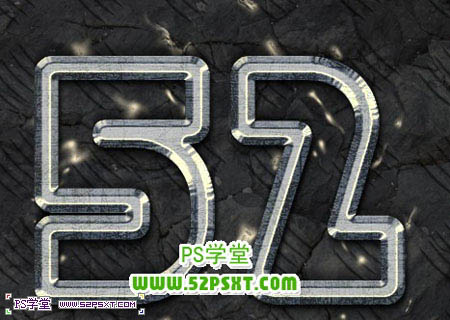
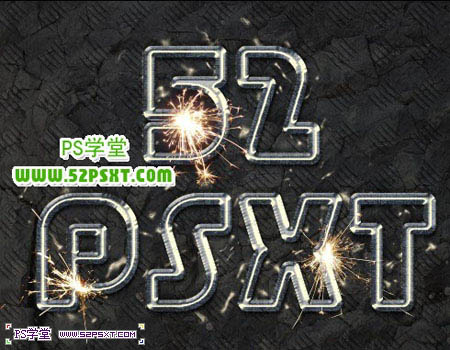
最终效果
1、新建1024*786px大小的文档,拉径向渐变,颜色从#464646到#363636。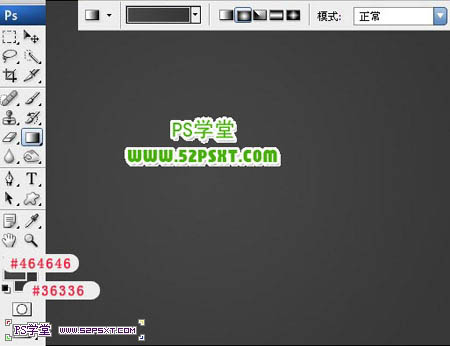
2、拉入素材1,将图层模式改为叠加,不透明度70%。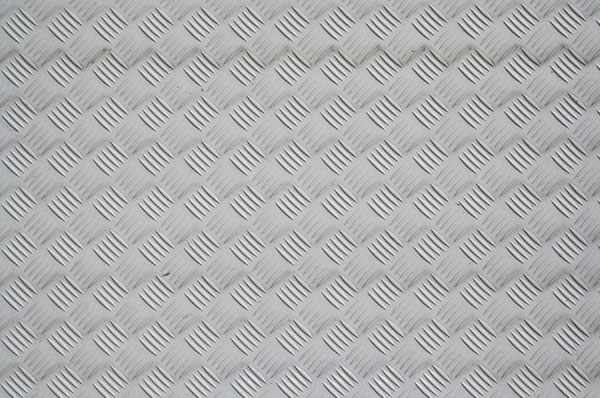

3、拉入素材2,将图层模式改为正片叠底。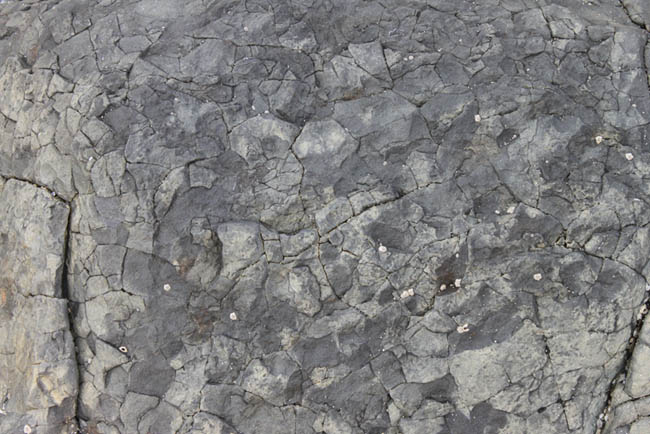

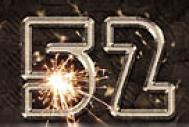
(本文来源于图老师网站,更多请访问https://m.tulaoshi.com/psxg/)4、用字体Age,颜色#fff7e5,打上文字。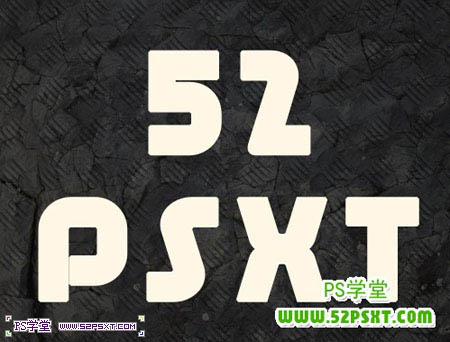
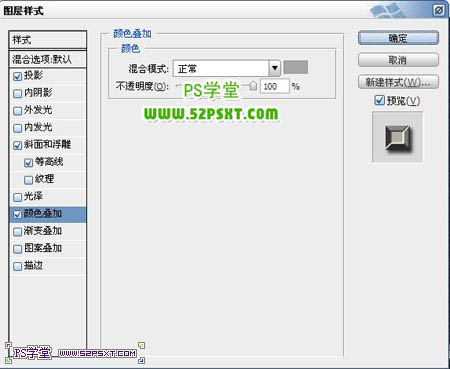
5、设置字体图层样式如下。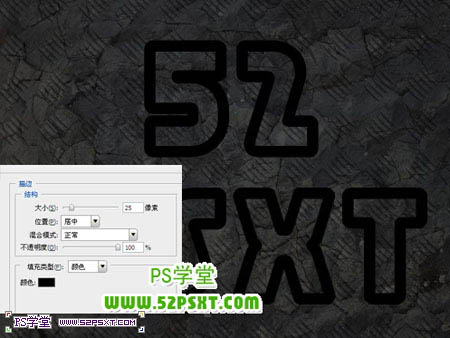
6、复制一层字体图层,将原字体图层眼睛关掉。新添图层,放在字体副本下面,合并字体副本和新建图层,得到新的字体图层,复制一层新的字体图层。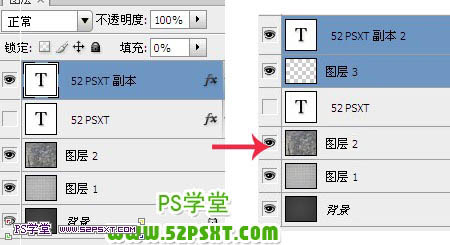
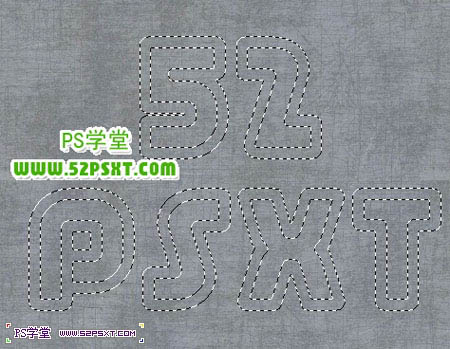
调出原文字选区,回到文字副本图层按Delete 删除,得到镂空的文字,然后把得到的文字图层复制一层。
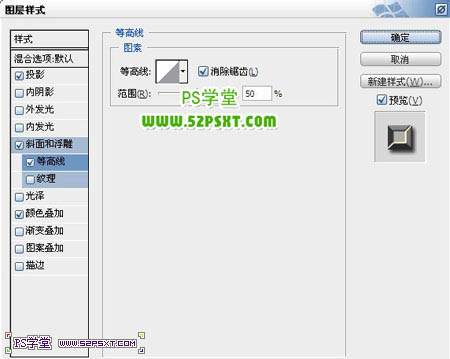
7、给“文字 副本2”设置图层样式如下。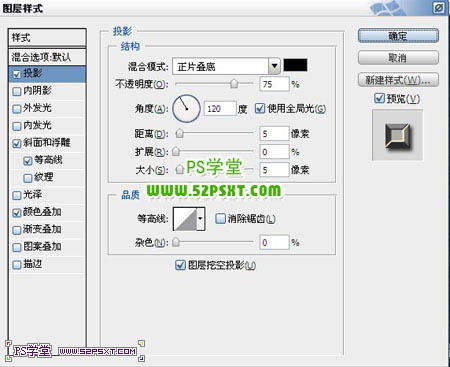

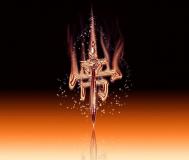
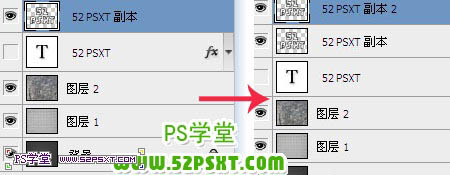
8、拉入素材3,放在字体上面,按住ctrl点击”文字副本2“图层,得到字体选区,ctrl+J复制,得到新图层。
9、给新图层调整色阶,设置如下。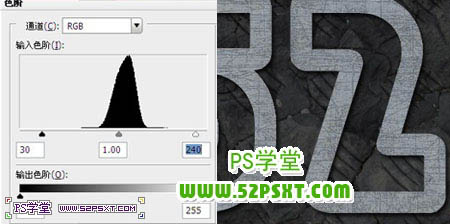
(本文来源于图老师网站,更多请访问https://m.tulaoshi.com/psxg/)10、将图层模式改为强光。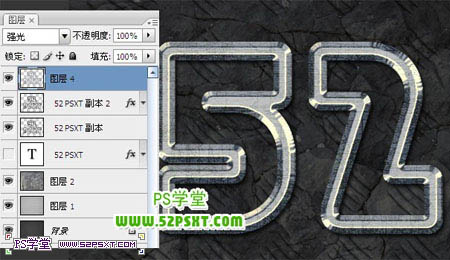
11、将52psxt副本图层执行动感模糊,使其字体有阴影效果。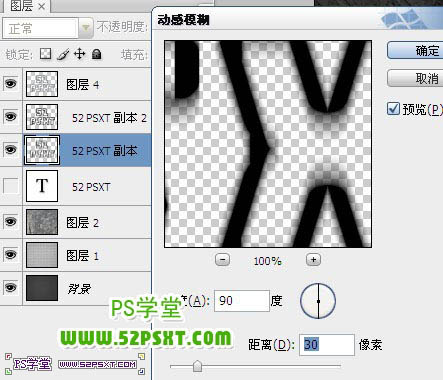
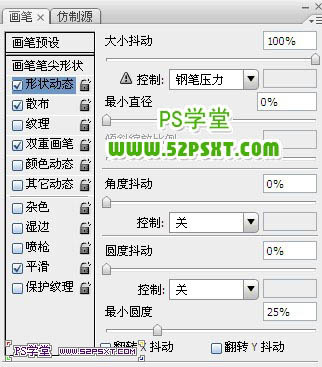
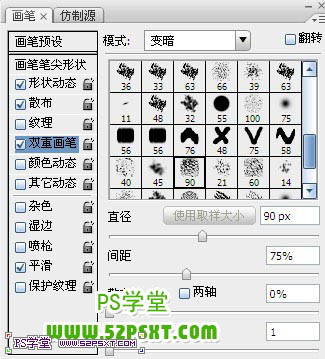
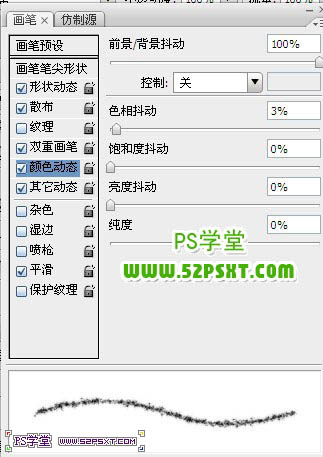
12、选择画笔,设置画笔如下。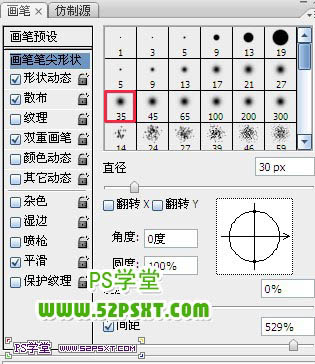
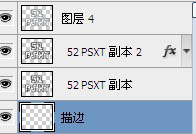
13、新建“描边”图层,放在字体图层下方,按住ctrl点击”52psxt 副本2“图层,得到字体选区,右击建立工作路径,设置前景色为#fff7e5,背景色为#363636。描边路径,右击删除路径,执行滤镜--扭曲--波浪,改图层模式为点光。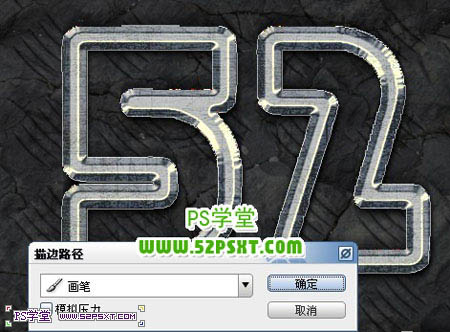

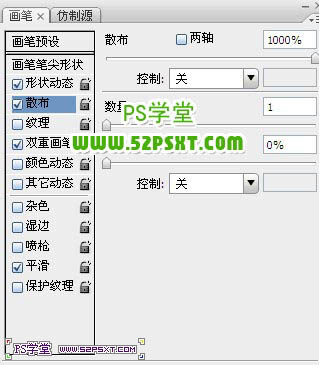
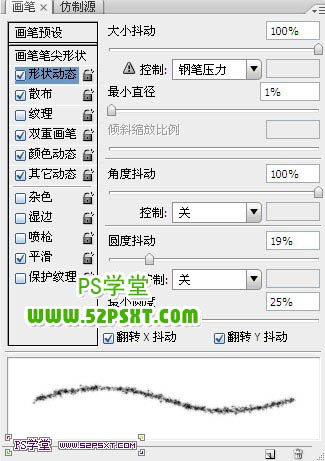
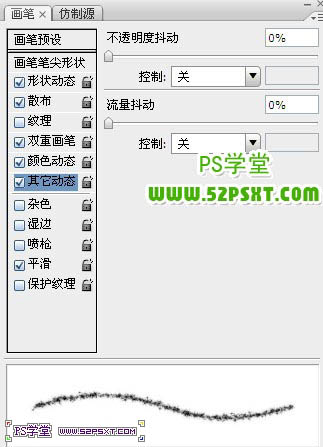
14、再设置画笔如下。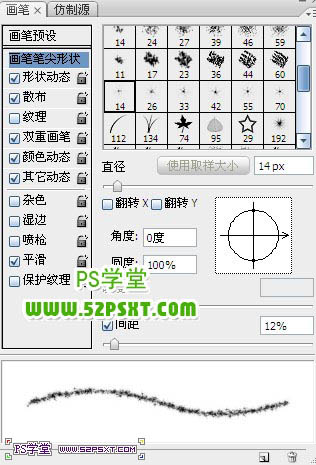
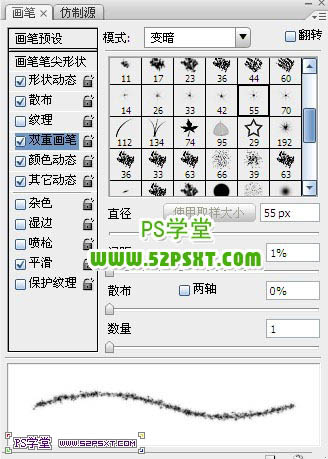
15、在描边图层上新建图层“描边2”,同样的方法建立工作路径,这里建立工作路径时填1,描边路径,同样设置前景色为#fff7e5,背景色为#363636。改图层模式为颜色减淡。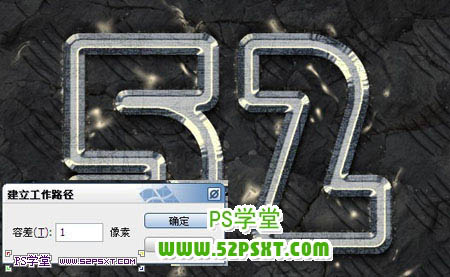
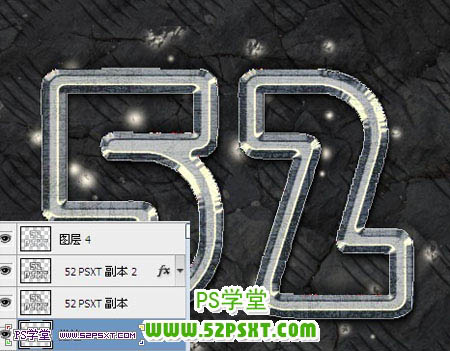
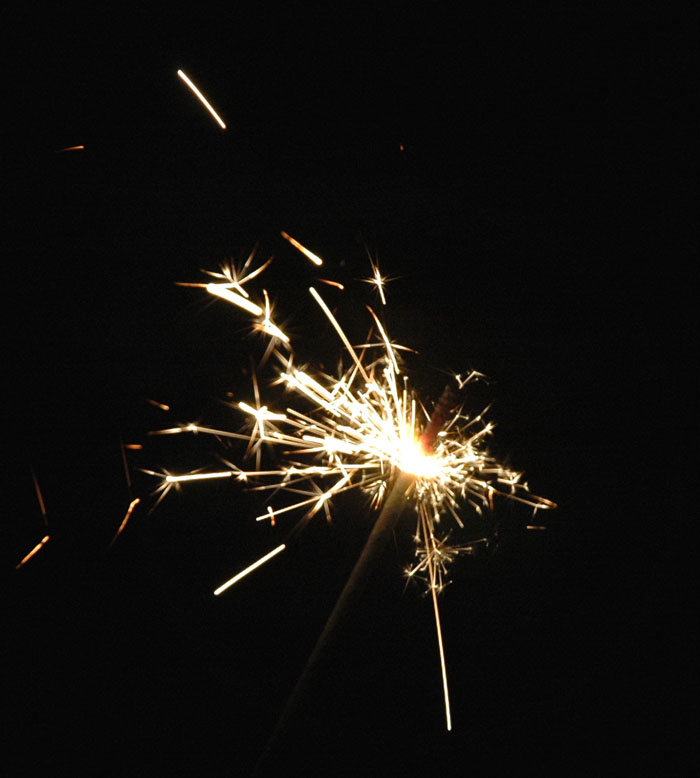
16、拉入火花素材,摆放好位置,图层模式为变亮。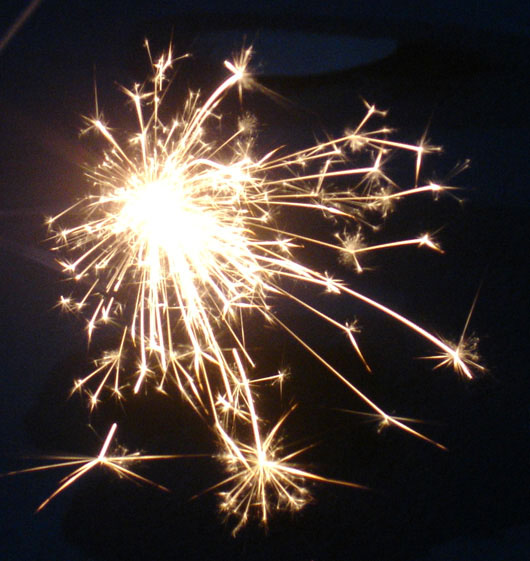

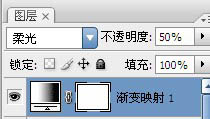
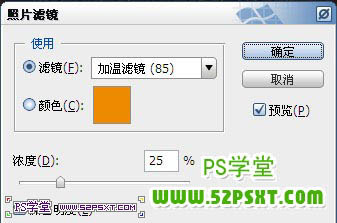
17、新建调整图层渐变映射,设置如下,改图层模式为柔光,不透明度50%,再新建调整图层照片滤镜,最后给整张图的四角做点阴影效果。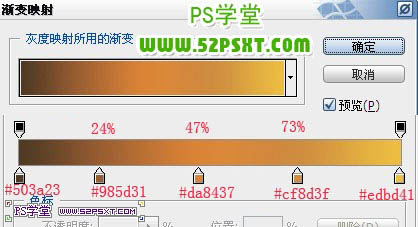
最终效果: