aq654667311
2016-01-31 15:49
关注图老师电脑网络栏目可以让大家能更好的了解电脑,知道有关于电脑的更多有趣教程,今天给大家分享Photoshop制作沙丘中的破碎建筑字教程,希望对大家能有一点小小的帮助。
本教程介绍较为复杂的立体字制作方法。文字部分基本上都是合成的,做出背景及立体字以后,需要用素材及画笔等给文字增加纹理,后期处理细节及调整颜色即可。
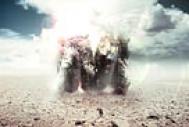
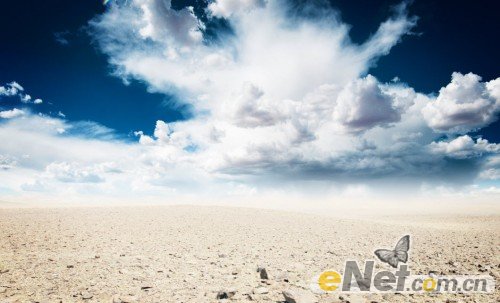
最终效果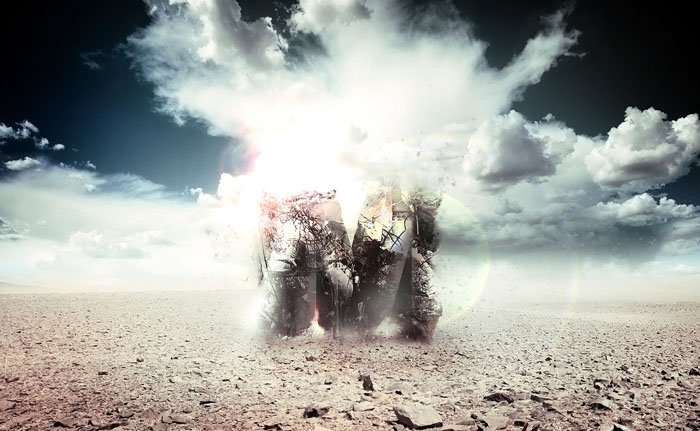

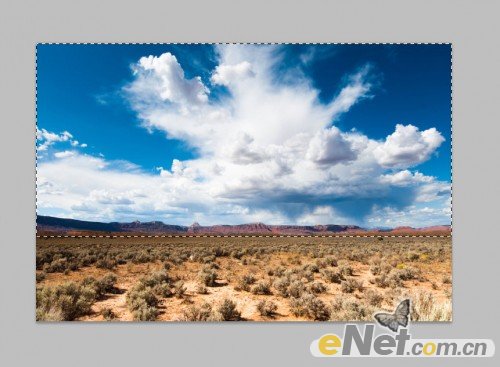
1、创建一个700 * 430像素的文件,背景为白色。载入沙漠照片,使用“矩形选框工具”将沙漠部分选取,如下图。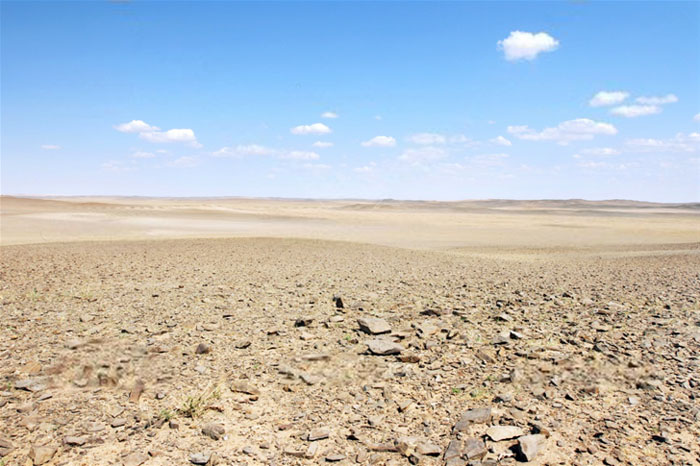
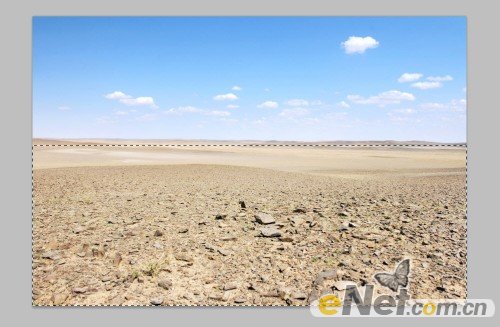
2、复制并粘贴到画布上,调整适当的大小,如下图。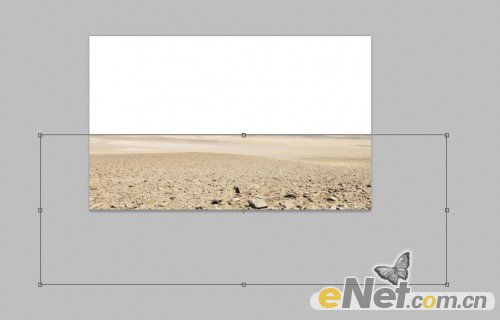
3、下面来做一个渐变,使后面的天空更加适合我们的沙漠,点击渐变工具选择从“背景色到透明”如下图。
4、给沙漠图层添加“图层蒙版”使用渐变从上向下拉一个渐变到沙漠的顶部,以遮挡沙漠边缘,方便我们制作天空。下图为蒙版中的效果。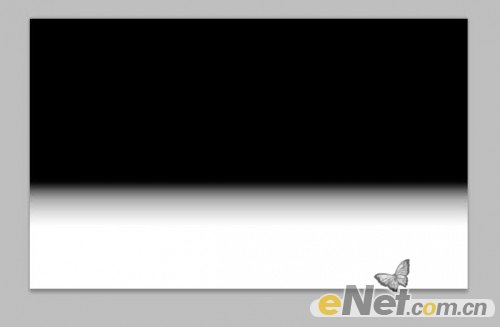
5、点击图层面板下方的“添加新的图层或调整图层”选择“色阶”并如下调整。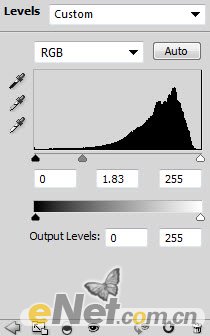
6、这时候沙漠应该变成这样。
7、打开天空图片,然后选择天空部分。
8、将选择的天空粘贴到画布上,调整大小。
9、给天空层添加蒙版,如上一步一样做一个渐变,下图是蒙版中的渐变样式。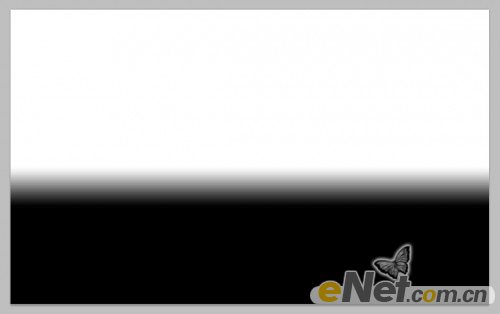

10、点击图层面板下方的“创建新的填充或调整图层”选择“可选颜色”在弹出的对话框中选择“青色”并如下设置。
11、色阶,并在色阶的图层蒙版中做如下涂抹。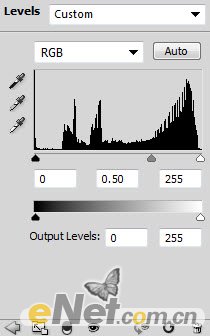
(本文来源于图老师网站,更多请访问https://m.tulaoshi.com/psxg/)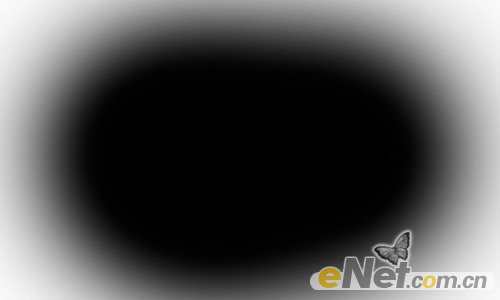
12、下面来添加灯光效果,用白色软笔刷,在下图所示的部分绘制白色。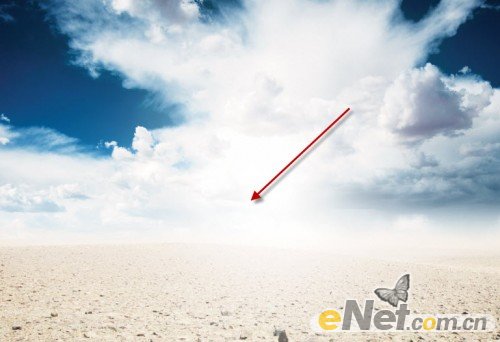
13、制作一个3D字母或者下载一个这样的字母,将他载入到画布上,并调整大小和位置。
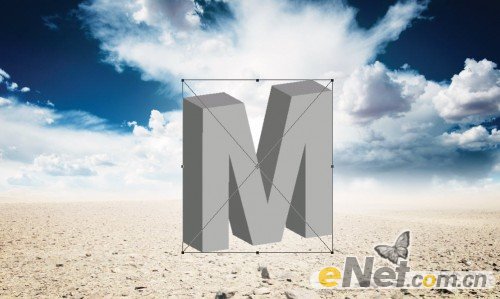
14、使用“自由变换”工具,用“扭曲”调整一下文字,如下图。
15、使用橡皮擦并调整不透明度与流量来制作残缺效果,如下图所示。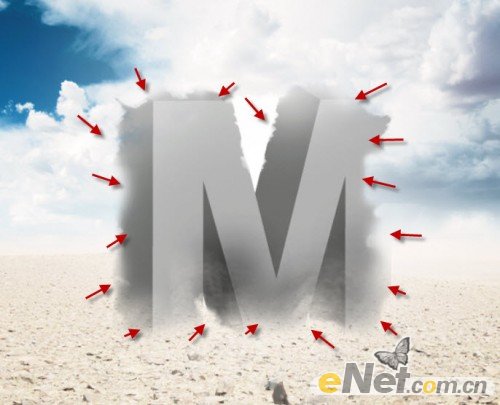
(本文来源于图老师网站,更多请访问https://m.tulaoshi.com/psxg/)16、按Ctrl键,点击文字图层的略缩图,调出文字选区。
17、打开破坏的屋子的图片,选择一个选区,如下图。
18、粘贴到画布,并覆盖在文字上面,使用“橡皮擦”工具,将不透明度和流量保持在100%然后把多余的房子擦除。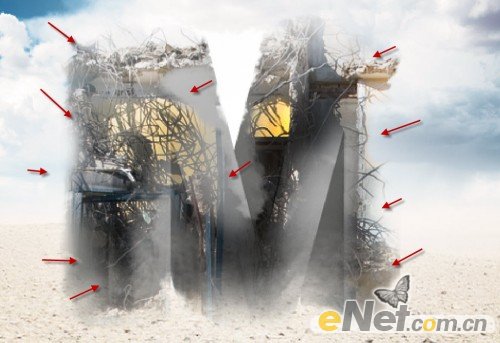
19、下面继续添加一些混泥土,回到破房屋图片,如下选择一块。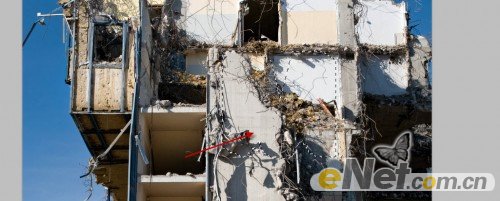
20、复制并粘贴到画布,放置如图所示位置,同时将混合模式设置为“强光”。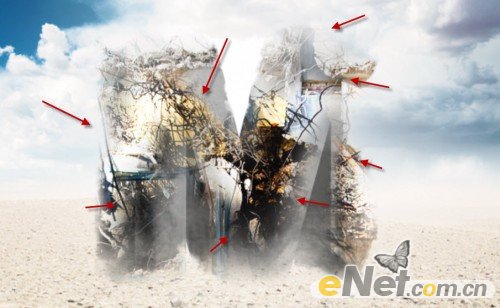
21、回到房屋图片,如下选区。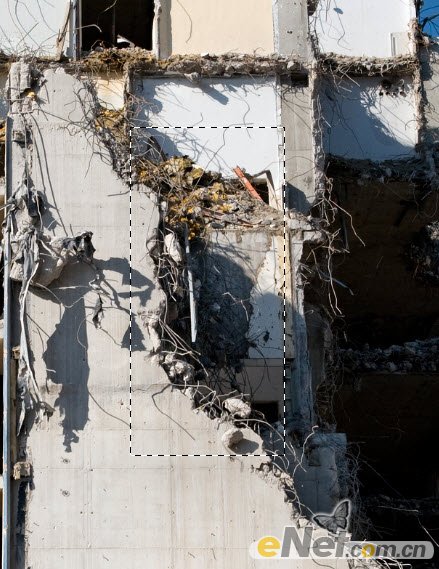
22、粘贴到画布,放到下图所示的位置。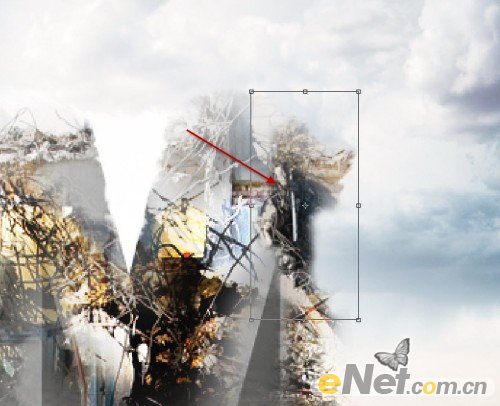
23、在其调整不透明度以及使用橡皮擦涂抹后你将得到如下效果。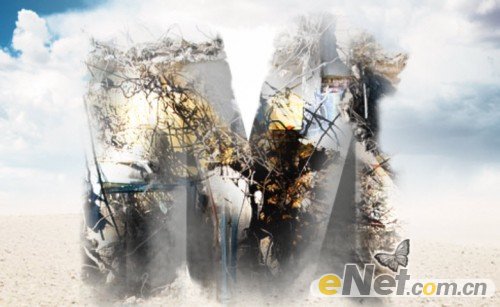
24、添加一些元素来丰富画面。如图选择颜色。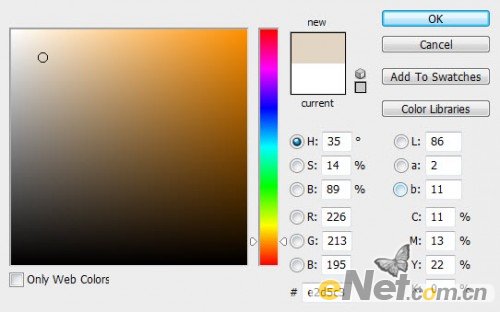
25、新建一个层,使用一个软角画笔,在底部绘制出云雾,这里设置画笔的不透明度和流量大约20%左右,如图所示。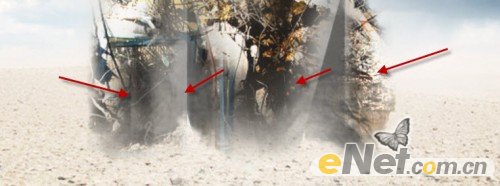
26、使用“自由变换”里的“变形”工具,来给这些云雾做一些调整,让他更加自然。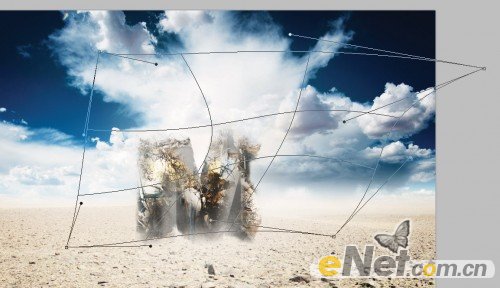
27、再新建一个层,用灰尘笔刷来绘制一些飞动的灰尘。
28、当然别忘了添加阴影,使用黑色笔刷调整不透明度,如下图所示。
最后使用色彩平衡来做一些色彩,色彩只要以你的感觉为主,你看好看就可以了。