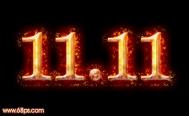
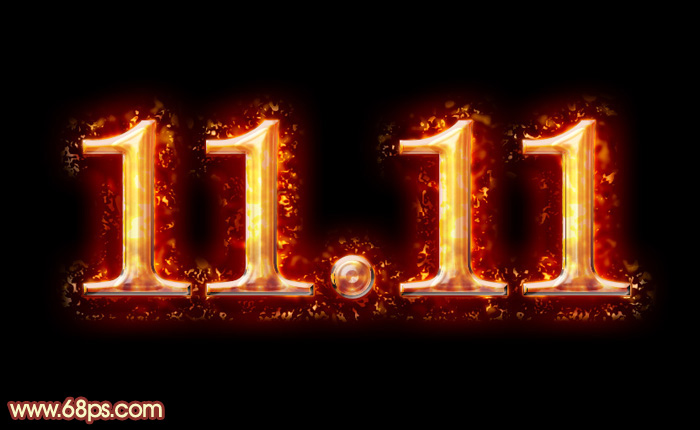
过程:把文字分为多个图层,底层的文字作为纹理层,中间的作为颜色层,顶部的文字作为渲染层,这样叠加后火焰效果就出来了,不仅文字,其它图形,实物等都适用。 最终效果
1、新建一个1000 * 700像素,分辨率为72的画布,确定后把前景色设置为黑色,用油漆桶把背景填充黑色。

图12、选择文字工具,字体为系统自带的英文字体“Georgia”,具体设置如图2。

图2 3、然后输入想要的文字,文字为白色,如下图。
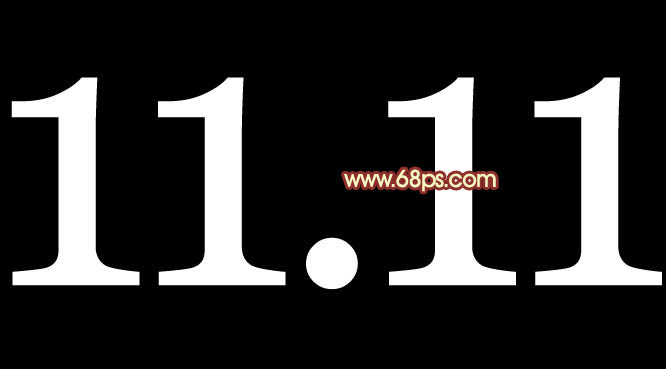
图3
4、按Ctrl + J 把文字图层复制一层,原文字图层隐藏,如下图。

图4 5、回到文字副本图层,选择菜单:图层 图层样式 斜面和浮雕,参数设置如图5。
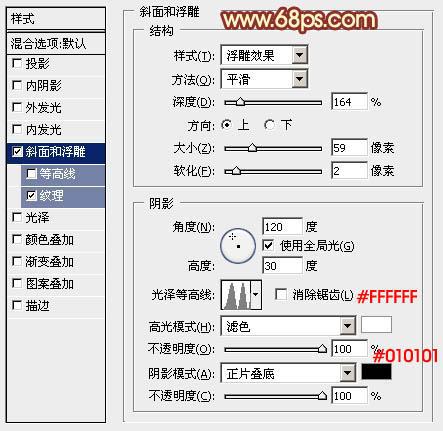
图5 再来设置纹理,图案列表中选择“云彩”,如果找不到这个图案,可以按照图7所示的提示复位图案,就可以找到如图8。
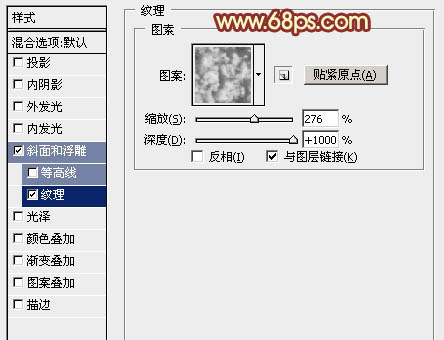
图6
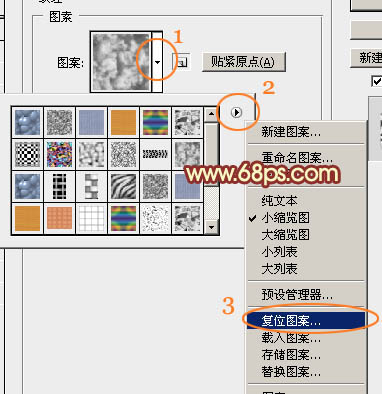
图7
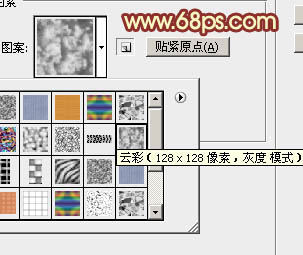
图8 6、设置好图层样式后的效果如下图,得到一些颓废的文字纹理,这正是制作火焰不错的底纹。
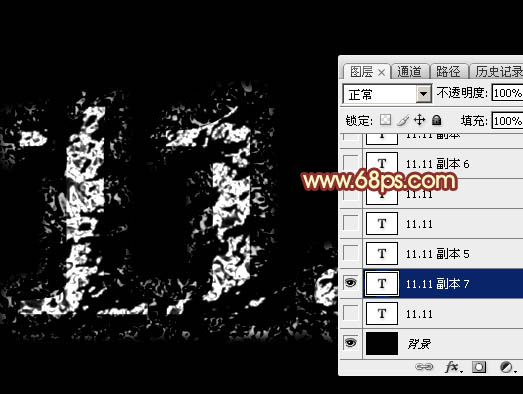
图9
7、按Ctrl + J 把当前图层复制一层,不透明度改为:50%,效果如下图。
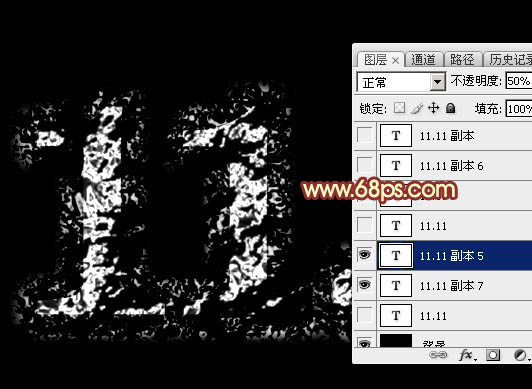
图10 8、把原文字图层复制一层,按Ctrl + Shift + ] 置顶,如下图。

图11 9、选择菜单:图层 图层样式 内阴影,然后再设置:内发光、斜面和浮雕、光泽、颜色叠加,图案叠加,过程如图12 - 17,效果如图18。这一步给文字中间位置增加颜色和纹理。
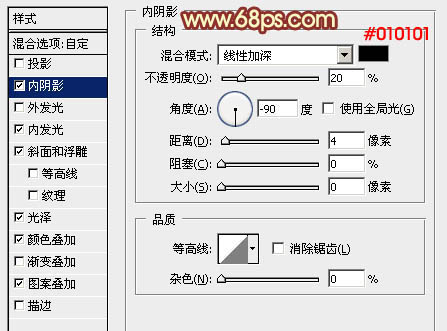
图12

图13
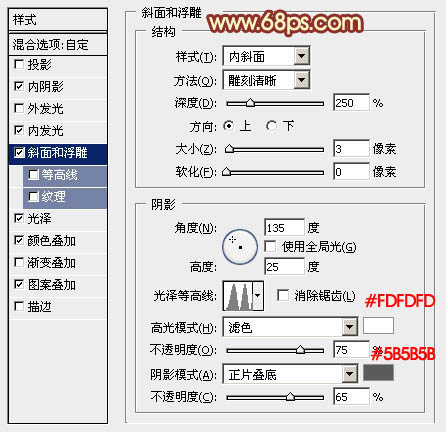
图14
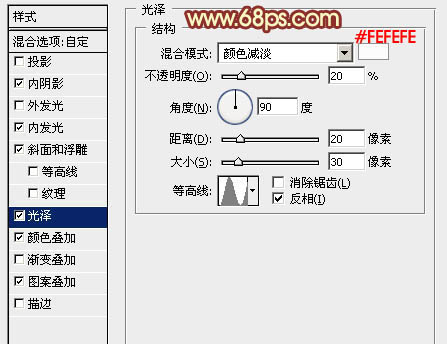
图15
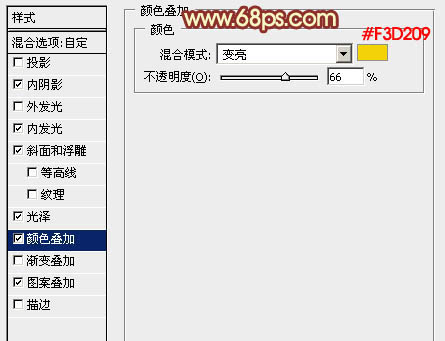
图16
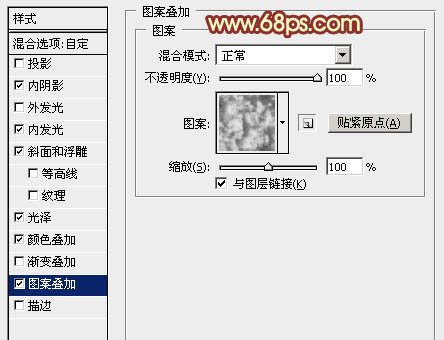
图17
图18
10、把原文字图层复制一层,按Ctrl + Shift + ] 置顶,如下图。
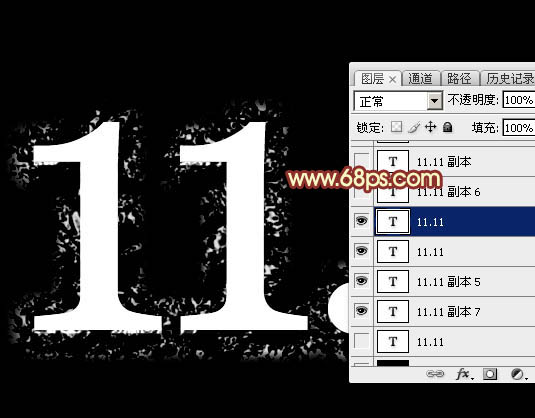
图19 11、同上的方法设置图层样式,这里需要设置:内阴影、斜面和浮雕、颜色叠加、渐变叠加,描边,过程如图20 - 26,确定后把填充改为:0%,效果如图27。这一步给文字增加一些浮雕及颜色。
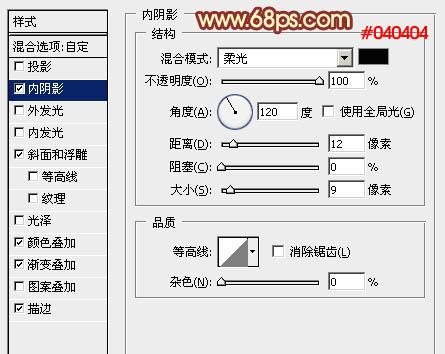
图20
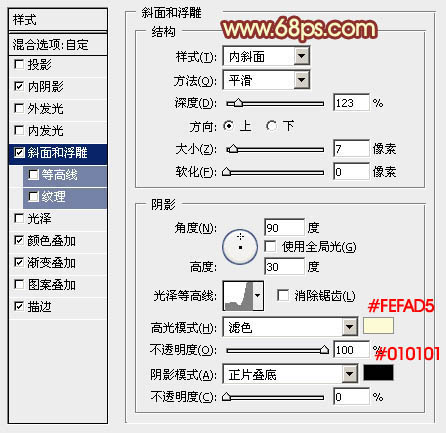
图21
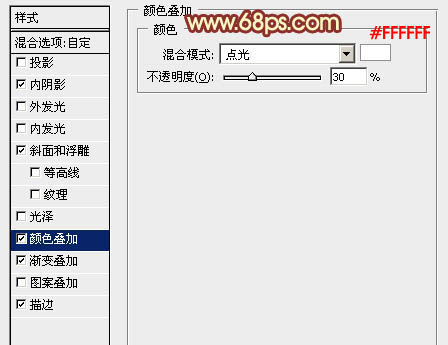
图22
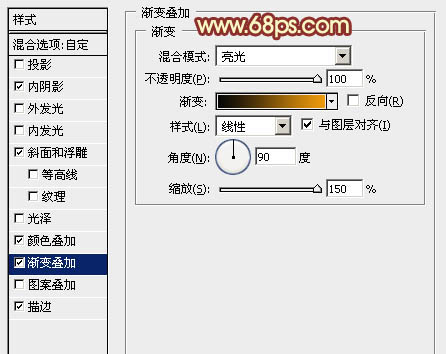
图23
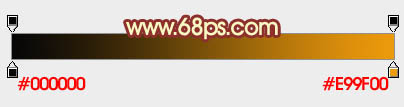
图24
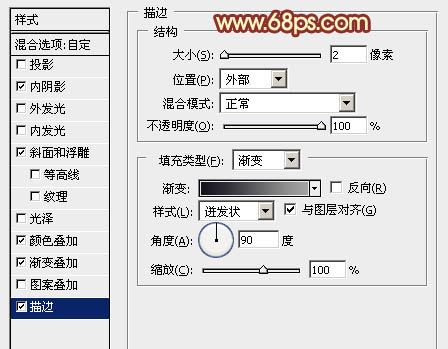
图25

图26
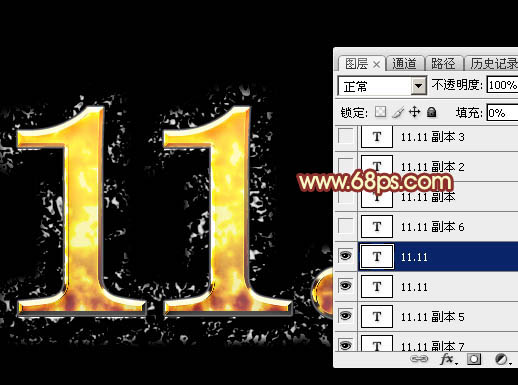
图27
12、把原文字图层复制一层,按Ctrl + Shift + ] 置顶,如下图。
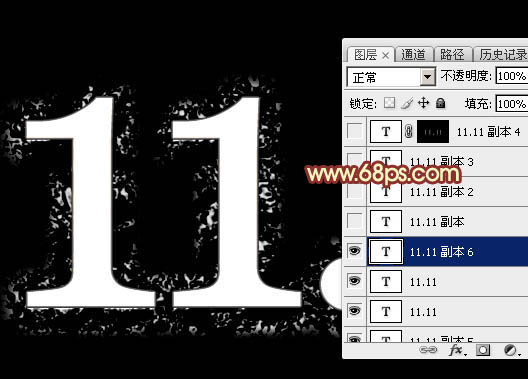
图28 13、再来设置图层样式,选择:投影、外发光、斜面和浮雕,纹理,过程如图29 - 32,确定后把填充改为:0%,效果如图33。这一步给文字渲染火焰。
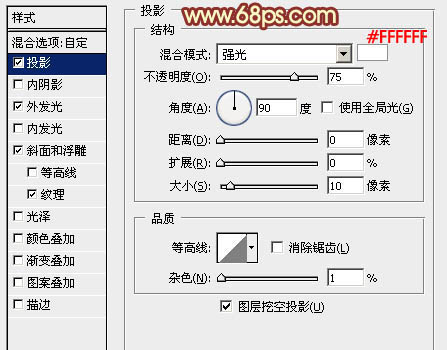
图29
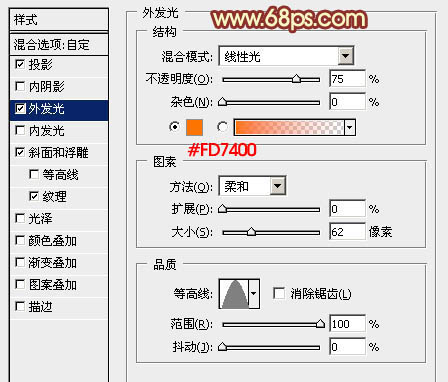
图30
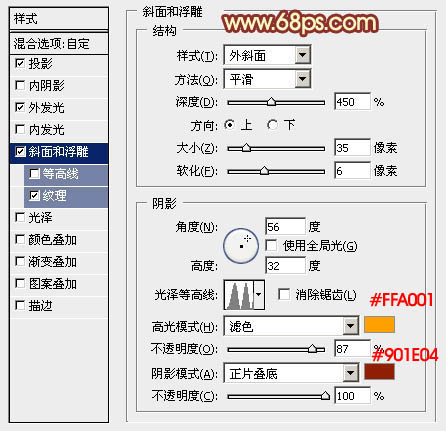
图31
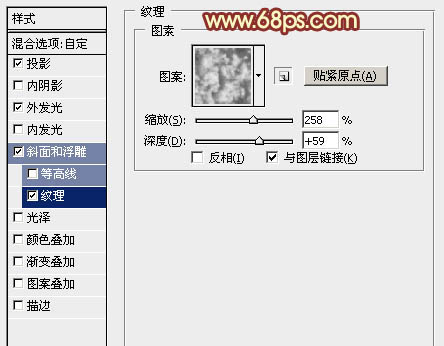
图32
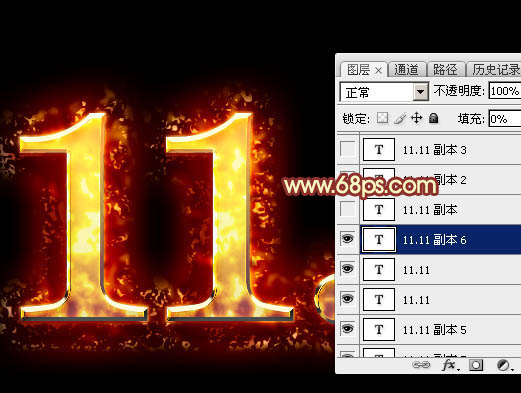
图33
14、看一下现在的效果,火焰表现的还不错,如果有些不满意的可以修改一下这几个文字图层的图层样式。
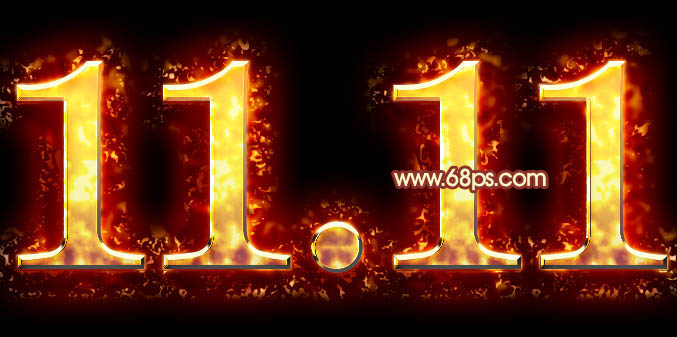
图34 15、把原文字图层复制一层,按Ctrl + Shift + ] 置顶,如下图。
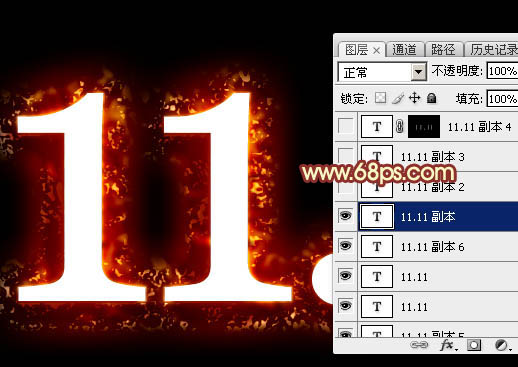
图35 16、给当前文字设置图层样式:斜面和浮雕,等高线,参数设置如图36,37,确定后把填充改为:0%,效果如图38。
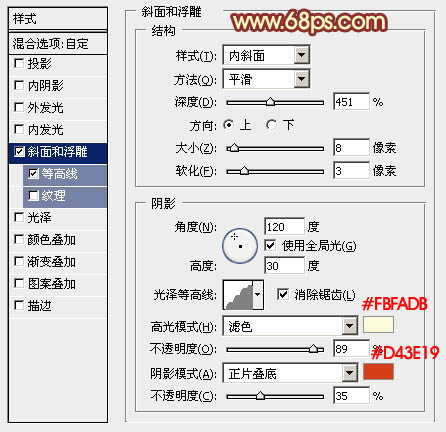
图36
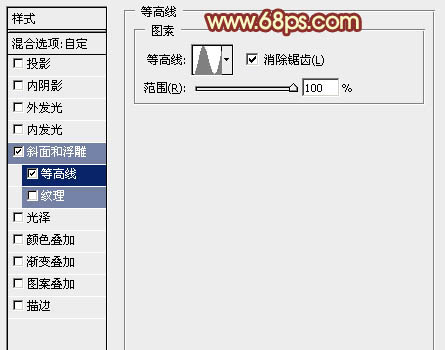
图37
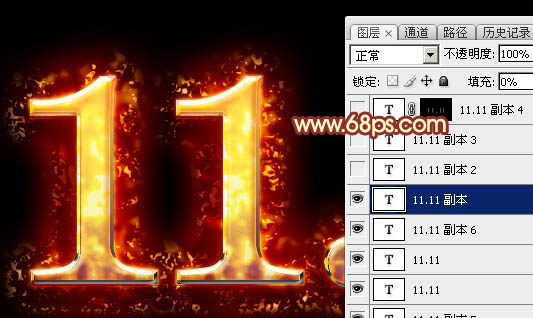
图38
17、按Ctrl + J 把当前文字图层复制一层,修改一下斜面和浮雕的数字,确定后把填充改为:0%,效果如图40。
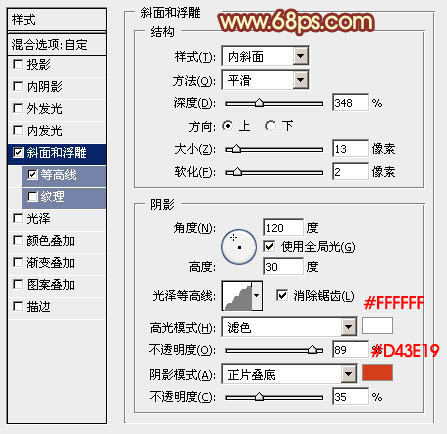
图39
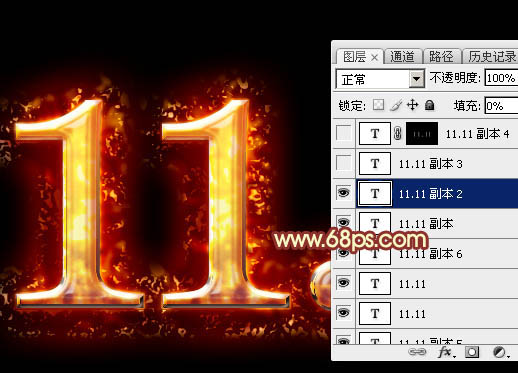
图40 18、按Ctrl + J 把当前文字图层复制一层,修改一下斜面和浮雕的数字,确定后把填充改为:0%,不透明度改为:50%,效果如图42。

图41
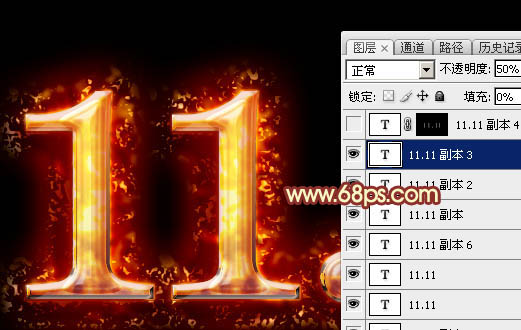
图42 最后调整一下细节,完成最终效果。