图老师小编精心整理的Photoshop制作超酷的立体铁架广告字希望大家喜欢,觉得好的亲们记得收藏起来哦!您的支持就是小编更新的动力~
效果图中的立体字制作比较复杂,文字为多层,同时还有一些装饰。制作的时候先分层做出平面图;然后用PS自带的3D工具立体化及渲染颜色。能熟练掌握3D工具,制作也很快。
最终效果
1、建立1280 * 1024像素,的新文件,背景颜色:#a1a1a1;新建文字图层,字体:Britannic Bold,颜色:#e6e6e6,大小:335点。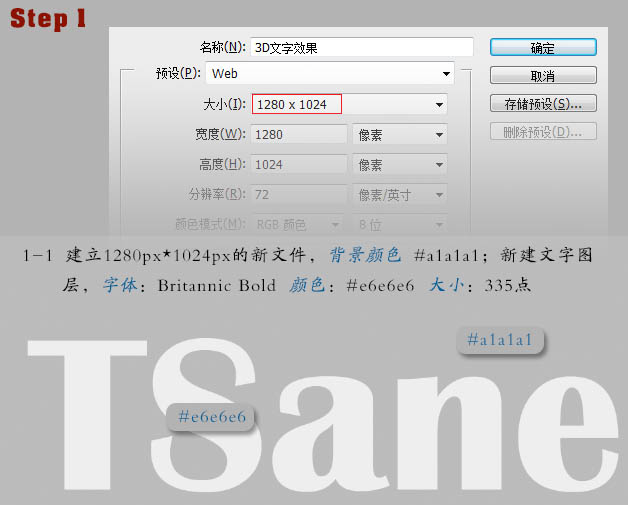
2、转换文字图层为形状。菜单栏:文字 转换为形状。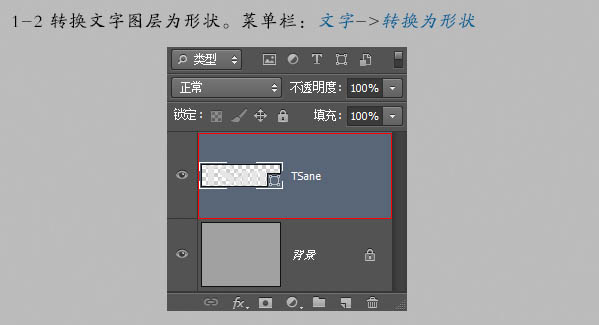
3、复制图层Tsane;切换到直接选择工具;设置填充类型为无,描边颜色为:#959595,大小为3点;在描边选项 对齐中设置居中。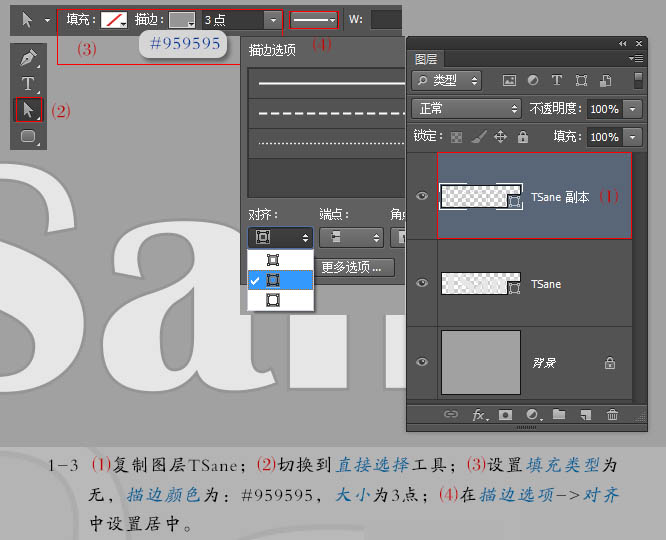
4、复制图层Tsane副本;得到Tsane副本2;设置描边颜色为:#464646;在描边选项中打开“更多选项”。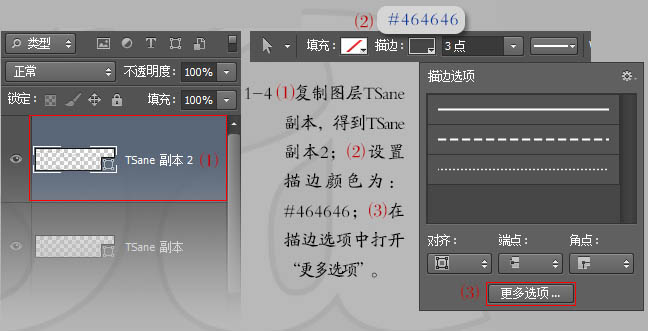
5、在描边的更多选项窗口中设置以下参数。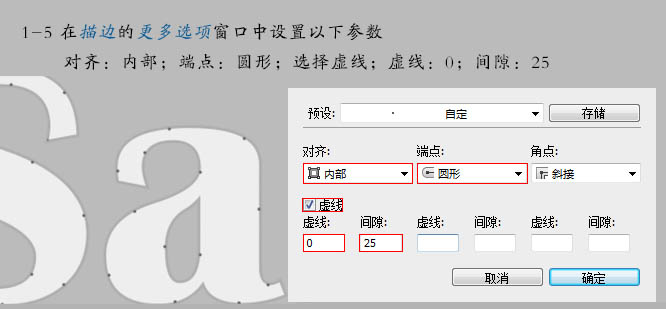
6、新建一个图层,命名“灯管”,选择钢笔工具,选项中选择路径,绘制灯管路径。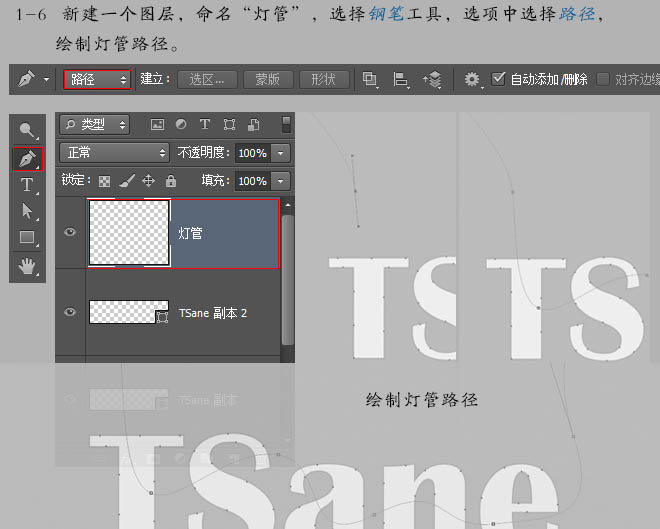
7、选择画笔工具,在窗口菜单栏中打开画笔面板,设置参数,大小:10像素;距离:1%。
8、选择直接选择工具,前景色设置为:#636363,在路径上点击右键选择“描边路径”,选择对话框的工具选择为画笔。描完边的路径如下图。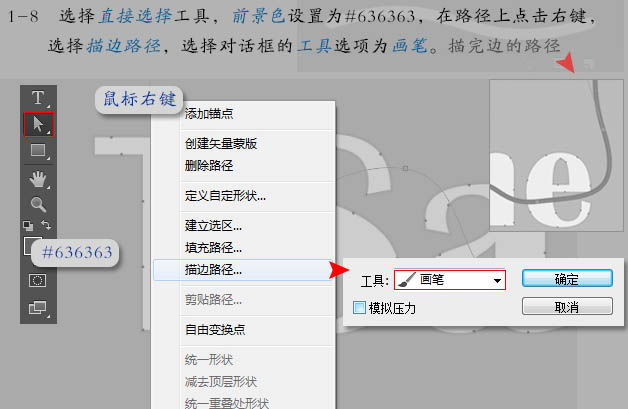
9、按Ctrl单击灯管图层缩略图得到选区,打开路径面板,窗口 路径,按Alt单击路径面板下方按键,设置容差为1像素。
10、隐藏灯管图层,选择转换点工具,调整路径使其平滑。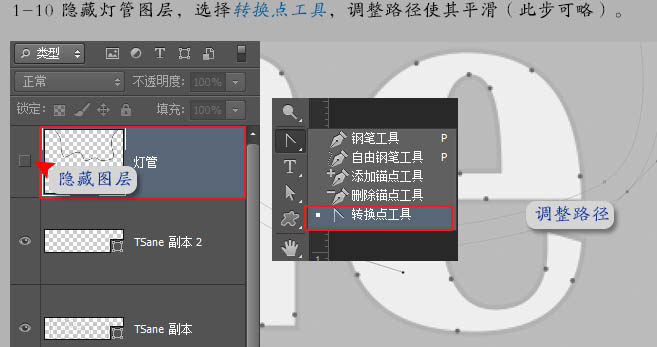
11、在选择路径的状态上,选择菜单:3D 从所选路径新建3D凸出,建立3D图层。
(本文来源于图老师网站,更多请访问https://m.tulaoshi.com/psxg/)12、按以上步骤将所有图层转为3D图层。
双击灯管3D图层,进入3D场景,选择灯管。 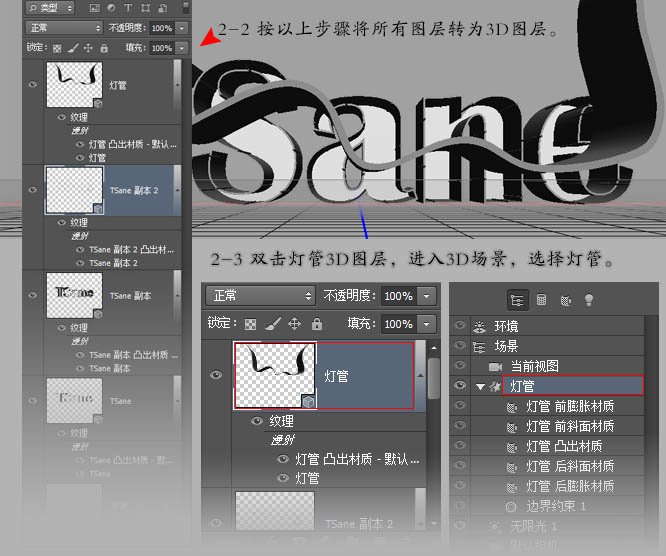
13、打开灯管的网格属性,选择形状预设中的枕状膨胀。
14、打开灯管的盖子属性,更改膨胀选项中的角度:90度,强度:20%。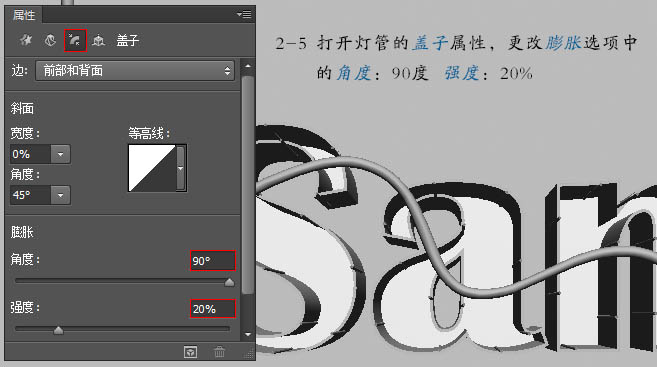
15、选择Tsane副本2图层,进入3D模式网格属性,更改凸出深度为50。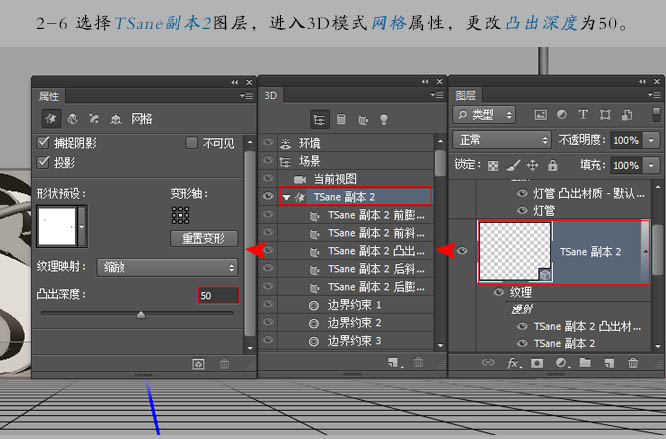
16、选择TSane副本图层,进入3D模式网格属性,更改凸出深度为20。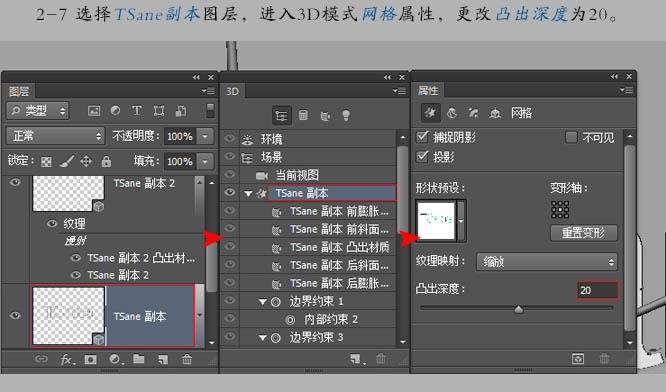
17、选择TSane图层,进入3D模式盖子属性,更改宽度为20%,宽度为锥形-反转,角度为45度。
18、选择TSane图层,进入3D模式网格属性,更改凸出深度为30。
19、复制背景图层并移动至最上层,转换为明信片3D图层。
20、选择所有的3D图层,合并3D图层。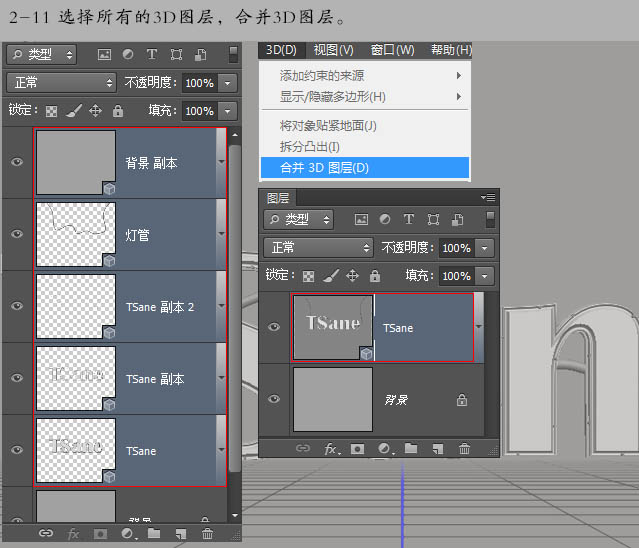
21、利用3D视图,调整当前视图到以下角度。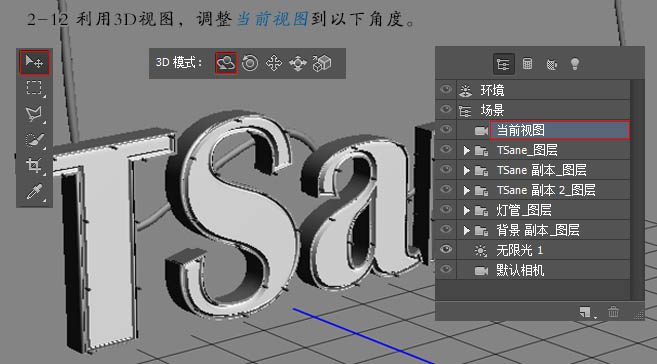
22、利用控制轴,对3D模型位置进行分别调整。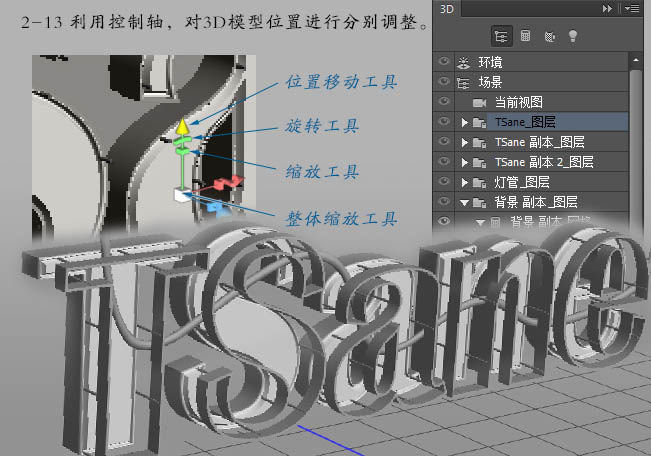
23、选择TSane的材质图层,在材质属性中移去纹理。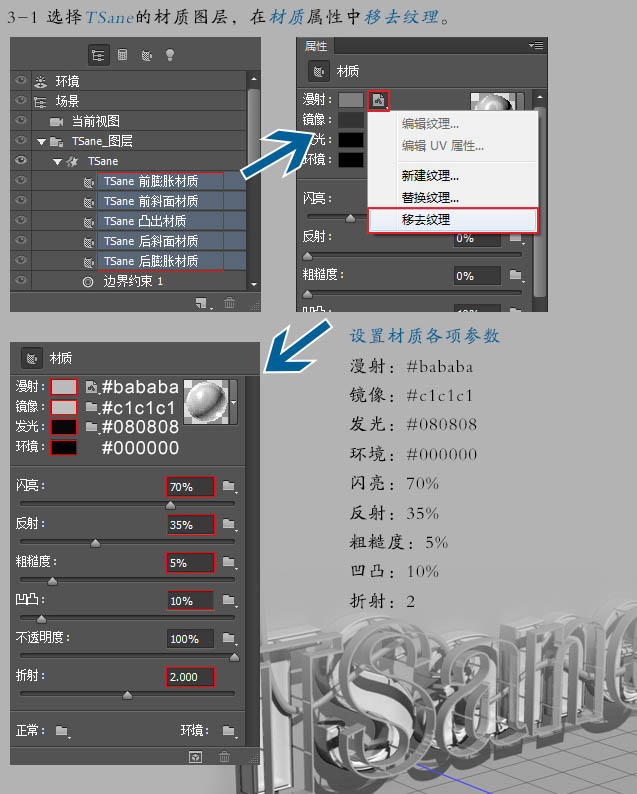
24、选择TSane副本的材质图层,在材质属性中移去纹理。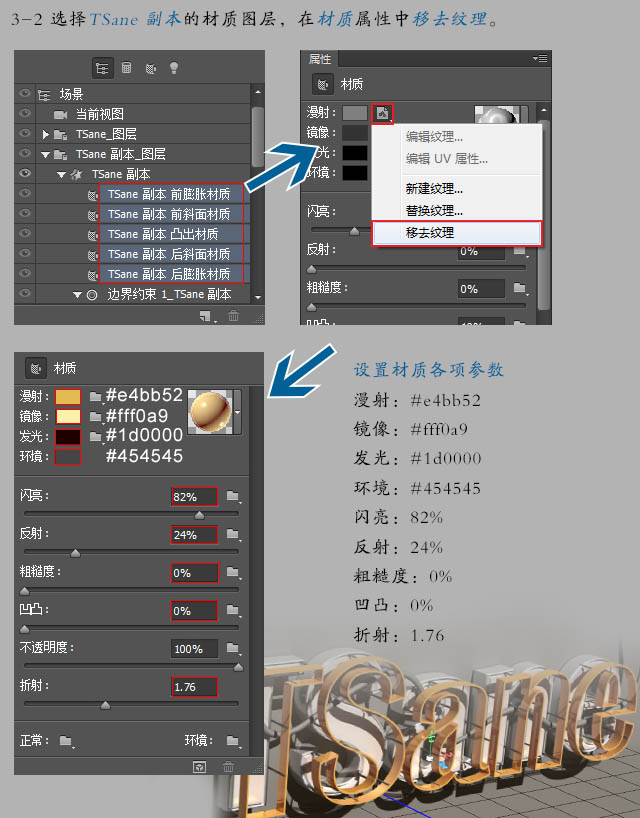
25、选择TSane副本2的材质图层,使用TSane副本同样的设置参数。
26、选择灯管的材质图层,按以下参数设置。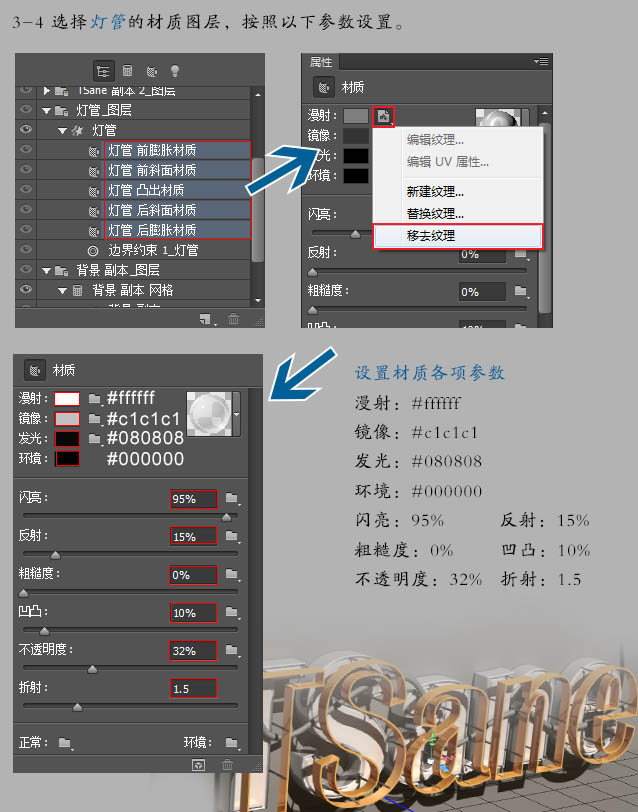
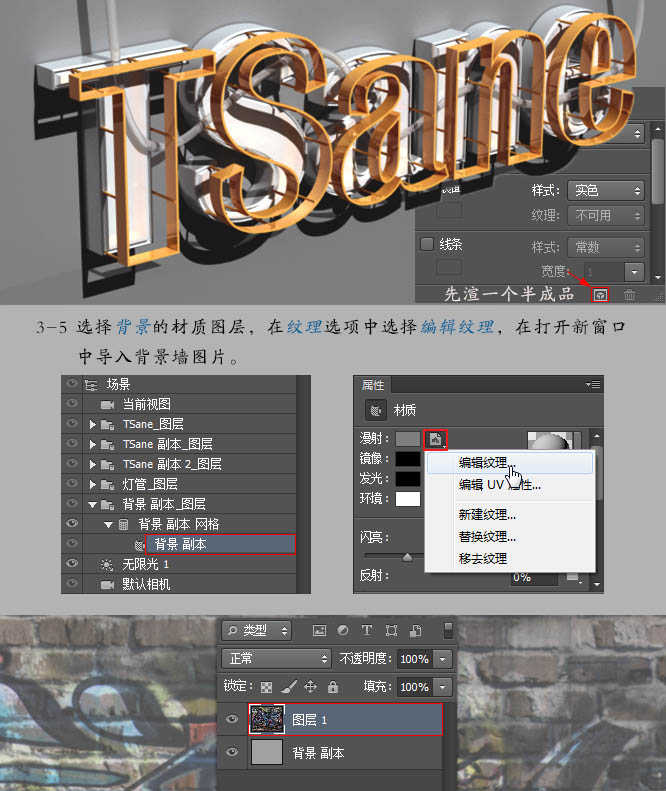
27、选择背景的材质图层,在纹理选项中选择编辑纹理,在打开窗口中导入背景墙图片。 
28、选择无限光1,在无限光选项中选择阴影柔和度为30%。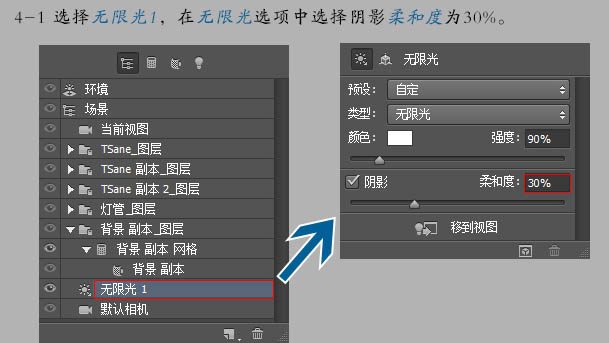
29、点击新建,选择新建点光,设置点光参数,颜色:#ff823d,强度:50%,勾去阴影选项。
30、新建一盏点光,参数同点光1,调整两盏灯光位置至3D文字上方。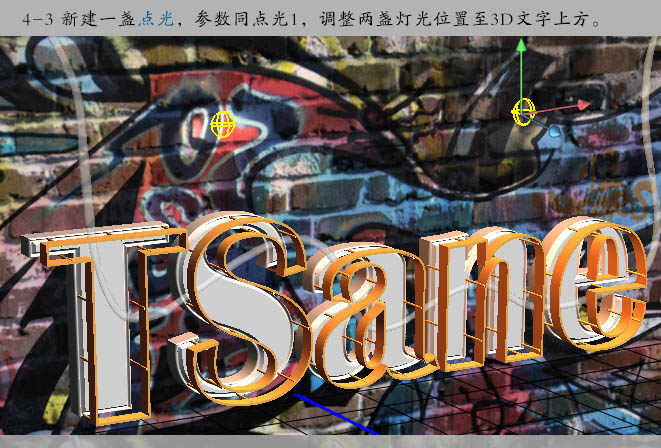
(本文来源于图老师网站,更多请访问https://m.tulaoshi.com/psxg/)31、调整无限光1坐标。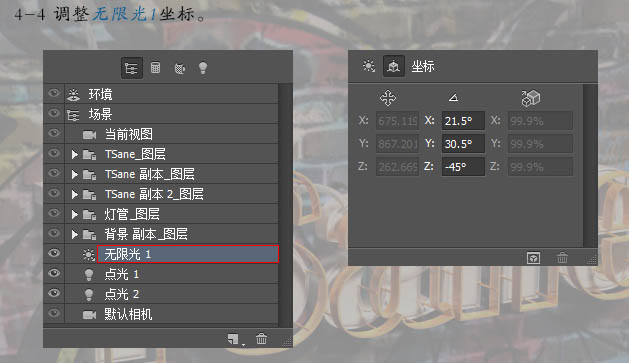
32、作最后点缀。选择画笔工具,前景色为#fff7e5,模式设置为叠加,画笔大小为70,新建图层“亮光”,在灯管位置点上亮光。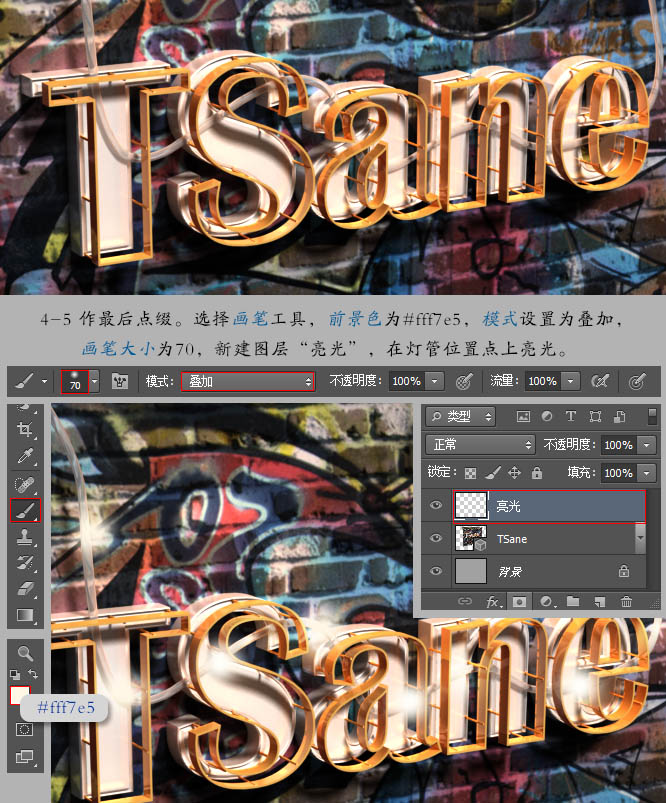
最终效果: