相信在生活中,喜欢看书的朋友不在少数,虽然现在有很多电子的书籍,但是纸质书籍却能给人不同的感受,那么,有了书籍那必不可少的就要有书签,下面给大家来到DIY手绘花朵书签步骤,一起来看看吧。
准备一张空白明信片

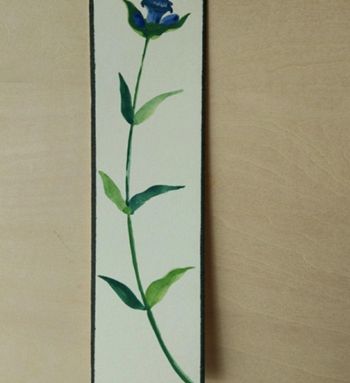
用颜料画出叶子

(本文来源于图老师网站,更多请访问http://m.tulaoshi.com/shuqian/)在添加两片叶子加以装饰

画出叶子茎部

(本文来源于图老师网站,更多请访问http://m.tulaoshi.com/shuqian/)画出花杆和根部

最后画出果实即可
 更多精彩内容请看:DIY手绘书签步骤