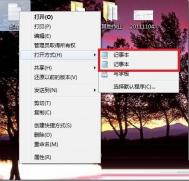
win10系统怎么重启资源管理器
1、首先,在桌面将鼠标光标放到任务栏空白处。
(本文来源于图老师网站,更多请访问http://m.tulaoshi.com/windowsshi/)
2、鼠标右键单击打开菜单,在菜单中启动任务管理器。

3、在任务管理器中找到进程。

4、然后,找到windows资源管理器。

5、鼠标右键单击,选择重新启动即可。

win10系统怎么设置图片解锁?
我们在使用笔记本或台式机的时候为了保证隐私,总要设个密码什么的,但是每次输入密码,时间久了,未免觉tulaoshi得烦累?最近win 10 发布,带来了一个很实用的小功能(图片解锁),用这个功能,不仅我们的隐私能得到保证,还能增加开机的趣味性及美感,何乐而不为呢?
1、开始菜单左键单击,选择设置,进入设置界面

2、选择第五项设置账户设置

3、进入账户设置后选择登录选项,然后在右侧点添加,进入图片解锁设置界面,在设置图片密码前需先设置普通密码及验证普通密码


4、现在按自己喜好选择一张图片作为密码图片,选择后在图片上选择三个点作为解锁密码


5、至此,我们的图片解锁就设置完成了,当然在我们忘了密码的时候还是可以用普通数字密码解锁的

如何卸载Win10中捆绑软件?
卸载Win10中捆绑软件的方法:
1、点击开始菜单,输入Get-AppxPackage -User username命令(‘username’请替换成当前实际用户名);
2、运行Get-AppxPackage命令,此时会显示所有已安装的应用程序;
(本文来源于图老师网站,更多请访问http://m.tulaoshi.com/windowsshi/)3、找到要删除的应用项,复制实际的PackageFullName;
4、运行Remove-AppxPackage PackageFullName命令;
举例:
如果你要卸载Windows 10系统中的‘人脉’(People)应用,那就运行Remove-AppxPackage Microsoft.People_1.10241.0tulaoshi.0_x64__8wekyb3d8bbwe。

备注:在执行上述操作的时候,应该保持谨慎,因为有些捆绑应用是系统运行时的一部分。如果您不知道这个应用是什么,应该先去查询一下资料再下定论,或者将它留着,不去理会,为了节约硬盘空间导致系统奔溃那就得不偿失了。
以上就是对卸载Win10中捆绑软件的方法的就诶是,有需要的朋友可以手动尝试下。