虽然用的是双曲线的磨皮方法。不过本文的双曲线操作上更为简单和智能。人物脸部斑点及痘痘的暗部及高光选区都用计算工具得出,然后分别调暗及调亮即可消除斑点,省去了双曲线中用手工具涂抹的复杂过程。
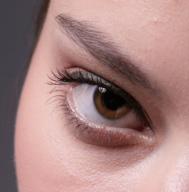
原图

最终效果
 tuLaoShi.com
(本文来源于图老师网站,更多请访问http://m.tulaoshi.com/ps/)(本文来源于图老师网站,更多请访问http://m.tulaoshi.com/ps/)1、复制图层1(ctrl+j)后,点击一下历史记录画笔工具,然后滤镜-模糊—表面模糊,参数如下。

2、用历史记录画笔工具恢复原图的五官,用较小的画笔和不透明度,如图。
 (本文来源于图老师网站,更多请访问http://m.tulaoshi.com/ps/)(本文来源于图老师网站,更多请访问http://m.tulaoshi.com/ps/)3、耳朵项链黑痣等地方都要用小画笔 放大图像N倍细心还原。
4、图层1——变亮模式,图像——计算。
 (本文来源于图老师网站,更多请访问http://m.tulaoshi.com/ps/)(本文来源于图老师网站,更多请访问http://m.tulaoshi.com/ps/)5、计算的参数设置。
6、计算参数设置好后点确定会弹出此窗口,确定。
 (本文来源于图老师网站,更多请访问http://m.tulaoshi.com/ps/)(本文来源于图老师网站,更多请访问http://m.tulaoshi.com/ps/)7、右下角点击“创建新的填充或调整图层”按钮,点曲线,为计算出来的泛白选区做曲线调整层。
8、在生成的曲线1图层,图像——调整——自动色阶,拉开对比,生成选区。
 (本文来源于图老师网站,更多请访问http://m.tulaoshi.com/ps/)(本文来源于图老师网站,更多请访问http://m.tulaoshi.com/ps/)9、回到图层1图层,将原先的混合模式变亮改为变暗,然后计算,得到我们需要的暗黑斑点选区。
10、同样给该图层做个曲线图层,参数都不用设置。
 (本文来源于图老师网站,更多请访问http://m.tulaoshi.com/ps/)(本文来源于图老师网站,更多请访问http://m.tulaoshi.com/ps/)11、同样做个自动色阶。
12、然后分别对两个曲线蒙版图层填充50%黑,此法可以更加精确选取需要的过白过暗选区。

13、再分别对两个曲线蒙版做高斯模糊0.5两次,以柔化选区边缘,使选区非选区能融合自然。
 (本文来源于图老师网站,更多请访问http://m.tulaoshi.com/ps/)(本文来源于图老师网站,更多请访问http://m.tulaoshi.com/ps/)14、点掉图层1的眼睛后,如图建一个纯黑填充图层。
15、然后选取混合模式里的颜色,此法的用途是为了回避有色图层对曲线图层的视觉干扰。

16、双击曲线1缩览图,弹出曲线面板,拉动曲线,密切注意脸部暗黑斑点,以自然融合到皮肤里是最好了,不要有太大反差。
 (本文来源于图老师网站,更多请访问http://m.tulaoshi.com/ps/)(本文来源于图老师网站,更多请访问http://m.tulaoshi.com/ps/)17、双击曲线2缩览图,弹出面板,下拉曲线,让泛白选区融合到皮肤像素即可。
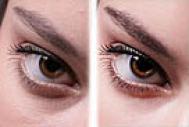
18、点掉最上面的颜色填充层眼睛,可以看到斑点都去干净了。

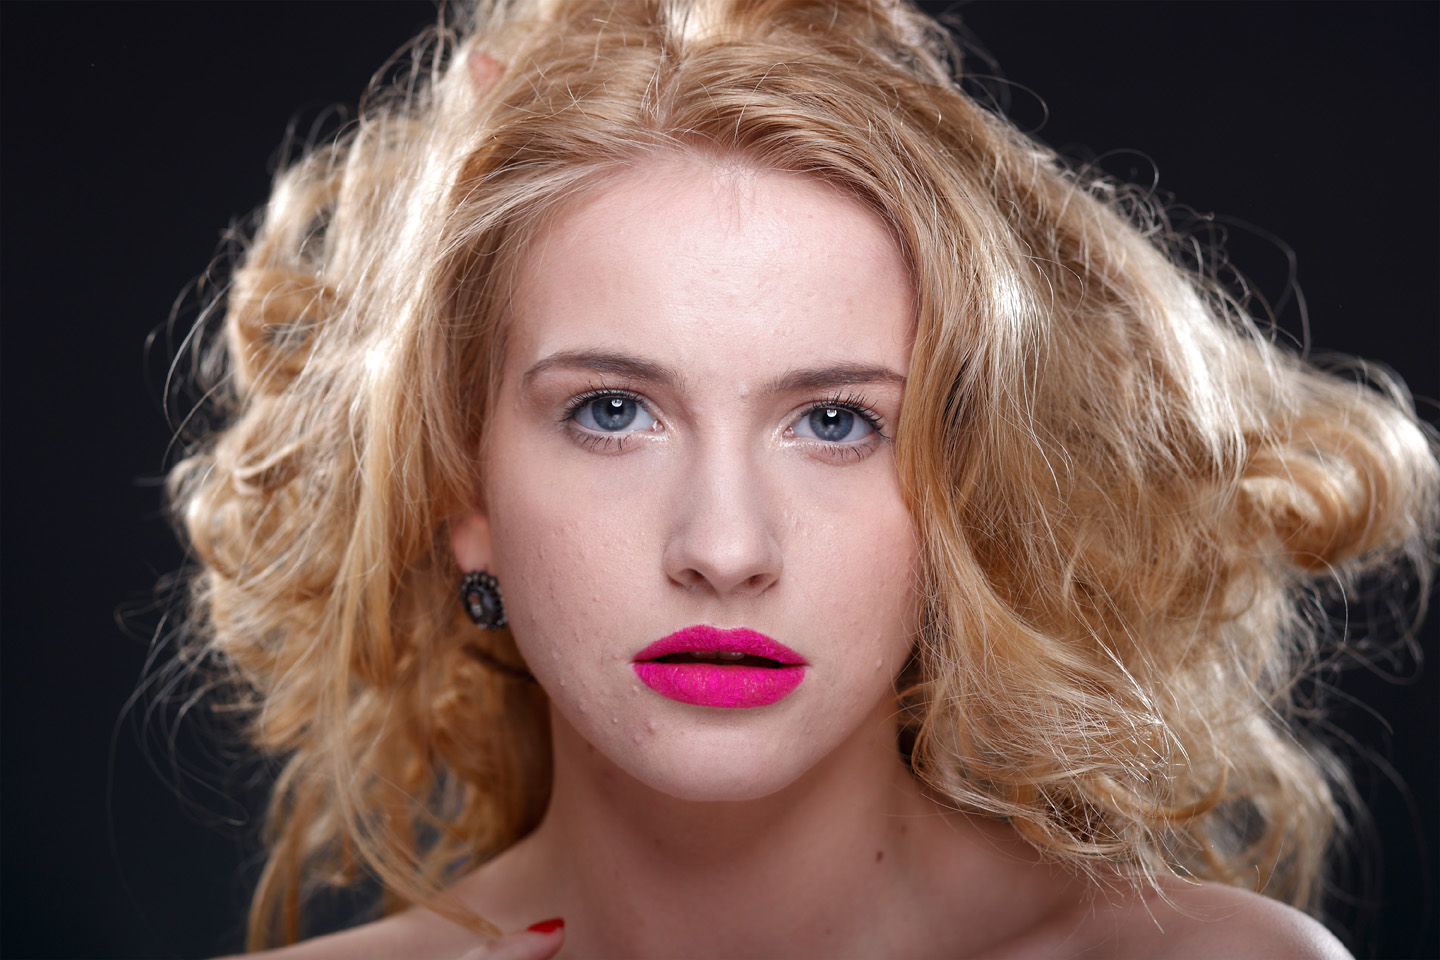
最终效果: