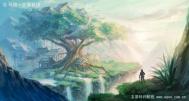
今天这篇photoshop教程将为大家介绍如何绘画一棵卡通圣诞树的方法。由于圣诞树上的装饰很多,所以绘画过程比较麻烦,但难度不大,希望大家喜欢。

1、新建文档800x600像素,背景填充#050043,建新层,用钢笔画出圣诞树的形状,填充白色。

2、添加图层样式。


效果如下。

3、建新层,前景色#4D80E8背景黑色,滤镜渲染云彩,添加蒙版,黑色径向渐变。
(本文来源于图老师网站,更多请访问http://m.tulaoshi.com/ps/)
4、建新层,用钢笔画出下图所示路径,填充#020353。

5、添加图层样式。

效果如下。

6、建新层,用钢笔画出其它路径,填充# 1038AA。

7、建新层,用白色柔角笔刷点几下,稍微高斯模糊一下,作为飘落的雪花。

8、建新层Tulaoshi.com,选择下图所示笔刷,设置画笔。


9、前景色白色用画笔涂抹,类似下图效果。

10、添加图层样式。

效果如下。

11、建新层,画一正圆选区,填充# 0375E0。

12、添加图层样式。


效果如下。

13、建新层,画一小些的正圆,白到透明直线渐变。

14、复制几个,改变颜色。
15、建新层,前景色#F5CE28画一个黄色的星星,用钢笔调整节点,使星星尖锐一些。

16、添加外发光样式。
17、建新层,用钢笔画下图所示路径。

18、转为选区,填充黑色,添加图层样式。


19、将填充归零,效果如下。

20、复制几层,旋转位移,效果如下,我们得到一个有明暗的五星。

21、建新层,用白色柔角笔刷点几下。

22、图层模式叠加,图层创建剪贴蒙版。

23、合并这3个星星层,复制几个,摆放位置。

24、复制一个星星,挪到圣诞树顶部,底部建新层,用白色大口径柔角笔刷点一下,作为星星的辉光。

25、建新层,用钢笔画出下图所示形状,填充白色。

26、添加图层样式。


效果如下。

最后,选择背景之上的云彩图层,用减淡工具加亮顶部星星周围区域,最终效果如下。