menghao170
2016-03-18 01:09
人生本是一个不断学习的过程,在这个过程中,图老师就是你们的好帮手,下面分享的灯光效果懂PS的网友们快点来了解吧!
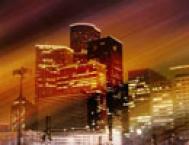
最终效果图

1、tulaoshi打开一个图片,或者你也可以自己绘制自己喜欢的一个:

2、新建立一个层,用钢笔工具绘制:

(本文来源于图老师网站,更多请访问http://m.tulaoshi.com/ps/) 3、转换为选区:

4、用白色到透明进行渐变:

(本文来源于图老师网站,更多请访问http://m.tulaoshi.com/ps/)
5、复制图层,然后执行高斯模糊,设置为3或者4都可以:

6、降低透明度为66%,原始图也降低透明度33%:

7、在上面添加东西点缀一下,作品完成,你可以创建出更好的效果: