本文我们将介绍如何用数码板手绘创建Photoshop画(图老师整理)笔,并将这个新画笔搬到Illustrator中。
步骤一
在Photoshop中新建一个文件,长宽分别是 80pixel × 275pixel,背景色是透明色。色彩模式是RGB。

步骤二
选择画笔工具,在工具选项栏中设置画笔。注意,我们要在画笔面板中选择笔压(Pen Pressure)选项,以便我们使用Intuos 2来绘画。

步骤三
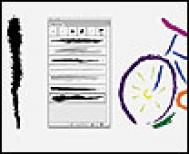
在工具选项栏中将工具模式设定成为 Dissolve在画面中央我们垂直地用压感笔画一个线条。注意在绘画中压力随着运笔的方向逐渐变化,因为Photoshop7和CS都支持intuos2的倾斜角度识别功能,对于画画的人来说无疑是一大强大的功能。如果不成功,可以按Ctrl+Z(Windows)或Command+Z(Macintosh)还原重新绘画。

步骤四
我们需要将这个线条变成 Illustrator可以使用的路径。首先,我们按住Ctrl或Comamnd直接在图层面板的Layer1上点按,产生一个具有画笔形状的选区。然后,把这个选区转换为路径。

步骤五
在 Photoshop中用路径选择工具选取整个路径。然后复制粘贴到Illustrator中。

步骤六
在 Illustrator中,用选择工具全选这个路径。从画笔(Brush)面板的选项菜单中选择“新建画笔”(New Brush…) 。在画笔设定对话框内进行设置。

步骤七
最后,我们就可以用这个在 Photoshop中的画笔在Illustrator绘画了。