本例的最终效果:
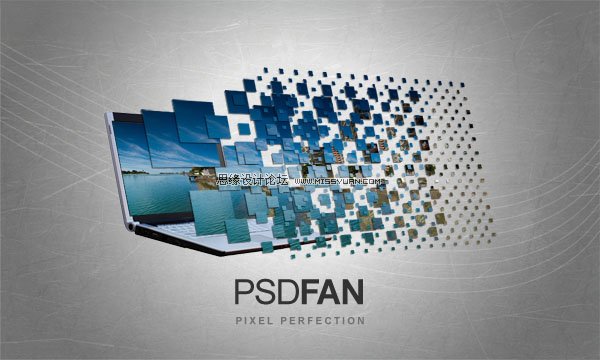
Step 1:
Open up a new document 1000px wide and 600px high. Then paste an image of a laptop into your document. Create a new layer set called ‘laptop’ and put the layer containing your laptop image into this layer set.
1.新建宽1000px、高600px的新文件,把笔记本电脑的素材图片导入舞台,然后将其所在文件夹重命名为Laptop。

Step 2:
Now I want to create a vanishing point for the screen of the laptop. Many Photoshop users, including myself, don’t yet have Photoshop CS2 or CS3, so this tutorial won’t utilize the useful vanishing point filter available in these versions. Instead, we’re going to manually create a fake vanishing point.
2.鉴于很多读者并没有将ps软件更新到CS2/CS3,所以我们将用手工制作屏幕的消失点。
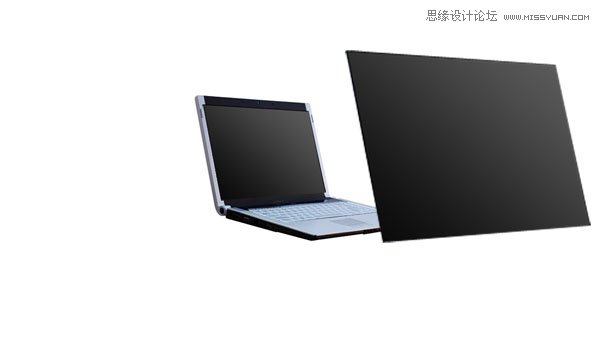
Select the screen part of your laptop using the lasso tool. Then copy your selection, create a new photoshop document, and paste in the selection. Go to imageimage size and double whatever your image size is. In this case the original screen was 204px wide, so I simply doubled this to 408px.
使用索套工具取得笔记本电脑屏幕选区,Ctrl+C复制,然后新建图层并粘贴,然后将其扩大一倍。
本例屏幕宽度204px,我们把它扩展到408px。
Then paste this new larger screen back into your original document. Positioning it roughly where you think it looks good in terms of perspective.
我们重新摆正扩大后屏幕的位置如下图所示:
Step 3:
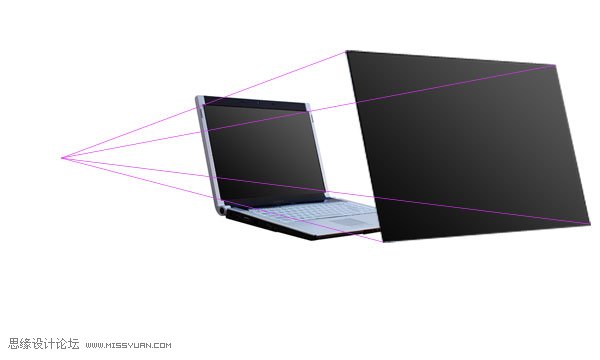
Now select your line tool and a nice bright color for it and draw lines each corner of your large screen through to the matching corner of the original screen and past to a vanishing point. Do this with each corner of the laptop screen, until you have something like the image below:
3.我们来使用亮色创建参考线,沿两屏幕的对应点绘制,知道4条先汇聚于一点。
Step 4:
Now duplicate your larger laptop screen and select editfree transform. Then in the menu near the top of your screen (see diagram below) change the W (width) and H (height) percentages from 100% to 90%.
4.复制图层,自由变换,大小调整为原尺寸的90%。
![]()
Move this resized image so that it matches up with the perspective lines that you created earlier. Be sure to place this resized screen layer behind the largest screen layer but above your original laptop photo layer.
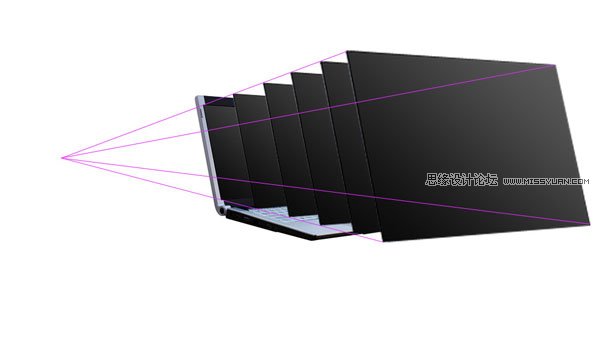
Repeat this process of duplicating/resizing/aligning using the resizing percentages of 80%, 70%, and 60% from your large screen layer. Remember that your original laptop photo is 50% of this large screen layer.
This is how your image should look after you have created this new screens and lined them up correctly:
使用相同的办法依次创建,80%、70%、60%这三个新图层。
Step 5:
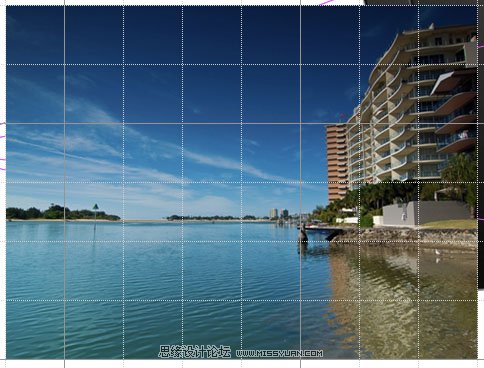
Now create a new layer set called ‘photo 1′. Paste in the image that you want to manipulate. View a grid over your image and then use the free transform tool to resize your photo to fit nicely into the grid squares. Make sure that the photo fits into an even number of grid squares for it’s height and width. In this example the photo is resized to be 8 grid squares wide and 6 high.
5.新建图层,命名为photo1,把我们要操作的图片素材置入,显示网格。
使用自由变化工具,调整图片贴合网格,本例刚好是8个网格宽、6个网格高。
Step 6:
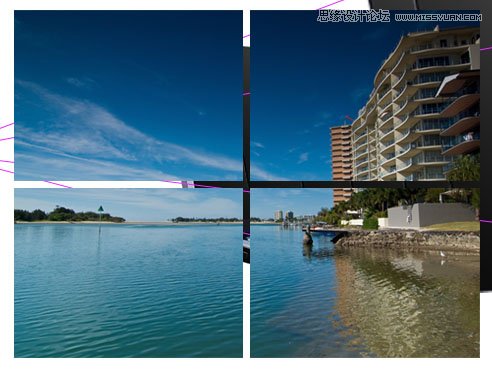
Now duplicate your photo layer, as you want to retain a copy. Be sure to hide the duplicate layer and go back to your original. Select your single column marquee tool from your selection palette (it’s under the Rectangle and Elliptical marquee tools). Using your grid click the grid line that marks the center point of your image and delete a central 1px column. Then switch to the single row marquee tool and do the same to delete a 1px line across the center of your image. You want these lines to be a little larger than 1px though, so grab your magic wand tool and click somewhere outside of your photo image. This will select all of the area surrounding the photo, but also the 1px lines cutting through it. Then go to selectmodifyexpand and expand the selection by 3px. Then hit delete to achieve an effect like the image below:
6.复制photo1图层,重命名为"photo2",作为备份,隐藏"photo2".
来到photo1图层,选择单行矩形选择工具‘,沿着网格线依次删除1px的内容,得到如下图所示效果。
如果觉得1px的间隔太窄的话,可以取得选取后,通过选择 -修改-"扩展" 值设为3px,获得更大的选区,然后删除内容,获得更大的间隔。
Step 7:
Now hide all of your duplicate laptop screens except the smallest one (the one that is 60% of the size of your largest). With your photo layer selected (the one you’ve just cut up using the grid) go to edittransformdistort and distort the photo so that it fits exactly over this smallest laptop screen image. To fit it well you make need to reduce the layer’s opacity to allow the screen underneath to show though. The image below shows the transformed photo layer at 57% opacity, allowing some of the screen underneath to show through. Be sure to move this photo layer below the next largest laptop screen layer, so that it is mostly covered by it.
7.现在隐藏所有的图层仅保留最小的一个图层(60%屏幕尺寸那副)。
选中photo2,编辑-变换-扭曲,使图片复合屏幕大小。
然后把图层的不透明度设为57%,让底层的内容区部分可见。

Step 8:
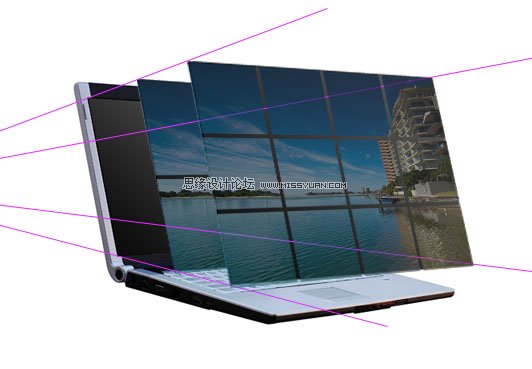
Now go back to your original photo layer. Duplicate it again, and using the same technique as before with the single row/column marquee tools cut it into 2X2 squares using the grid. As the image is 8 squares wide and 6 high, this will result in 12 squares each 4 grid squares in size. Again, use your magic wand tool to select the area around the photo and the lines cutting through it, then expand your selection by 3px and hit delete. Then use the distort transform tool to fit your new image to the 2nd smallest laptop screen. Remember again to move this photo layer behind the next largest laptop screen layer. The image below shows the result of this, with the photo layer again at 57% to allow me to nicely fit it to the screen image beneath.
Step 9:
(本文来源于图老师网站,更多请访问http://m.tulaoshi.com/ps/)Now repeat these steps, but make your squares half the size each time. So using the grid that will then be 1X1, 1/2X1/2, 1/4X1/4. To cut the photo into 1/2 and 1/4 grid square pieces I would recommend just using your judgement, but if you want to be really picky you can use rulers. Another tip is to duplicate the photo after cutting it into the squares, as this will save you having to repeat the slicing process right from the start each time.
9.重复此过程,确保每次单个方格的尺寸是上次的一半即可。
所以我们使用的网格单位依次为1*1、1/2X1/2和 1/4X1/4。
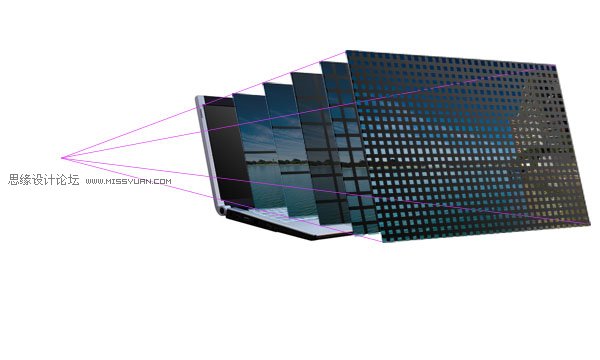
Step 10:
Here is the same image but with all duplicate laptop screen image layers hidden and all photo layer’s with 100% opacity.
10. 隐藏所有屏幕图层。
所有photo图层不透明度设为100%.
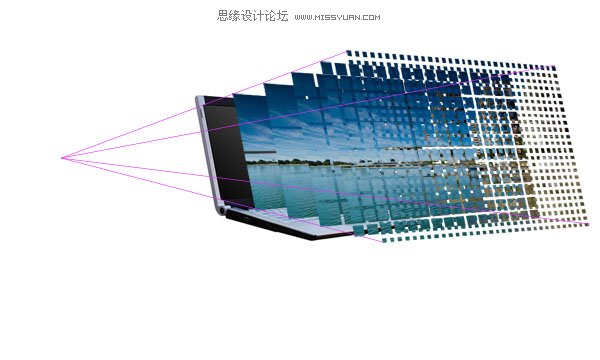
Step 11:
Now is the time-consuming part. Hide all of your photo layers except for your smallest photo layer. Use your magic wand tool set at 255 tolerance to select entire squares and delete them to leave a checkerboard effect. To do this simply go down each column deleting squares, being sure to leave a square remaining between each two that you delete. Then move onto the next column and repeat, but make sure that no squares you delete are next to an already deleted square, deleted squares should be diagonal to each other. The image below shows the various stages of doing this with each photo layer:
11. 现在到了最费时的一步,隐藏所有的photo图层,除了最小尺寸的一张。
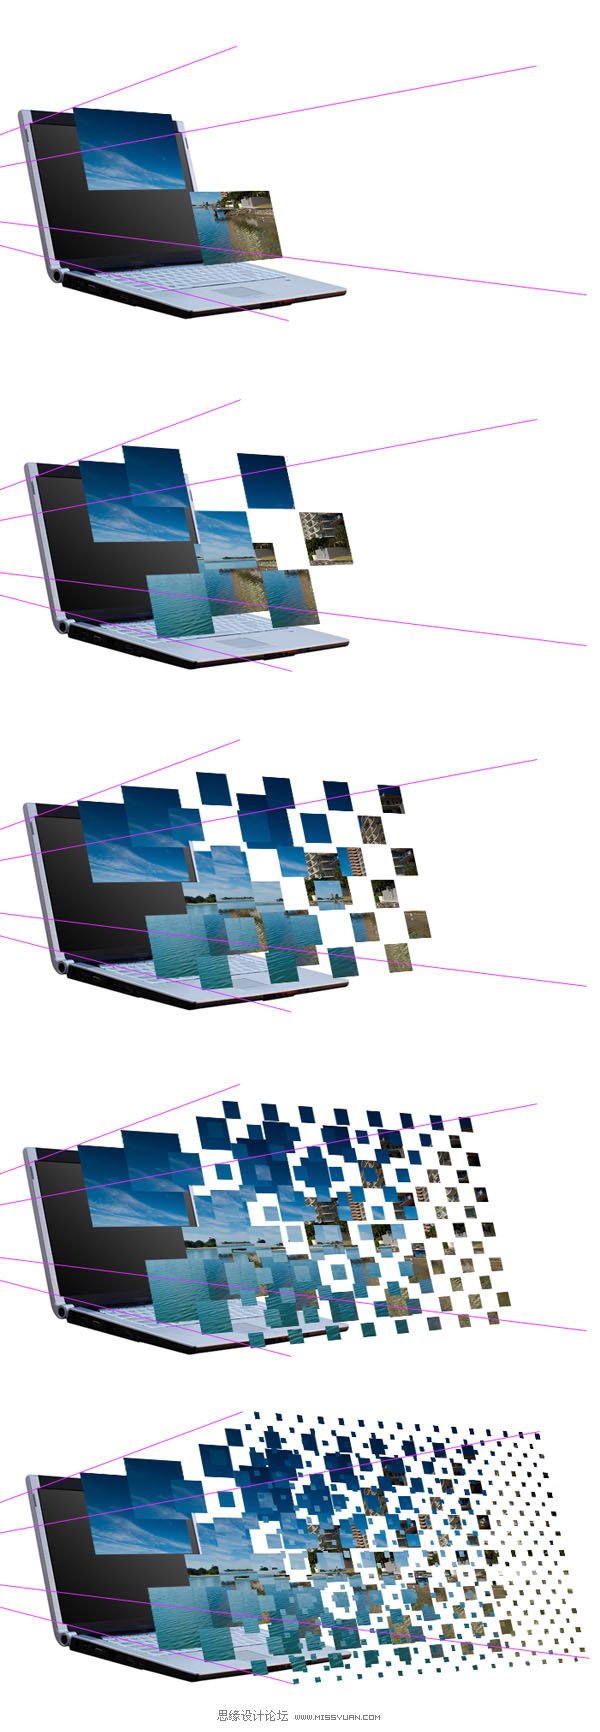
Step 12:
You should still have your original photo layer, as it was duplicated for safe keeping near the start of the tutorial. Duplicate the layer again, and move it so that it is the first layer above your laptop image layer. Then go to edittransformdistort and fit the photo nicely over the laptop screen. Then hide all of your vanishing point guidelines and make sure that all of your checkerboard photo layers are visible. Seeing as all these layers are within the same layer set select the layer set and drag it to make the graphic more central in your document.
12. 打开我们之前备份的photo原图,复制图层,变换其大小后紧贴笔记本屏幕。
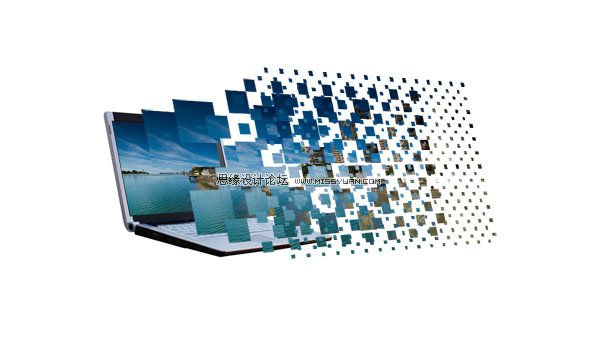
Step 13:
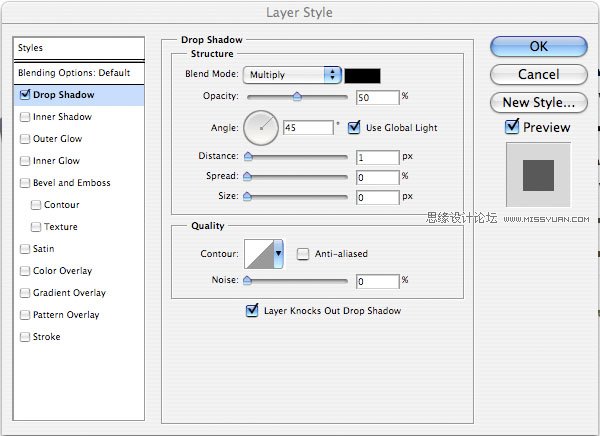
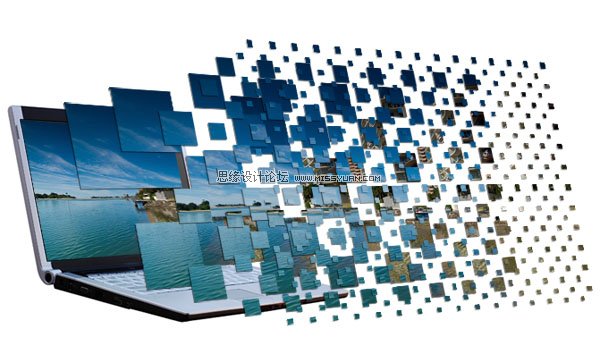
Right click on one of your photo squares layers and click blending options. Apply the drop shadow settings shown below. Then once this has been applied right click on the drop shadow shown in your layers palette, select ‘copy layer style’ and paste the layer style to all of your other photo squares layers. The outcome is shown below:
13.为photo图层添加图层样式:投影参数设置如下:
技巧:为一个图层添加样式以后,右击复制图层样式,然后把图层样式粘贴到其他图层上,这样可以为图层快速添加图层样式。
Step 14:
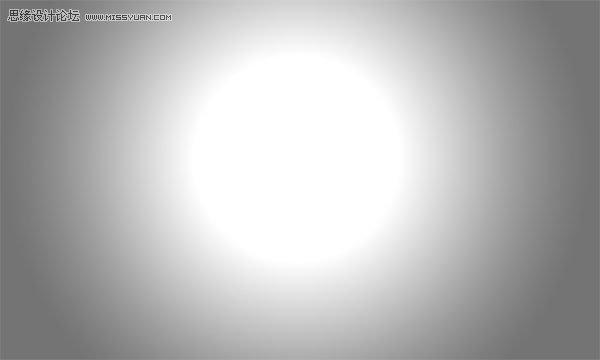
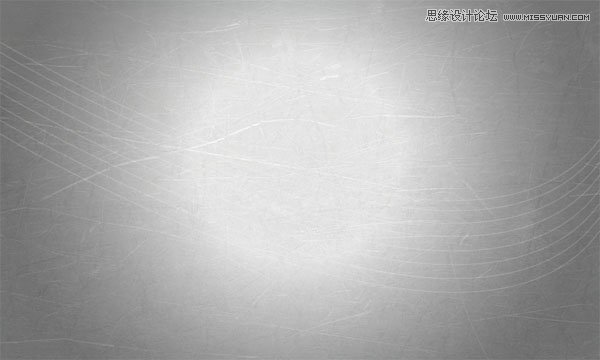
Now create a new layer set below your laptop/photos layer set called ‘background’. Hide your laptop/photos layer set. Create a new layer and fill it with a white to light gray radial blur.
14.新建文件夹命名为backgroud。
隐藏其他图层,创建镜像渐变如下图。
Step 15:
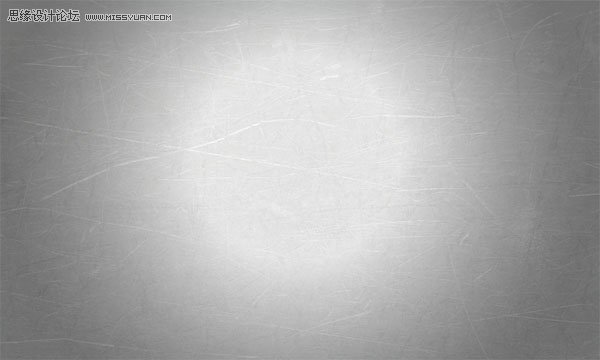
Paste a metal texture onto a new layer above your radial gradient layer and reduce it’s opacity to 20% for a subtle textured effect.
15. 粘贴纹理图片到舞台,置于background上方,降低不透明度为20%。
Step 16:
Now create some bendy lines across your background using the pen tool. Be sure to have a white 1px brush selected and then once you have created your bendy pen line right click on it and select ’stroke path’. Then simply duplicate your line layer until you have multiple white lines across your background. I merged all of my line layers together and reduced the merged layer opacity to 30% for a more subtle effect.
16.使用钢笔工具创建一组1px白色的纵贯背景宽度的曲线。
And we’re done!
To finish things off I added some cool text. Click the image below if you want the full sized version.
这是我们最终的结果。


![HP笔记本电脑创意广告设计欣赏[3P]](http://img.tulaoshi.com/201603/23/7ad5b2c58cd0522810eeaafb3a21ed61_thumb_189.jpg)


