下面图老师小编要向大家介绍下PS合成天空飞翔的古老树屋,看起来复杂实则是简单的,掌握好技巧就OK,喜欢就赶紧收藏起来吧!
教程重点是漂浮的绿岛部分制作。过程:先截取球体的一部分作为岛的底部,然后用一些绿植及树木装饰,做成真实岛屿的感觉。最后添加一些自己喜好的元素,再调整好整体颜色即可。
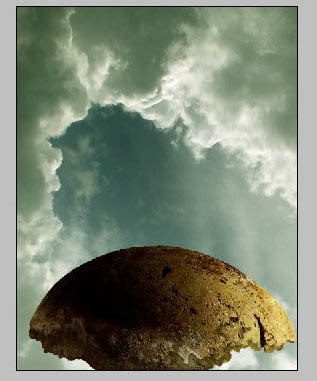
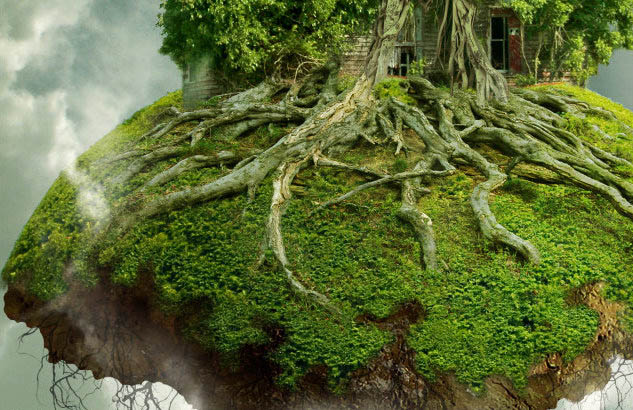
最终效果
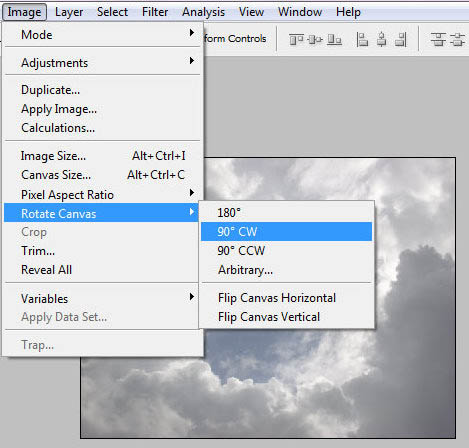
1、下载好尺寸为1120px*840px命名为”云”的图片素材后,将其在Photoshop中打开。旋转画布,执行 图像 旋转画布 90度(顺时针)。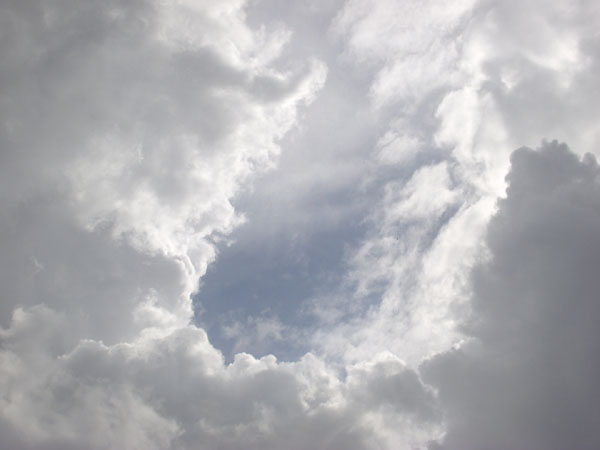

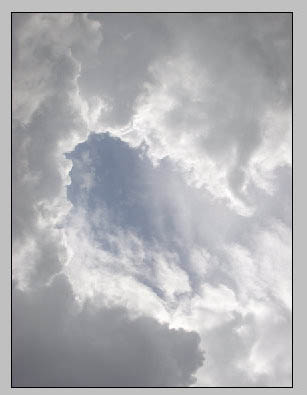
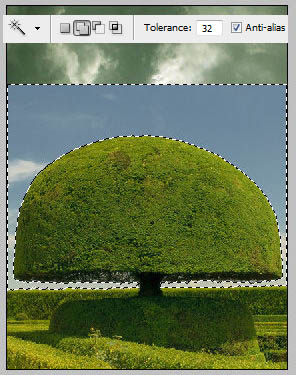
2、接下来使用矩形选框工具 ,选择固定大小,宽度为1104px高度为1428px ,然后像下面示图中一样画一个选区。执行图像 裁剪。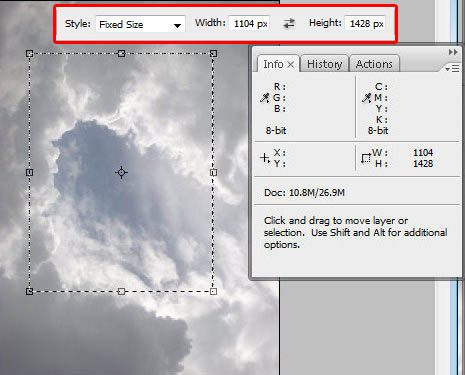
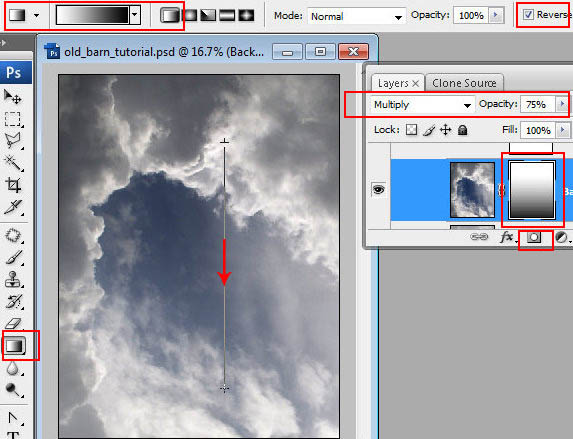
3、将”云”图层复制一层,然后在复制的图层上执行 图像 调整 自动对比度,接着将该图层的图层混合模式设置为正片叠底,不透明度设置为75%。现在,点击在图层面板底部的 小按钮给图层加蒙版,保持蒙版的选中状态并为其填充黑白线性渐变。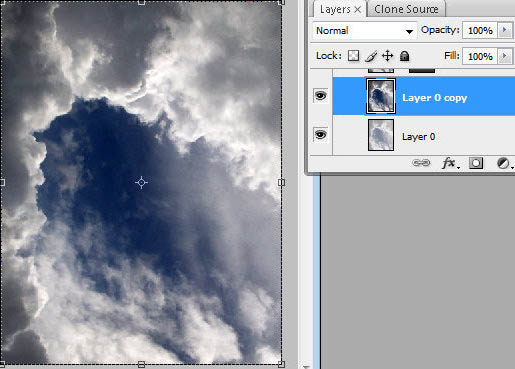
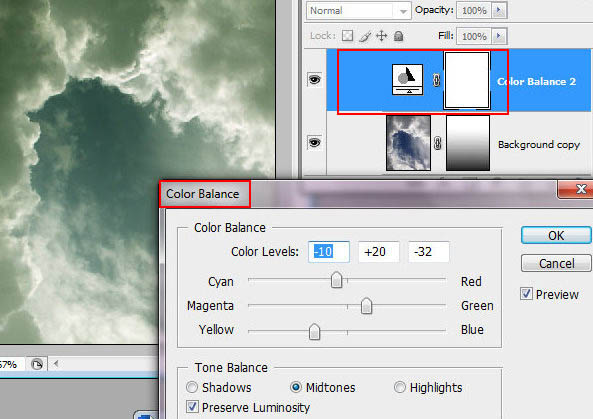
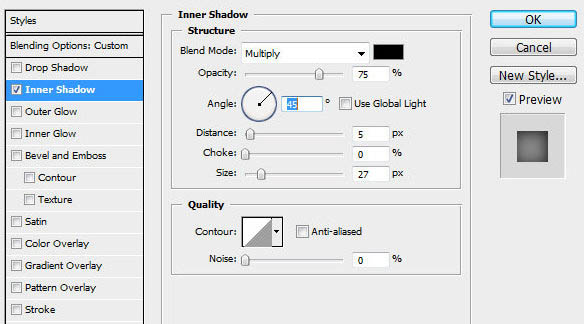
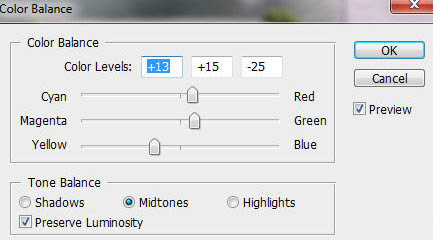
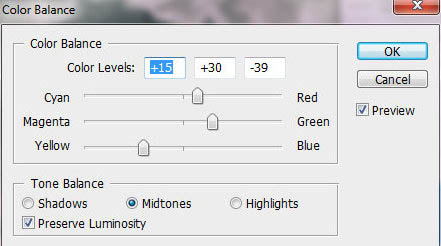
4、单击图层面板底部的这个 小图标新建一个调整图层。选择下拉菜单中的色彩平衡选项。接下来按照下图参考参数进行设置。
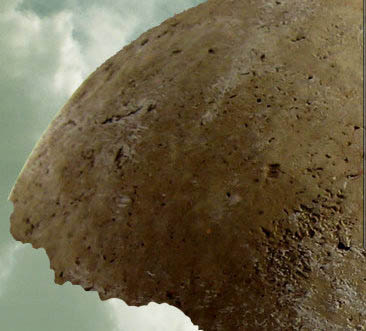
5、插入素材中的”土壤”图层,你可以使用魔棒工具从有背景的图片素材中选中球体的外部部分之后再将其删除。接着,执行 编辑 变换 旋转 ,将球体的暗部旋转到图片的左边。

6、点击这个 为”土壤”图层添加蒙版,接着用黑色圆形小笔刷涂抹掉下图中选区选中位置。你也可以使用白色笔刷恢复你刚才抹掉的轮廓。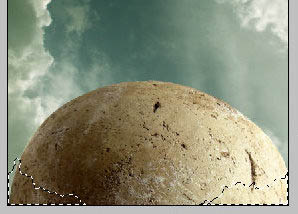

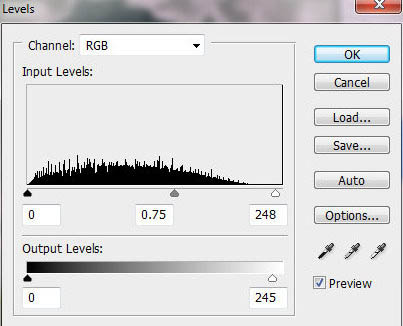
7、点击图层面板下方的这个 图标新建调整图层,选择色阶。为了使色阶的应用只发生在球形的范围内,我们右击调整图层创建剪切蒙版。按照下图参数调整色阶数值后,使用大的软笔刷抹除蒙版的左边。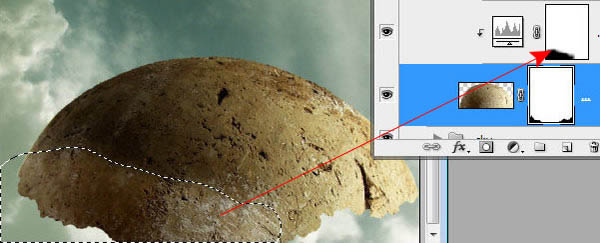

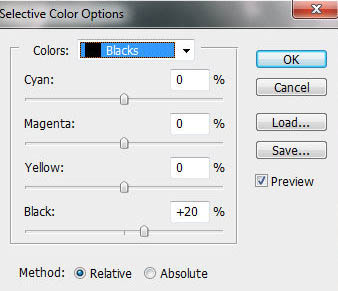
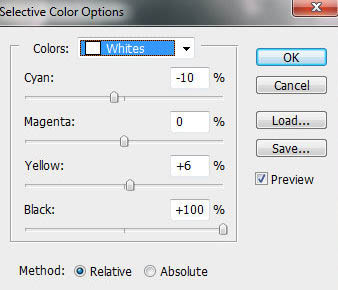
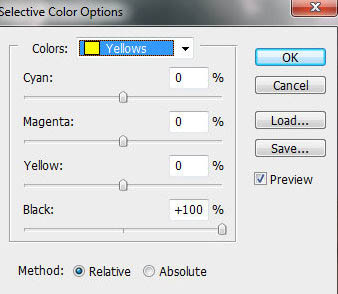
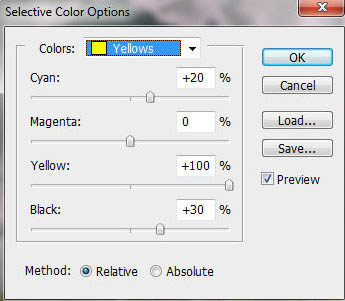
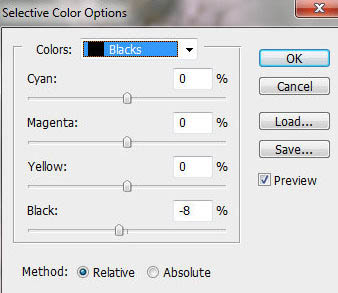
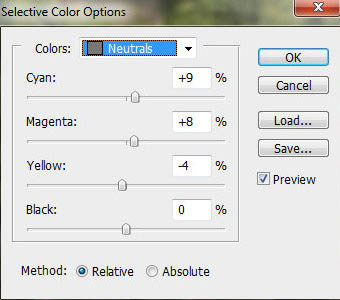
8、新建一个调整图层,选择”可选颜色”并创建剪切蒙版,接着按照下图参考参数设置好。然后使用软笔刷对蒙版进行加工,制作出疏松、参次不齐的纹理。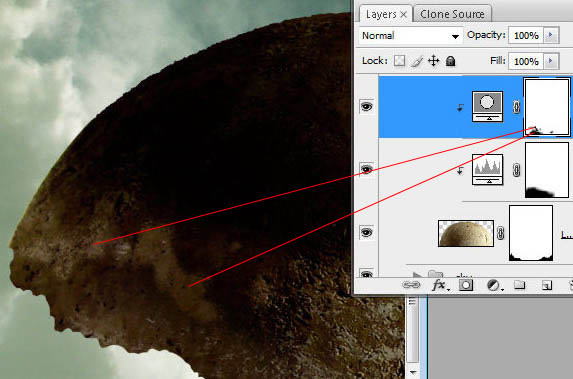

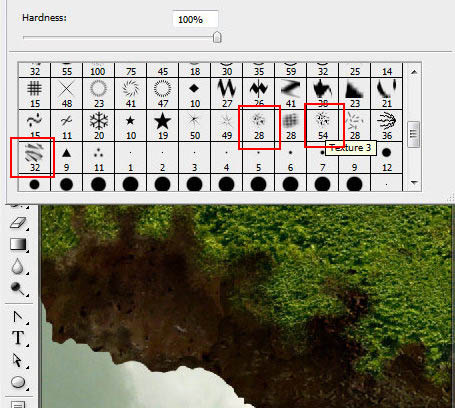
9、新建一个空白图层,并为其对下一图层创建剪切蒙版。使用常规圆笔刷以及在画笔预设中的”纹理3″笔刷,在球形的底部画一个不规则的轮廓,如下图。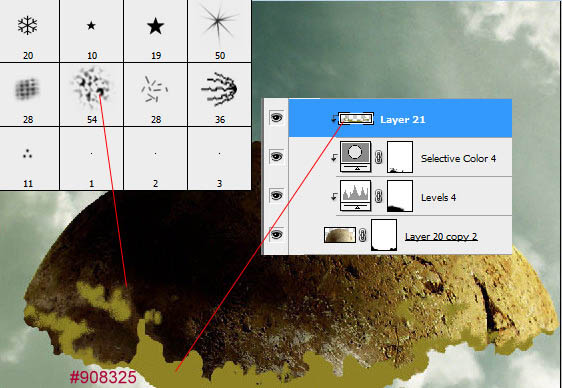
10、将步骤九创建的图层的混合模式设置为正片叠底,不透明度为60%,再按照下图参考参数设置内阴影。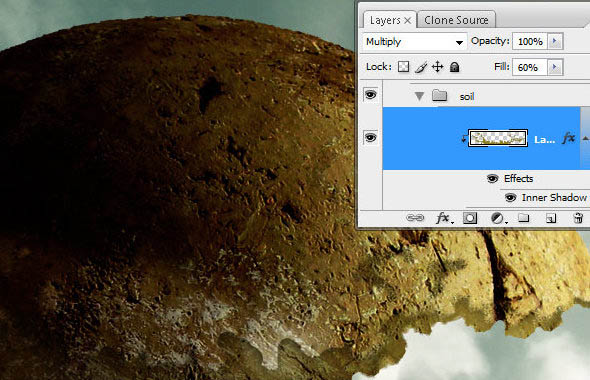
11、插入下载好的”绿色纹理”素材图片,使用魔棒工具 选择蓝天白云的区域。多点几下魔棒工具使蓝天白云都被选出来。接着删除选中的蓝天白云选区,再用橡皮擦工具抹掉图片的底部,如下图示例。
12、执行编辑 变换 变形,使用变形工具改变绿树的形状,使其更接近球形。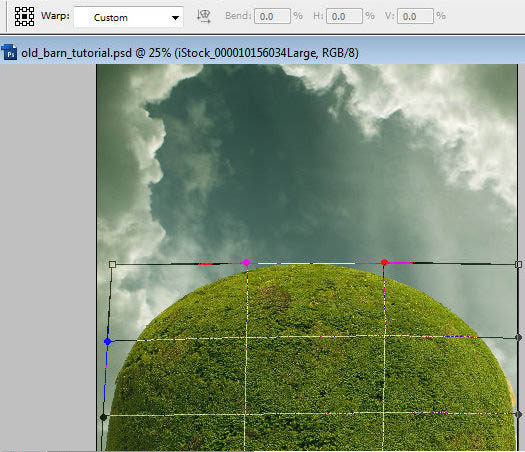
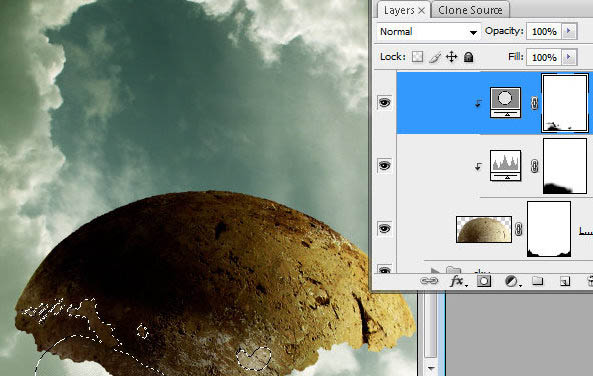
13、为”绿球”图层添加蒙版,再用橡皮擦工具抹掉图片的底部。你可以使用Photoshop的画笔预设中有纹理的笔刷来制作不规则的弯曲的轮廓。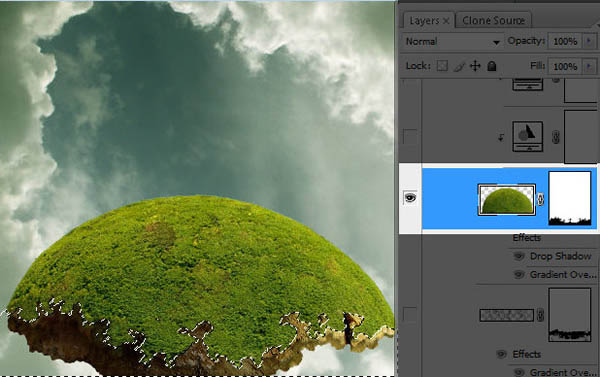
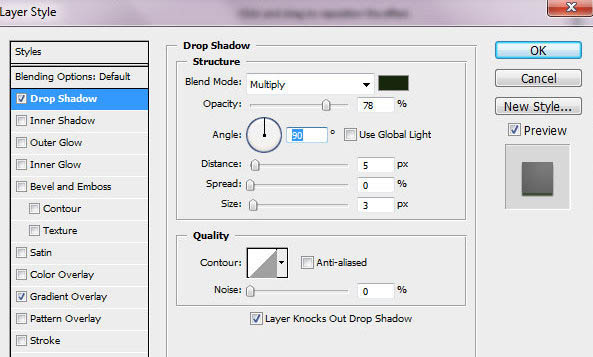
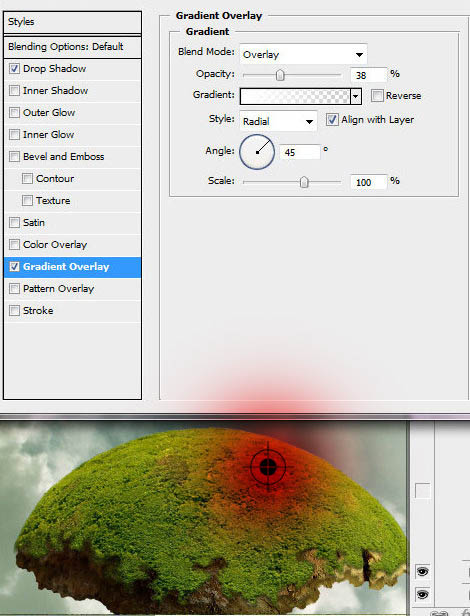
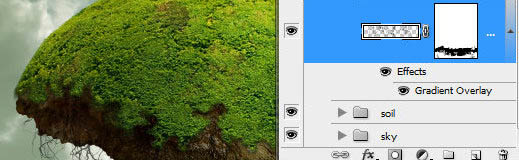
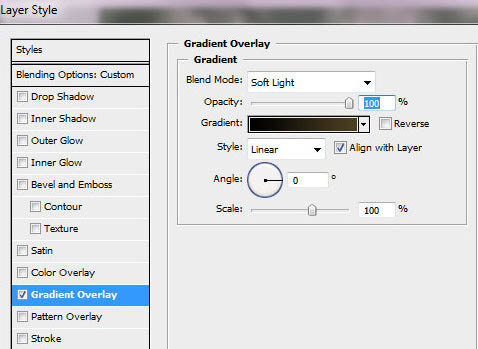
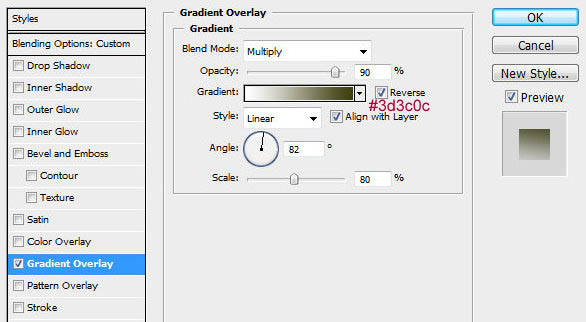
14、按照下图的参考参数为该图层添加上渐变叠加以及投影的图层样式。渐变区域的中心就在下面示例图的第二章中的红色位置。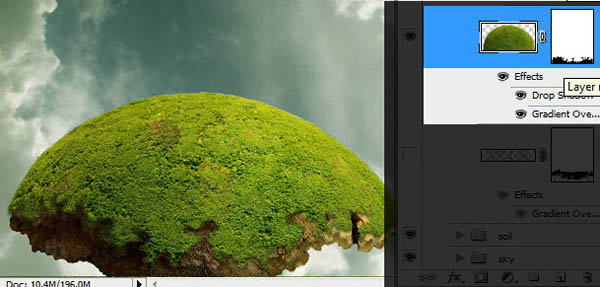
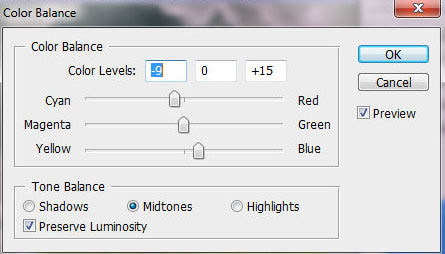
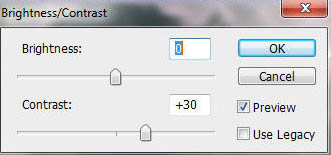
15、为”绿球”图层添加新的调整图层”色彩平衡”和”亮光/对比度”,再为它们创建剪切蒙版。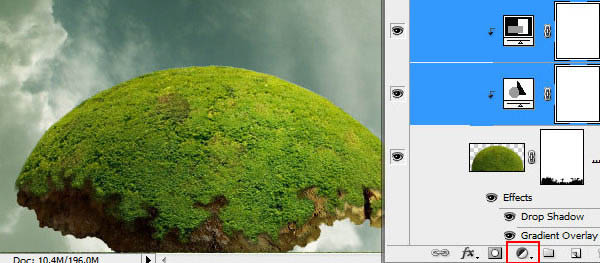
16、选择模糊工具,使用小的强度为100的软笔刷加工绿球形状。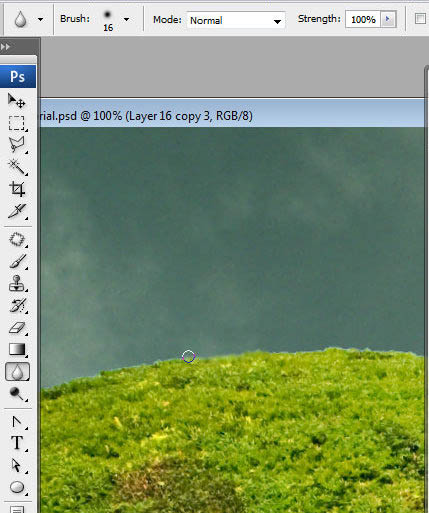

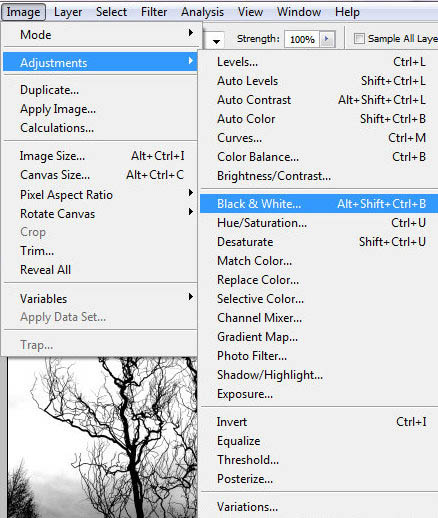
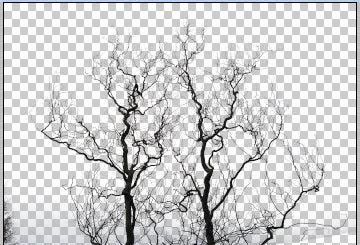
17、打开”树枝”素材图。执行图片 调整 黑白(预设为默认值)使图片变成黑白。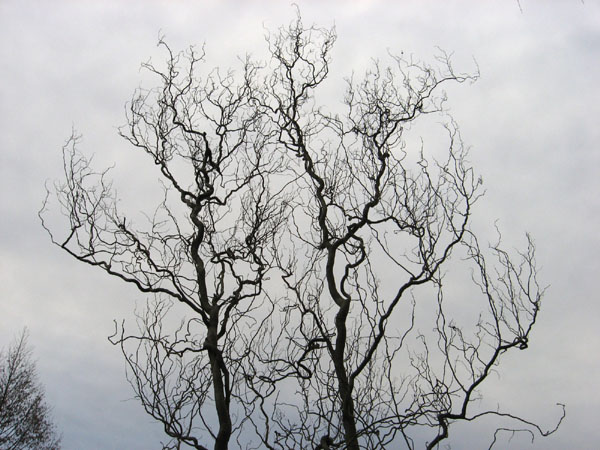

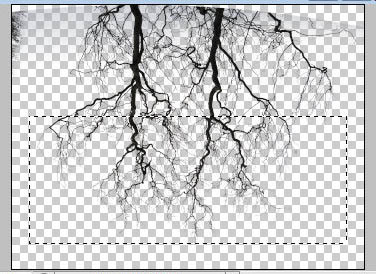
18、可以参考下图数值来改变”树枝”图层的色阶值,调整使树枝更黑,背景更白来增加它的对比度。不需要在意图片的底部部分,我们只需要使用图片的上半部分。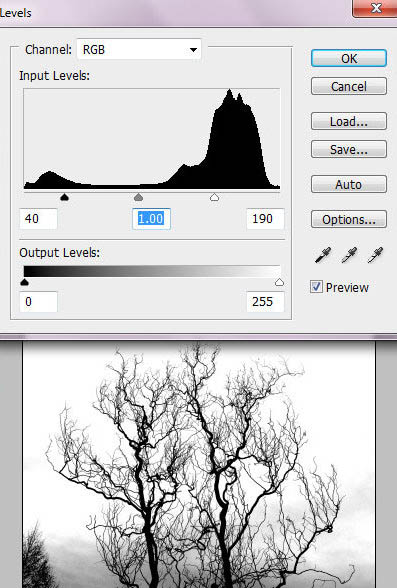
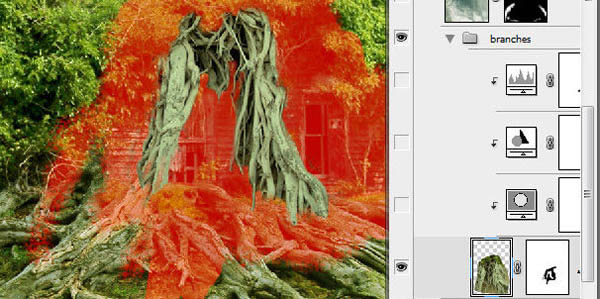
19、接着,将背景载入选区。 执行 选择 色彩范围。将颜色容差设置为100,接着将取样吸管工具在白色地方点一下,再确定。将选区删除。这样,你就可以在这个透明的背景上得到黑色的树枝了。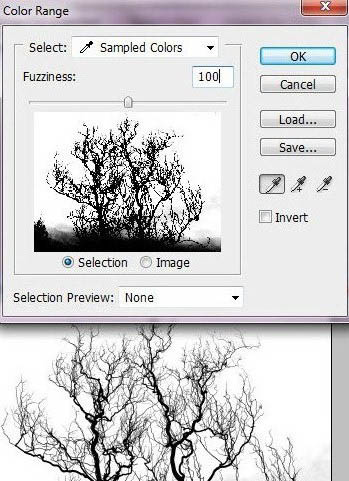

20、将图层垂直翻转。 执行 编辑 变换 垂直翻转。选择树枝的底部并且复制选区。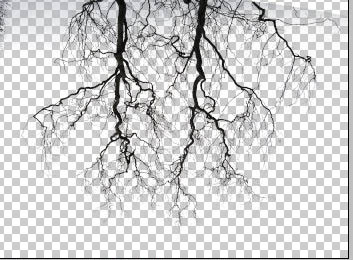
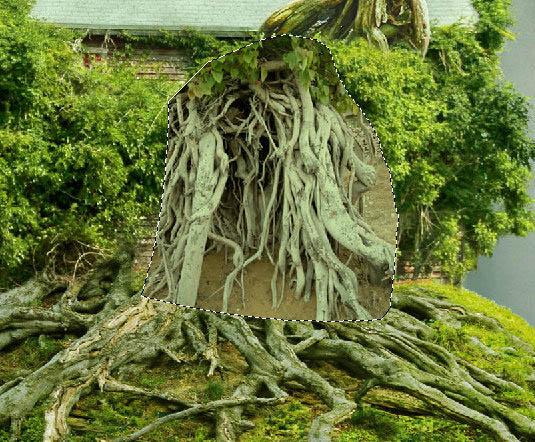
21、将刚才复制好的树干放到”土壤”的图层之上,”绿球”层之下。再用橡皮擦工具抹掉超过土壤球外围的树枝。如下示图。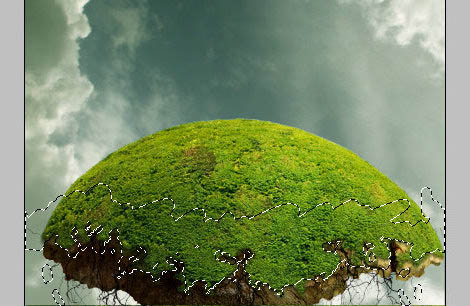

22、为树枝图层添加正片叠底的图层样式,将不透明度改为60%。再按照下图参数给其添加上渐变叠加的样式效果。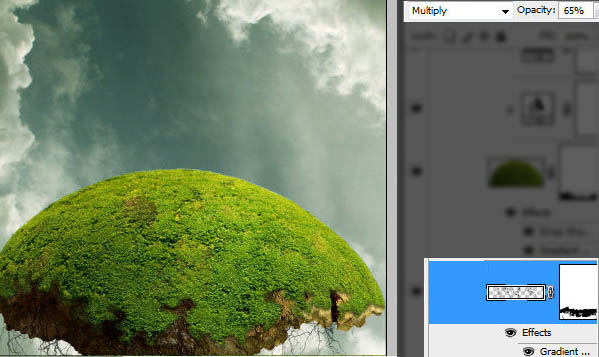
23、插入”老畜棚”素材图片。使用之前用过的添加蒙版的方法抹除选区,这会对你在区域抹除多次有帮助,黑色的笔刷用来抹除,白色的用来恢复。为了使老畜棚的的底部轮廓更加平滑,你可以使用透明的有纹理的笔刷进行加工。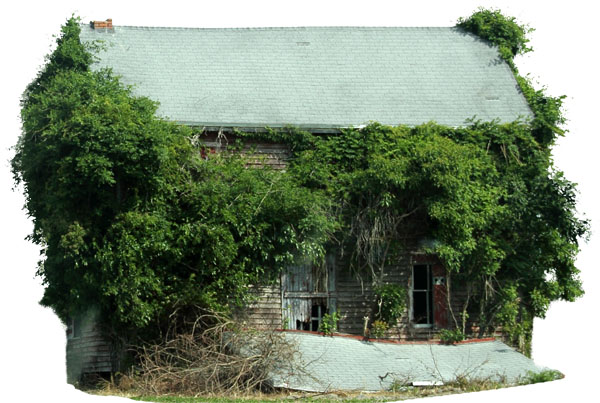


24、分别创建以下的调整图层,它们是”色相/饱和度”、”色彩平衡”、”色阶”、”亮度/对比度” ,请参考下图数值进行设置,也可以自己尝试不同的数值,也许会有更好的搭配。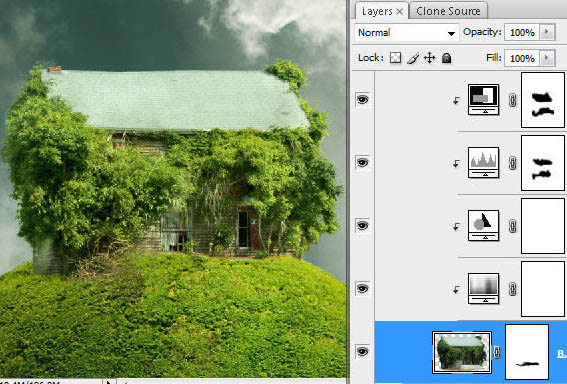

25、使用大的软笔刷抹掉调整图层”色阶”和”亮度/对比”在下图中的选区位置。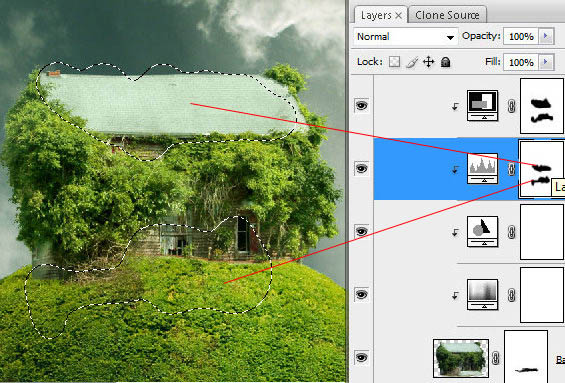

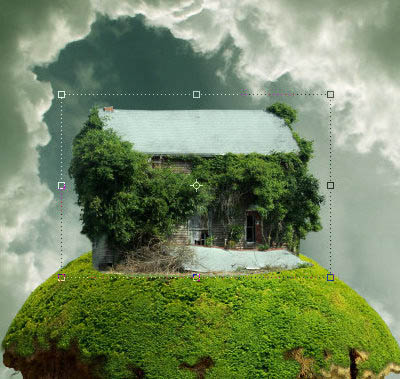
26、做到这里,你的效果图应该像下图这样。
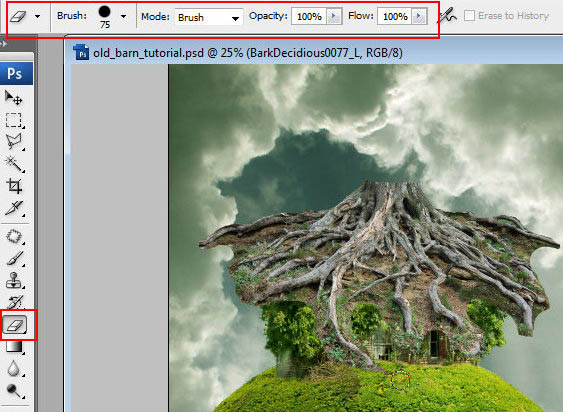
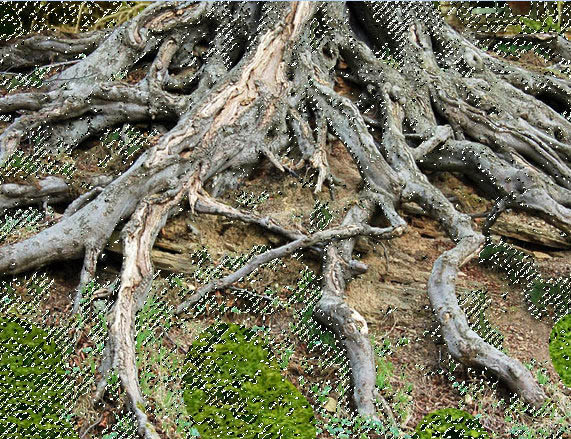
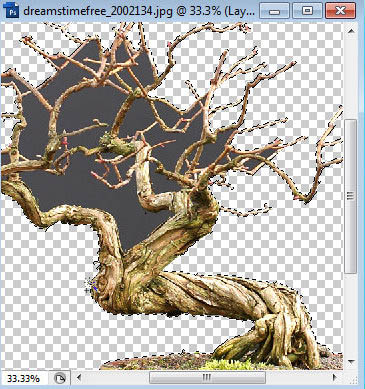
27、插入”根”素材图片,使用圆形橡皮擦工具抹除背景。执行 编辑 变换 自由变换 ,将”根”图层变换后填到绿色球的形状中去。
28、为”根”图层添加蒙版,使根图层的缩略图保持选中状态,执行 选择 色彩范围 ,接着使用取色吸管工具点一下下图中圈中的绿色的位置,然后确定。你会得到如下图中的那样的选区。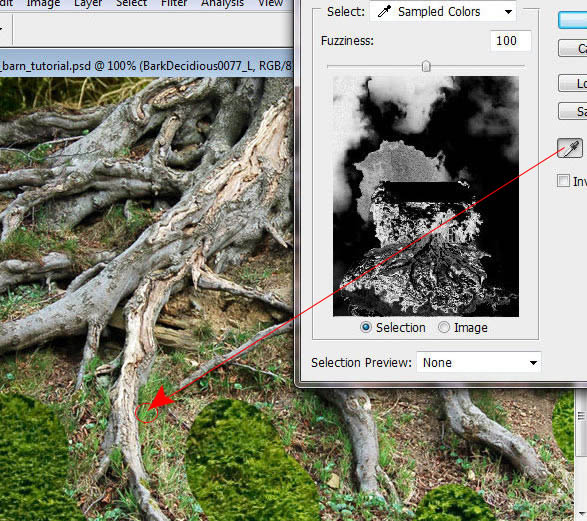
29、保持上个步骤的选区不变,这次选中”根”图层的蒙版层(提醒下,在步骤二十八里选中的是”根”图层而不是根的蒙版层),并且抹掉根上的绿点。接下来选择色彩范围,然后使用取色吸管工具点一下除了根颜色外的其他颜色(黄色,淡综色)如下图,载入选区。再次抹去背景的小点,不要抹掉根部。现在来创建一个临时的白色底层看看效果怎么样。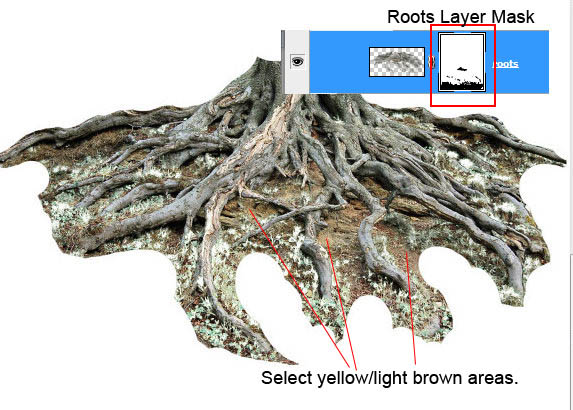
30、将上一步重复几次。最后,你可以使用有纹理的笔刷在没有色彩范围的选区下抹除和修改根部的轮廓。背景不需要完全的清除。接下来你可以使用扭曲变换改变根的形状,使其更接近球形。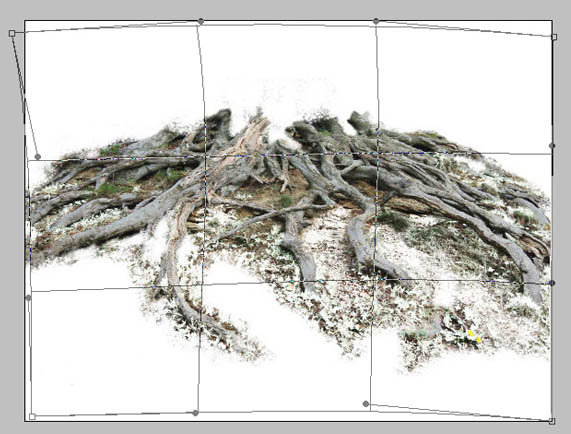
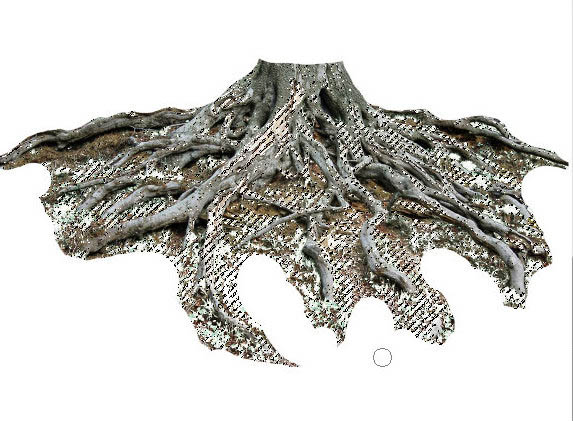
(本文来源于图老师网站,更多请访问http://m.tulaoshi.com/ps/)31、去掉之前建立的临时的白底图层,效果应该是这样的。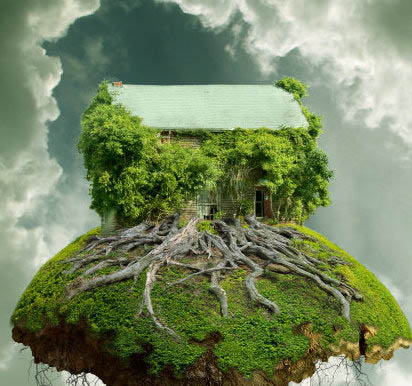
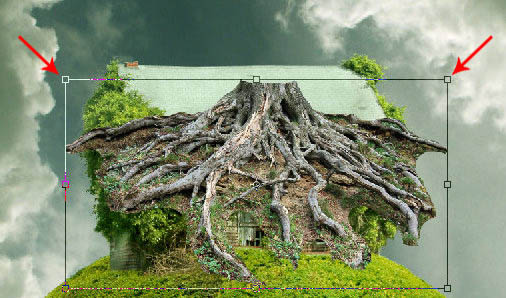
32、为了调整图片的亮度和色彩明暗,我们来创建以下调整图层,它们是”可选颜色”"色彩平衡”"色阶”。使用软笔刷抹除”色阶”调整图层的左边和右边,使其变得模糊一些。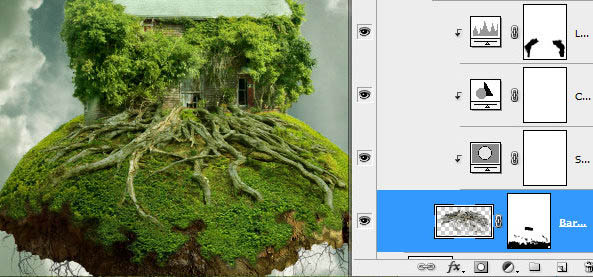

33、在”根”图层上新建一个图层,载入”绿球”图形的选区,填充任意色彩,并将其填充设置为0。接着,将之前做好的”绿球”图层样式复制到这个图层上。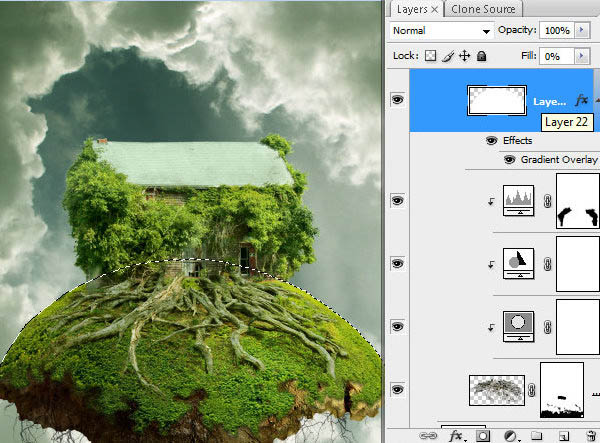

34、打开”树”的素材图片,解开背景的锁,使用魔棒工具 选出图片的背景选区,并将其删除掉。接着使用橡皮擦工具抹除图片的底部。

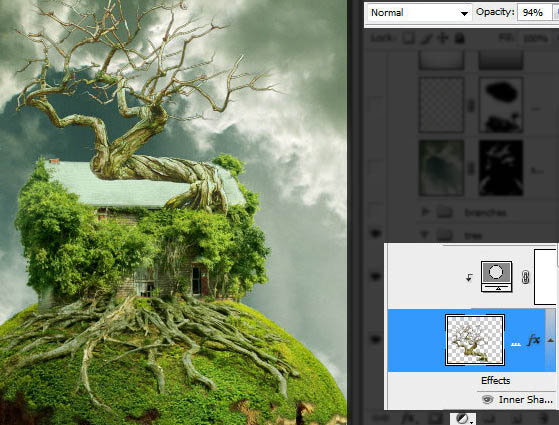
35、将背景透明的”树”图层放到所有图层之上,把不透明度设置为94%,添加调整图层”可选颜色”,并且添加上内阴影的图层样式。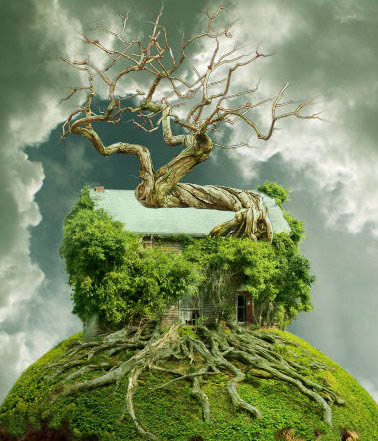


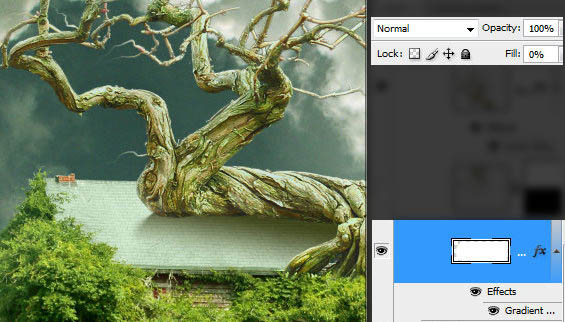
36、为了给屋顶添加阴影,我们在”树”图层下方创建一个图层,并且画上如下图中的形状,然后使用涂抹工具加工左边边缘。将填充设置为0,然后添加渐变叠加的图层样式。
37、插入”根2″图片素材,按照下图指示抹除掉红色区域。

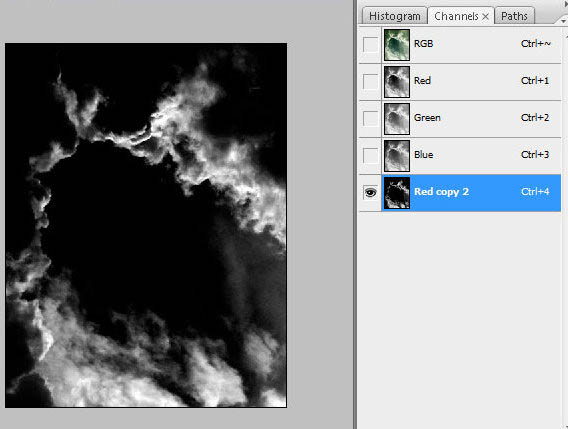
38、创建以下调整图层,分别是”可选颜色”"色彩平衡”"色阶”。使用圆形软笔刷涂抹”色阶”调整图层。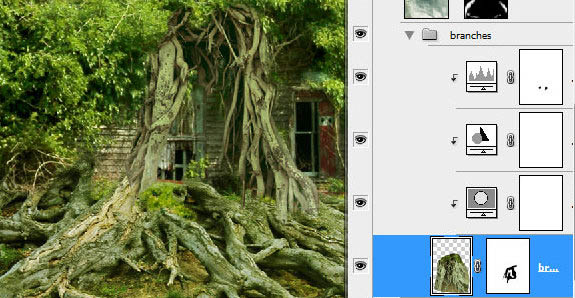

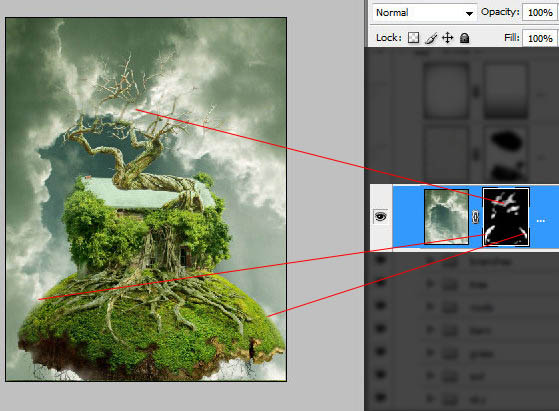
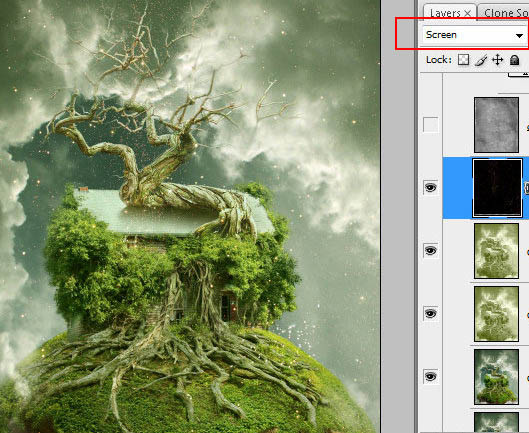
39、回到最下面的”云”图层。将”云”图层以及它的调整图层放到一个组里。复制这个组,并将其合并。接下来,将合并的图层放置于所有图层的最上面。为图层加上蒙版并填充黑色。然后选择半透明的白色圆形软笔刷(不透明度为16~20%),并且修复一些接近树的树枝顶部的区域,以及绿球的轮廓。可以参考下图中红色区域部分。修复的区域应该是透明的。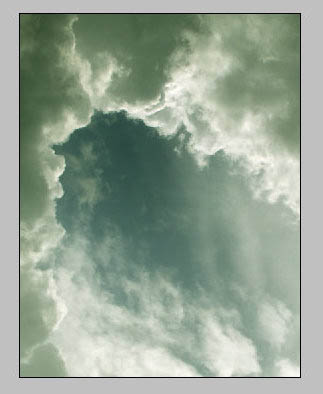

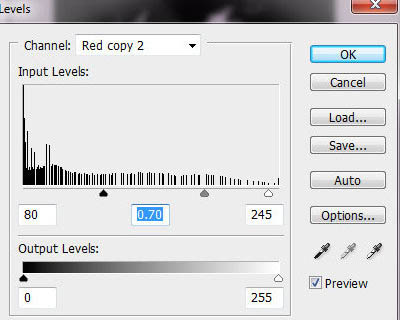
40、再复制一层合并的”云”图层,放置在上一个步骤的图层之上。到通道面板中复制一层红通道。调整色阶将复制的红通道的对比度调大一些。执行Command/Ctrl+点击红通道副本的缩略图或者点击面板下面的这个 图标将白色区域载入选区。
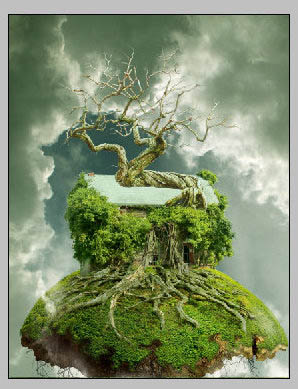
41、保持选区不变,接下来点击RGB通道回到图层控制面板,执行 选择 反向, 然后删掉反向的选区。做到这里,你的效果图应该类似下图这样。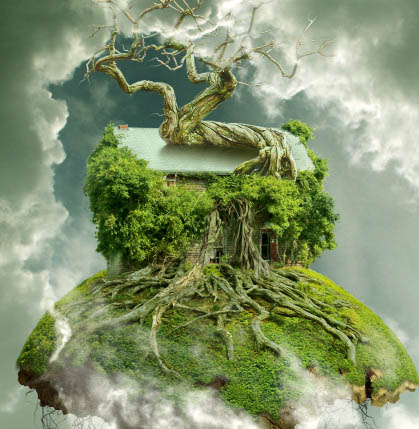
42、为”云”图层添加蒙版,然后删掉下图中红色区域的部分。只留下底部左边和右边部分的云做处理就好。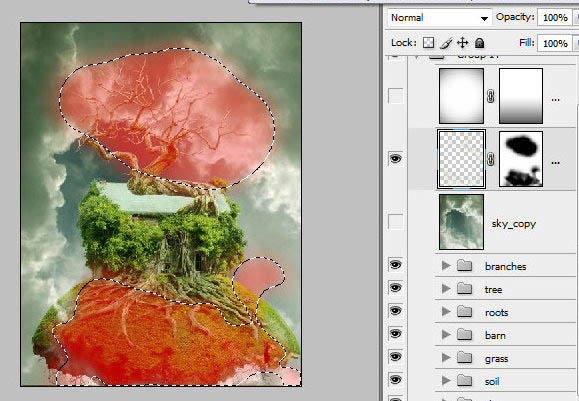
43、创建一个新的空白图层。执行 滤镜 镜头校正 ,更改”晕影”的参数。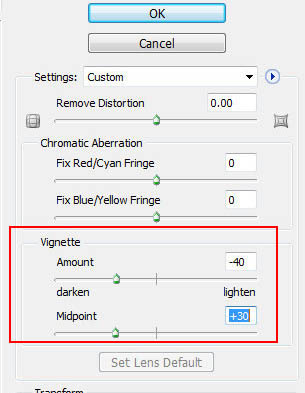
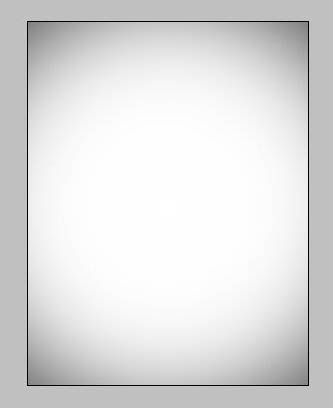
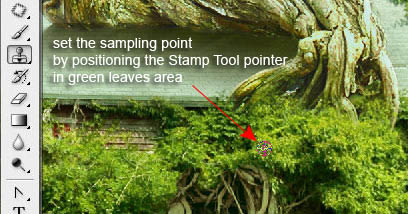
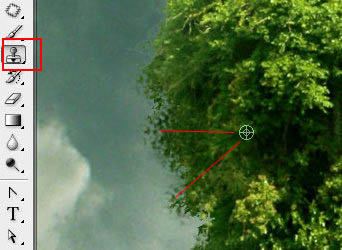
44、为刚才创建的图层的混合模式设置为正片叠底,不透明度为70%,创建蒙版后填充线性的黑白渐变色。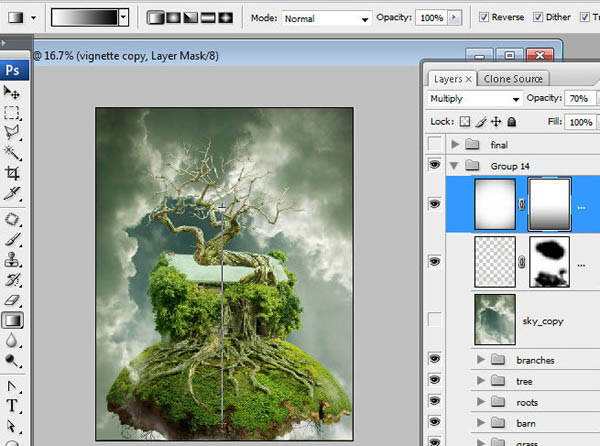
45、合并所有的图层。
46、润饰合并的图层。使用图章工具遮掉那些组成合成物不同细节间的杂乱地区以及边缘。为了使树枝和绿色的树叶之间的杂乱地区变得平滑些可以将有纹理的笔刷用于图章工具中。按住Alt点击鼠标让定位器停留在绿叶上定位。然后添加一些克隆好的绿点在树枝上。重复几次这个动作使得那些粗糙的点全部被覆盖。你也可以使用这种手法去修饰和平滑天空跟老畜棚之间的叶子区域。
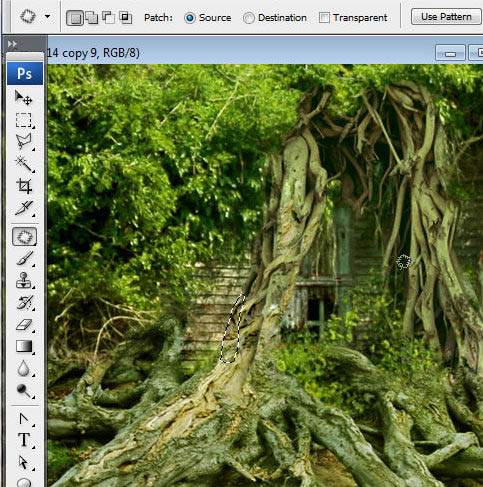
47、你也可以用修补工具区修复一些漏洞。拖曳选区一些边缘地区出来,并修补好不同石块间的潦草的东西。当你放开鼠标,你所选的区域就会被另一些你抽取像素所修复。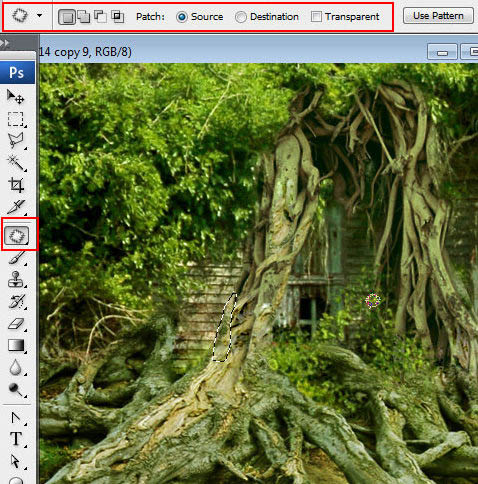
(本文来源于图老师网站,更多请访问http://m.tulaoshi.com/ps/)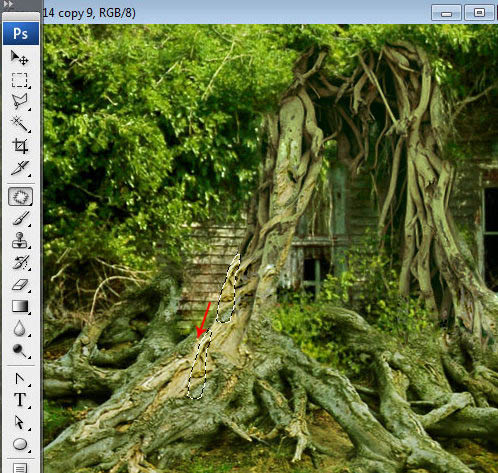
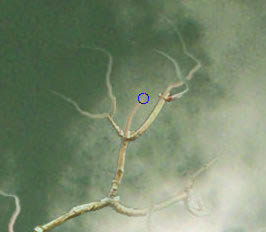
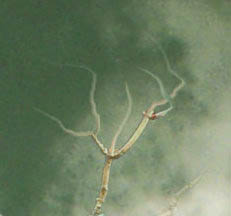
48、使用”涂抹工具”修饰树枝的细节。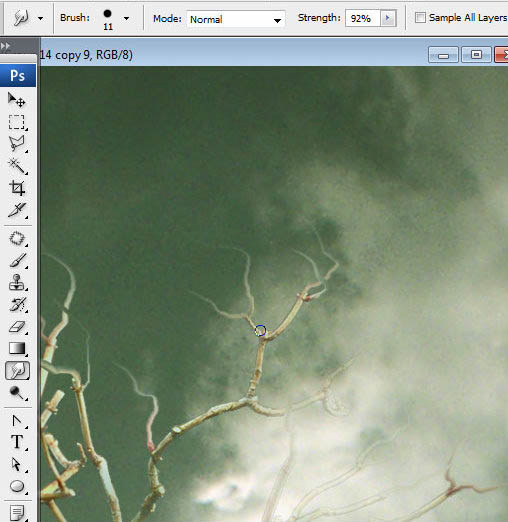
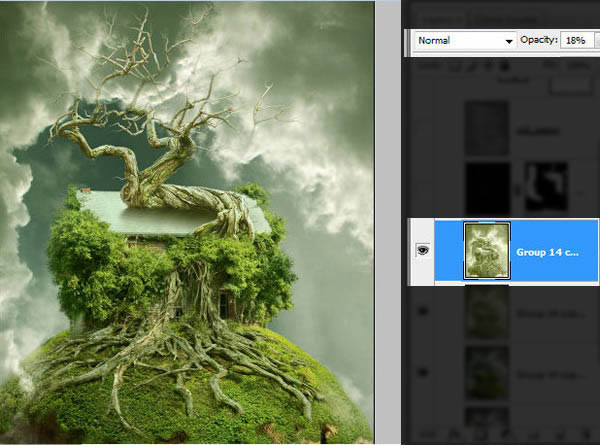
49、复制一层刚才润饰过的图层,执行 图像 调整 渐变映射。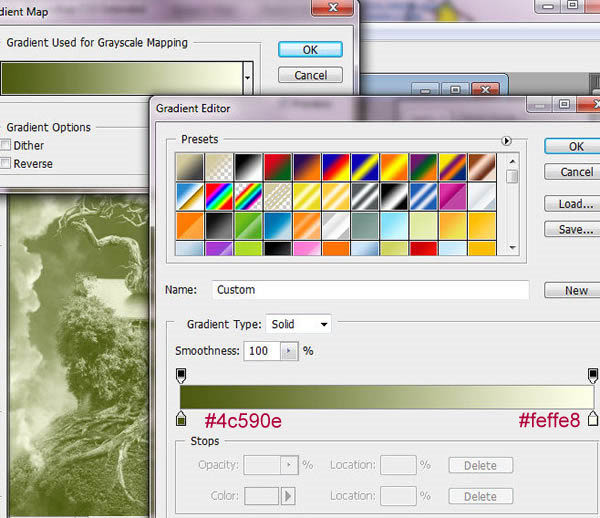
50、复制两次渐变映射过的图层。为最底下这层的图层混合模式设置为正片叠底,不透明度为14%,为最上面这层使用正常图层混合模式,不透明度设置为18%。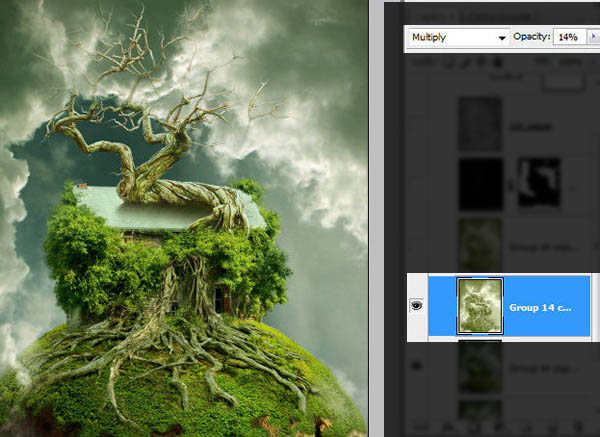
51、插入”星星”素材图片,执行自动对比度和自动色阶,并把图层混合通道设置为滤色。然后打开色阶设置,将黑色标往右边以一些,直到星星的背景完全变成透明的。然后抹掉一些星星。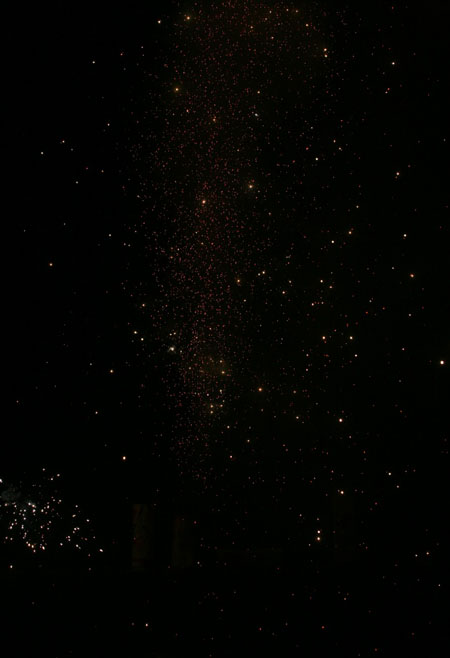

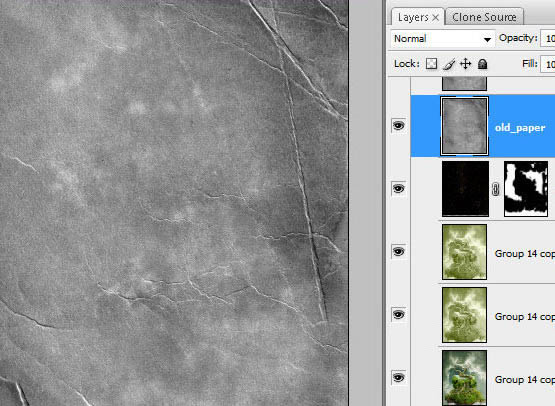
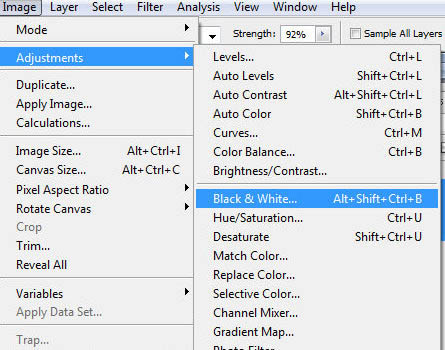
52、插入”旧纸片”图片素材,执行 图像 调整 黑白(预设值为默认值)。将其图层混合模式改为柔光,不透明度为79%。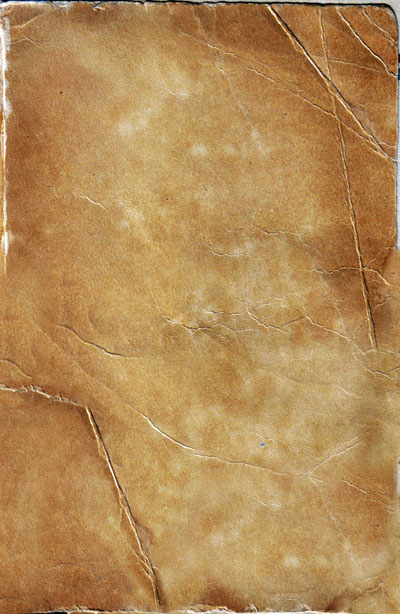
最终效果: