岁数大了,QQ也不闪了,微信也不响了,电话也不来了,但是图老师依旧坚持为大家推荐最精彩的内容,下面为大家精心准备的Photoshop制作蓝色梦幻的潮流壁纸,希望大家看完后能赶快学习起来。
现在潮流风格的作品层出不穷,这种效果讲究色彩鲜丽,画面由一些花纹及个性图案构成。视觉效果非常突出。不过教程中漂亮的图形基本上都是用钢笔工具勾出来。看来掌握好钢笔工具是作图的前提。
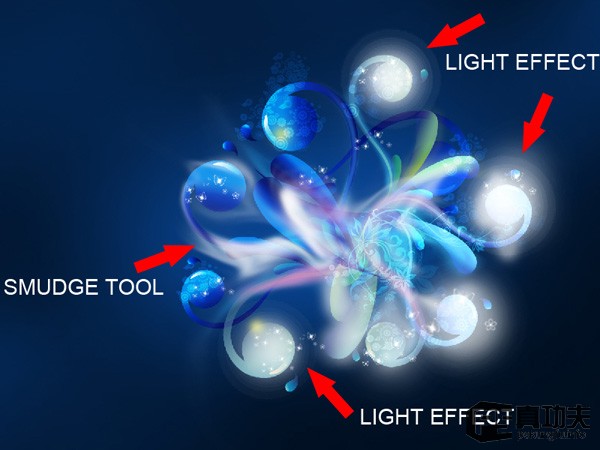
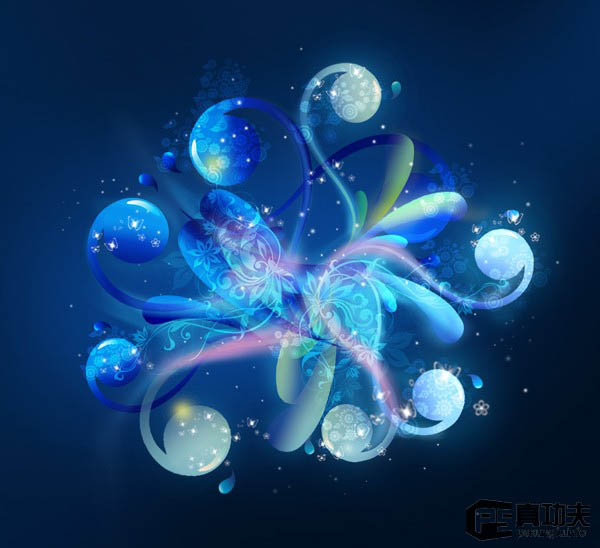
最终效果 
1、首先我们来创建一个新文件 (文件新建) 1920×1200px/72 dpi.。选择油漆桶工具 (G)将背景填充为黑色。
2、创建新层之后,我们要装饰下背景,选择photoshop笔刷工具 (B)。笔刷颜色选择#0E77FF 以及不透明度为 15%

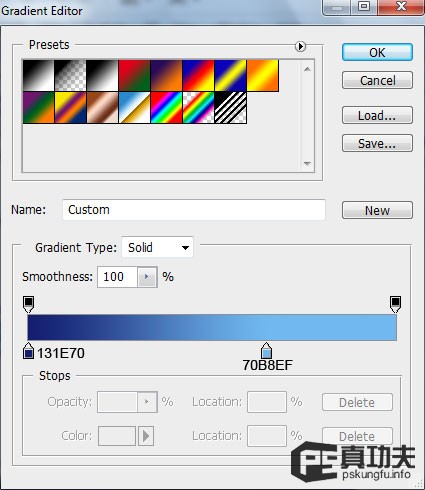
3、接下来我们就要来描绘形状了,使用钢笔工具开始绘制第一个形状的路径然后使用转换点工具,你可以调整路径线段如下图所示,颜色为#094A9F。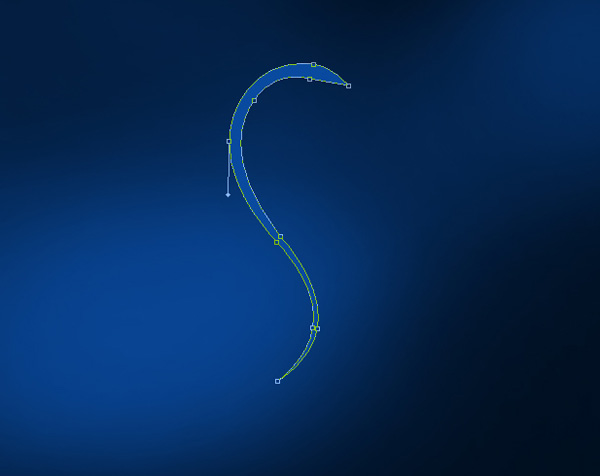
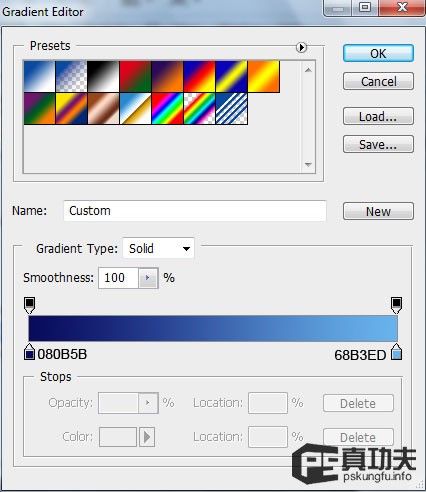
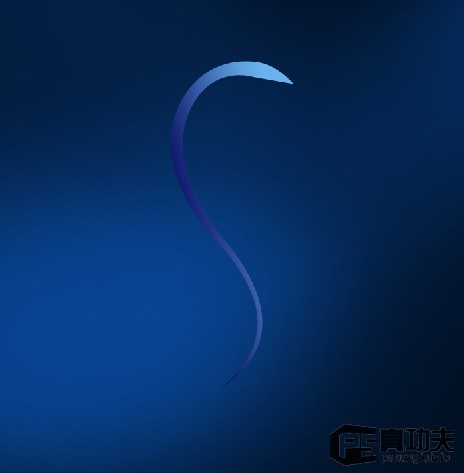
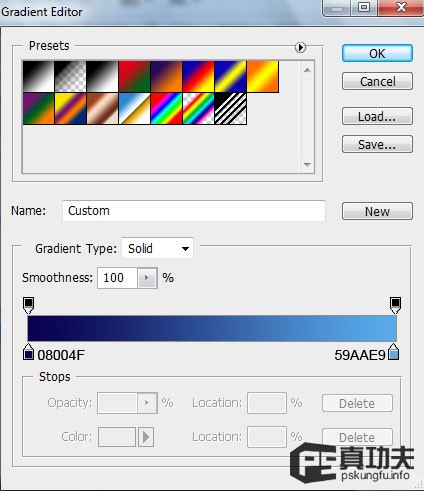
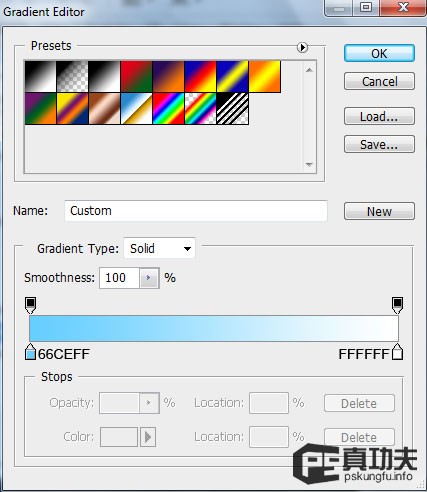
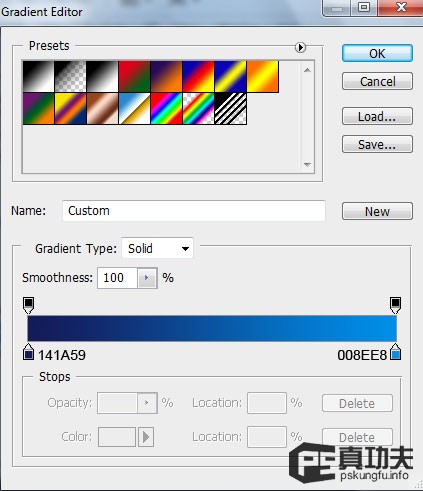
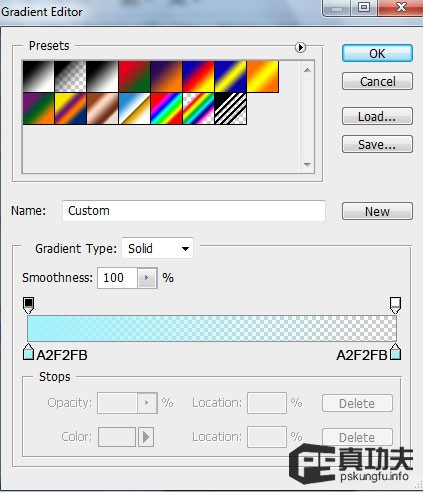
4、在图层上右击转到图层样式然后添加渐变叠加,参数及效果如下图。

5、接下来我们将描绘另一个形状,使用钢笔工具 (P) 和转换点工具。
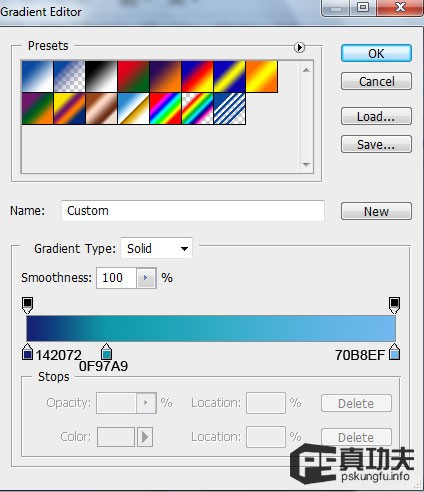
6、然后图层样式 渐变叠加,参数及效果如下图。

7、使用相同的工具和方法,继续绘制形状: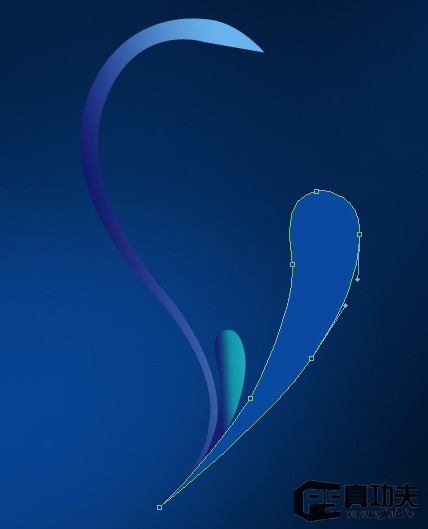
8、添加图层样式 渐变叠加,参数及效果如下图: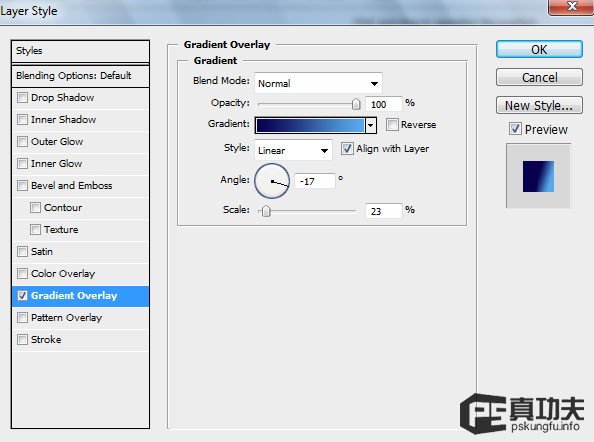

9、使用椭圆工具(U)在形状的顶部位置来绘制一个小小的圆: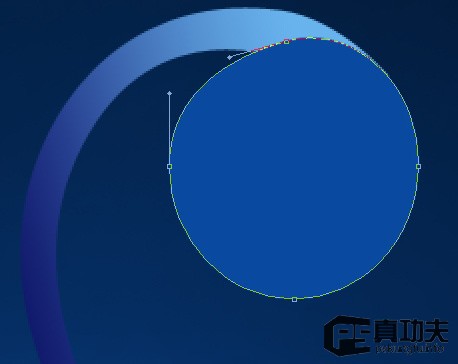
10、在图层上右击转到图层样式然后添加渐变叠加:

11、接下来我们要给这个圆加一点高光,使用钢笔工具(P)和转换点。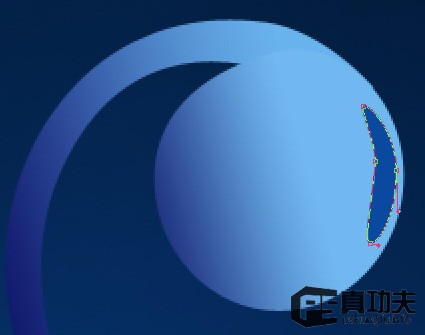
12、添加图层样式 渐变叠加: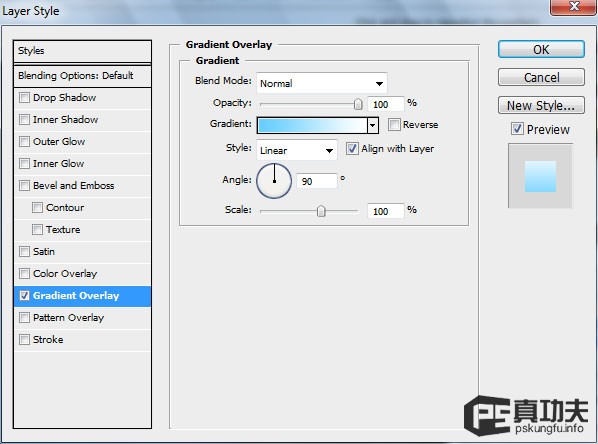

13、继续考验你的钢笔工具掌握程度继续绘制另一个形状吧: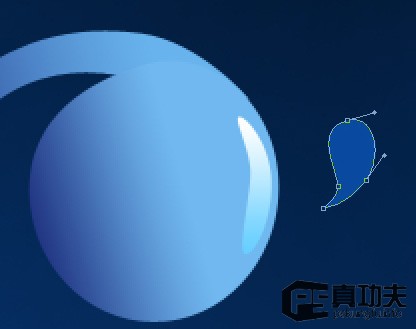
14、在图层上右击转到图层样式然后添加渐变叠加: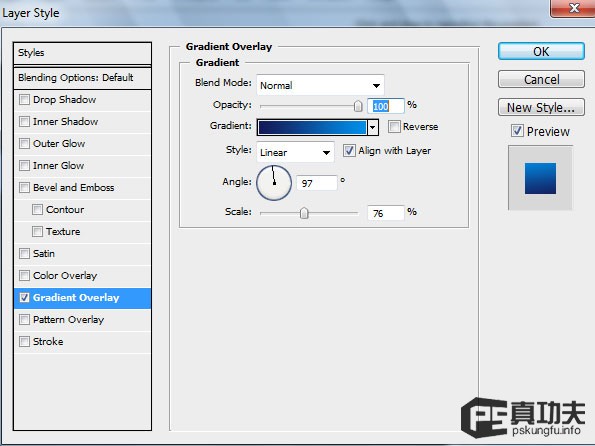

15、在形状的顶部我们再加一点高光,使用椭圆工具(U)和转换点工具。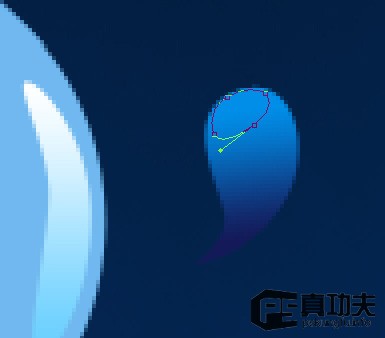
16、把这个层的填充设置为0% ,在图层上右击转到图层样式 渐变叠加: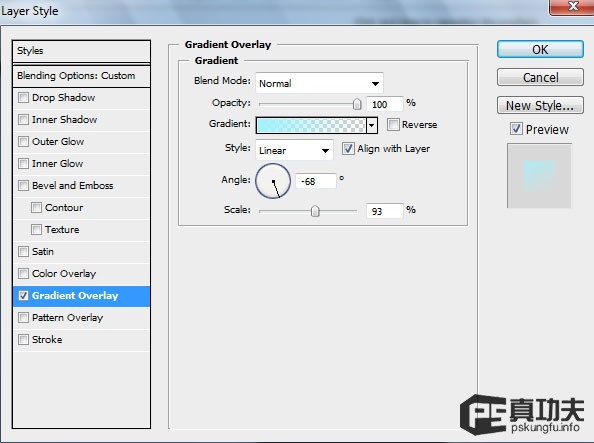

17、把这些装饰的图层编为一组(按住CTRL键然后单击相应的图层拽动他们到图层面板上的新建组按钮上),在图层调板上选中这个组向下合并这些图层快捷键 CTRL+E。选择自由变换工具(Ctrl+T)重调一下层的大小,可以查看下图演示。
(本文来源于图老师网站,更多请访问http://m.tulaoshi.com)18、把这个图层的混合模式改为排除:
19、复制一下最后创建的图层,选择自由变换工具来调整下副本的倾斜度和大小等,然后把图层的混合模式改为叠加。
20、复制先前第一次创建的图层,选择自由变换工具来翻转下这个副本,然后如下图一样的方式来放置这个副本:
21、翻转刚才创建的副本,使用自由变换工具,把图层混合模式改为线性减淡。
22、在复制一下装饰的图层,选择自由变换工具来翻转副本,扩大一下然后把如下图所示放置同样的位置,把图层模式改为强光。
23、复制先前第一次创建的图层,再一次选择自由变换工具来缩小和翻转下这个副本,然后如下图一样的方式来放置这个副本:
24、创建先前创建的图层的副本,然后选择自由变换工具来调整副本的大小和他们的位置。效果如下图所示: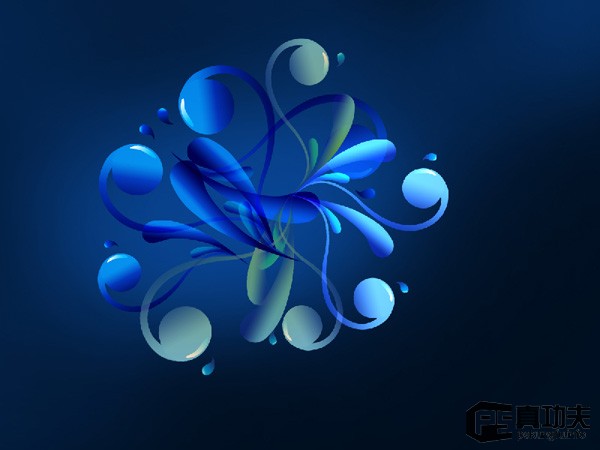
25、创建一个新层,选择笔刷工具,颜色为#41A8DC,在装饰画中描绘斑点:

26、然后应用涂抹工具 (R)来模糊这个斑点 ,如下图所示:
27、把填充设置为0%,然后把图层混合模式改为线性减淡。
28、创建一个新层应用笔刷来绘制装饰一下,颜色选择#F0A7D3 (不透明度 10%)。
29、使用同样的笔刷在新层上来绘制斑点,颜色设置为#A8D196。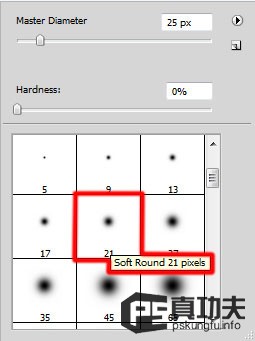
30、打开下图所示的花纹素材,拖进来适当改变颜色,再复制几分,效果如下图。

31、把这个图层的填充设置为65%,图层混合改为叠加。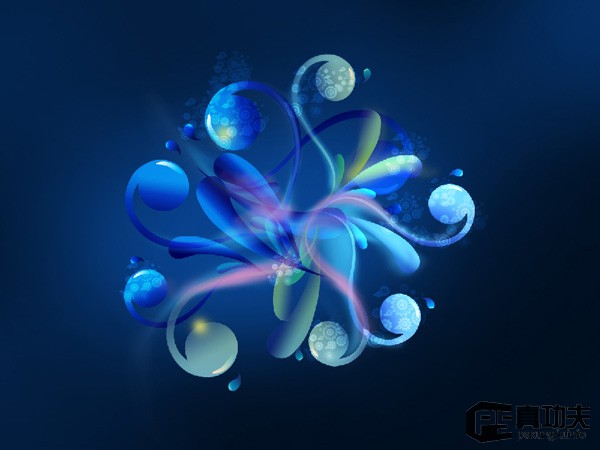
32、同样的方法加上一些小的蝴蝶素材,效果如下图。

33、再加上花纹素材,效果如下图。

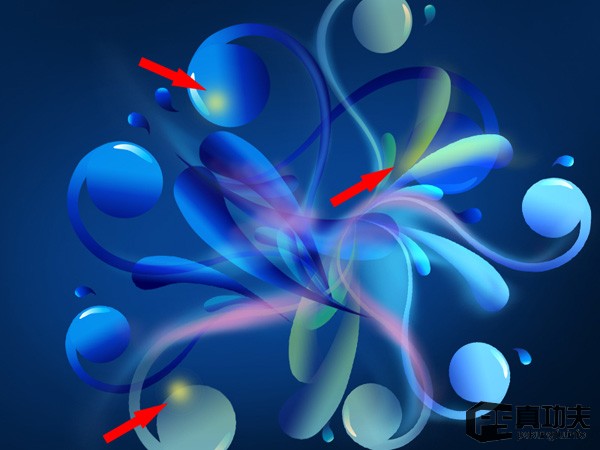
34、把图层混合模式改为叠加,右击图层转到图层样式 内发光: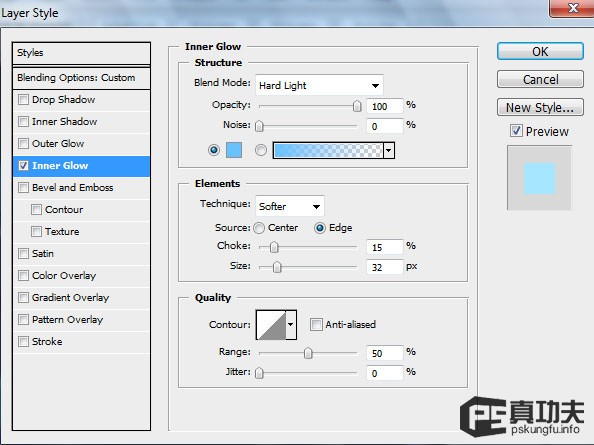

35、创建另一个新层,这里应用白色的柔角笔刷来描绘一些斑点,然后使用涂抹工具来模糊它。然后应用笔刷小些的半径或大点的半径如下图所示来描绘冷发光的效果(不透明度设置为10%)。
36、把这个图层的混合模式改为柔光。
37、把花纹图层复制一层,翻转一下,再放好位置,效果如下图。
38、再创建一个新层,选择柔角笔刷来绘制不同半径的斑点:

39、在同样的图层上单击图层调板上的添加图层蒙板,笔刷颜色选择黑色(不透明度为20%)来清除一下小白点。
(本文来源于图老师网站,更多请访问http://m.tulaoshi.com)40、在图层面板上单击来创建一个填充图层或者是调整 曲线来矫正一下颜色。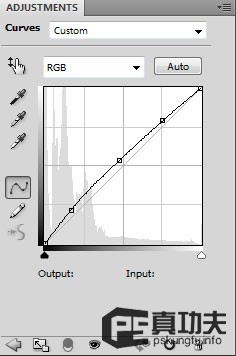
最终效果。


