015834622
2016-02-01 23:51
下面,图老师小编带您去了解一下Photoshop打造梦幻的泡泡文字图标,生活就是不断的发现新事物,get新技能~
本教程介绍较为综合的图标制作方法。大致分三步来完成:首先是梦幻背景的制作,需要运用渐变和画笔等来完成。然后是泡泡部分的制作,其中重点是高光部分的渲染。最后就是图标主体部分的制作,作者制作的是立体字效果,跟其它立体字制作方法类似。 最终效果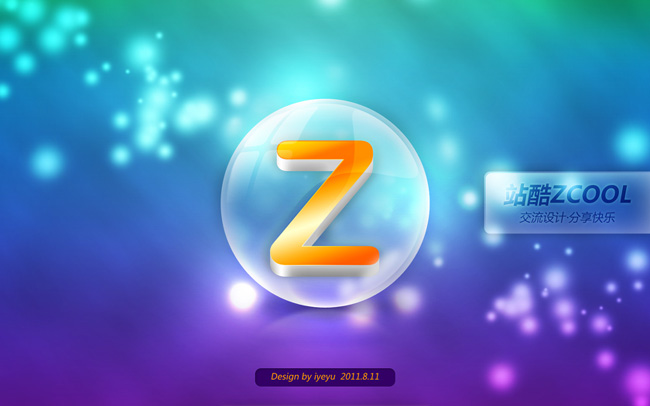
(本文来源于图老师网站,更多请访问http://m.tulaoshi.com)
1、新建一个 840 * 525像素的文档,选择渐变工具颜色设置如下图右,然后从左至右拉出线性渐变,作为背景。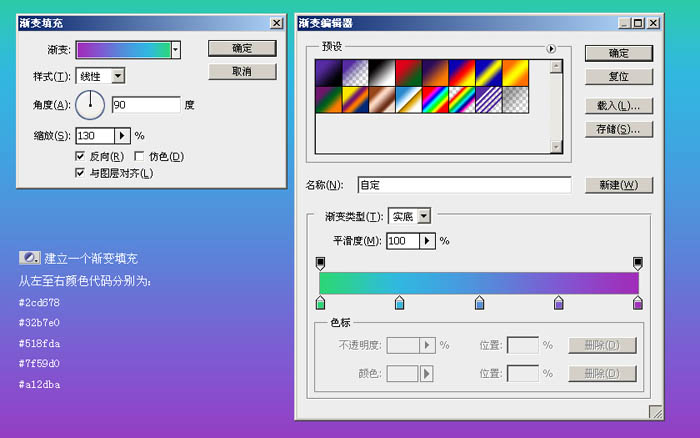
2、新建一个图层,命名为“背景光1”,填充50%灰色,然后执行:滤镜 渲染 光照效果,参数设置如下图。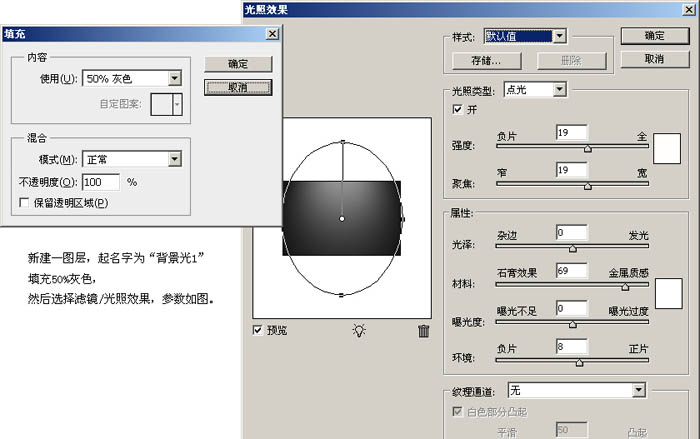
3、复制“背景光1”图层,命名为“背景光2”,分别设置这2个图层叠加方式和透明度,具体设置如下图。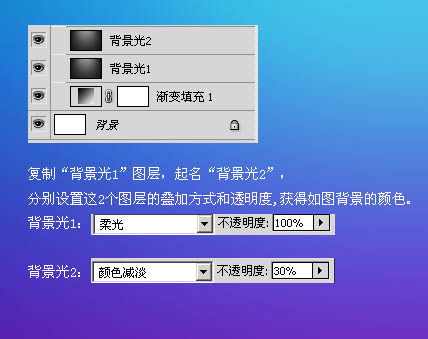
4、新建一个图层,命名为“斜线光”填充黑色,执行:滤镜 渲染 云彩,确定后再执行:滤镜 模糊 动感模糊,参数设置如下图。
5、新建一个图层,命名为“背景光点”,选择画笔工具,笔刷大小为170,再调出画笔属性面板,设置形状动态和散布,参数设置如下图。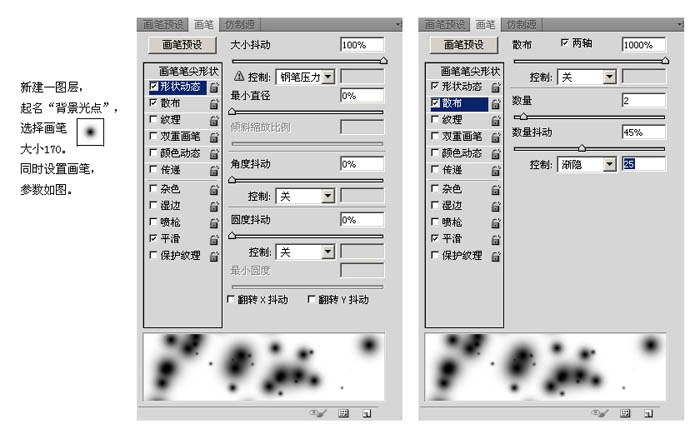
6、然后用画笔按45度角画一笔,得到如图效果,复制背景光点2次,分别设置叠加方式如下图。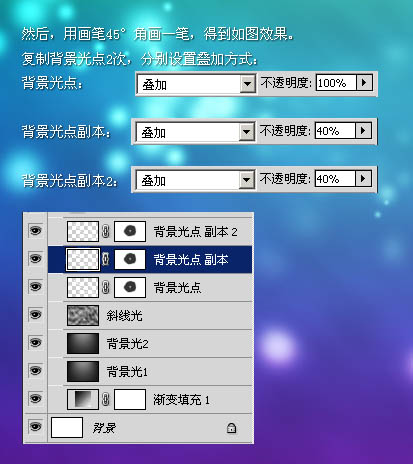
7、新建一个图层,用椭圆工具画一个圆,颜色为黄灰色。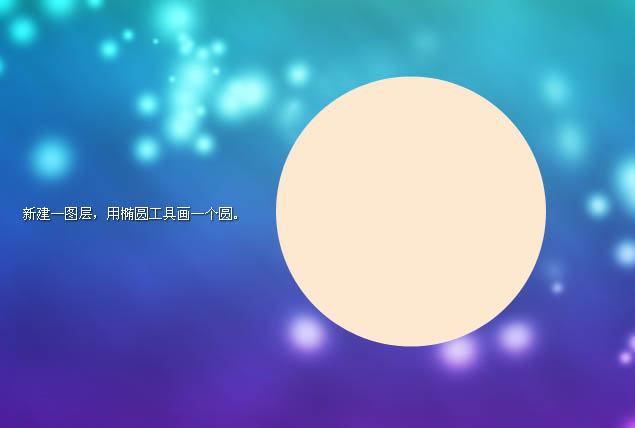
8、为圆圈添加图层样式,设置投影和内发光,参数设置如下图。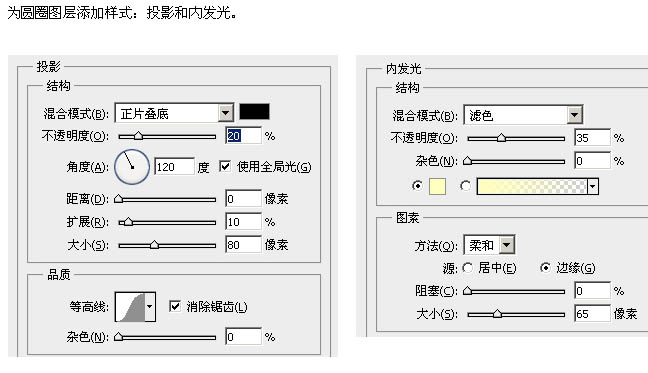
9、把该图层的填充设置为0,得到剔透的效果如下图。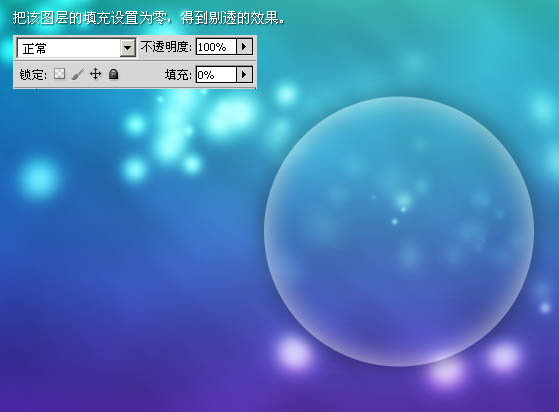
10、新建一个图层,用圆角矩形工具画出4个圆角矩形,合并图层。然后执行:滤镜 扭曲 球面化,得到下图所示的效果。再用变形工具和蒙版调整好弧度和边缘的过渡。确定后把图层不透明度设为:60%,如下图。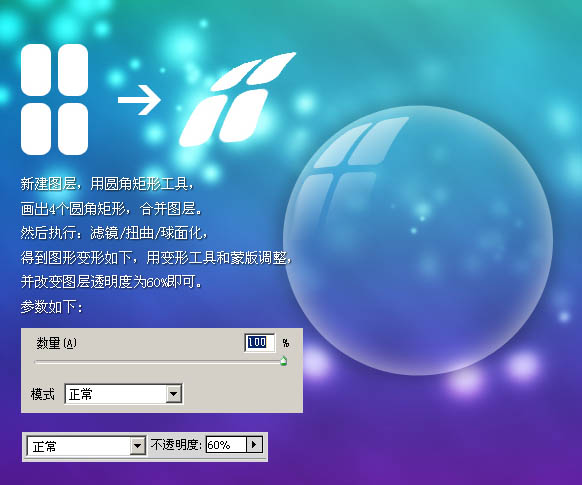
11、新建一个图层命名为“光斑”,用椭圆工具画出下图左边的高光图形,填充白色,然后执行:滤镜 模糊 高斯模糊,数值为5,确定后把图层不透明度改为:60%。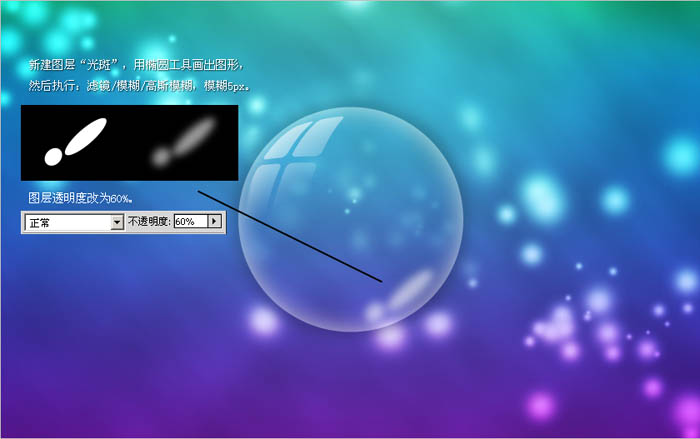
12、新建一个图层命名为“球形光”,用椭圆工具画一个稍小的白色圆,如下图。
13、添加图层蒙版,擦掉中间部分,再把图层不透明度改为:50%,效果如下图。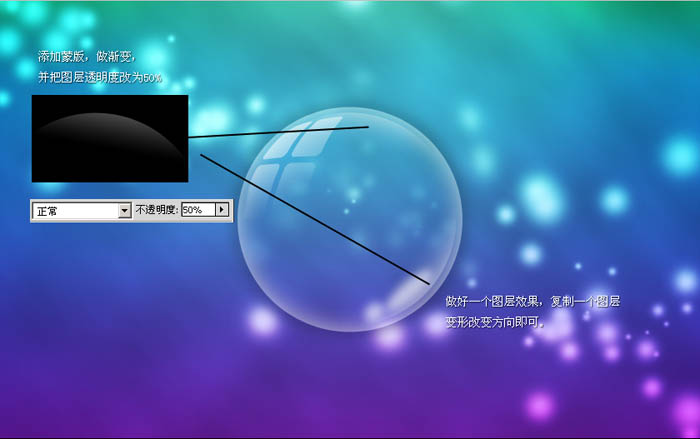
14、新建一个图层,用钢笔勾出下图所示的图形,转为选区后填充白色。
15、同样,添加图层蒙版,渐变。改图层混合模式为“叠加”,透明度为50%,如下图。
16、新建一个图层,用钢笔工具画出下图所示的图形,填充白色。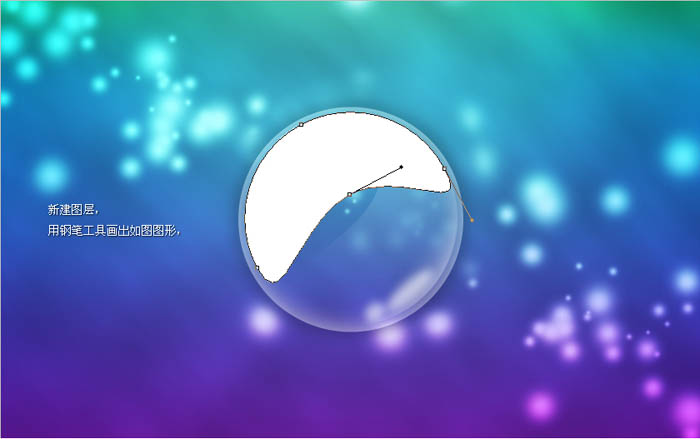
17、再次添加图层蒙版,渐变。改变图层混合模式为“叠加”,透明度为:30%,效果如下图。
18、在圆圈中输入字母“Z”,调整好大小,这里使用的字体是“Arial Rounded MT Bold”。
19、给文字添加图层样式,设置投影和渐变叠加,参数设置如下图。

20、把文字图层复制3层,如下图,每复制一次就上移一点。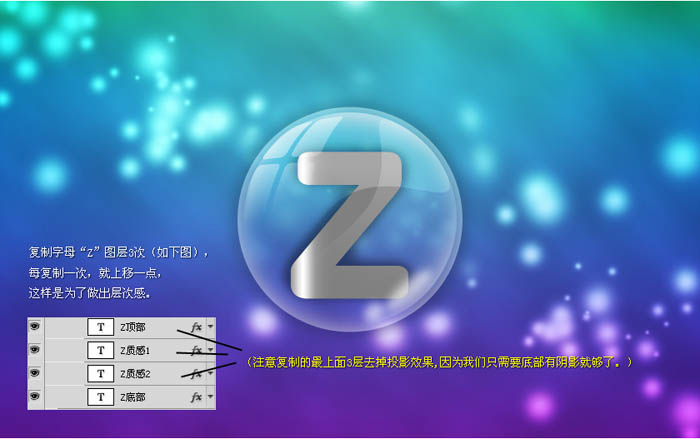
21、现在我们改变顶部文字的图层样式,设置外发光和渐变叠加,参数设置如下图。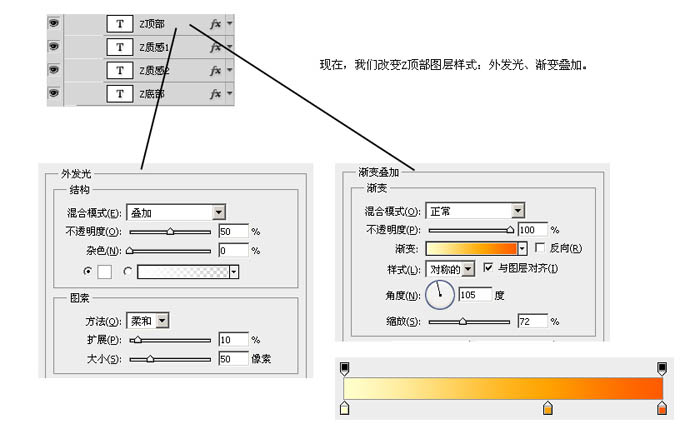

22、下面我们来给文字添加细节,过程如下图。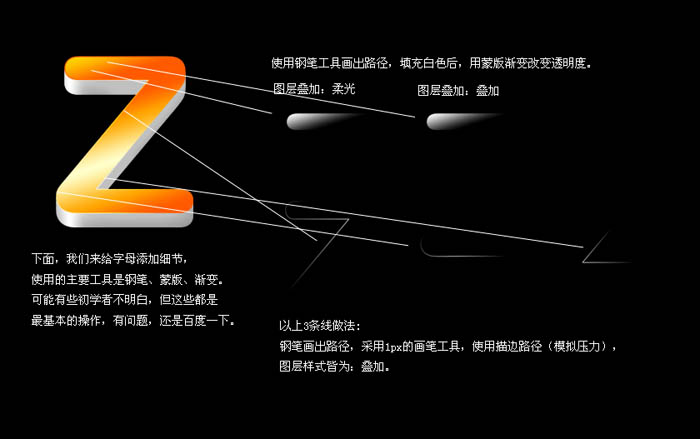

23、使用大像素的画笔,颜色为白色在圆圈的边缘点一下,得到5个光点,把混合模式改为“叠加”。

24、新建一个图层,命名为“阴影”,画一个黑色椭圆。
25、执行:滤镜 模糊 高斯模糊,数值为8,确定后把图层混合模式改为“正片叠底”,不透明度改为:55%,效果如下图。
(本文来源于图老师网站,更多请访问http://m.tulaoshi.com)26、最后一步,给图标增加倒影,效果如下图。
最终效果:
(本文来源于图老师网站,更多请访问http://m.tulaoshi.com)


