岁数大了,QQ也不闪了,微信也不响了,电话也不来了,但是图老师依旧坚持为大家推荐最精彩的内容,下面为大家精心准备的Photoshop制作可爱的炫彩文字签名,希望大家看完后能赶快学习起来。
虽然是一些简单的文字,如果我们加上绚丽的色彩,并配上合适的闪烁动画,出来的效果就会大不一样。动画制作不难,关键是要发挥我们的想象去构思一些精巧的动态画面。
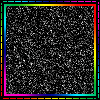
最终效果
1、新建文档并填充黑色,使用矩形选框工具绘制选区,转到通道面板,点击生成路径按钮,如下图。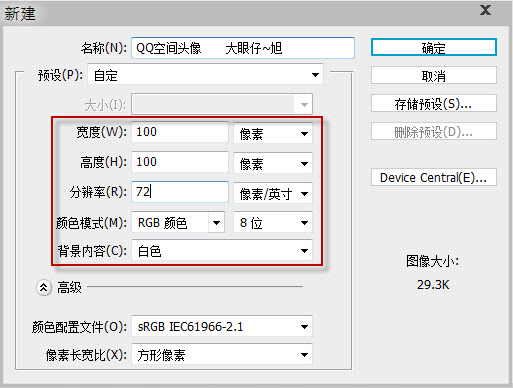
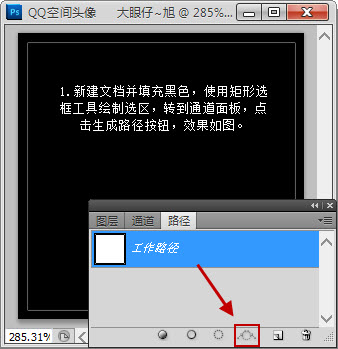
2、使用文本工具,选择合适的姿态,并设置字体编剧,输入“-”来制作边缘的虚线,调整大小,效果如下图。
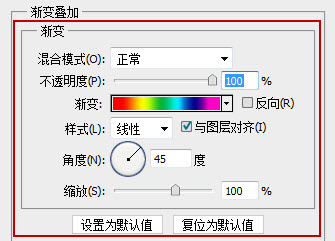
3、把文本进行栅格化处理,并填充渐变叠加样式,效果如下图。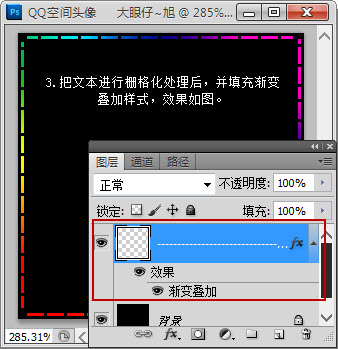
4、新建一个图层,用矩形徐昂看工具绘制下图所示的选区,并填充黑色。执行:选择 修改 收缩,数值为2,确定后按Delete 删除不需要的部分,效果如下图。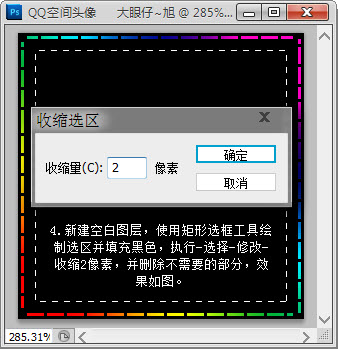
5、保持选区,执行:选择 修改 收缩,数值为2,确定后按Delete 删除不需要的部分。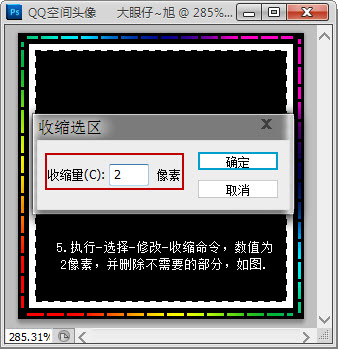
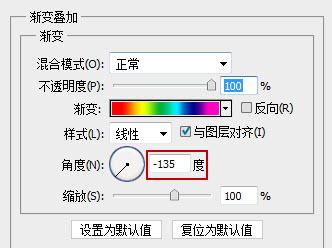
为其添加渐变叠加样式,只是把色彩进行对称调整而已,效果如下图。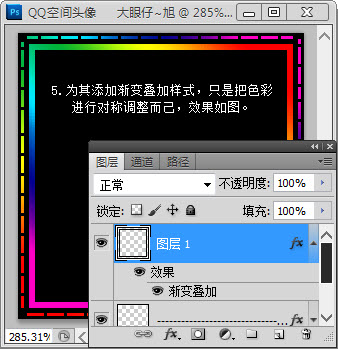
6、输入合适的文章,如下图。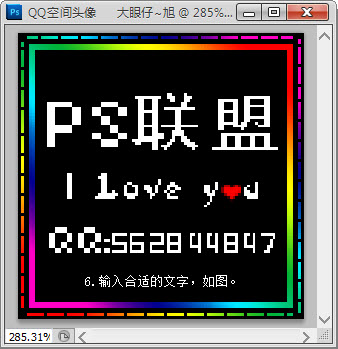
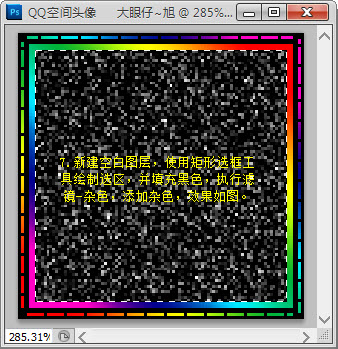
(本文来源于图老师网站,更多请访问http://m.tulaoshi.com)7、新建一个图层,用矩形选框工具绘制选区,并填充黑色。执行:滤镜 杂色 添加杂色,效果如下图。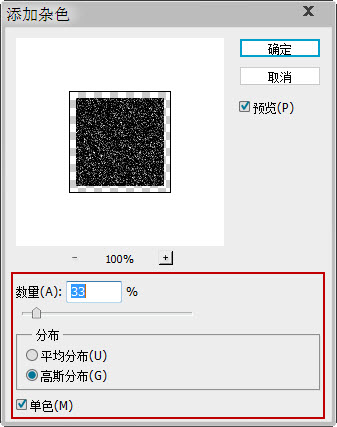
8、打开动画面板,转到时间轴面板,对文档进行设置,如下图。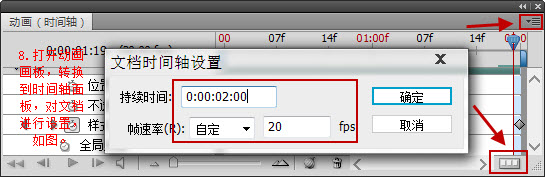
9、选择虚线外框图层,开始为其添加关键帧,打开虚线的图层样式,在工作区中拉动渐变,制作动画效果。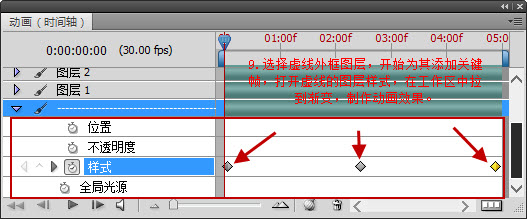
用同样的方法去制作其它动画的样式效果,如下图。
生成的动画效果:
10、选择图层3,为其制作过渡效果,同样为其添加关键帧,如下图。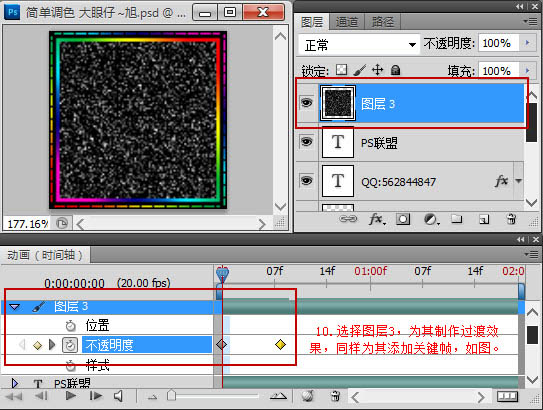
设置关键帧的不透明度。
生成的动画效果:
同样的方法制作其它部分,效果如下图。

11、不要以为这样储存为Web格式就可以了。还需要设置哦,转换到动画面板,会提示点击继续。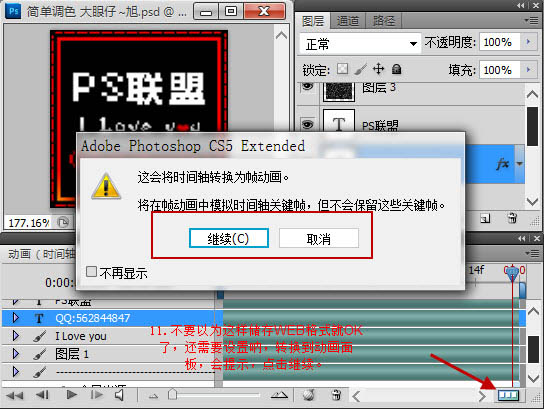
(本文来源于图老师网站,更多请访问http://m.tulaoshi.com)12、当转换到动画面板时会发现,首先动画的播放是一次,其它播放的时间不能满足我们的视觉需要。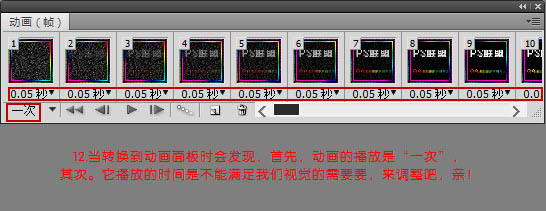
13、设置它的播放为永远,时间为0.01秒,这样再次储存为Web格式就可以了。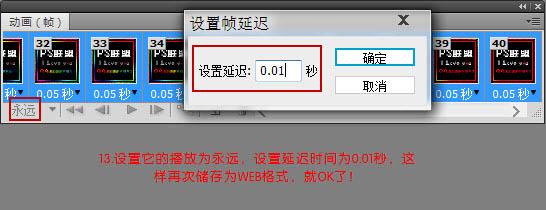
最终效果: