Queen范儿99
2016-02-01 23:18
想要天天向上,就要懂得享受学习。图老师为大家推荐Photoshop制作stRangEr风格法治疗效果,精彩的内容需要你们用心的阅读。还在等什么快点来看看吧!
制作的过程中有任何疑问可以加作者的QQ群:65028523。
原图
(本文来源于图老师网站,更多请访问http://m.tulaoshi.com/psxpcl/)最终效果
1、打开原图(CTRL+J)先复制一层,然后在复制层上选择色彩平衡,(CTRL+B),数值如图。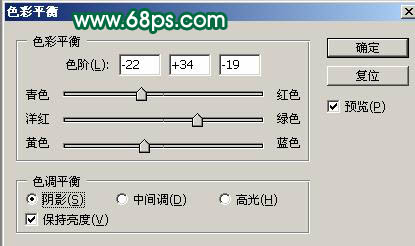


2、创建一个图层,盖印图层(CTRL+AIT+SHIFT+E),选择图象 模式 LAB颜色,创建曲线(CTRL+M)数值如图。


3、创建一层,盖印图层,选择图象调整去色.不透明度为30%。
4、创建一层,盖印一次,在创曲线,调节A通道,数值如图。

5、新建一个图层,盖印图层,创曲线调整图层,调节B通道,数值如图。
(本文来源于图老师网站,更多请访问http://m.tulaoshi.com/psxpcl/)
6、新建一个图层,盖印图层,选择滤镜 模糊 高斯模糊,数值为6,混合模式为柔光,不透明度为60。
7、新建一个图层填充颜色:#1c64ad,然后把图层混合模式改为“柔光”,图层不透明度改为:75。
8、选择菜单:图像 模式 RGB颜色,选择拼合,然后用Topaz滤镜锐化一下,完成最终效果。


