下面图老师小编跟大家分享利用图层样式制作非常精致的相机图标,一起来学习下过程究竟如何进行吧!喜欢就赶紧收藏起来哦~
相机图标的镜片部分稍微复杂一点,不过作者非常厉害,全部用图层样式来完成,制作的时候只需画好一个底图,然后添加图层样式即可。
最终效果
(本文来源于图老师网站,更多请访问http://m.tulaoshi.com)(本文来源于图老师网站,更多请访问http://m.tulaoshi.com)1、新建大小自定的文件,背景填充黑色。选择圆角矩形工具在画布上画一个200 * 200像素,圆半径为40PX的圆角矩形。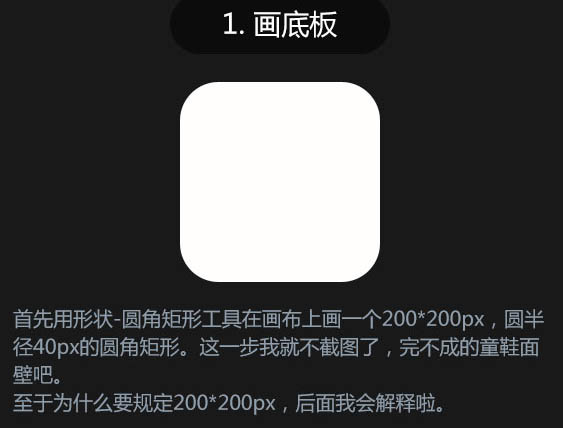
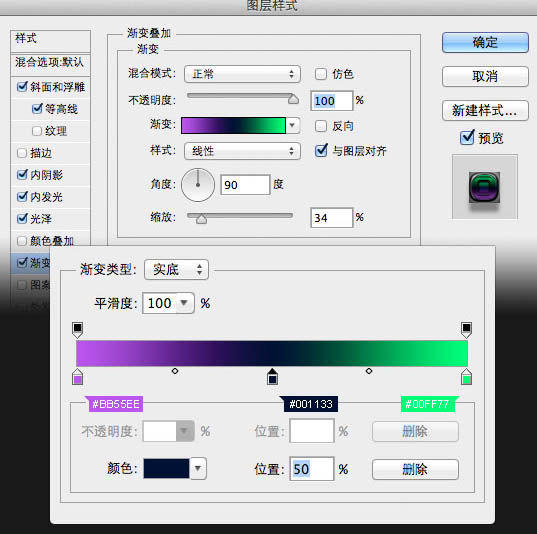
2、双击图层面板缩略图调出图层样式,先设置渐变叠加,如下图。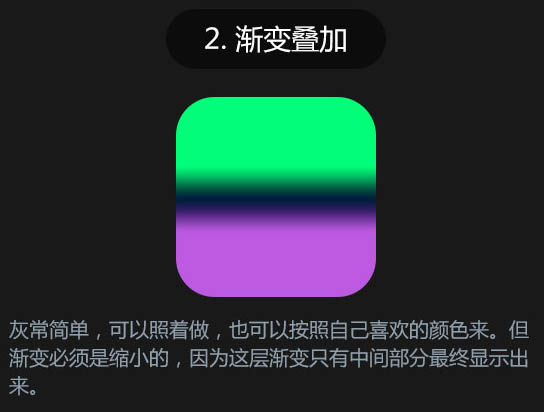
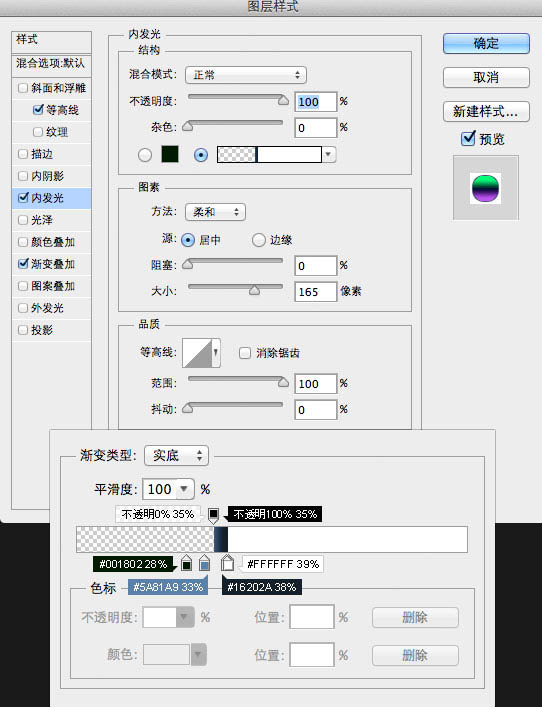
3、设置内发光。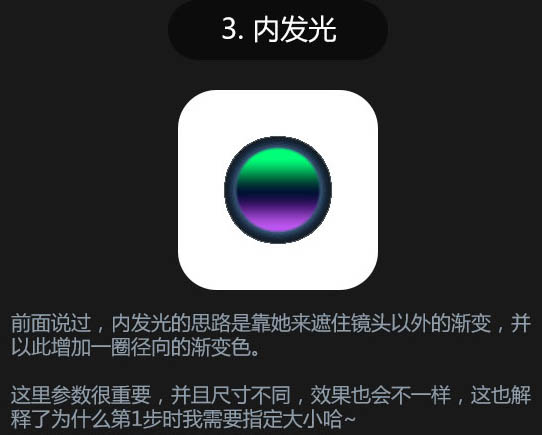
4、设置斜面和浮雕。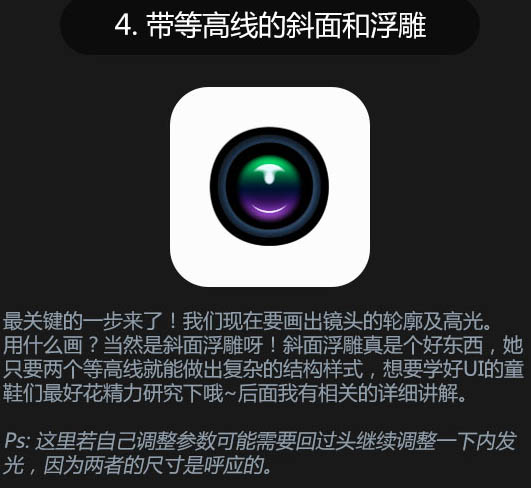
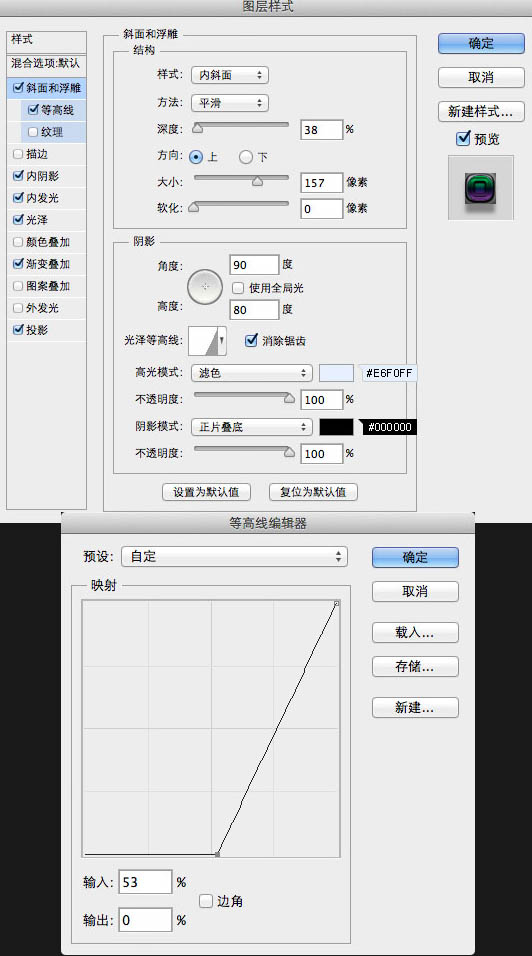
5、设置等高线。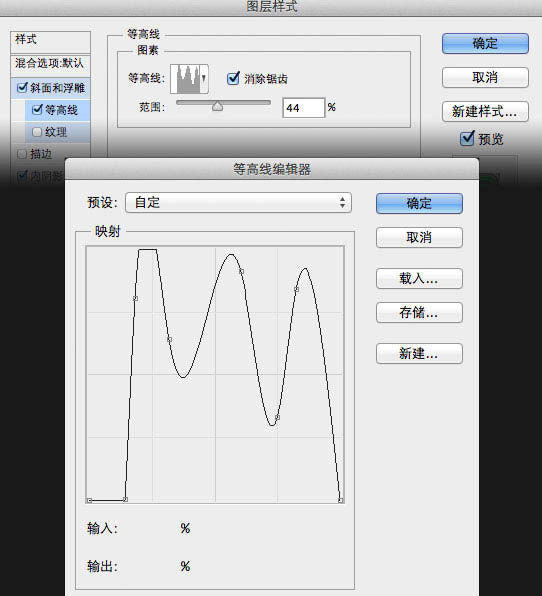
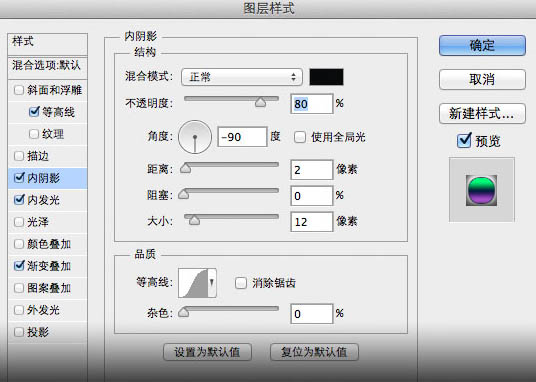
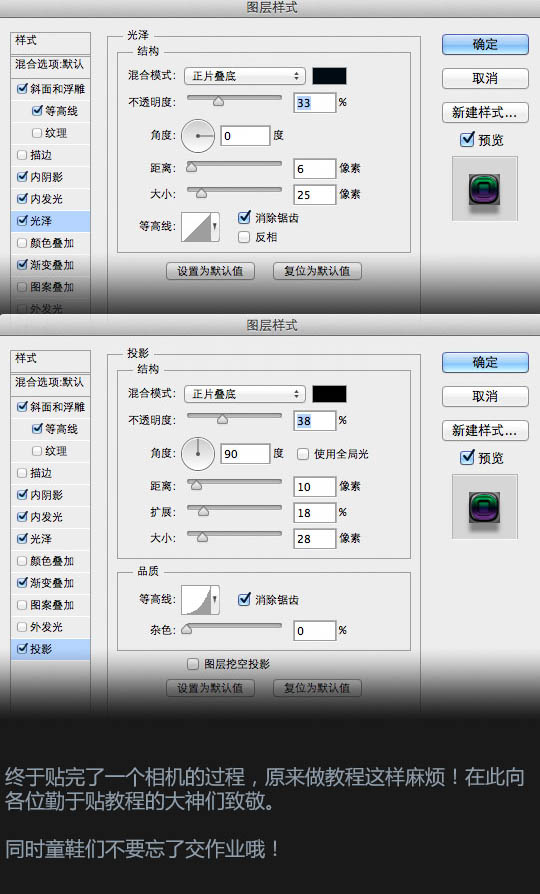
6、设置内阴影、光泽、投影。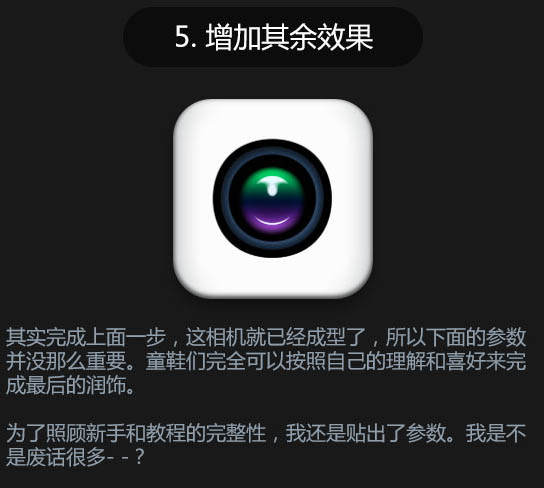
最终效果:
(本文来源于图老师网站,更多请访问http://m.tulaoshi.com)(本文来源于图老师网站,更多请访问http://m.tulaoshi.com) 


