生活已是百般艰难,为何不努力一点。下面图老师就给大家分享Photoshop快速还原偏色的雪景照片,希望可以让热爱学习的朋友们体会到PS的小小的乐趣。
那村老师确实对PS的了解非常深刻,在处理一些简单的图片的时候,都运用了很多高深的技术。这样出来的效果特别精美。看来要学好调色还得跟老师慢慢学。 原图 
最终效果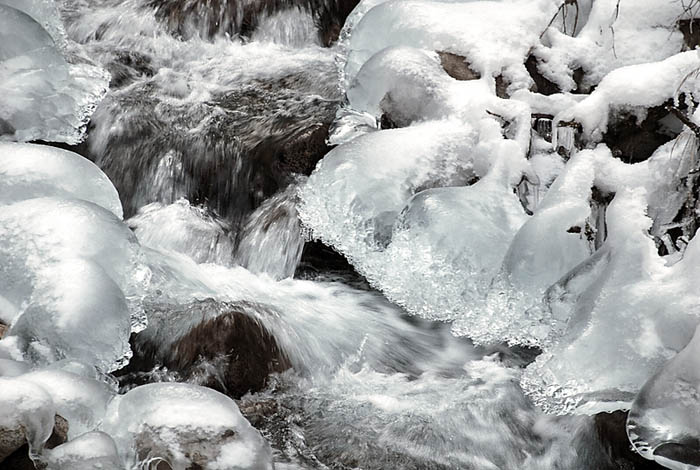
1、打开素材图片,执行:图像 调整 自动色阶,效果如下图。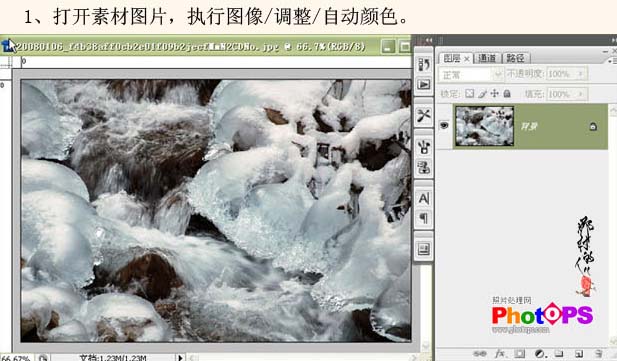
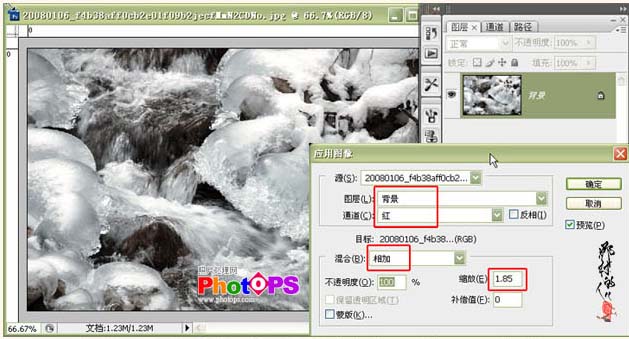
(本文来源于图老师网站,更多请访问http://m.tulaoshi.com/psxpcl/)2、执行:图像 应用图像操作,参数及效果如下图。如果你需要了解更多参数设置的含义,可以参阅下面的文字描述。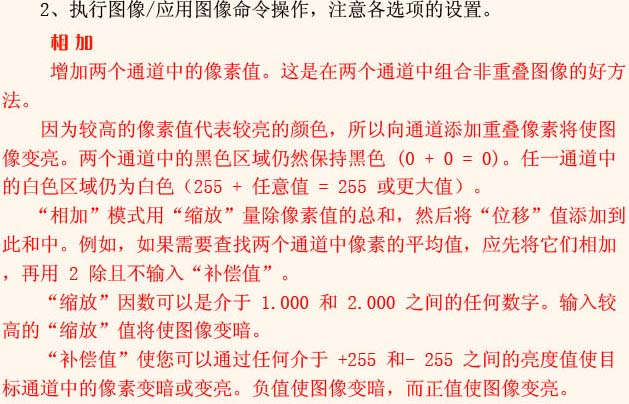
(本文来源于图老师网站,更多请访问http://m.tulaoshi.com/psxpcl/)3、把背景图层复制一层,得到背景副本,按Ctrl + Alt + ~ 调出高光选区,按Ctrl + J 把选区部分图片复制到新的图层,如下图。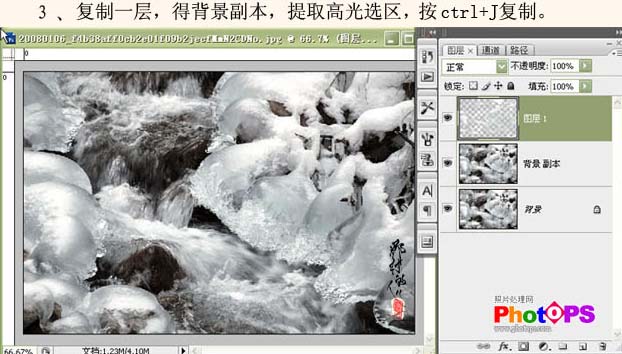
4、选择菜单:图层 图层样式 斜面和浮雕,参数设置如下图。这一步操作时增加冰雪的厚度感。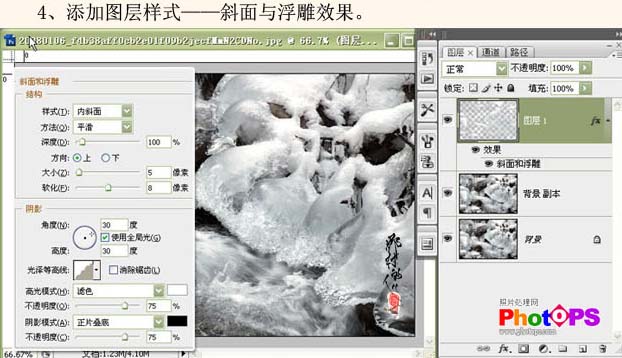
5、按Ctrl + E 向下合并(效果图层变为普通图层)。添加图层蒙版用黑色画笔在不需要浮雕效果处涂抹。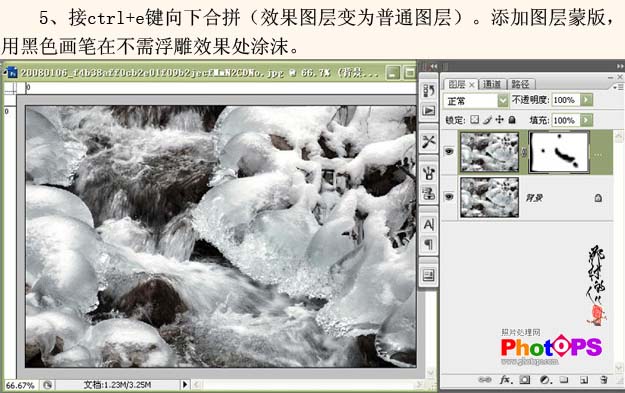
6、合拼图层,选择菜单:图像 模式 Lab颜色,点通道面板,对明度通道进行USM锐化,参数设置如下图,再选择菜单:图像 模式 RGB颜色,操作完成。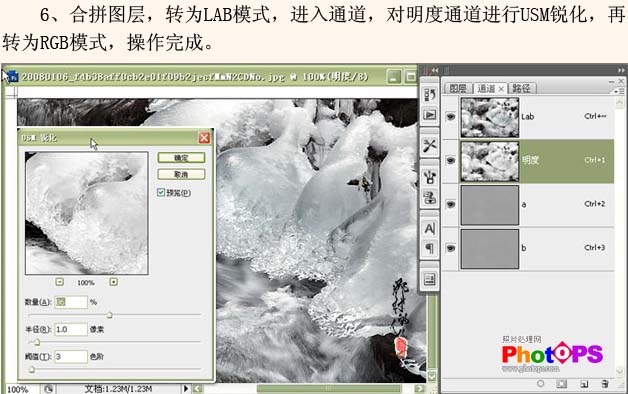
最终效果:


