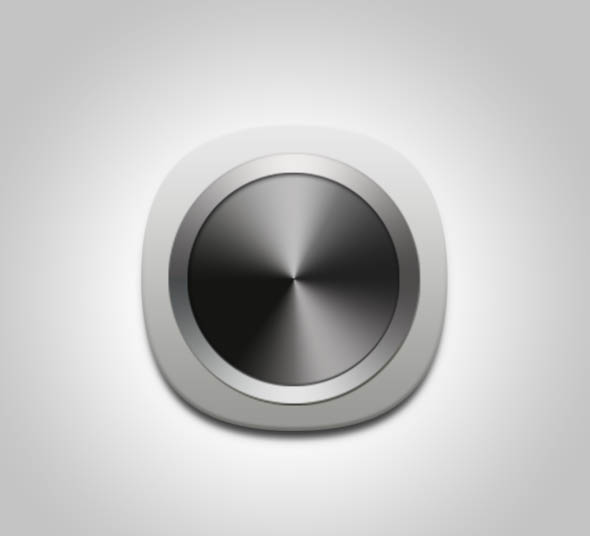
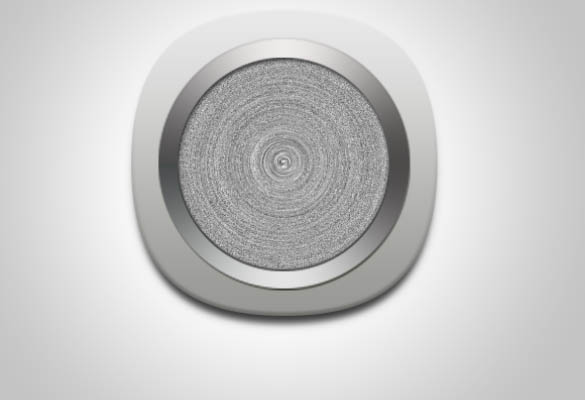
制作图标之前,有很多的工作要做,先找出相关的实物图参考,然后自己构思出想要的效果并画出草图。后期用PS慢慢细化,把想要的形状、颜色、质感、纹理等都表现出来即可。 最终效果
1、新建一个600*600画布。
2、来个白到灰的径向渐变。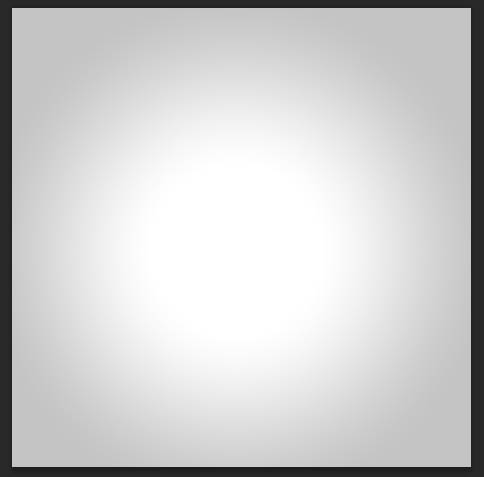
3、椭圆工具画个300*300的圆。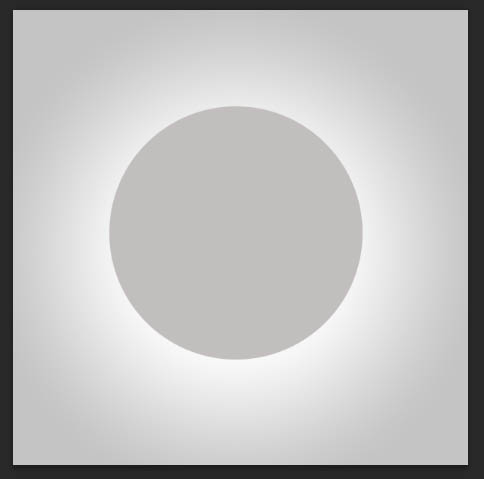
4、直接选择工具选中这两个点。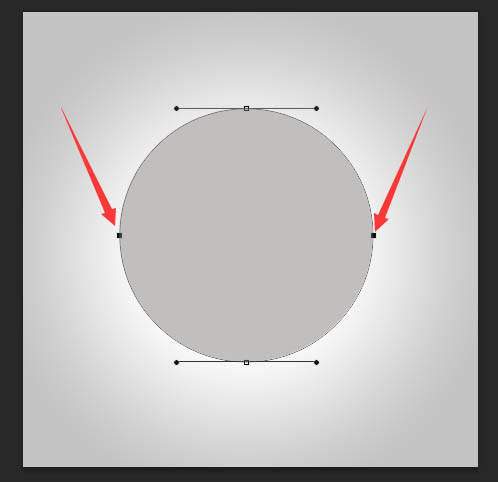
5、右键,自由变换点,在箭头标注的W位置输入80。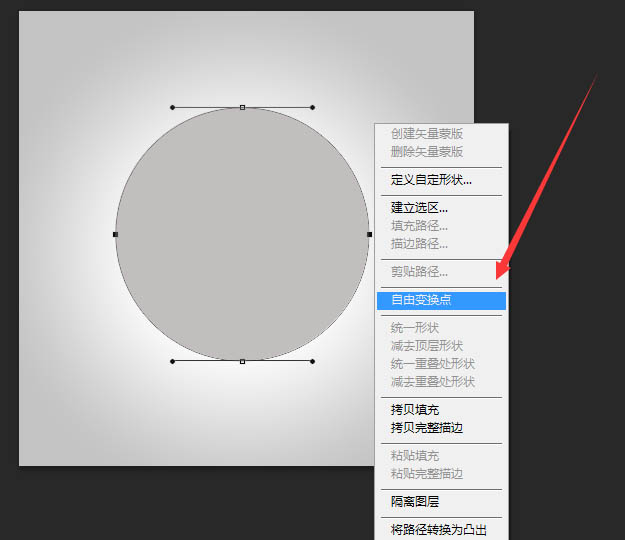
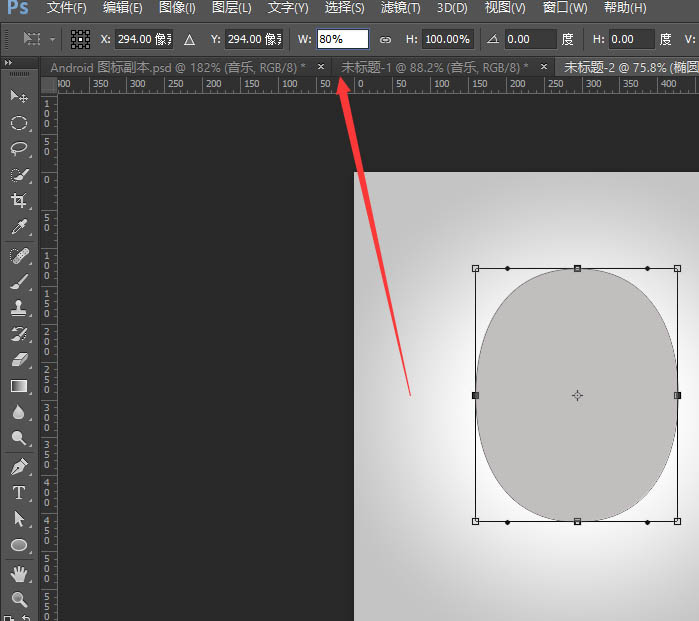
6、重复上一步骤,选中上面两个点,在H位置输入80。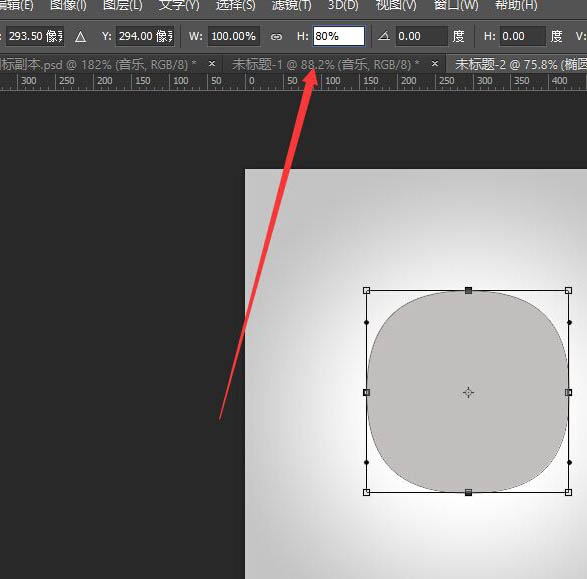
7、居中下,调整下大小自己感觉合适即可。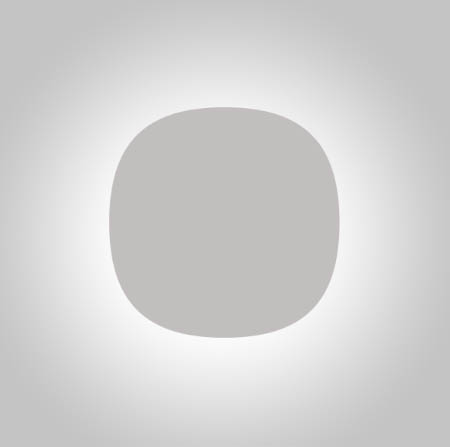
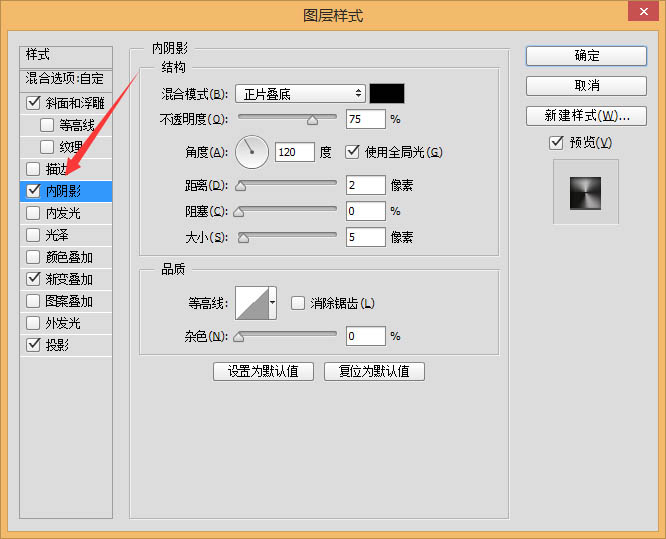
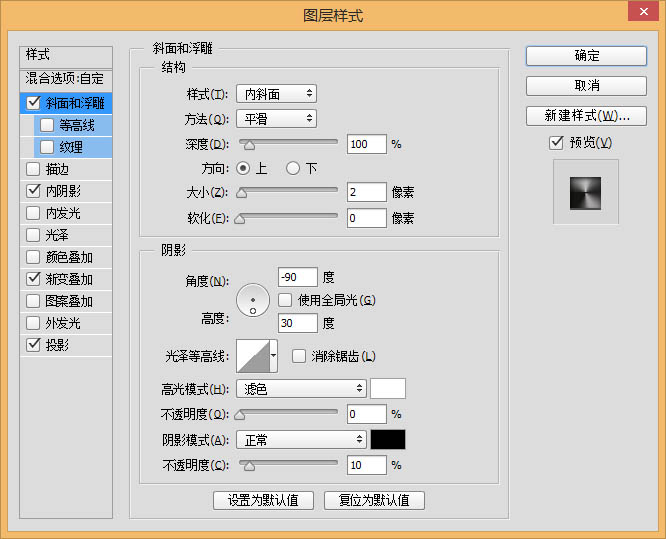
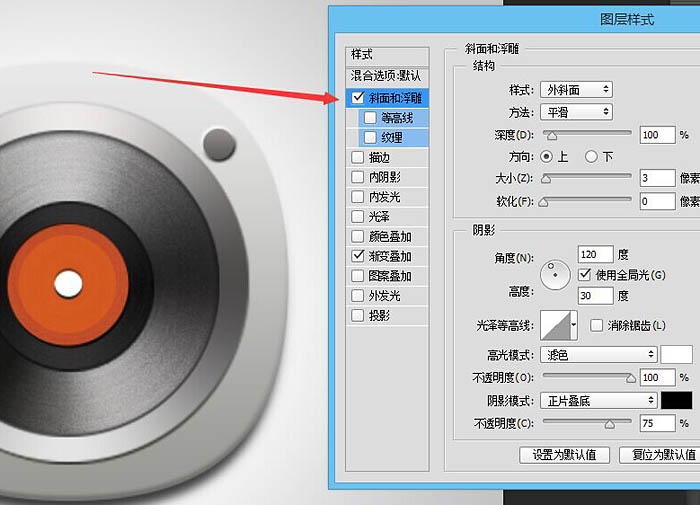
8、给调整好的圆角矩形添加图层样式,投影,渐变叠加,内阴影,斜面浮雕。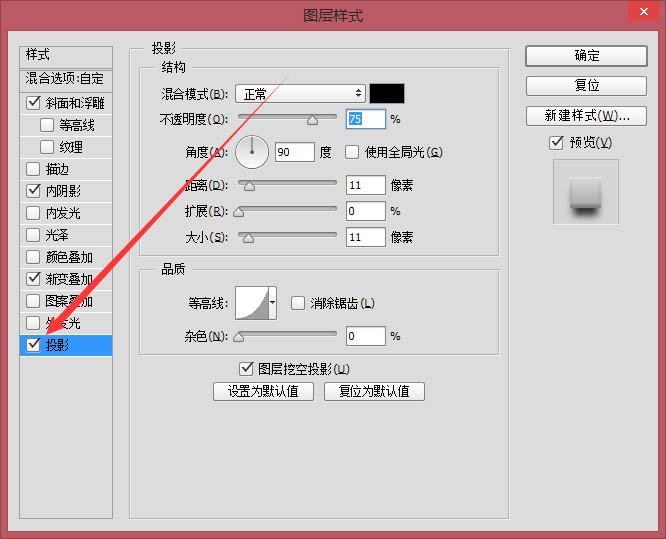
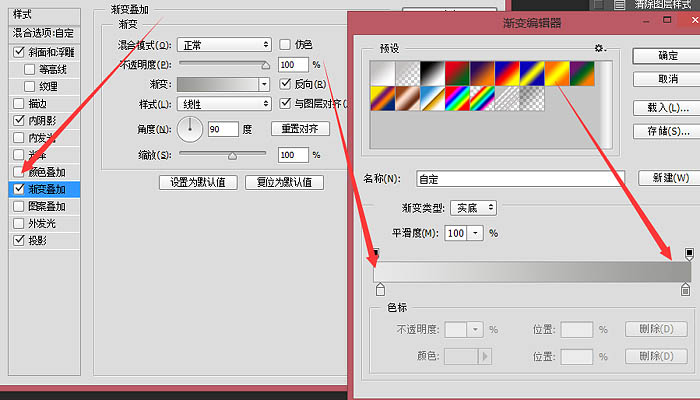
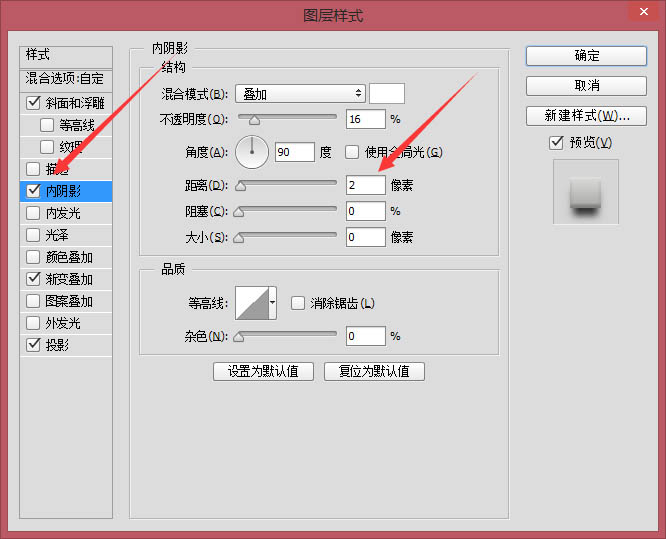
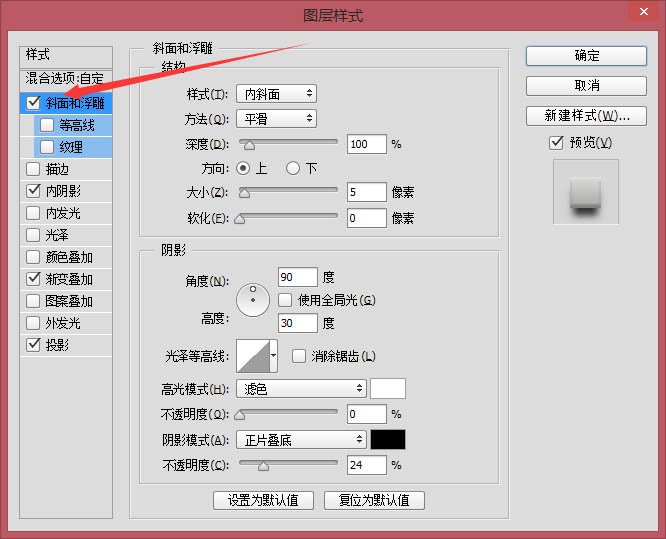
9、调整图层样式后的圆角矩形变的更有立体感。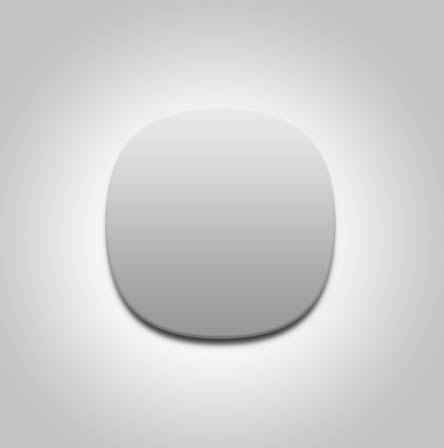
10、画一个圆大小自定,用渐变叠加调处金属质感。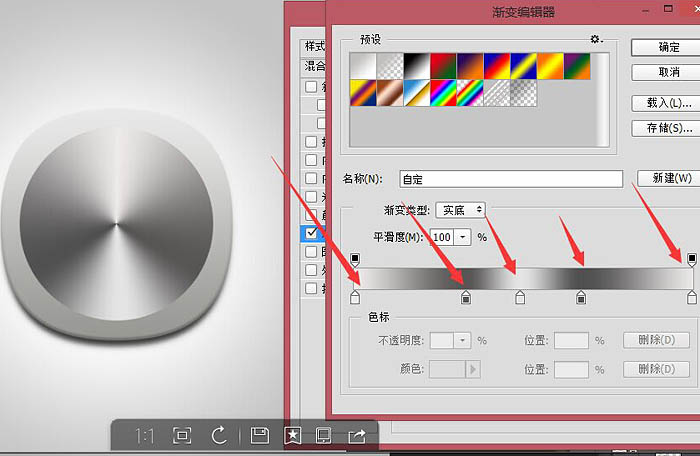
11、接着添加斜面浮雕和投影。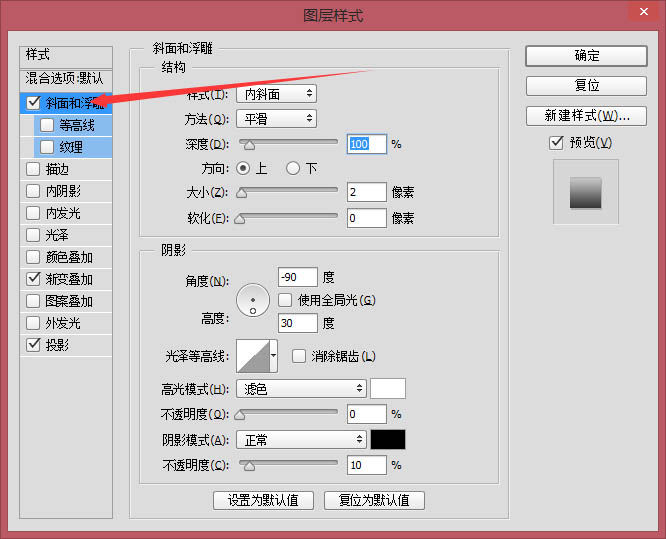
(本文来源于图老师网站,更多请访问http://m.tulaoshi.com)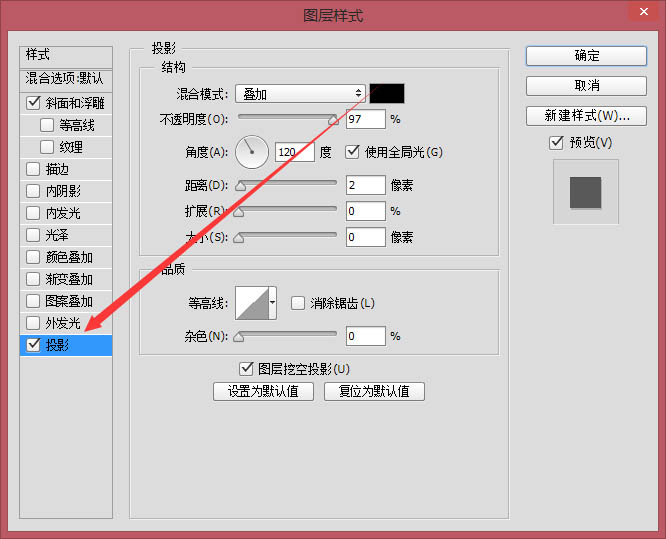
12、再画一个圆。
13、添加图层样式,先来个渐变叠加。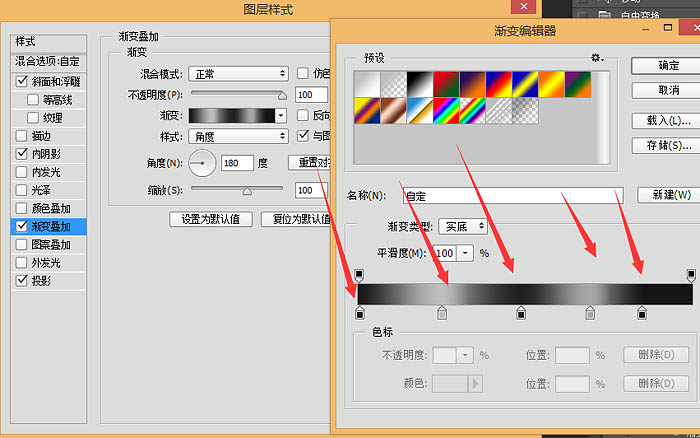
投影,内阴影,斜面浮雕。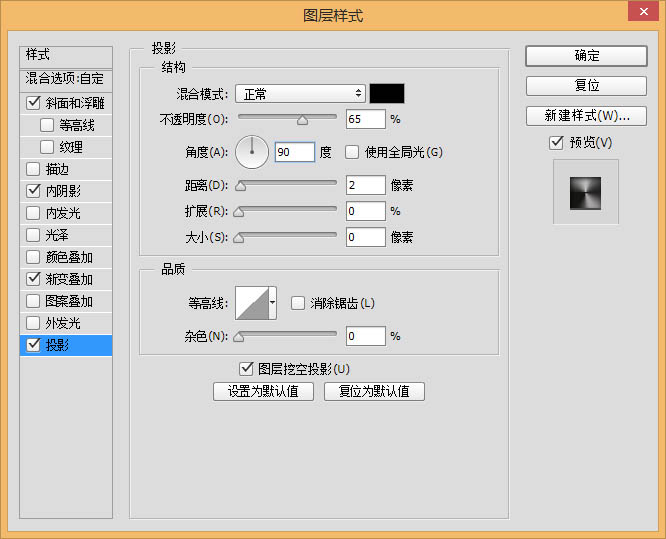
14、这一步来教同学做光碟上的拉丝效果,使它更为逼真,新建图层,拉个圆形套索,填充白色。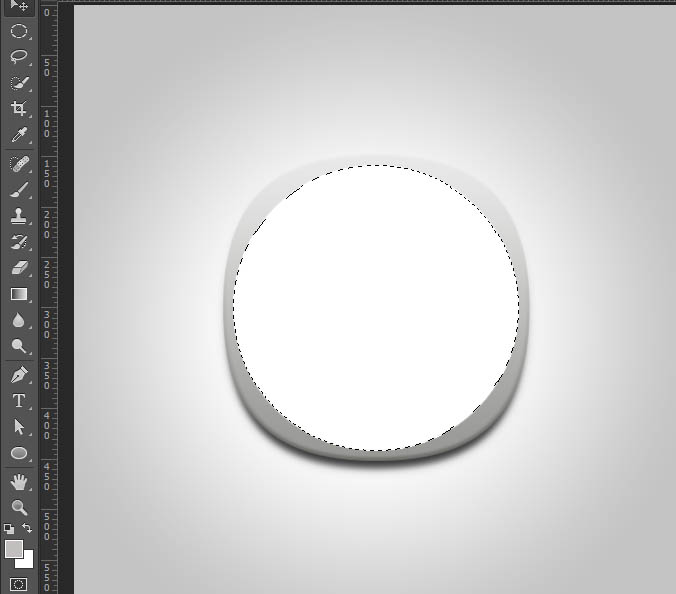
15、滤镜添加杂色。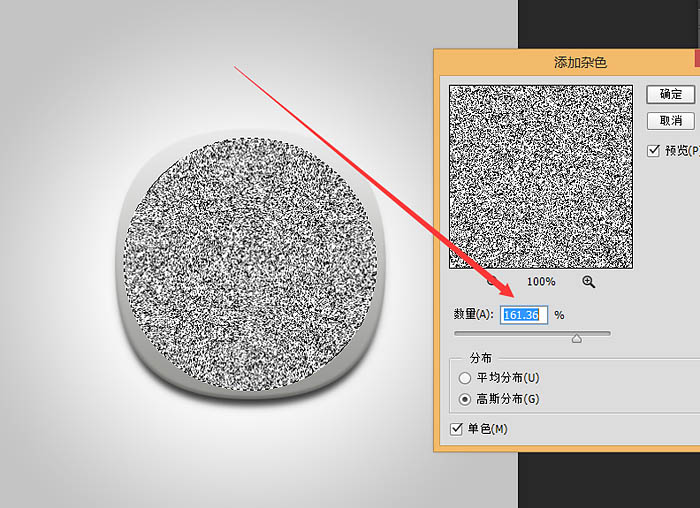
16、滤镜径向模糊。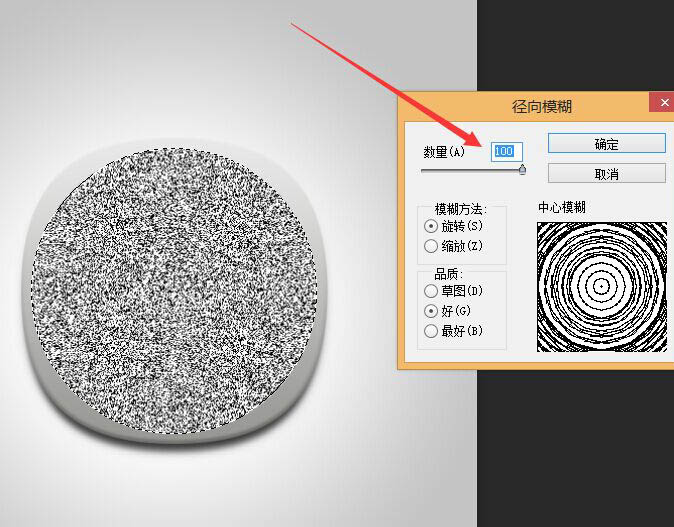
17、剪辑蒙版。 (有同学反映插入后就不见了,方法是:调出圆形的图层样式,混合选项里,勾上“将内部效果混合成组”勾选掉,把剪贴图层混合成组。就ok了)。
18、模式改为叠加,调整不透明度。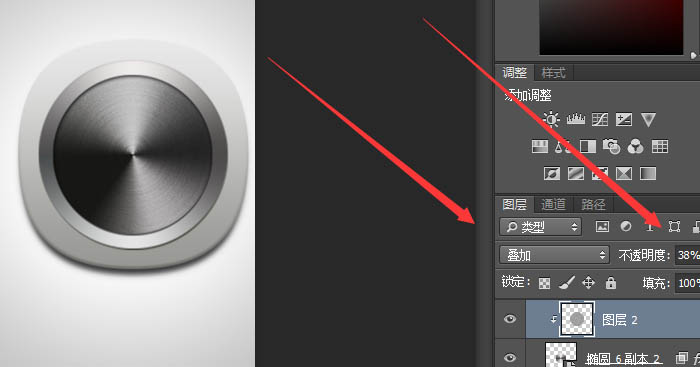
19、这样拉丝效果就出现了,也更加逼真点。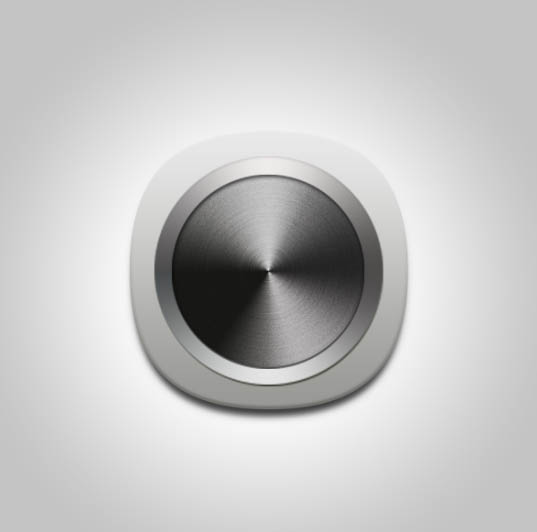
(本文来源于图老师网站,更多请访问http://m.tulaoshi.com)20、再画个圆形添加渐变叠加。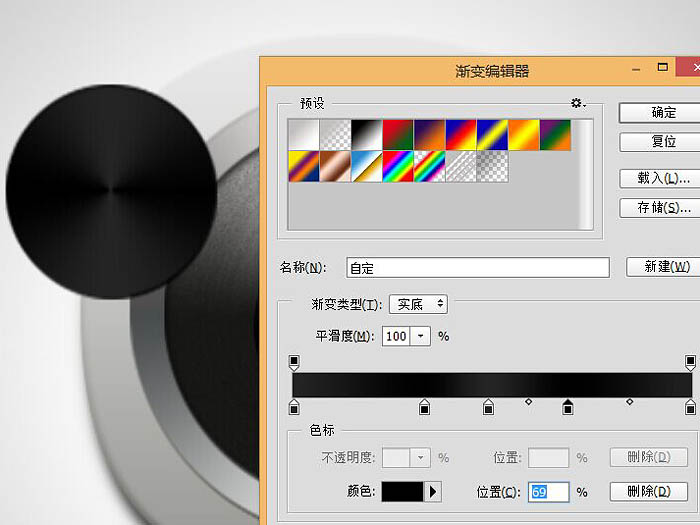
21、把拉丝图层拷贝出来,剪进去,透明度调低点,给它也添加拉丝效果。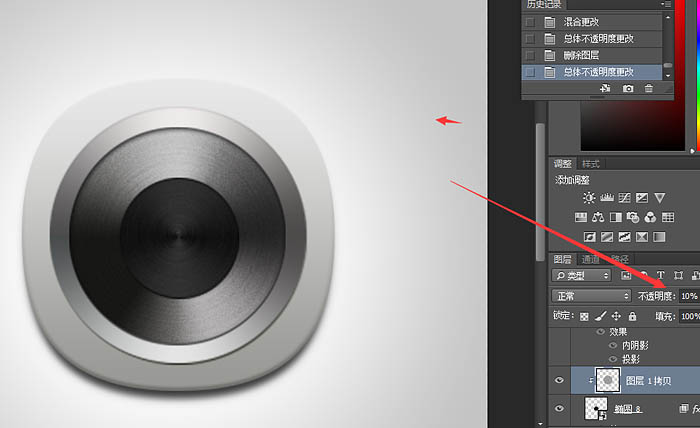
22、再画一个圆形填充红色。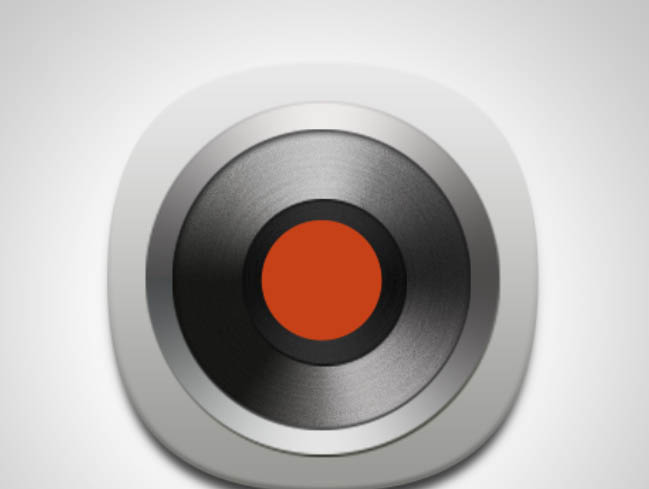
23、添加图层样式,投影,内阴影(参数可自己调整)。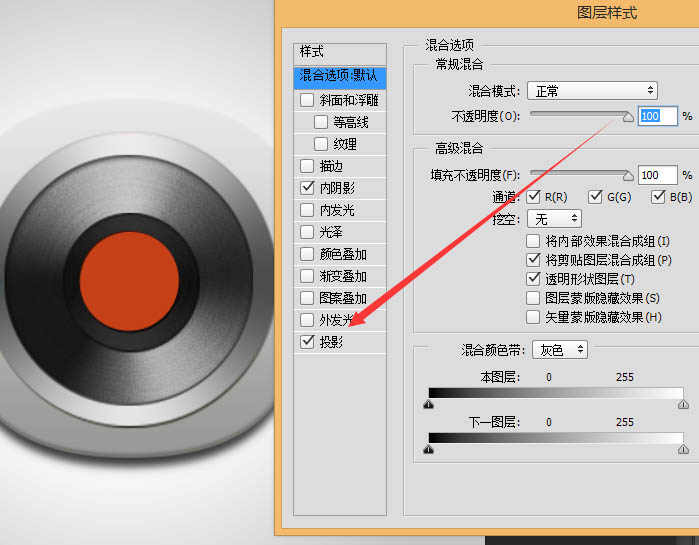
24、拷贝拉丝图层剪辑进去。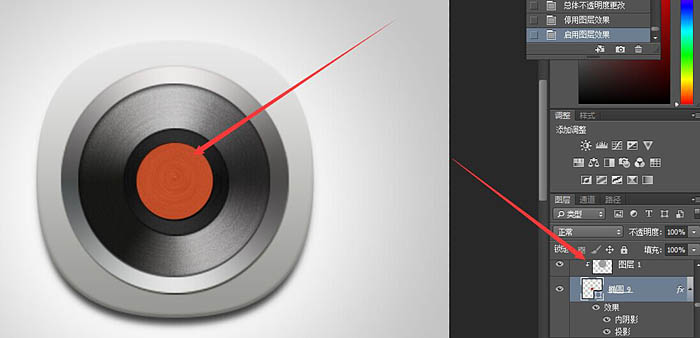
25、再画一个圆形,填充淡红色,也添加拉丝效果,即有俩红色圆形。
26、再画个小圆形填充白色。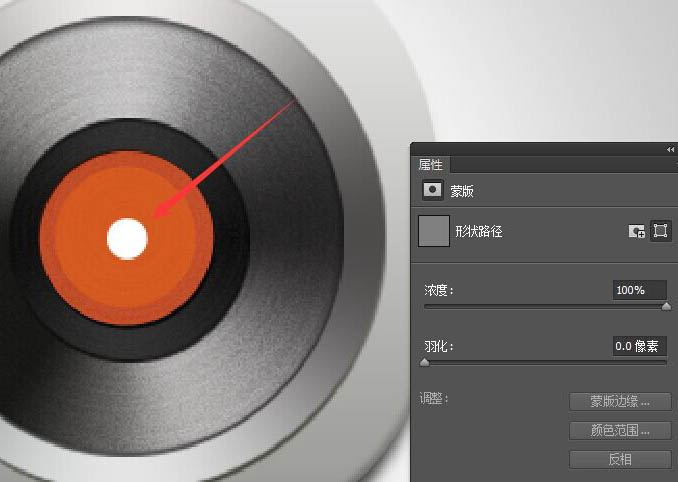
27、添加投影,内阴影。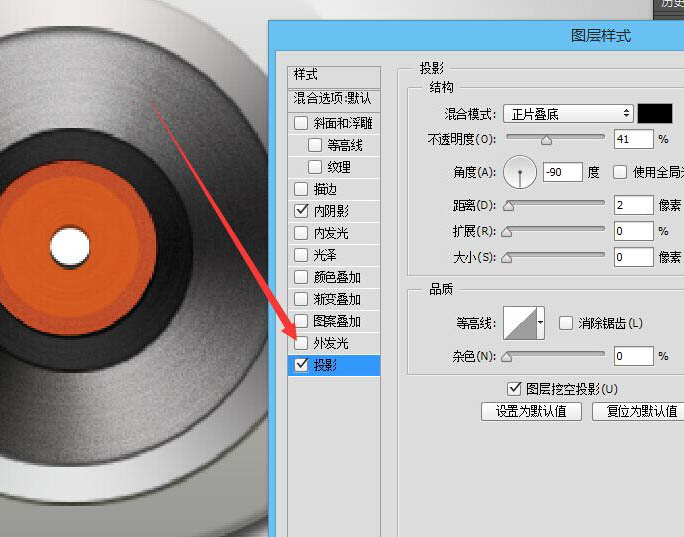

28、画个白色小圆放在这个位置,来做支架。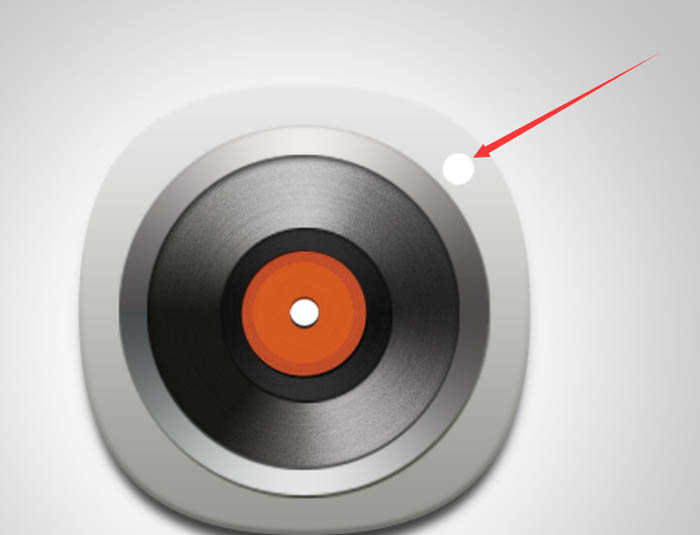
29、添加渐变叠加和斜面浮雕。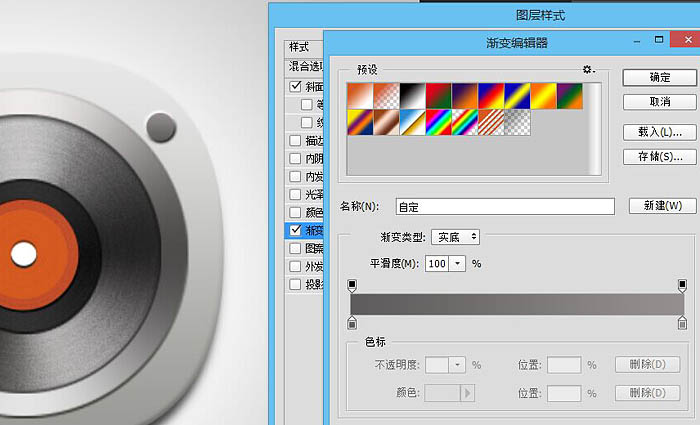
30、画个白色小圆,添加一像素描边。
31、支架部分很简单,同学们试着去做下,全都是用形状工具做的。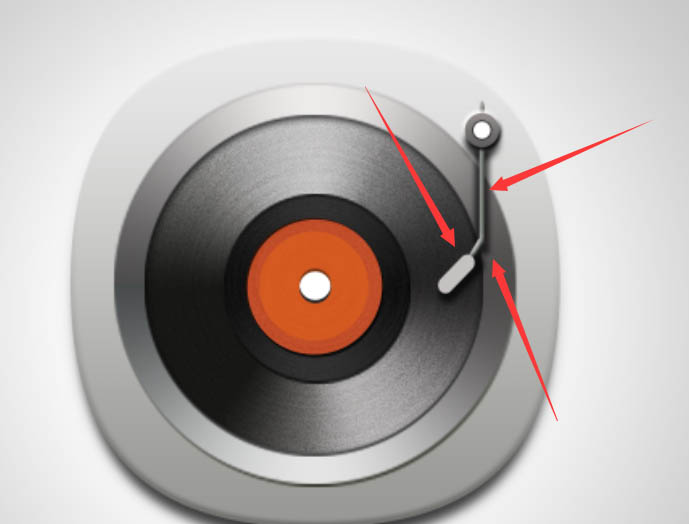
最终效果:


