下面是个Photoshop美化偏暗的外景图片并增加清晰度教程,撑握了其技术要点,学起来就简单多了。赶紧跟着图老师小编一起来看看吧!
偏暗图片的美化方法有很多,比较专业一点的就是把人物和背景分开来调整。这样处理相对来说比较灵活,可以随意美化图片中不太理想的部分。
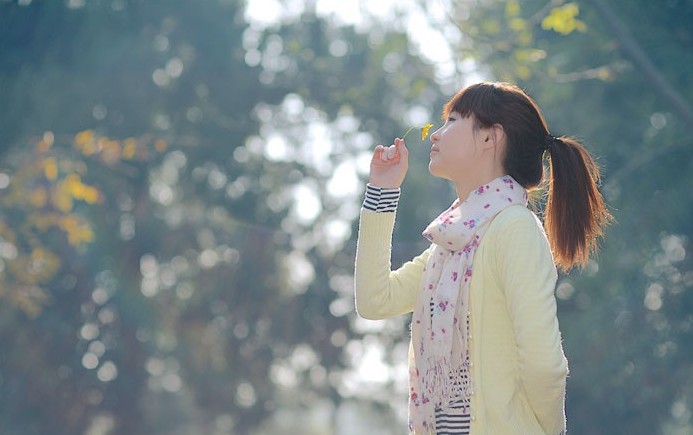
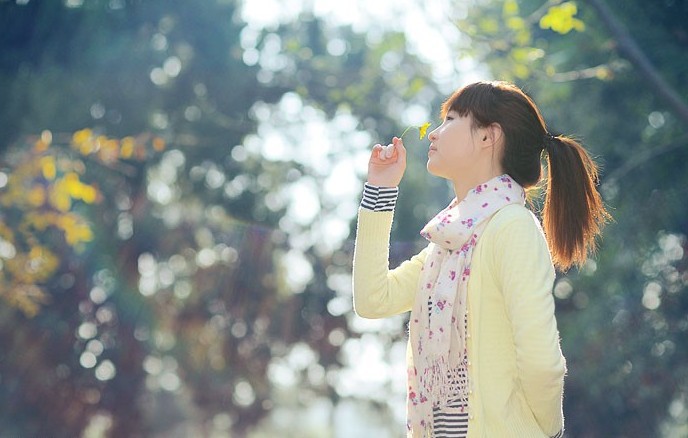
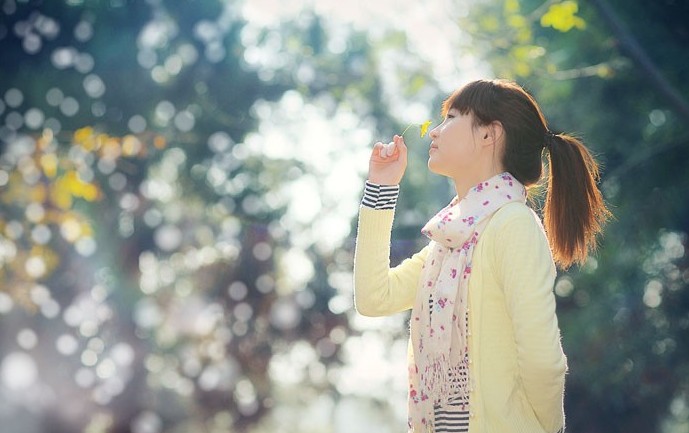
原图
最终效果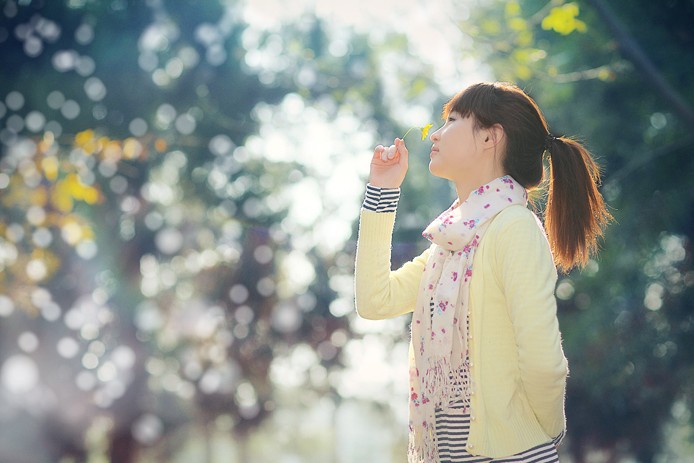
1、先打开原图,给人物进行磨皮,这里我用的是手工磨皮,图层1为对人物磨皮的图层,主要磨皮在于手上和人物的下巴部分,不会手工磨皮的使用Portraiture滤镜进行磨皮Portraiture滤镜。里我就不做详细介绍了。
盖印图层得到图层2,执行智能锐化,参数自定,效果如图。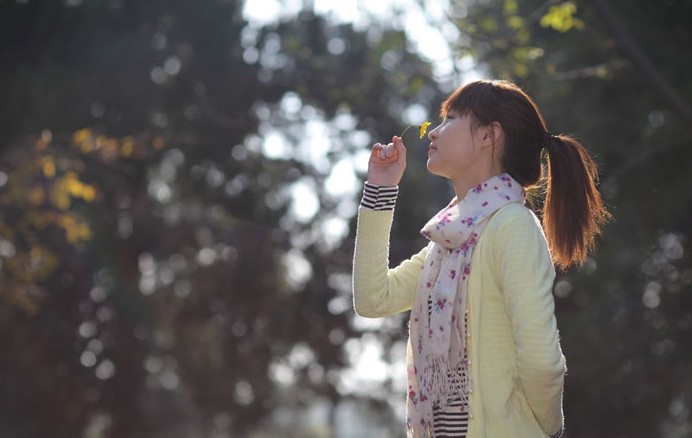
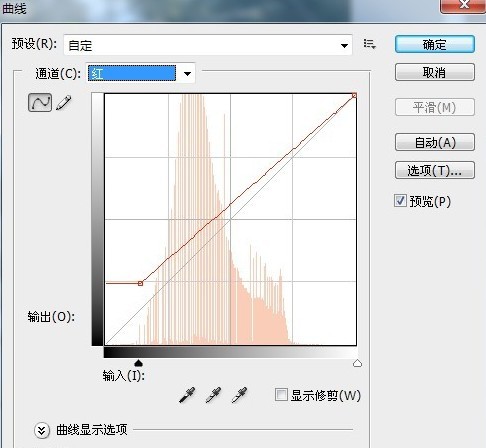
2、打开通道面板,选择红通道,载入选区,执行选择-反向,建立曲线调整层,参数如下。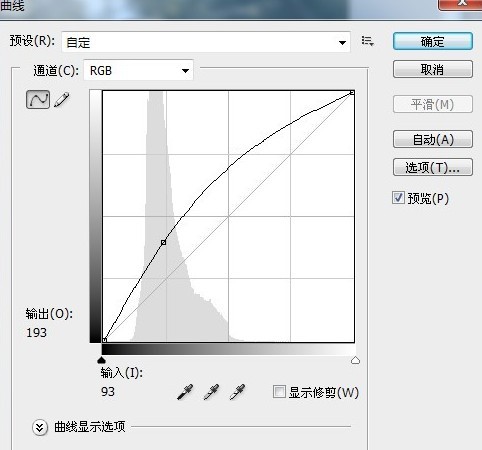
(本文来源于图老师网站,更多请访问http://m.tulaoshi.com/psxpcl/)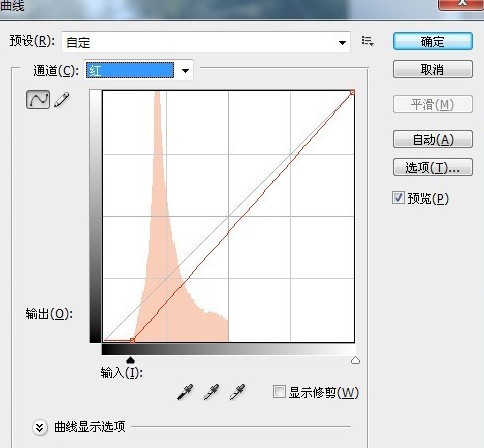
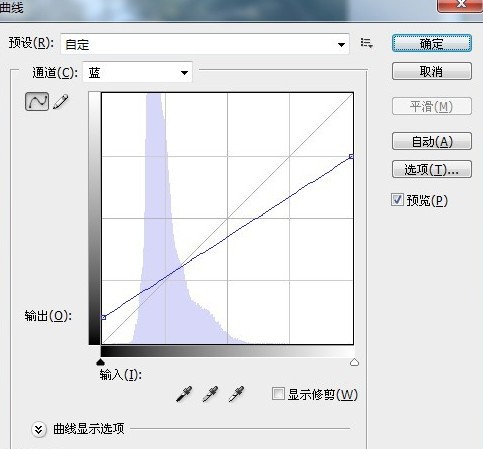
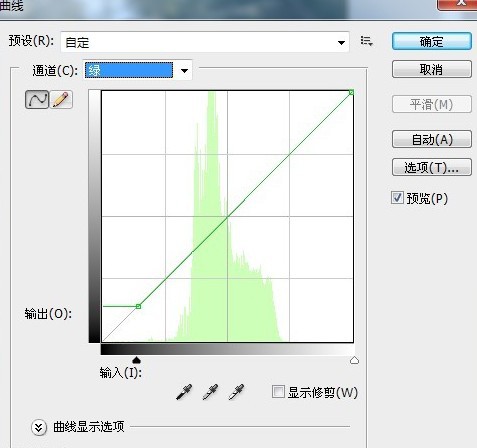
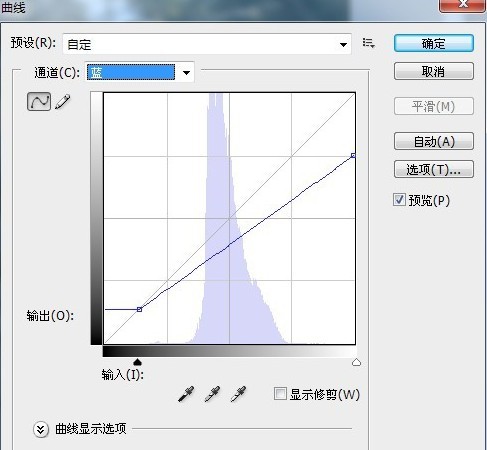
3、CTRL+刚刚的曲线层图层蒙版,得到选区,建立曲线调整层,参数如下。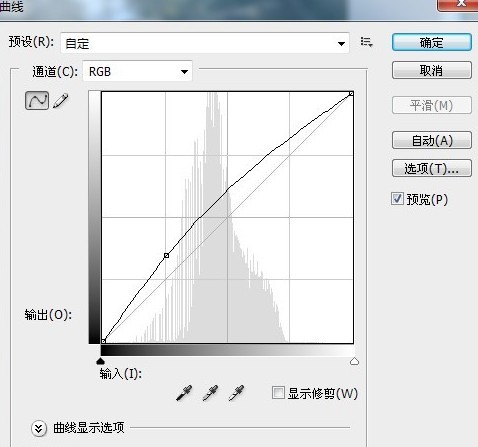

4、盖印图层得到图层3,再次执行智能锐化,参数自定,效果如图。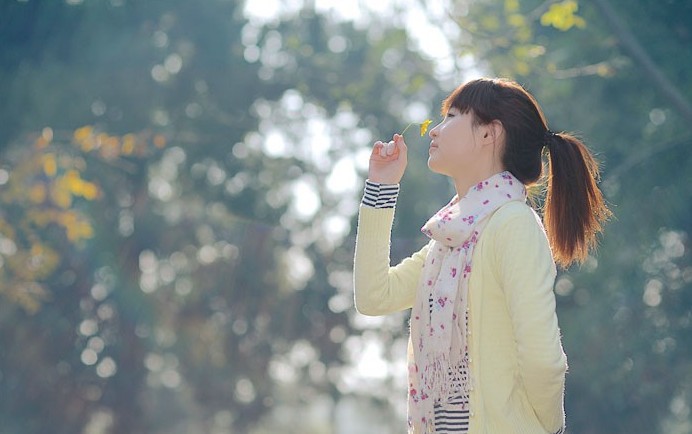
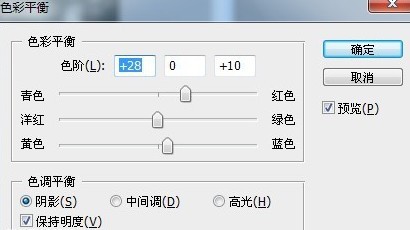
5、使用套索工具把人物选择出来,执行选择-反选,建立色彩平衡,参数及效果如下图。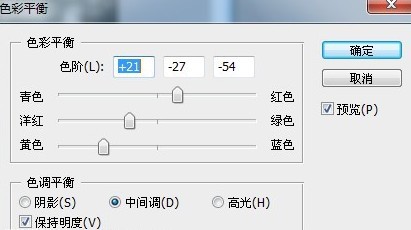
(本文来源于图老师网站,更多请访问http://m.tulaoshi.com/psxpcl/)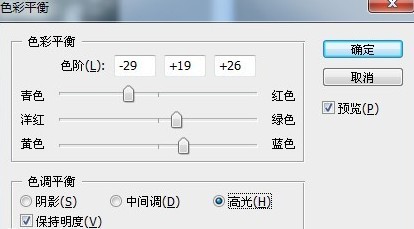
6、使用套索工具选择人物层,执行色阶调整层,参数如下。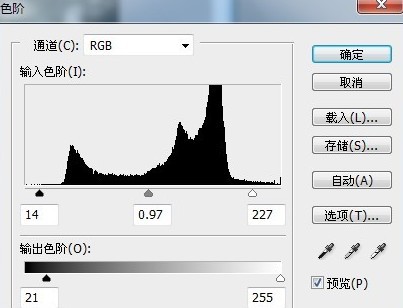
7、盖印图层得到图层4,复制一层图层5然后把人物部分撤掉,再次复制图层5得到图层6,不透明度为75%,填充为71%,可以添加一些镜头光晕和光照效果。
最后在进行一下模糊效果,图层模式选择强光,主要是把背景变亮和模糊掉,这步可以自由发挥的。
8、盖印图层得到图层7,然后给照片做一下暗角效果,效果如下。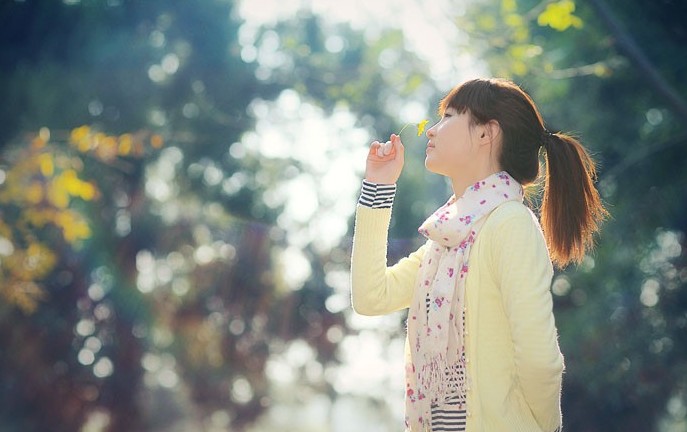
9、载入高光素材,放到人物的左边,混合模式改为“滤色”,完成最终效果图。
图层参照及最终效果。