关注图老师电脑网络栏目可以让大家能更好的了解电脑,知道有关于电脑的更多有趣教程,今天给大家分享Photoshop制作剔透的灰色塑胶字教程,希望对大家能有一点小小的帮助。
好看的水晶或塑胶字都不是用一个简单的图层样式完成的。需要用多层文字叠加,慢慢渲染出高光和暗部。再适当配上一些纹理或高光素材,作出晶莹剔透的效果才完美。 最终效果

(本文来源于图老师网站,更多请访问http://m.tulaoshi.com/psxg/)(本文来源于图老师网站,更多请访问http://m.tulaoshi.com/psxg/)
1、首先我们新建一个文档,尺寸:800x290px,背景填充灰色,可加上一些杂色。打上想要的文字,复制两层。然后分别讲解下这3个字体图层的图层样式:
调整laohei 1图层样式,如下图: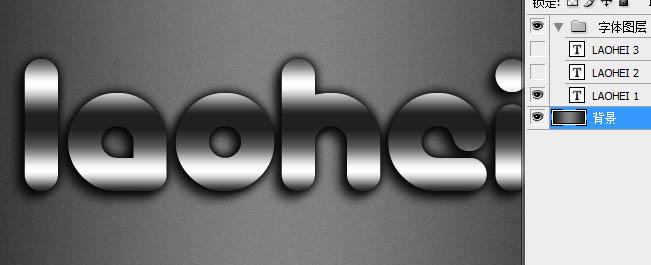


添加图层样式后的效果如下图:
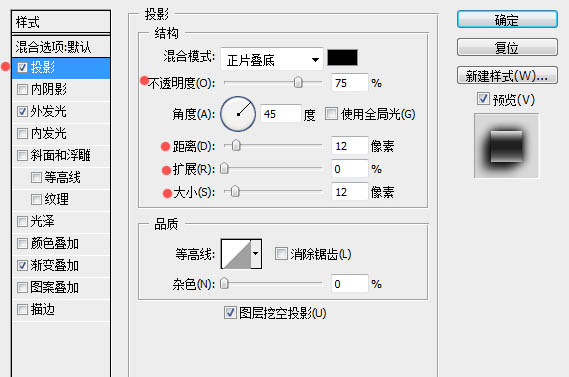
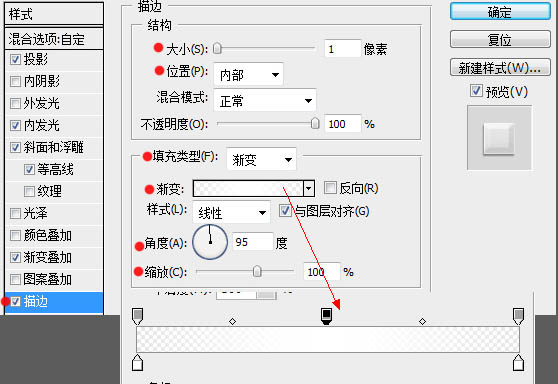
2、调整laohei 2 图层: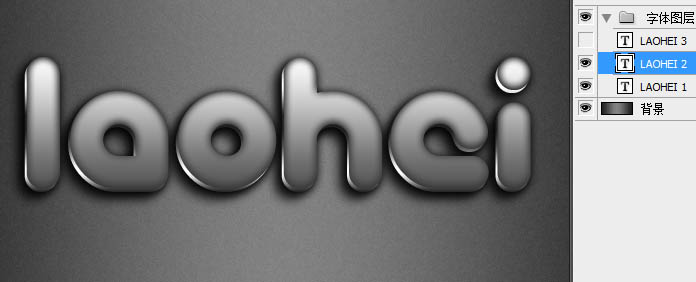
图层样式参数如下图:
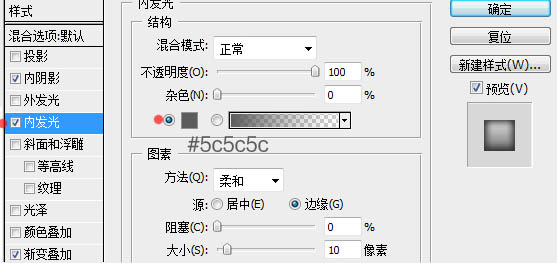

3、调整laohei 3图层: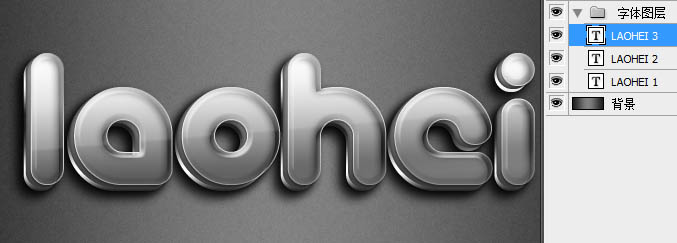
具体参数如下图: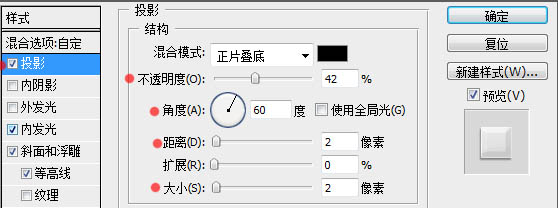


最后适当调整第二个和第三个图层的位置,就可以得到理想的效果:
(本文来源于图老师网站,更多请访问http://m.tulaoshi.com/psxg/)(本文来源于图老师网站,更多请访问http://m.tulaoshi.com/psxg/) 


