a963070679
2016-01-31 12:57
想要天天向上,就要懂得享受学习。图老师为大家推荐Photoshop给高清的人像脸部增强质感,精彩的内容需要你们用心的阅读。还在等什么快点来看看吧!
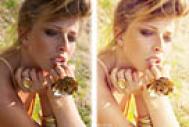
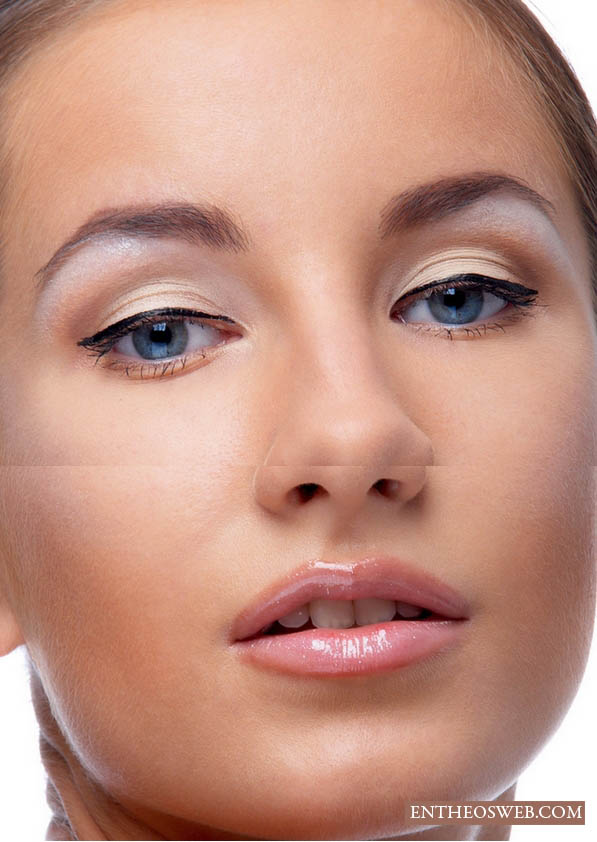
高清人像处理大致分为两个大的阶段。第一阶段就是修复瑕疵及简单润色,各种保细节磨皮都可以派上用场。第二阶段就是后期质感增强,增强质感的方法就是提亮高光部分同时加深暗部。 原图
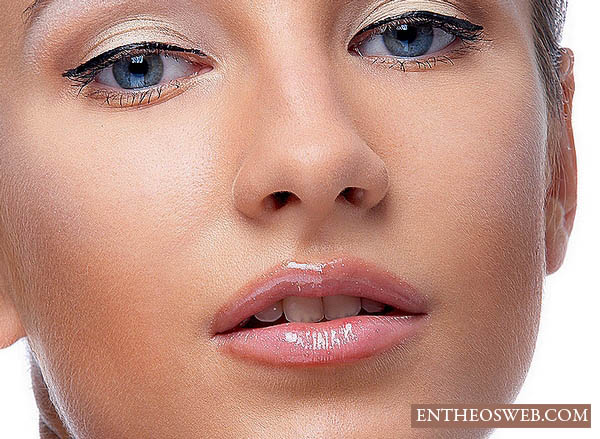
最终效果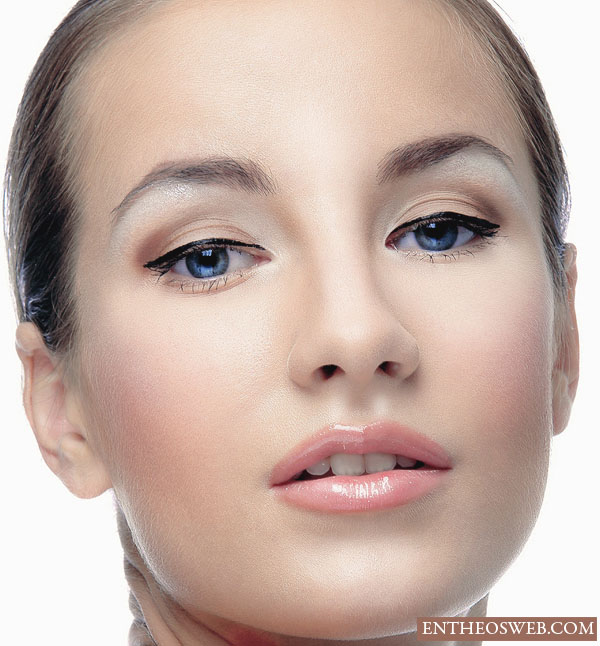
1、打开图片。记住不是所有的图像可以适合这个修饰风格。你应该选择一幅高质量和人物皮肤不要过于光滑)或模糊,至少应该清晰可见毛孔。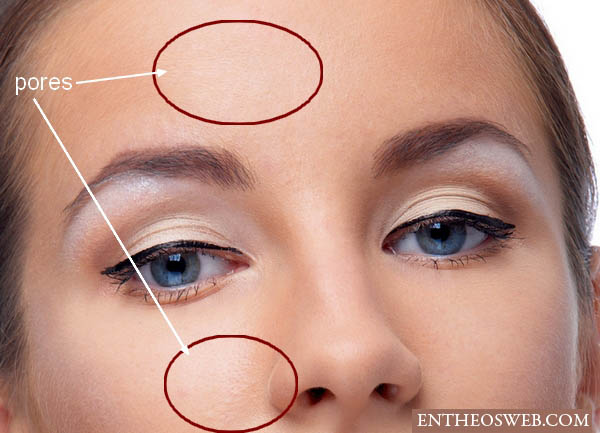
2、复制一个的新背景层,通过这种方法我们可以编辑的皮肤的时候不影响其余的图片,可随时回调。笔刷设置如下图所示。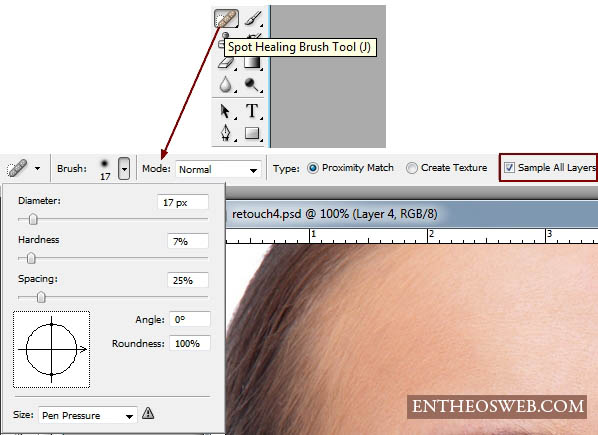
3、点击你想要除去的污点。 根据污点的大小你可以更改笔刷的直径。记住,不是所有的污点都可以成功去掉,你可以用别的工具(图章、修补工具…)固定后再说。这一步后,一个完美的皮肤清洁就完成了,你能看到我脸上运用这个工具的轨迹如下。
4、盖印一个图层,放在最上面。执行:滤镜 锐化 智能锐化。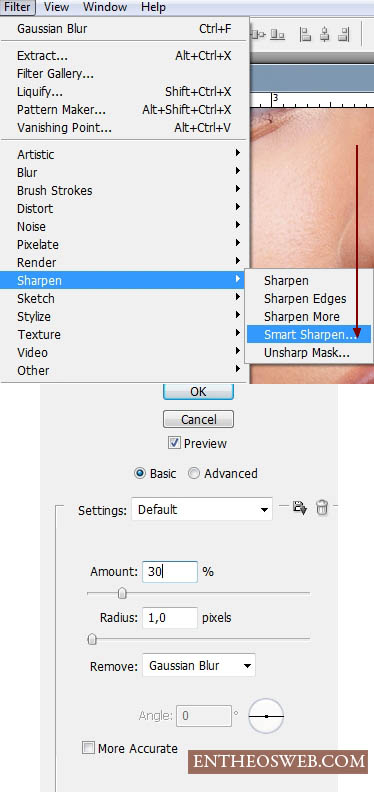
5、合并所有图层了,然后复制一层。现在简单锐化皮肤。选择:滤镜 其它 自定。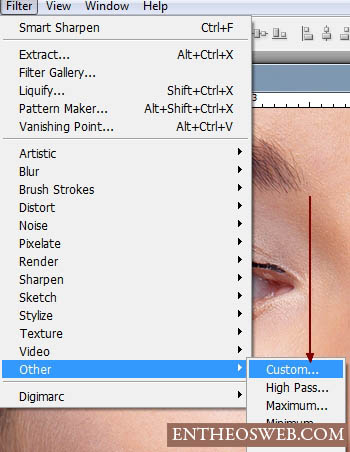
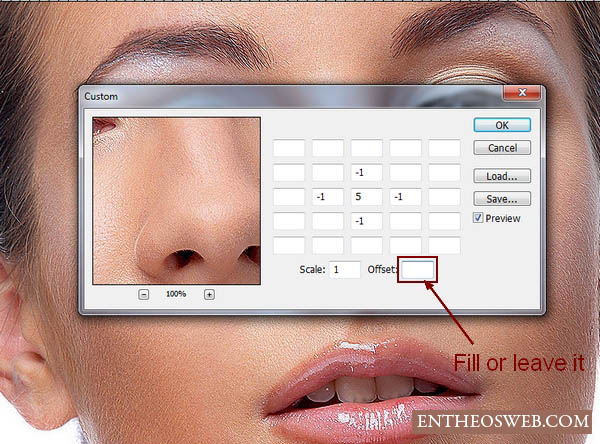
6、执行:编辑 渐隐。
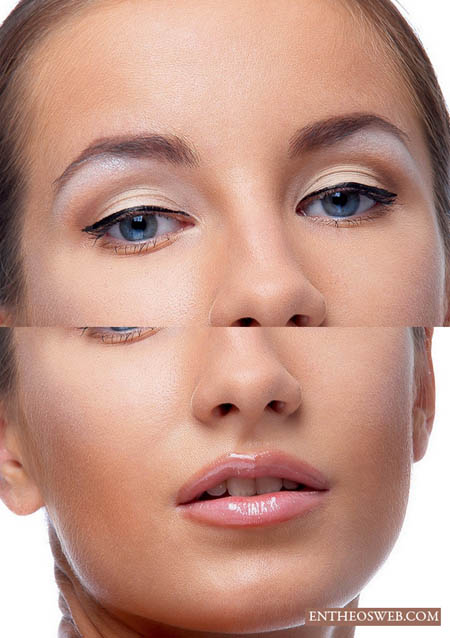
7、加图层蒙版除去锐利头发、眼睛、眼睑的嘴唇,牙齿。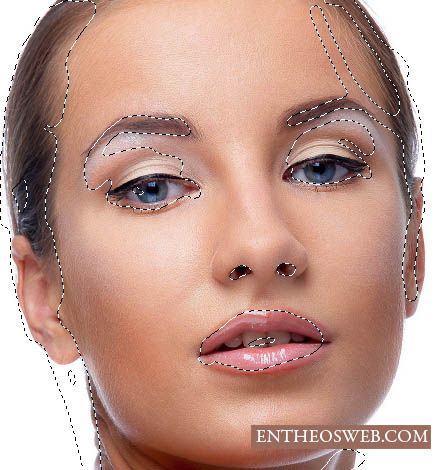
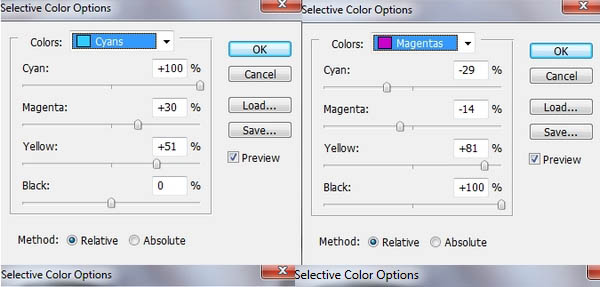
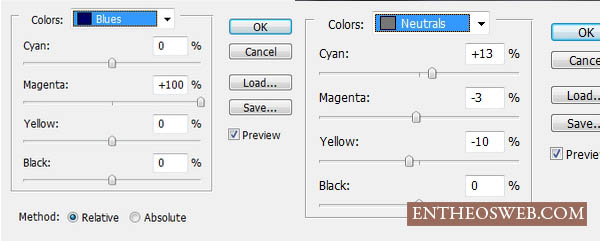
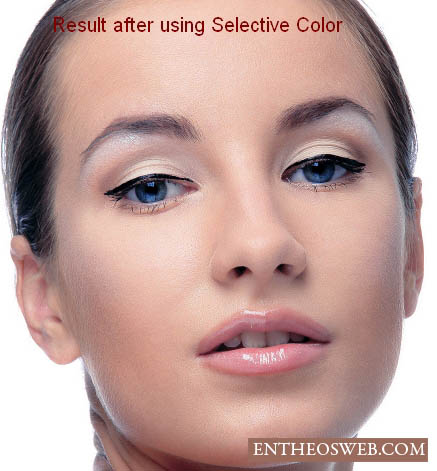
8、创建可选颜色调整图层。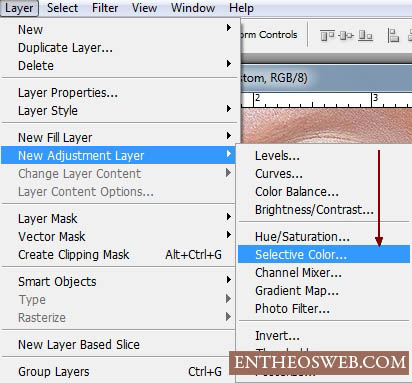

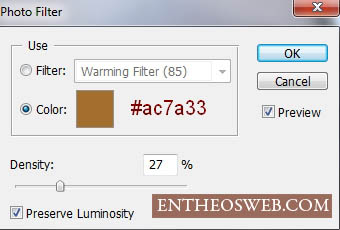
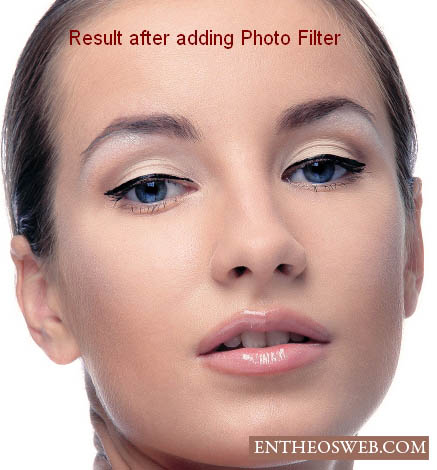
9、创建照片滤镜调整图层。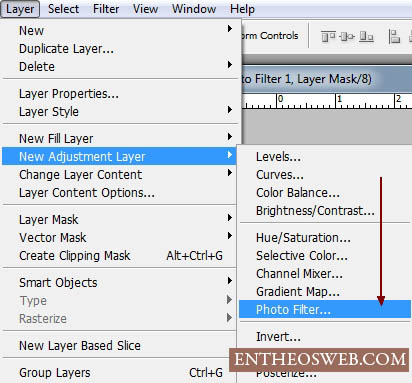
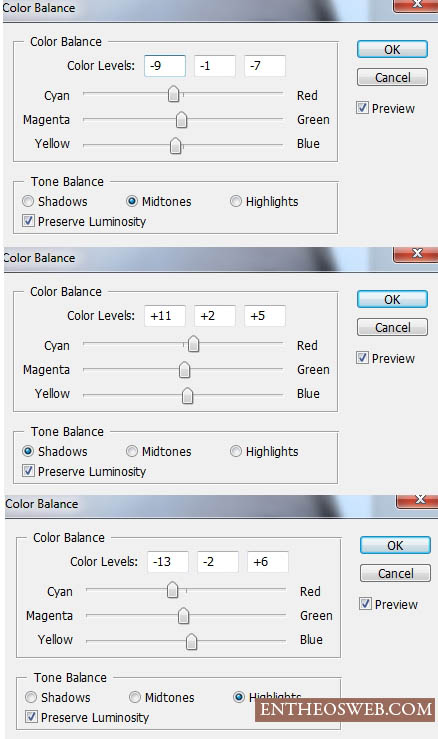
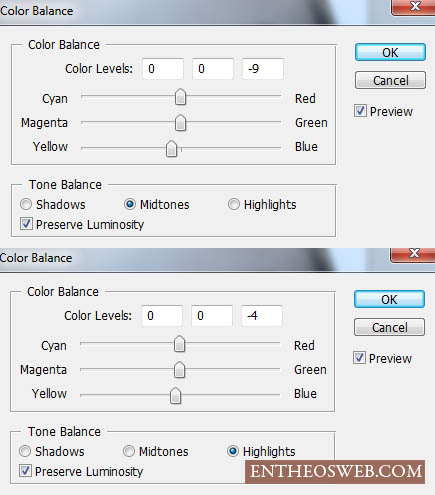
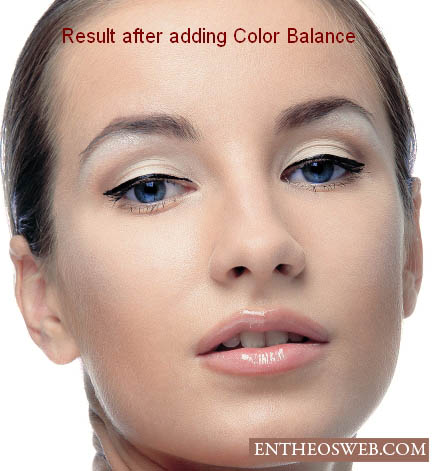
10、创建两次色彩平衡调整图层,参数及效果如下图。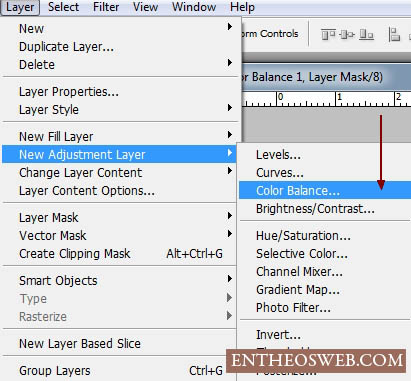
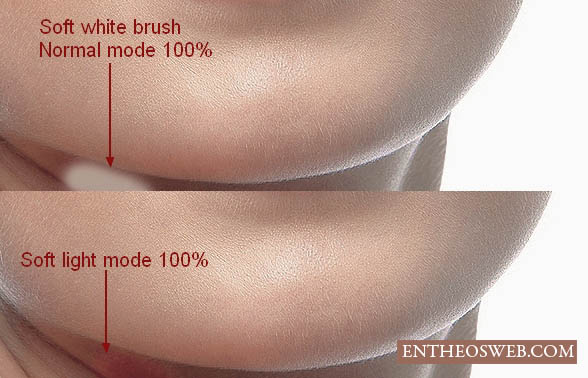
11、现在我们修复脖子部分的暗部。新建一个图层放在最上面,用白色画笔轻轻涂抹如下图,确定后把图层混合模式改为“柔光”。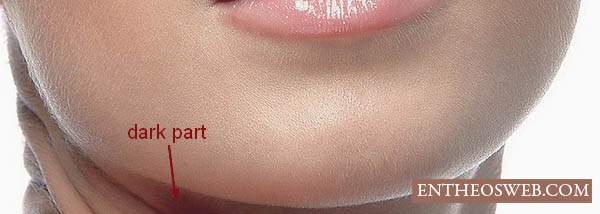
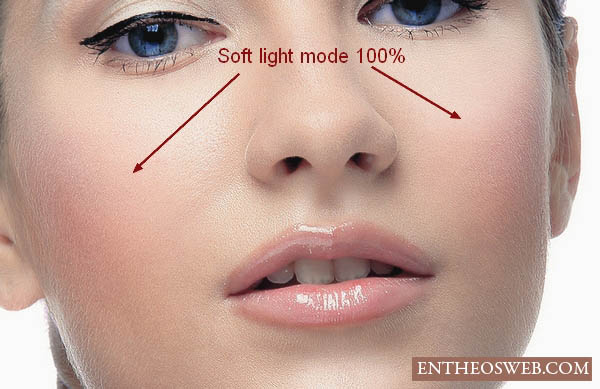
12、在这一步骤中,我们增加脸部的高光。创建一个新的层,使用柔软白色画笔涂抹下图各位置。需要控制好画笔不透明度。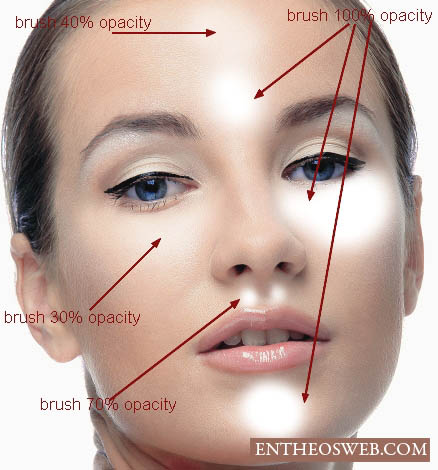
(本文来源于图老师网站,更多请访问http://m.tulaoshi.com/psxpcl/)13、图层混合模式改为“柔光”,不透明度改为:60%,如下图。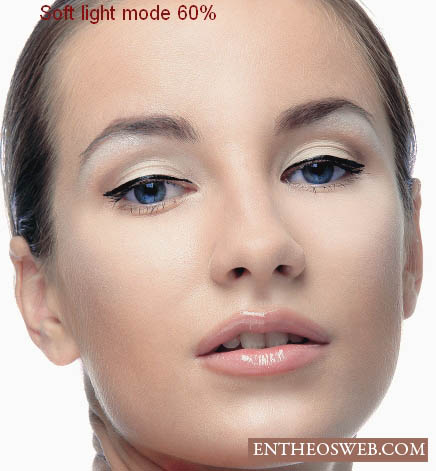
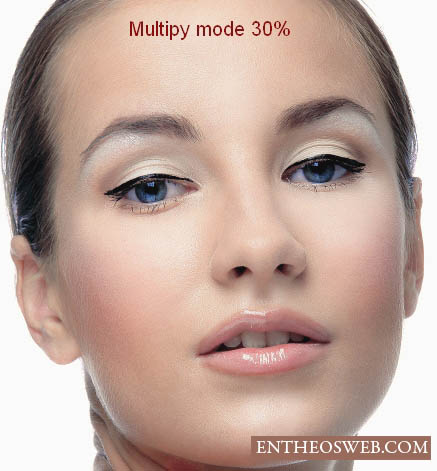
14、新建一个图层,把前景颜色设置为紫红色:#c6828d,用画笔在腮红位置涂上腮红,再把混合模式改为“柔光”。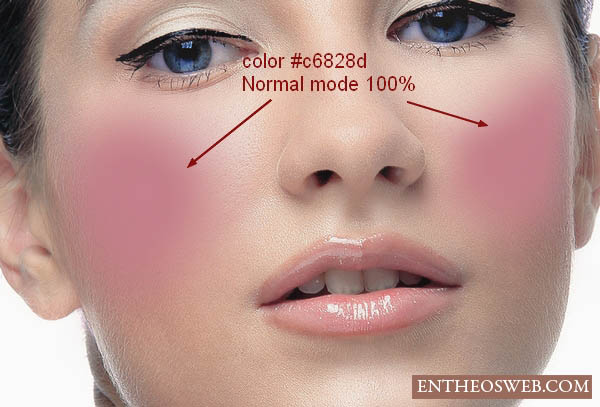
15、新建一个图层,额头边缘用画笔涂上颜色:#c7bdb9,混合模式改为“正片叠底”,不透明度改为:30%。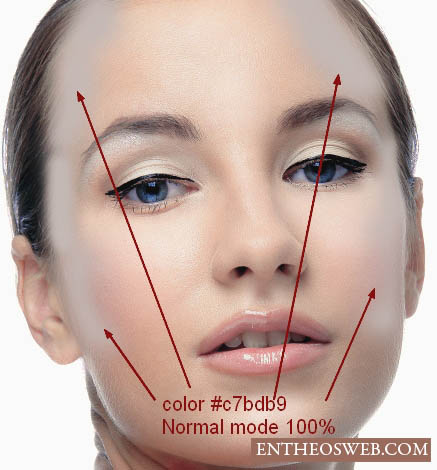
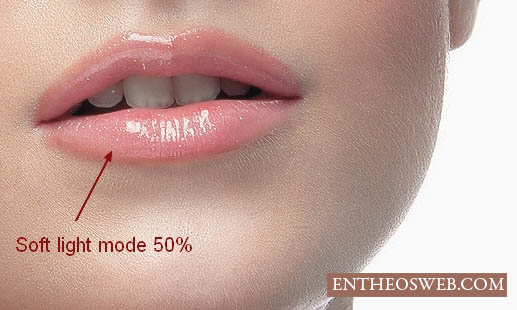
16、新建一个图层,用画笔把嘴唇部分涂上颜色:#b45f6d,混合模式改为“柔光”,不透明度改为:50%。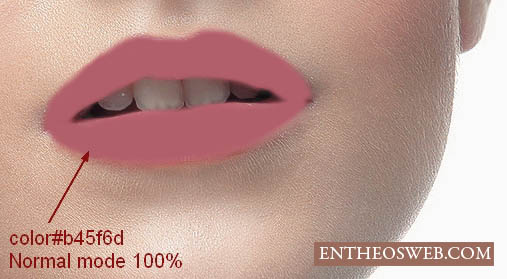
17、新建一个图层,牙齿部分刷上白色,混合模式改为“柔光”,不透明度改为:30%。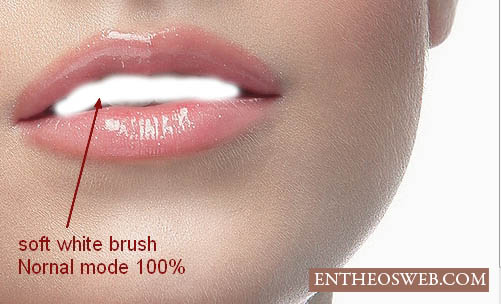
(本文来源于图老师网站,更多请访问http://m.tulaoshi.com/psxpcl/)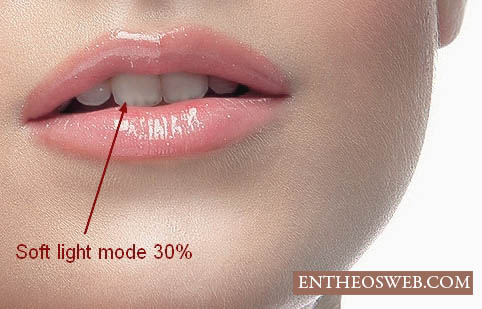
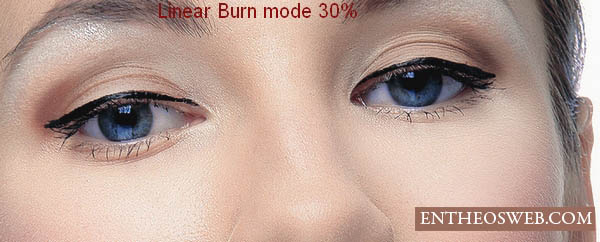
18、新建一个图层,眼影部分涂上颜色:#b37c76,混合模式改为“线性加深”,不透明度改为:30%。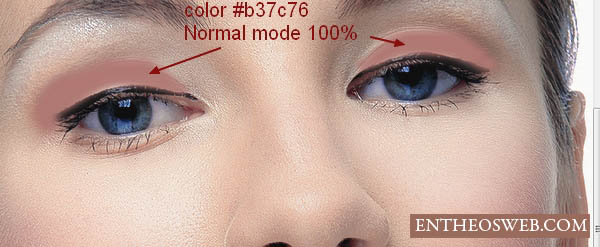
19、在最后一步,新建一个图层,模式为叠加100%和填充50%的灰色。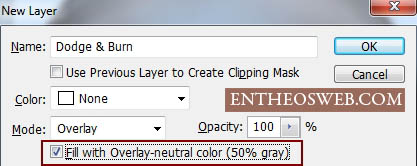
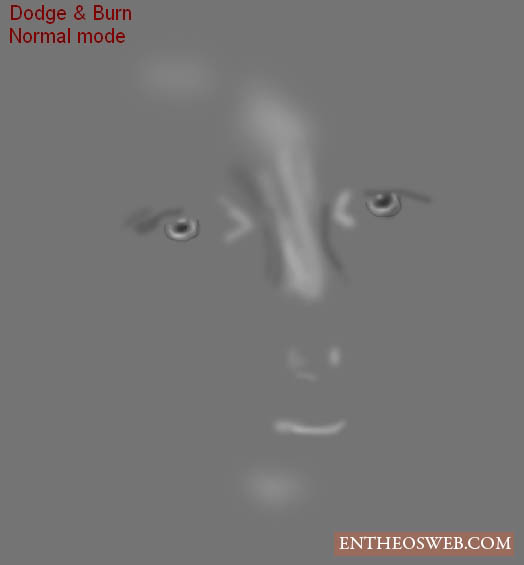
20、用减淡和加深工具处理细节,减淡工具涂抹光亮的鼻梁、下巴、额头、皮肤、眼睛等部位。加深工具涂抹鼻子的一面、虹膜、眼睑、睫毛、尤其是最后的眼皮,示意图如下图。

最终效果: