这里介绍的火焰字是使用火焰素材来完成的。过程:先设置好想要的文字,如果喜欢立体效果,就需要用3D等做出立体字;然后用纹理素材给文字表面增加一些纹理,并用火焰素材叠加到文字上面;后期给文字周围及画布的其它位置增加一些火焰即可。
最终效果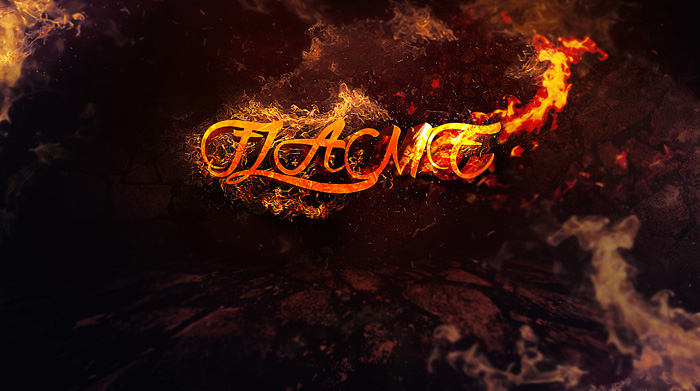
1、新建一个黑色背景1400px * 782px的文档,我们将从使用下载的碎石纹理准备大地开始。在Photoshop中打开这个纹理并画选区。

2、复制粘贴这个选区到我们的文件,并使用自由变换来改变选区的角度。
3、使用软橡皮工具减淡纹理的边缘。
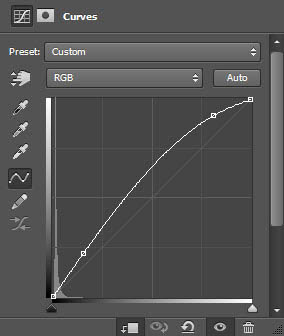
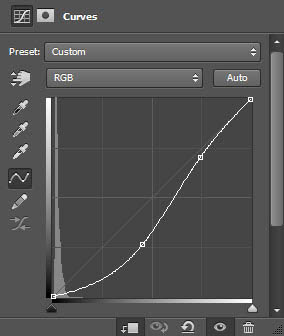
4、添加下面两个调整图层,色阶及曲线,并在大地纹理上创建剪贴蒙版。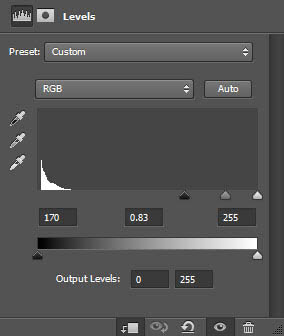
5、我们将在后面添加一些碎石来支撑我们的文字。我们可以回到碎石纹理并选中整个图像。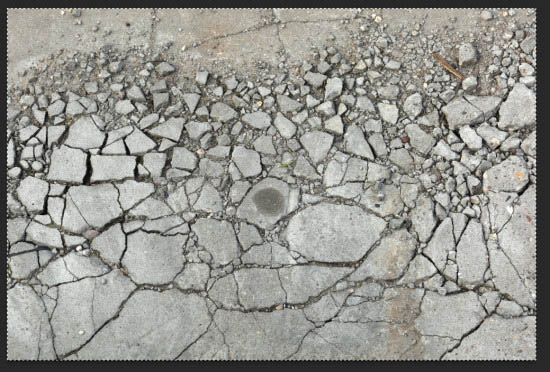
6、复制粘贴整个选区到我们的文档。调整大小以适合文档并降低其不透明度到70%左右。
7、用软橡皮工具减淡其边缘。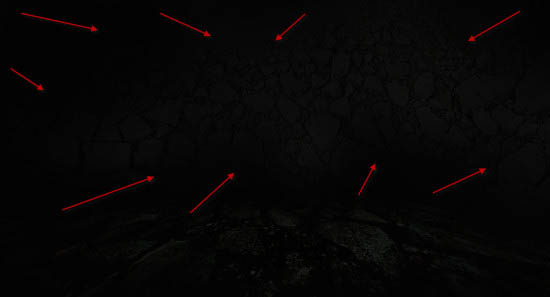
8、应用下面两个调整图层并将其设为新碎石图层的剪贴蒙版。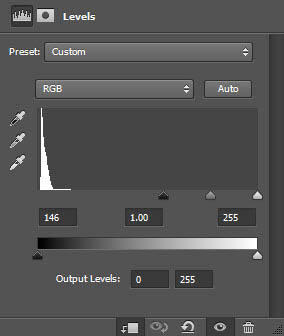

(本文来源于图老师网站,更多请访问http://m.tulaoshi.com/psxg/)9、如果你使用的是早期版本的Photoshop而且没有3D功能,你可以在这里下载渲染好的3D文字PSD文件。 如果你有CS 6及以上版本,使用我们下载的字体并用3D功能渲染文字“FLAME”。
10、选中文字。
11、把选区移动到我们的碎石地面图像上,并复制选区。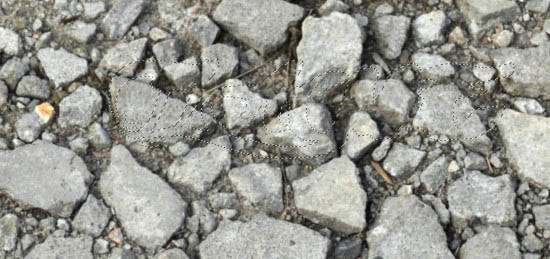
12、把选区粘贴到文字上,使用软橡皮移除纹理上的某些部分,不要让它覆盖所有文字。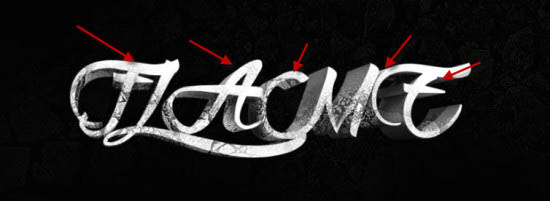
13、加载火焰纹理图像并重复上面的步骤,复制火焰的选区。 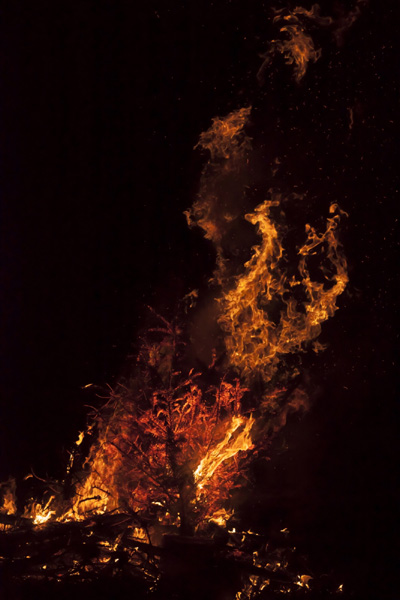
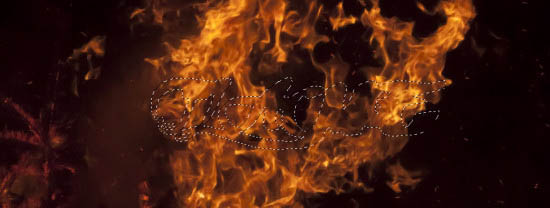
14、把选区粘贴到文字上,并把图层混合模式改为强光。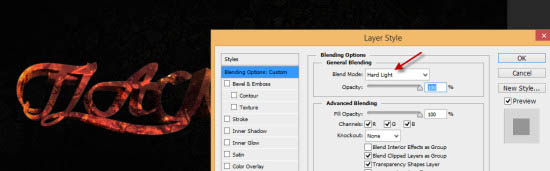
(本文来源于图老师网站,更多请访问http://m.tulaoshi.com/psxg/)15、我们可以复制3D图层并将其移动到所有纹理图层的最上方。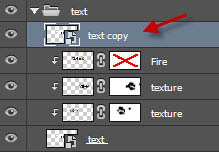
16、将这个图层的混合模式改为“叠加”。
17、这是迄今为止的效果。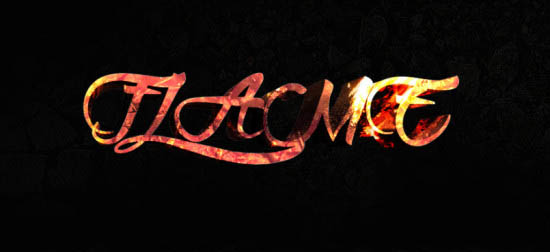
18、我们将为我们的文档添加周围的火焰,使用套索工具(羽化设为40px)来选择火焰图像的一部分。
19、把选区复制粘贴到我们的文档,使用下面USM锐化来稍微锐化一下火焰。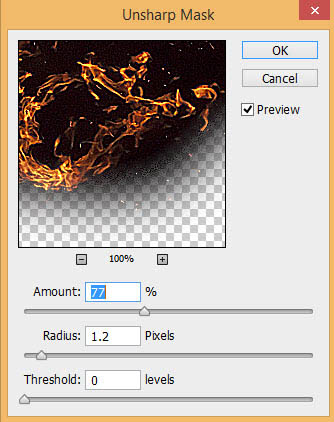
20、把火焰的图层混合模式设为滤色。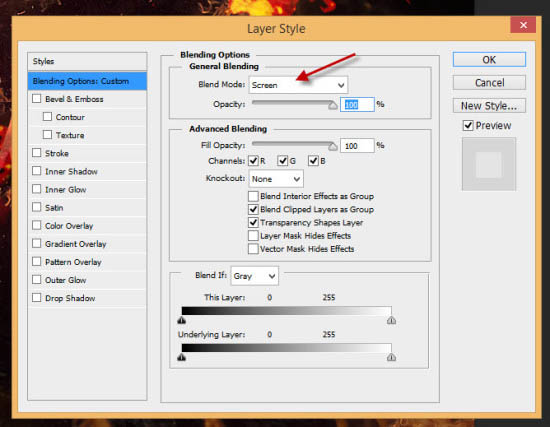
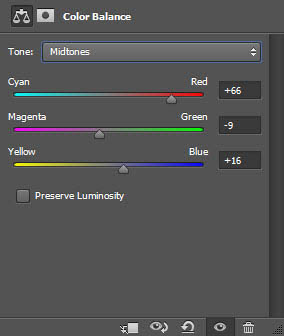
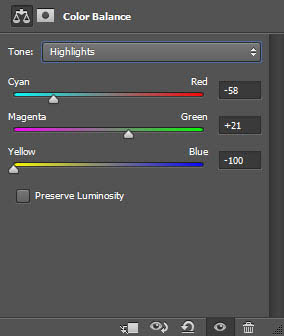
21、把火焰贴到我们的文字上,另外在画布周围添加更多的火焰元素,如图所示。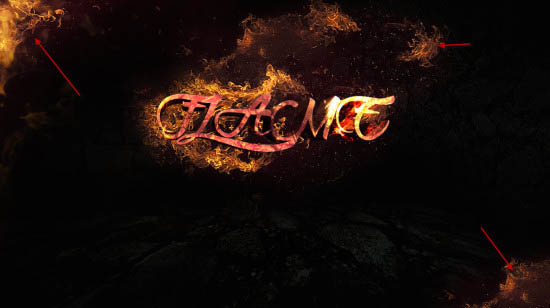
22、我们就快完成了!要微调效果,我在所有图层上添加了一个色彩平衡调整图层。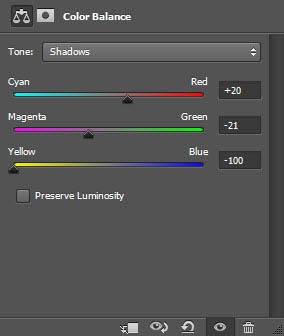
23、从火焰素材中复制一些额外的火焰元素,贴在如图所示的位置上。 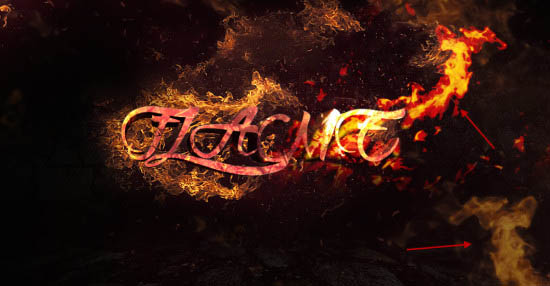
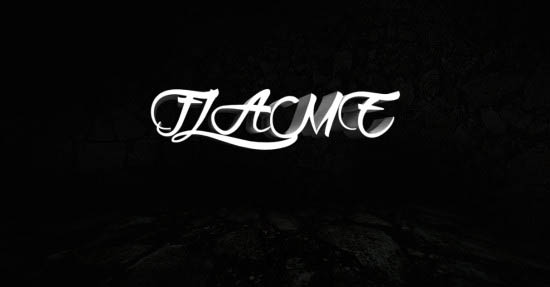
最终效果: