elitelewfan
2016-01-31 12:20
下面图老师小编要向大家介绍下Photoshop制作古典暗金质感立体字,看起来复杂实则是简单的,掌握好技巧就OK,喜欢就赶紧收藏起来吧!
这例效果图中的图层样式并不复杂,为简单的立体字,如果你发现你的效果颜色灰暗无冲击力,那么使用色彩平衡及曲线工具可以很好的帮你解决问题,希望我的教程能给你的设计带来帮助!
最终效果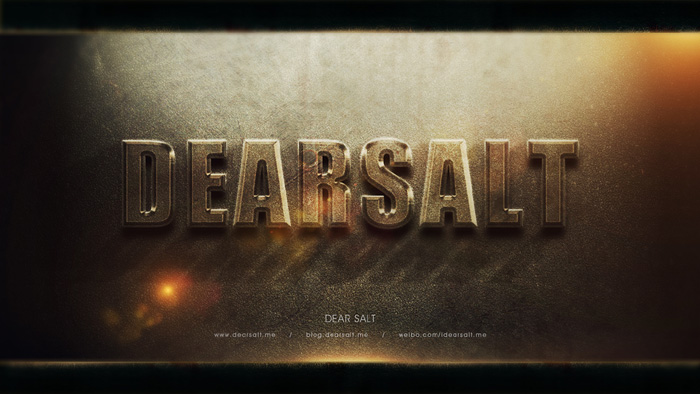
在做之前呢我们先网上搜点资料,下面是我找的四张图,我们需要借鉴的就是它们的色调,样式,然后再结合自己的想法就能做出一件满意的作品。 
1、首先我们从背景开始做起,背景的制作并不难,进行一些溶图和添加暗角效果就好,溶图时主要用到了图层模式,如叠加、柔化。添加暗角则是新建一个黑色图层,然后由中心做一个椭圆选区反选删除即可,以下是我找的几张素材,关键字:“质感”,“划痕”,“皮质”。 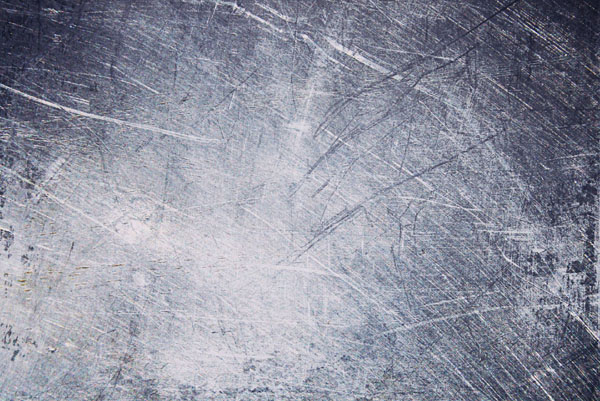


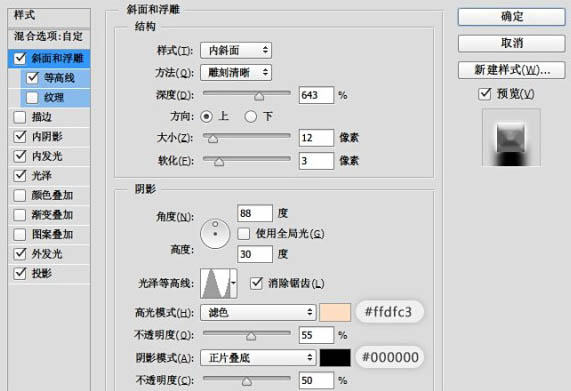
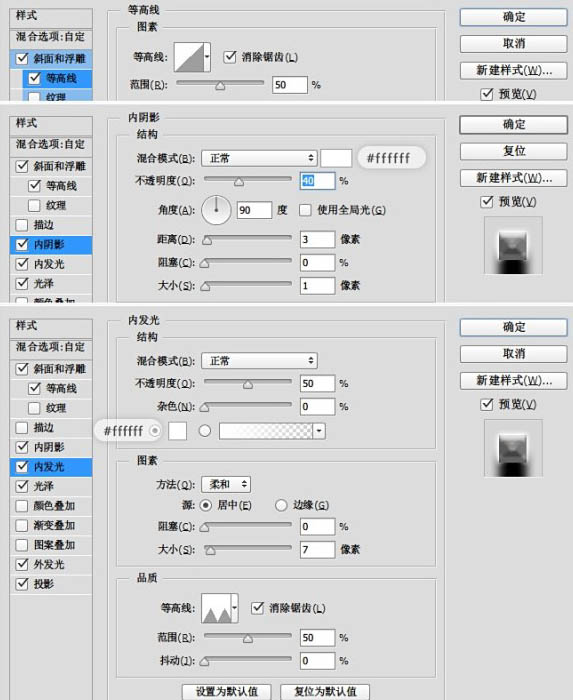
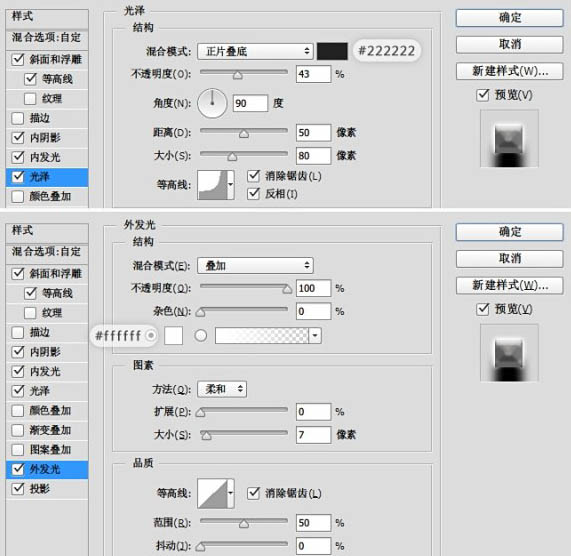
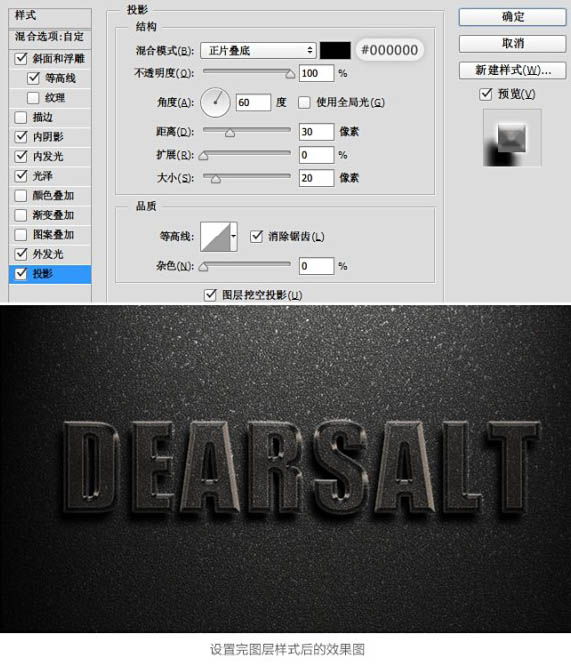
2、在画布上打上你想做的文字,英文效果最佳,我在这里使用的字体是“Impact Regular”,文字是我的英文名“DearSalt”,然后双击打开图层样式进行修改。 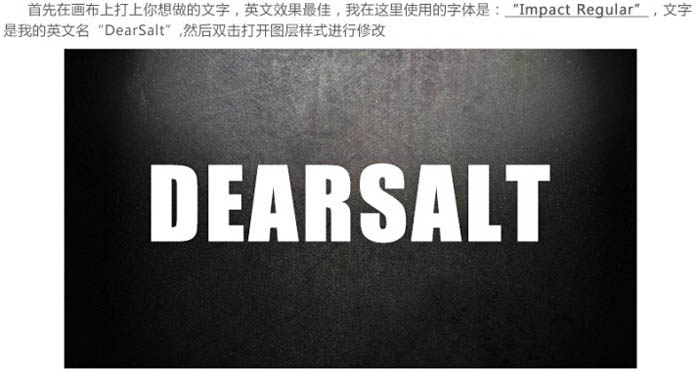
3、阴影的做法如下: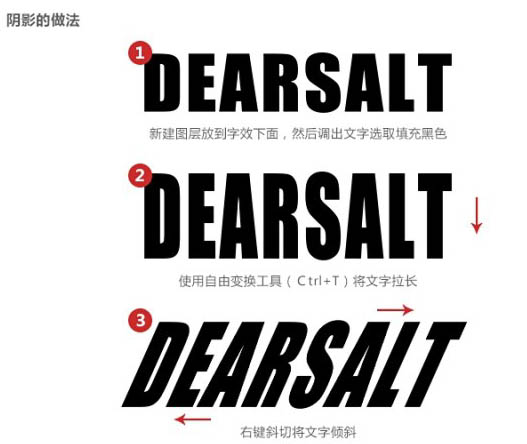
4、适当降低不透明度并使用蒙版工具擦除上方部分,也可以适当加一些模糊效果。

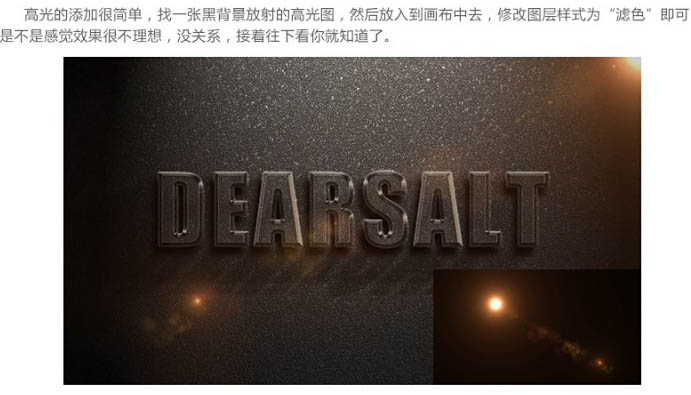
5、高光的添加很简单,找一张黑背景放射的高光图,然后放入到画布中去,修改图层样式为“滤色”即可。是不是感觉效果很不理想,没关系,接着往下看你就知道了。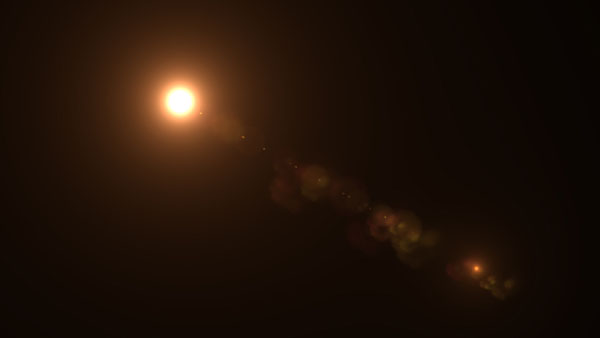
(本文来源于图老师网站,更多请访问http://m.tulaoshi.com/psxg/)
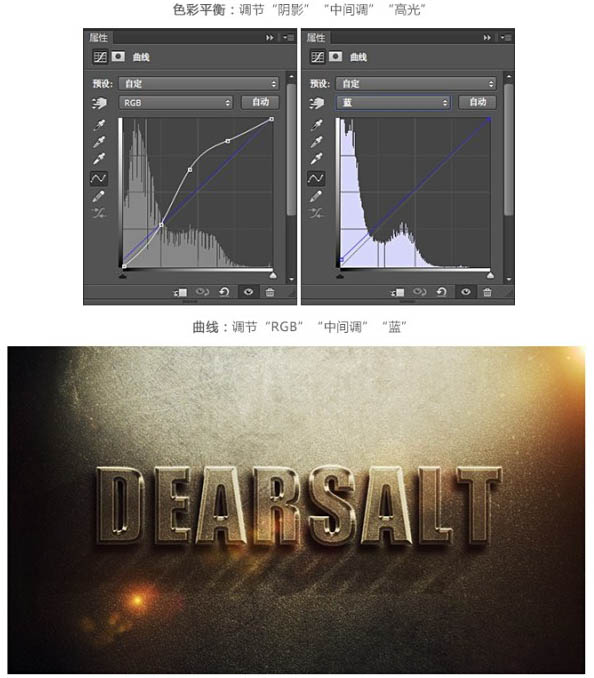
6、目前的效果很平淡而且可以说毫无吸引力,那接下来就是让它焕发光彩的时刻了,在这一步骤中我们用到了“色彩平衡”“曲线”工具,调整后我们可以让整体画面颜色饱满起来,提升效果的视觉冲击力。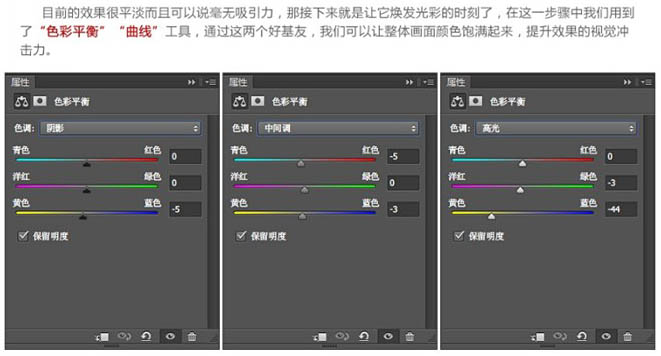
(本文来源于图老师网站,更多请访问http://m.tulaoshi.com/psxg/)
7、目到此字体的制作以及大功告成,剩下的就是要为整件作品添加一些装饰。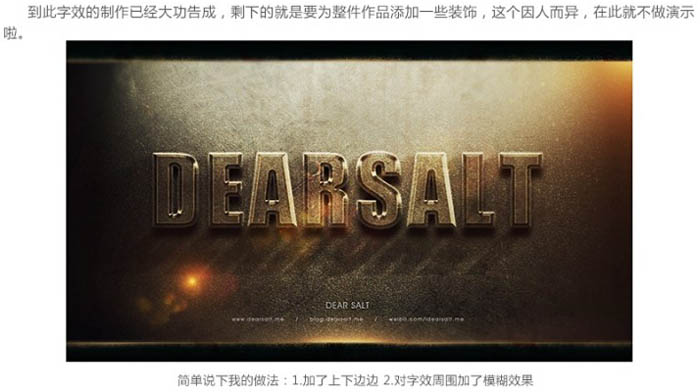
最终效果: