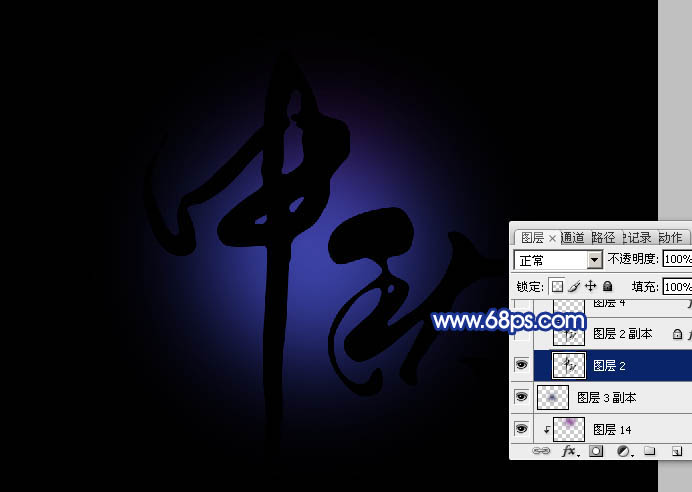
2、按Ctrl + J 把当前图层复制一层,混合模式改为“滤色”,按Ctrl + T 稍微缩小一点,效果如下图。
![](http://img.tulaoshi.com/image/20160201/2b77b09b44b2e74e27bd75d09a19a4ac.jpg)
(本文来源于图老师网站,更多请访问http://m.tulaoshi.com/psxg/)
图2 3、现在来制作文字效果,在图3上面右键保存图片,保存到本机,然后用PS打开,文字为PNG格式,拖进来放好位置,如图4。 ![](http://img.tulaoshi.com/image/20160201/01900961e6c7e438292095daf6e014b3.png)
图3
![](http://img.tulaoshi.com/image/20160201/fde6c4a06507a3929da289e865c6c6e4.jpg)
图4
4、双击文字图层缩略图载入图层样式,设置:投影、外发光、内发光,参数设置如图5 - 7。 ![](http://img.tulaoshi.com/image/20160201/5ca65fa2c7a6cab6a57a5986e7803290.jpg)
图5 ![](http://img.tulaoshi.com/image/20160201/52327d7a1bd079e64ce421138c36d407.jpg)
图6 ![](http://img.tulaoshi.com/image/20160201/1012d475382bd9d29f3e495f80c12d56.jpg)
图7 5、确定后把填充改为:0%,效果如下图。![](http://img.tulaoshi.com/image/20160201/5da505c06fbe571f64f07780c7672a6c.jpg)
图8 6、现在给文字增加星光装饰。按住Ctrl + 鼠标左键点击文字缩略图载入文字选区,进入通道面板,点击下图红圈位置图标,把选区转为路径。 ![](http://img.tulaoshi.com/image/20160201/785a013682c1122822fac7d6c082d33d.jpg)
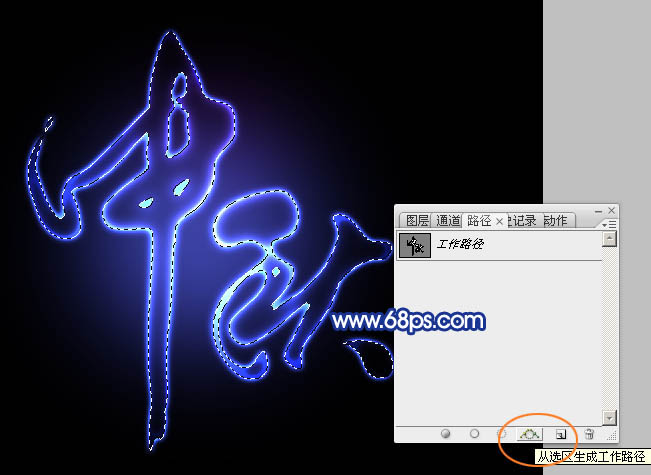
图9
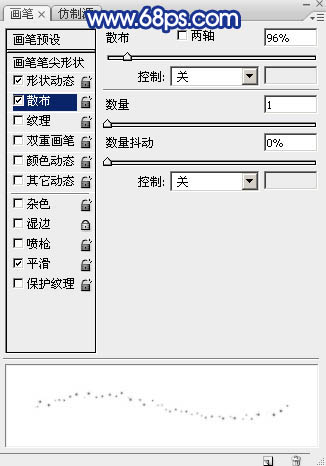
7、点这里下载星光笔刷。返回图层面板,选择画笔工具,选择刚才载入的星光笔刷,再按F5调出画笔预设面板,设置:画笔预设、画笔笔尖形状、形状动态、散布,参数设置如图10 - 13。 ![](http://img.tulaoshi.com/image/20160201/61c78587530b54a15fe6a4629dcddaff.jpg)
图10 ![](http://img.tulaoshi.com/image/20160201/7d960b64195382cb39983e3385bd9b9e.jpg)
图11 ![](http://img.tulaoshi.com/image/20160201/fddb56b9d92cab8d711180a7469686e9.jpg)
图12 ![](http://img.tulaoshi.com/image/20160201/5d6005ed07b916ef91393e62b4906830.jpg)
图13 8、把画笔大小设置为10像素,不透明度及流量都设置为:100%,再把前景色设置为白色,如下图。![](http://img.tulaoshi.com/image/20160201/911b403576afa645e9fb5e0dd44133a9.jpg)
图14 ![](http://img.tulaoshi.com/image/20160201/d77923a7adcc5cc3d0d54e7ed99cacae.jpg)
图15 9、选择钢笔工具,在路径上右键选择“描边路径”,如下图。![](http://img.tulaoshi.com/image/20160201/bffb870d94888a9e2e493f463c0af183.jpg)
图16
10、在弹出的对话框选择“画笔”,不要勾选“模拟压力”,确定后按回车隐藏路径,效果如图18。![](http://img.tulaoshi.com/image/20160201/2866736df45bc00eb2852532007036b3.jpg)
图17 ![](http://img.tulaoshi.com/image/20160201/10237a737304f2c218bd3a4a759228f7.jpg)
图18 11、原文字图层缩略图上右键选择“拷贝图层样式”,如下图。![](http://img.tulaoshi.com/image/20160201/51a007751ce9895d93041da7bcfc4e58.jpg)
图19 12、回到描边图层,在缩略图位置右键选择“粘贴图层样式”,如下图。![](http://img.tulaoshi.com/image/20160201/f0f5331c24096dcec117259da0f40524.jpg)
图20 13、加好图层样式后的效果如下图。![](http://img.tulaoshi.com/image/20160201/49907c70d26481fadb56c2bb047ba138.jpg)
图21 14、回到路径面板,调出文字路径,然后返回图层面板。![](http://img.tulaoshi.com/image/20160201/8beac14fadc01e808d050d6cf1bb2da3.jpg)
图22
15、选择画笔工具,把大小设置为20个像素,如下图。![](http://img.tulaoshi.com/image/20160201/449f03295f5f4f439ac54a3e64c2245c.jpg)
图23 16、同上的方法描边路径,得到下图所示的效果。![](http://img.tulaoshi.com/image/20160201/47b203b7dde1b7d2ee2c5659a6416f3b.jpg)
图24 17、再给当前图层粘贴之前复制的图层样式,然后再调出路径,如图26。![](http://img.tulaoshi.com/image/20160201/64ae47208e4c1d6c13647f9a45771374.jpg)
图25 ![](http://img.tulaoshi.com/image/20160201/a1e47fdea87e4016958e730e7e31606e.jpg)
图26 18、把画笔设置为35个像素,同上的方法描边路径,效果如下图。![](http://img.tulaoshi.com/image/20160201/989031b5cfa7649ece1b0791a545736a.jpg)
图27 19、给当前图层粘贴之前复制的图层样式,效果如下图。![](http://img.tulaoshi.com/image/20160201/b1b46d16fff3e0a5cd58e49092f675e1.jpg)
图28
20、新建一个图层,按Ctrl + Alt + Shift + E 盖印图层,如下图。 ![](http://img.tulaoshi.com/image/20160201/d44c49b96bd7f34427a8881eb29c15b0.jpg)
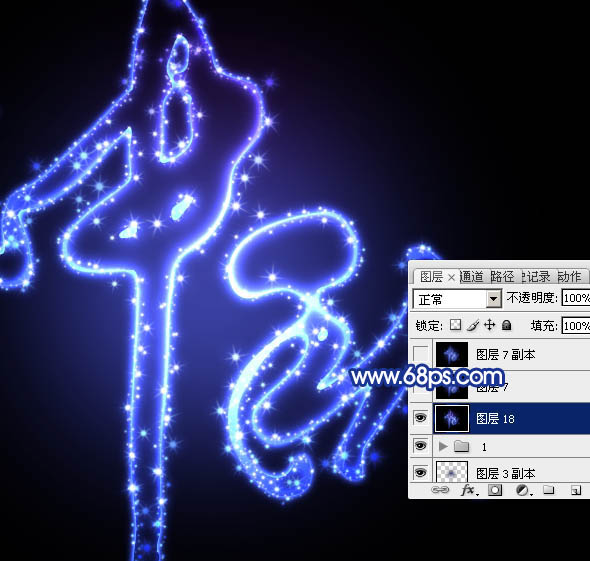
图29 21、选择菜单:滤镜 模糊 动感模糊,参数设置如图30,确定后把混合模式改为“柔光”。 ![](http://img.tulaoshi.com/image/20160201/aad29474f9b5969a086725bf8020bee2.jpg)
图30 ![](http://img.tulaoshi.com/image/20160201/fa1f00216947f43864e9af0aa6144707.jpg)
图31 22、按Ctrl + J 把当前图层复制一层,效果如下图。 ![](http://img.tulaoshi.com/image/20160201/966f924a9979bd29ff4b315331558724.jpg)
图32 23、新建一个图层,盖印图层。选择菜单:滤镜 模糊 高斯模糊,数值为3,确定后把混合模式改为“变亮”,效果如下图。 ![](http://img.tulaoshi.com/image/20160201/69efb203af05f82904dd5b61e0f79e5b.jpg)
(本文来源于图老师网站,更多请访问http://m.tulaoshi.com/psxg/)
图33 24、新建一个图层,盖印图层。选择菜单:滤镜 模糊 高斯模糊,数值为6,确定后把混合模式改为“变亮”,效果如下图。 ![](http://img.tulaoshi.com/image/20160201/509308dedd90e5d72ed95cf0ce9312b8.jpg)
图34 25、创建曲线调整图层,对RGB,蓝色通道进行调整,参数及效果如下图。![](http://img.tulaoshi.com/image/20160201/ba3fee55c34c4c2ad841e0228d83966f.jpg)
图35 ![](http://img.tulaoshi.com/image/20160201/930aaf549ee368133b117cd7a29e09c2.jpg)
图36 最后调整一下细节,完成最终效果。 ![](http://img.tulaoshi.com/image/20160201/7b748b4eb3aef399e05b43a077055840.jpg)