步骤1:

效果图压阵!!本期背景有没有透漏出本姑娘其实是个有学识有内涵有墨水的文艺女青年?!!好害羞呀~(@^_^@)~
步骤2:

玉线1M*8根(我怕不够用的1.5M,结果剩下好多,好心疼,决定下次做点什么小物件)
步骤3:
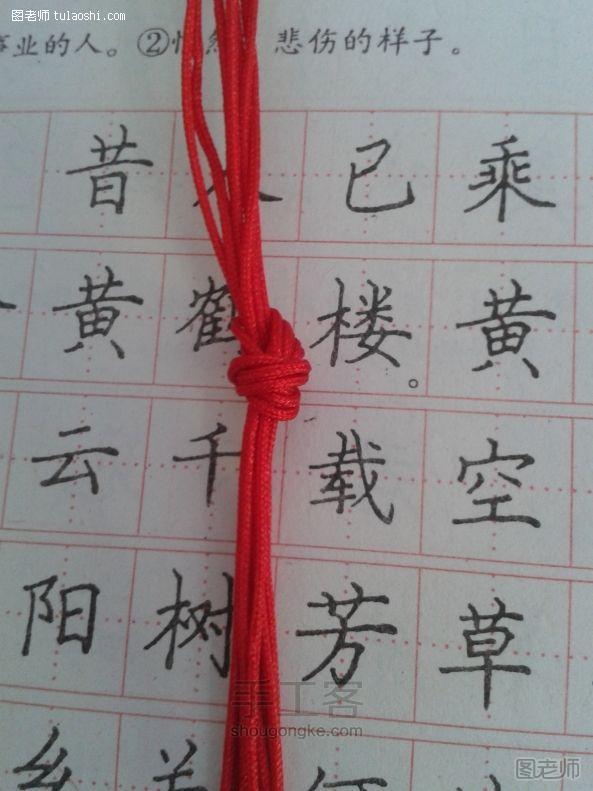
八根中间打个结,不要太紧,一会还要拆开的
步骤4:

八根排排坐,每次都从左往右依次:1、2、3、4、5、6、7、8
步骤5:

先练习左右手斜卷,分为绕线和轴线
步骤6:

感谢兰亭老师的教程,别人辛苦做的教程我们应该学会感激
步骤7:

5为轴,1、2、3、4为绕线绕斜卷
步骤8:
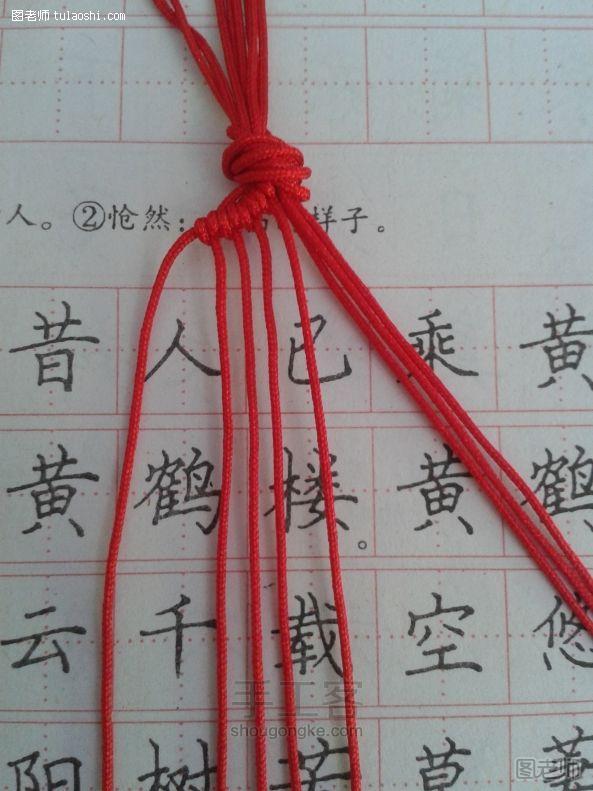
编完是这样的
步骤9:

5为轴(重新从左往右排号哈),6、7、8为绕
步骤10:

编完成这样
步骤11:

5为轴,2、3、4为绕
步骤12:

5为轴,6、7为绕
步骤13:

5为轴,3、4为绕
步骤14:

5为轴,6为绕
步骤15:
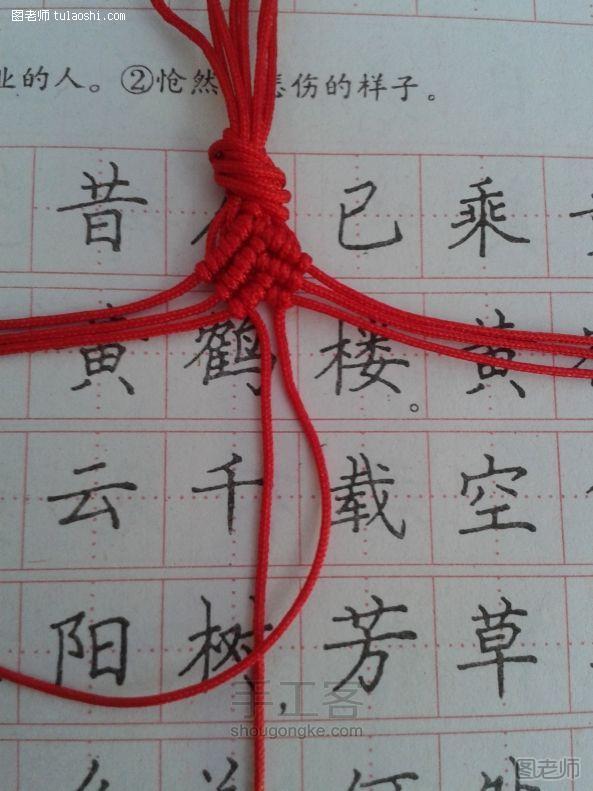
5为轴,4为绕
步骤16:

一个菱形OK了,继续
步骤17:

4为轴,1、2、3为绕,2、3记线不要拉紧,留出自然弧度
步骤18:
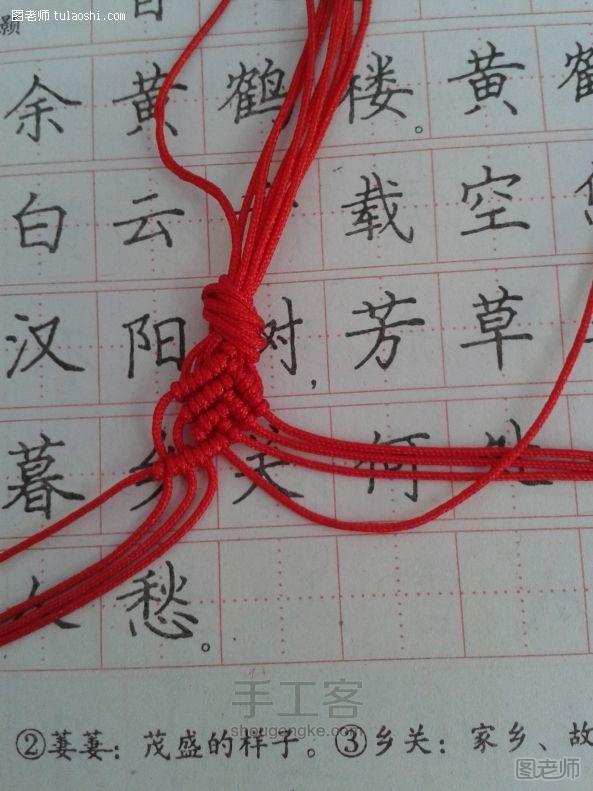
5为轴,6、7、8为绕
步骤19:

重复11~18步骤图,编上6、7个菱形
步骤20:

掉头,把最开始打的结拆开。4为轴,1、2、3为绕
步骤21:

5为轴,6、7、8为绕
步骤22:

OK,继续重复11~18步骤图
步骤23:

两个方向都编好了,开始结尾了
步骤24:

8为轴,5、6、7为绕
步骤25:
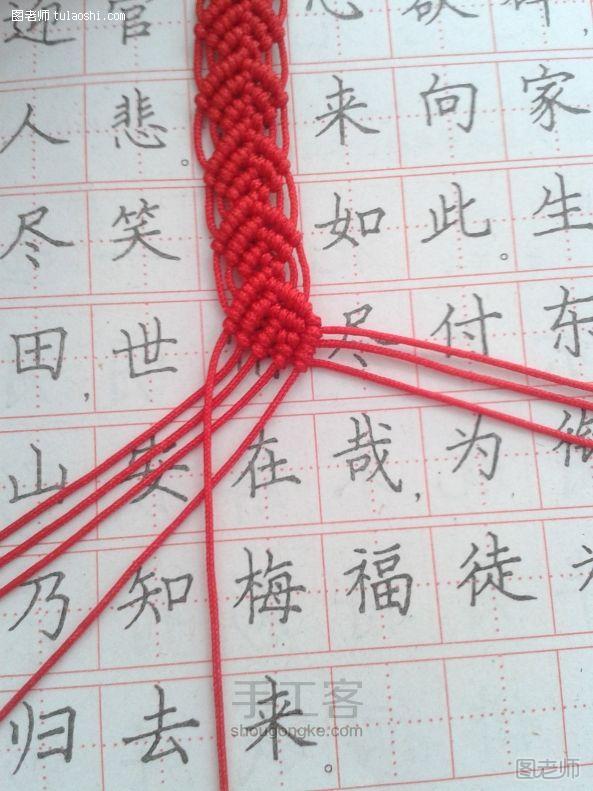
1为轴,2、3、4、5为绕
步骤26:

再来一遍前两步
步骤27:
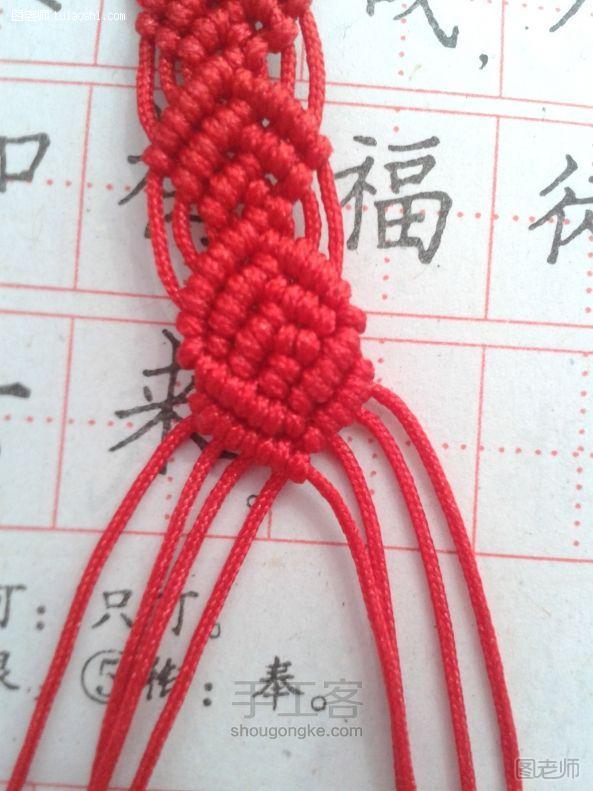
这样子,另一头一样编法
步骤28:
(本文来源于图老师网站,更多请访问http://m.tulaoshi.com/bianzhi/)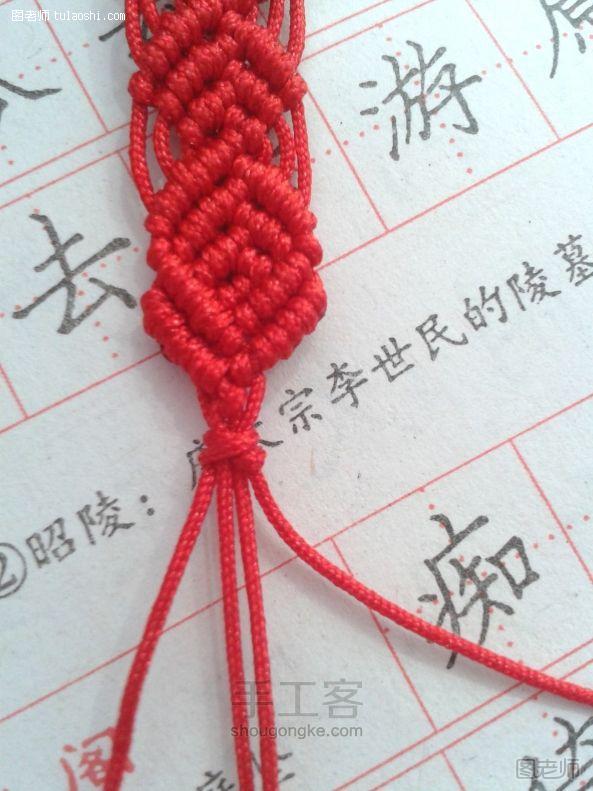
左右各剪掉两根,烧线。两根包两根打双联结(之前的教程有教)
步骤29:

两头的线相互方向合在一起,一小段玉线包裹它们编三对平结
步骤30:

尾巴的编法,八字结,看图
步骤31:

绕~
步骤32:

继续绕~
步骤33:
(本文来源于图老师网站,更多请访问http://m.tulaoshi.com/bianzhi/)
来回绕5、6次,抽紧,然后剪掉剩余的线,背后烧线
步骤34:

大红中国结就是应该配上中国字才叫美~
步骤35:

没地儿戴啦~(≧▽≦)/~
延伸阅读:
小块肥皂DIY手工合理利用小技巧
大家平常买的大块肥皂,用到最后剩的的一小块是不是都扔了呢?看完小编的这篇文章以后别扔了哦,今天小编给大家分享一个合理利用剩余小肥皂的教程,合理利用剩余肥皂的小技巧,避免浪费哦!
小块剩余肥皂合理利用技巧一
把很难使用的各种小块肥皂放在小网袋里(装蒜头的小塑料袋等),用来洗手等很方便,变成小块的肥皂不断放进小网袋里可以用很久。
小块剩余肥皂合理利用技巧二
1)把收集的小块肥皂切细,放在锅里
2)在锅内加入热水,其量约能盖住3分之1肥皂碎。
3)不断搅拌蒸发水分。待溶液呈面糊状停火。
4)把它加在模具里,如制作小蛋糕等的模具。
5)稍微冷却后加些干花等做成可爱的肥皂。
6)约过1个星期~1个月变干凝固就完全。
小块剩余肥皂合理利用技巧三
把小块肥皂切细,加在锅内加热溶解,冷却后加入小苏打,变成泡泡。用它洗碗、清洁厨具等,有些人很喜爱这种泡泡清洁剂。
看完是不是觉得以前扔掉的小肥皂很可惜呢,看完小编的文章以后注意保存好剩余小肥皂,积少成多,以后可以派上大用场哦


