步骤1:

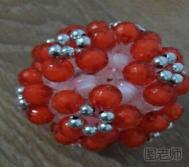
这是整体效果
步骤2:

从中间6颗珠子开始。这是底。
(本文来源于图老师网站,更多请访问http://m.tulaoshi.com/bianzhi/)步骤3:

来个大图 看一面其实就可以 其他五面都是一样的。
步骤4:

然后就是竖着加立柱。可能看不太清楚。想学的可以联系我
步骤5:
(本文来源于图老师网站,更多请访问http://m.tulaoshi.com/bianzhi/)
一共分为3层 这是一个面的侧面效果
步骤6:

这个是侧面效果
步骤7:

最后一层的收尾。编的时候有的忘记拍了。想学的联系我就好。下面发些其他作品
步骤8:

钢琴。看到后面眼花缭乱的纸巾盒没
步骤9:

小马
步骤10:

熊先生
步骤11:

熊太太。目前正在奋斗和果盘同系列的纸巾盒
步骤12:

收纳箱
步骤13:

糖果盒
步骤14:

打开是介个样子滴
步骤15:

这是重点。一个多月才完成滴财神。好稀饭。哎呀。太多了。
延伸阅读:
十字绣钱包的绣法及经验和技巧
十字绣钱包不仅与普通钱包同样的实用,而且还非常的好看,富有艺术气息,可谓是高端、大气、上档次。不过呢,十字绣钱包虽然漂亮,但对于十字绣的新手来说,却不是一件很简单的事,往往将十字绣钱包的半成品买回后,却不知道从哪里下手,今天图老师就为你介绍一下十字绣钱包的绣法及一些经验与技巧。
1、绣图
首先在裁剪好的十字绣布上面,根据图纸绣制图案,这一步需要强调两点:首先就是要选择好起针的地方,最好采用中心定位法。另外就是在绣制十字绣之前最好是用水溶笔打上格子,避免出错。特别是对于新手而言。
2、缝合
十字绣钱包的缝合过程是非常关键的,怎样缝合十字绣钱包呢,首先拿出最大片的那张十字绣布,放在下面,然后根据图纸,一层一层的摆放,一般十字绣钱包的3—4层,在秀完图案之后,一层一层的进行缝合,就像上图所展示的一样。这里需要注意的是,在缝合的过程中,最好要预留2—3格,避免线脱落,同时也比较美观。
3、收尾
十字绣钱包在绣制完之后,最后的收尾很重要,因为十字绣钱包与一般的十字绣装饰画的有很大的不同,由于十字绣钱包是要经常使用的,所以十字绣钱包的收尾要是做得不好,就会导致脱线,减少十字绣钱包的寿命。


